Pages

Wednesday, May 30, 2018

Romping in a Riviera Dress

The Winter Wear Designs Riviera Romper pattern. I saw it on sale a few weeks ago, and was intrigued. The bodice was just so pretty! But, it was a romper, and I don't wear rompers. . . Could it be made into a dress?


Yes, yes it could!


At first the dress idea didn't even enter my mind. I passed on buying the Riviera pattern when it was on sale, because I just couldn't see myself wearing a romper. Nope, it wasn't going to happen. 


Then I had the opportunity to participate in the Winter Wear Designs "Romp On" blog tour. A blog tour all about that one garment, the one I don't really intend to wear for practical purposes, the romper. I was going to pass on this tour, until Suzanne, the designer behind the Winter Wear patterns, mentioned that someone could hack the Riviera Romper into a dress. I jumped on that idea! Suzanne kindly sent me the pattern, and I began my pattern hacking.

  
I loved the bodice of the Riviera romper, with the low back, ties on the back neckline, and the color blocked strap option. So, I made no significant changes to the bodice, and just drafted a skirt to go with it.


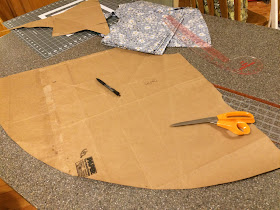
I decided I wanted my dress to have a circle skirt, as I felt that would really compliment the blouson bodice. So, I drafted 1/4 of a circle skirt, then began the most challenging part of the whole project - fitting the pattern onto a limited amount of fabric.


In my stash I found 2 yards of a sunflower print cotton lawn. It had a beautiful drape, and looked so summery, I just couldn't not use it for my Riviera dress! But 2 yards of fabric isn't a lot for a dress, especially if you want to make a full circle skirt. So, once I had my skirt pattern made, a little improvising was required.


The first thing I did was cut out the bodice, using as little fabric as possible (For this reason my bodice has a center back seam, rather than being cut on the fold). Then, I took my newly drafted circle skirt pattern and proceeded to trace four 1/8th circle pieces onto some scrap material. I folded my sunflower fabric in half, and used those 1/8th pieces as my pattern. I arranged, and rearranged them on my fabric, trying to get the fullest skirt possible out of the limited material. I knew I wasn't going to quite manage a full circle skirt, but I hoped to get something fuller than a half circle. Eventually, I figured out a way to get a 6 panel, 3/4 circle skirt cut out of my fabric! 


The panels weren't all the exact same size, the center front and back panels were wider than the side panels, but that was ok! I had the skirt I'd envisioned.


Once my skirt was cut out, I decided to add pockets to it, because what is a dress without pockets? A disappointment, that's what! For these, I used the pocket pattern included in the riviera romper. 


Using the pocket facing pattern piece as a guide, I cut pocket openings on my side front skirt panels. Then I sewed up the pockets according to the pattern, using the facing piece and the pocket lining piece. Slight adjustments had to be made to these pieces so the upper edge matched the curved waistline of the skirt, but that was easily done.


 For a little extra something, I added a dark green knit rib binding to my pocket openings. the result is a pair of highly functional, very pretty, pockets in my skirt. 


With the skirt done, I turned my attention to the bodice of my dress. I made it up almost exactly as the pattern pictured it, but that doesn't mean I didn't have fun with it!


I found some dark green lace fabric in my stash and used it for the front shoulder straps. I love how that turned out!


I bound the neckline and made the back ties with some scraps of green rib knit, left over from a shirt I made a while back.


Unfortunately, after making the back ties, I did not have enough rib knit left to bind the armholes. So instead, I finished the armholes with single-fold bias tape, turned to the inside and stitched down. This resulted in a very clean looking finish that I actually prefer to a visible armhole binding.


The resulting dress is both pretty and comfortable, and I am thrilled to have had the chance to make it!


All the Romper patterns are on sale this week at Winter Wear Designs for 20% with the code ROMPON, so check those out if you're interested! All are cute, and would make fantastic dresses if rompers aren't your thing.

*I received the Riviera Romper pattern for free in exchange for this blog post, but all thoughts and opinions are my own.


Don't miss any of the spectacular rompers
 on the Romp On Tour!!!

5/28

5/29


5/30

5/31

6/1

Saturday, May 26, 2018

The 1890's Minerva McGonagall Tea Gown - Inspiration and Fabric

It all started because of wizards' robes. While on the World Race last year, I re-read the Harry Potter series, and began to wonder about wizard's robes. In the movies, robes are depicted as garments worn over relatively normal clothing. In the books however, robes are referred to as primary garments, not over garments. This realization lead me down a rabbit hole. I had to figure out what wizards robes were supposed to look like, according to the books. And, while I was at it, I decided I wanted to design and make a Professor McGonagall costume for myself.


On Pottermore, (the official Harry Potter website) J.K. Rowling mentions wizard's robes are inspired by 17th century clothing. So, I spent some time researching clothing from the 1600's. Then, I decided to go forward from there and look at clothing from later eras that appeared to resemble 17th century fashions. This gave me an idea of how wizard's robes may have evolved over time.  Eventually, I went down another rabbit hole when I stumbled on late victorian tea gowns. 

1887-1889 Tea Gown, FIDM


The definition of a robe is a "long, loose, garment." This can be an outer garment, a ceremonial garment, or an at-home lounging garment. Wizard's robes appear to be a mix between the last two items, and that is what a tea gown resembles as well.
1897 Women's Tea Gown, Kerry Taylor Actions


In the last quarter of the 19th century, tea gowns were long, loose, comfortable garments, worn by ladies in their homes during the mid to late afternoon. They were absolutely beautiful, and often very elaborate, made from silk wool, and lace, but they were not garments to be worn outside the home. The styling and purpose of these garments reminded me of wizards robes, long, loose, comfortable, and not meant to be worn around muggles (non-magic folks)! Thus, I decided to make myself a historically accurate 1890's tea gown, that could also be worn as a Professor McGonagall costume for Halloween or any other occasion requiring Harry Potter World attire.

I quickly found a tea gown I wanted to recreate - this black beauty made by Liberty of London in 1895.

1895 Women's Tea Gown, LACMA
My next order of business was to find an appropriate fabric for my re-creation. Inspired by Professor McGonagall's attire in the Harry Potter movies, I wanted my tea gown to be black and green. In Malaysia (my final country on the World Race) I found the perfect fabric - a green and black silk jacquard for only about $5 USD per meter! I bought all the shop had (only about 3 meters, unfortunately), and brought it home with me.


Upon returning home, I began to search for a solid black silk to pair with my jacquard, and found an affordable streaked satin on the Fashion Fabrics Club website.


With my materials acquired, I was ready to make my tea gown - and this project was all because of wizard's robes.


Saturday, May 19, 2018

The Not Too Small Maria Blouse

I'd given up. It seemed my sister was really, truely, out of girl's patterns. Her wardrobe would have to be made using solely women's patterns from here on out. My little sister is growing up.


Now, growing up is a good thing. It's what children are supposed to do. But still, as I continue to sew her wardrobe it's been hard to say goodbye to the sweet little girl's patterns. So many fun designs, which she's now to big for! Women's patterns often seem boring by comparison. 


Then, just when I'd admitted defeat, thinking my days of sewing girl's patterns for my sister were over, a tester call for a girl's blouse pattern appeared. It was a sweet looking blouse, and I figured it probably only went up to a size 10, maybe a 12, but definitely not my sister's size. Upon checking the size chart, I was delighted to discover I was wrong! The pattern went up to size 14, which corresponded perfectly to my sister's measurements!


I applied to test the pattern, got accepted, and proceeded to sew up the most girly, ruffley, version of the blouse possible. (After checking with my sister to be sure she would actually wear such a garment, of course)


I showed my sister the pattern, and told her to go pick a fabric for it from my stash. After a bit of debating, she decided on this bird-print apparel cotton (left over from a blouse I made my mom once upon a time). She then went straight to my button stash and found some green buttons that matched the green birds perfectly. My sister has excellent taste when picking fabrics and notions!


This is the Maria Blouse pattern, by Suco by Susana. Not only does it come in a fantastic size range (3-14), it also has 4 different sleeve options (long, short, puffed, and ruffled), 2 different collar options (ruffle and peter pan), and 2 different bodice options (plain shirt, or peplum). So, had my sister thought herself too old for the ruffley version, I would have been able to make her a more grown-up looking blouse. However, I'm quite happy she can still appreciate ruffles! And Swings, she definitely still loves swings! (and I hope that doesn't change!)


The pattern is well drafted, going together easily with beautiful results. I already have plans to make my sister a few more garments from it. 


A blouse pattern, in my sister's size, with plenty of style options, and endless pattern hacking possibilities (I'm already thinking of making it into a dress!)? Yes, I will be using this pattern until my sister well and truly outgrows it! I only hope that day doesn't come too soon. (But, at the rate she's growing, that day might be tomorrow!)


*I received this pattern in exchange for testing it. All thoughts and opinions are my own.

Wednesday, May 16, 2018

Making an 1890's Shirtwaist

I made myself an 1890s shirtwaist. I'd shared I planned to make one, when I wrote about my corset cover. Since then, I've actually finished it and it's appeared in two separate blog posts (the one about my apron, and the one about the belt), but I haven't actually told you how the shirtwaist came to be. So, I figured it was about time to share all those fun details.


Once I finished altering my 1890’s plaid wool skirt, a shirtwaist was the next logical project. A skirt can't be worn alone after all. First, I had to figure out what I wanted the shirtwaist to look like. Then I had to figure out a pattern. I already had the fabric, so once those first two steps were done, I just had to actually make the garment.


Several years ago I found a 2 yard piece of striped cotton shirting at a thrift store. It looked blue, but close up you could see the stripes were actually a rainbow of colors, and it was absolutely beautiful! I'd saved this fabric for the perfect project, and I decided the shirtwaist would be just that. In my thread stash I found 3 matching wooden spools of vintage cotton thread - in just the right shade of blue for the fabric! Pretty fabric, and strong vintage thread, I had my shirtwaist materials!


Picking the fabric was the easy part, settling on the design, however, was a bit more difficult. There were so many fun design elements to choose from! Pintucks, Cross-over bodice, or yoked bodice? Really puffed sleeves or only slightly puffed sleeves? What did I want? What was my fabric best suited to become? For a couple weeks I dithered and dathered on my design choice - at one point I even considered making two different shirtwaists so I wouldn't have to decide between so many fabulous choices - but eventually I found myself coming back to one design again and again. The yellow pin-tucked shirtwaist, in on the right side of this 1898 fashion plate, would be the basis for my shirtwaist.


With that finally decided on, it was time to figure out my pattern. I decided to drape it directly on my dress form. Pattern draping is a skill I'm not very practiced in yet, but something I'd love to become proficient in. As I had no patterns resembling this shirtwaist in my stash, I decided I might as well give draping a go. Thus, I pulled out some muslin and got to draping, pinning, tucking, and marking until I had half a shirtwaist staring back at me from the dress form. So far, so good.


I took that half a shirtwaist off my dress form, removed all the pins and tucks, and used it as a pattern to cut out a mock-up. 


The mock-up turned out quite well, and after a couple small adjustments, I felt ready to cut into my shirting fabric. Well, almost. I still had to figure out the sleeves.


I didn't feel confident draping the sleeves, so I decided to use a sleeve pattern from a 1980's Simplicity pattern instead. The pattern had close to the right look, I just altered it a bit to have a more 1890's shape, then proceeded to make 3 or 4 sleeve mock-ups until I was actually satisfied with the sleeve shape. That was a headache.


One sleeve mock-up was too puffy, another wasn't puffy enough, one had just the right amount of puff, but too high of a sleeve cap. Eventually, after a morning spent pattern drafting in my corset so I could do frequent fittings, I got the sleeves all sorted out and was ready to move on to the final project.


I cut out my fabric, then sewed the shirtwaist on the sewing machine with my vintage thread. As shirtwaists aren't lined garments, I used french seams throughout, as recommended in the book "Authentic Victorian Dressmaking Techniques" (a wonderful Christmas present I received last year). A reprint of a 1906 dressmaking manuel, this book was a great help as I went about constructing my shirtwaist! It gave period directions for cuffs, sleeves, collars, buttons and buttonhole, among other things.


For maximum historical accuracy, I handsewed all the buttonholes. This took a couple weeks as, while not particularly hard, hand sewing buttonholes is not my favorite thing to do. Once all the button holes (18 in total, including sleeve cuffs) were done, I sewed on the buttons. In my stash I found a set of matching white china buttons - in just the perfect quantity!


With the last button sewn on, there was only one more thing I had to do to make my shirtwaist wearable - add a drawstring.


The back pleats are permanently stitched in place, but the front gathers are adjustable.


There is a casing a few inches above the hem of the shirtwaist, right about at waist level.


Through this is a threaded linen drawstring, which is pulled tight around the waist, gathering the front of the garment.


The drawstring is tied and the shirtwaist is then buttoned up. 


Thanks to the drawstring, if I ever decided to lace my corset a bit tighter or looser, the shirtwaist will still fit, no problem.


The same does not apply to skirts, however. If you lace your corset a bit too tight, you may need to employ a safety pin to hold that garment in place! Not that I know anything about that, of course. Good thing belts cover safety pins on waistbands!


So, with a wool skirt and cotton shirtwaist (and my new American Duchess button boots!) I have an excellent every day 1890's outfit!


Well, perhaps not an everyday outfit for me as I don't actually live in the 1890's. However, if I did, this would be the equivalent of jeans and a T-shirt, and I'm quite pleased with it!