Pages

Monday, January 30, 2023

A Blue Seersucker Shirt to Toddler Dress Refashion

 I was very excited this weekend to see my niece wearing a dress I made for her last spring, (She has worn the dress since I gave it to her, I just haven't been around to see it until now.)


This dress stared out as a men's button down I thrifted years before my niece was even born. 


A beautiful blue cotton seersucker! Sometime last winter I unearthed it in my fabric stash and decided it needed to become a dress for my niece. I used Simplicity 9243 to accomplish this goal.


I loved the peter pan collar and cut on sleeves!


I cut the skirt from the body of the shirt, below the sleeves, and kept the original hem. 


I filled in the higher sides with some wide eyelet trim from my stash. Prior to cutting the skirt, I removed the breast pocket from the shirt, with the intention of re-using it as a pocket on the skirt.


Under the pocket I found some pen marks on the fabric. Well we know that pocket was used! These pen marks would have been visible at the very top of the skirt, so I had to figure out a way to cover them. More eyelet to the rescue!


Once the skirt was sorted out, I cut the bodice out of the top of the shirt body, and cut the underside collar from the yoke pieces. 


In keeping with the eyelet on the skirt I went back to my trim stash and found a scrap of eyelet fabric to cut the top layer of the collar from and a ruffled eyelet trim to finish the sleeves off with.


I used the original button placket down the back of the dress.


Due to a cutting miscalculation, the button placket is only functional from neck to waist. The button placket on the skirt is purely decorative. 


Thankfully the back still opens enough for my niece to easily get the dress on and off!


She particularly likes the pocket on the skirt! It's the perfect place to store the gum Mimi gave her!


She looks absolutely adorable in this dress (though, of course, she looks adorable in anything!), and it was absolutely worth taking the time to make!


Now I just need to make her lots more dresses!


Saturday, January 28, 2023

My Sister's Golden Snowflake Christmas Dress

 Golden Snowflakes were the theme of this year’s Christmas Dresses.


My sister came with me to Joann’s the weekend I went to buy the fabric for our niece’s Christmas dress (that was a busy weekend by the way, I’ll tell you all about it in a future post), and while there we spotted a white fabric embroidered with gold snowflakes. My sister fell in love with it, and all the Christmas fabric happened to be on sale, to the degree that this particular fabric was about 75% off.

We decided we simply had to buy 4 yards to make her a Christmas dress. 

So we did.

After returning to my apartment we set about planning this dress.

We decided to use the Charm Patterns Night and Day Dress pattern, with the yoked skirt, elbow length bishop sleeves, and the round neckline with the collar.


Ok, so we’d actually planned to do the long bishop sleeves, but when I went to cut the dress out 2 months later I discovered we had not bought enough fabric for that idea, so elbow length sleeves it would be.


Since my niece’s dress was going to be gold snowflake fabric with red “trim”, we decided my sister’s dress should be trimmed with green.


Thus, I bought a dark green crepe-backed satin for the collar and cuffs. (Yes, I probably did have some sort of dark green fancy fabric in my stash that would have worked for this, however, due to moving and all that entailed, I did not have a chance to go back to my parents’ house and dig through my fabric stash to find such a thing prior to starting this dress. Thus, buying 1/2 a yard of new fabric it was)


There’s not much to say about the construction of the dress. I lined the bodice with a Christmas print from my stash and the sleeves and skirt are both unlined.


It closes up the back with a lapped zipper.


I finished the dress about a week and a half before Christmas and was able to send it home with my sister when she and my parents came to visit!


She wore it to church on Christmas morning, and then to the Christmas gathering with my mom’s family the day after Christmas.


Where she gave my grandpa this gorgeous American Flag blanket she crocheted for him.

A week later she wore it again for our family Christmas.


She’d intended to make herself a green shawl and belt to wear with the dress, but thanks to all the gifts she was making for other people, that didn’t happen. (Who else can relate to that? ðŸ™‹‍♀️)


Oh well, she, and the dress, looked great regardless!

And maybe next Christmas she’ll get that belt and shawl made and wear the dress again!

Saturday, January 21, 2023

The "Golden Rose" 1770's Silk Petticoat

 On a visit with my friend @historicthimble over a year ago, she went through a bin of fabric. Out came an abandoned project - a striped silk pet en l'air, nearly half finished. Having no interest in finishing it herself, she offered it to me.

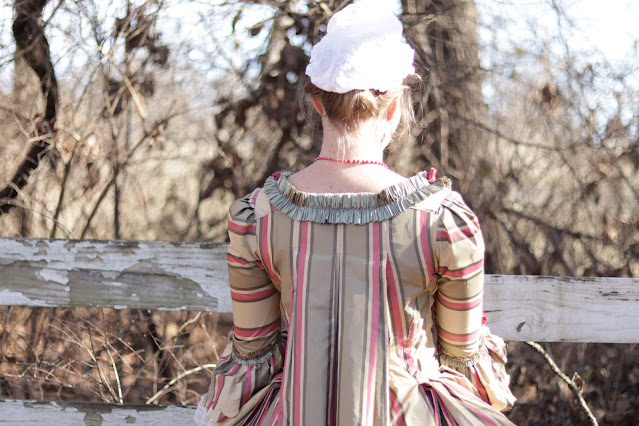
Well I wasn’t going up say no to silk! I gratefully accepted the grocery bag of begun 18th century jacket and silk scraps. It wasn’t my size, but 18th century construction is forgiving so I knew I could re-fit it. A pet en l'air is the shortened version of a Robe a la Francaise, or Sack-Back gown. It has a fitted lining under double box pleats in the back. The pleats are stitched down at the neckline and then free-flow loose down the back. My friend had finished the back pleats and lining. The front of the pet needed to be sewn to the lining and the sleeves still needed to be cut out.


 I took the grocery bag of silk back to my parents’ one weekend for a trip through my fabric and pattern stashes. 


There were enough silk scraps in the bag for sleeves, sleeve ruffles, and robings, (and I could use my Larkin and Smith English Gown pattern to cut out those pieces and re-fit the bodice lining) however there would not be enough silk to trim the pet the way I wanted, and I would need to figure out a petticoat to go with it - there wasn’t enough silk for that either.

Surly my “very healthy” fabric stash would yield something for trims and a petticoat! 

The fabric was stripped green, fuchsia, and gold. A look through my fabric stash revealed silk shantungs and taffetas in similar shades. Scraps of gold and ivory shantung, picked up at estate sales, thrift stores, and the like would be used for trimming. Nearly 2 yards of fuchsia taffeta, acquired from Sewstine when she was destashing a couple years ago, would do for the petticoat. And the green shantung, left over from this petticoat, would complete any trim deficiencies.

With this settled, I decided to start with the easy part - the petticoat. 


Just shy of 2 yards wasn’t quite enough for a petticoat so some piecing was required. From the silk I cut the front panel of the petticoat about the length I thought it needed to be. This made the piece of silk I had for the back panel 10”-12” shorter than I required. So I cut a strip of cotton about that wide and pieced it onto the top of the back panel with a narrow mantua maker's seam. The top cotton section would be covered by the skirts of the pet en lair when the ensemble was worn.  In the 18th century the unseen parts of petticoats were often made from cheaper fabrics with the expensive silk saved for the visible areas, so this was a perfectly period appropriate solution to not enough fabric.


Once the back panel was pieced together, I sewed up the side seams with a running back stitch, hemmed the pocket slits, and hemmed the bottom edge.


Once that was done it was time for trim! Yes, the petticoat needed to be pleated along the top edge yet, but it would be easier to trim the petticoat while it was still flat, before the pleating happened.


I did some brainstorming and finally came up with a trim idea I liked. I would make roses out of strips of silk. Big ones for the petticoat and little ones for the jacket. The roses on the petticoat would be ivory and gold. The roses on the jacket would be ivory and fuchsia. (I had one 1" wide strip of fuchsia taffeta saved back from making the petticoat.)
The roses would be mounted on gathered strips of green silk.


I decided the gathered green silk would trim the petticoat in a figure-eight-ish design. I used my large pizza-pan as a template to mark this on the petticoat.


And then I sewed, and sewed, and sewed, strips of green silk around the bottom of the petticoat. It felt like it took forever!


Finally, it was all on! Then I got to decide upon the arrangement of the roses. . .


And sew them on one by one. . .


Until the petticoat was completely trimmed!


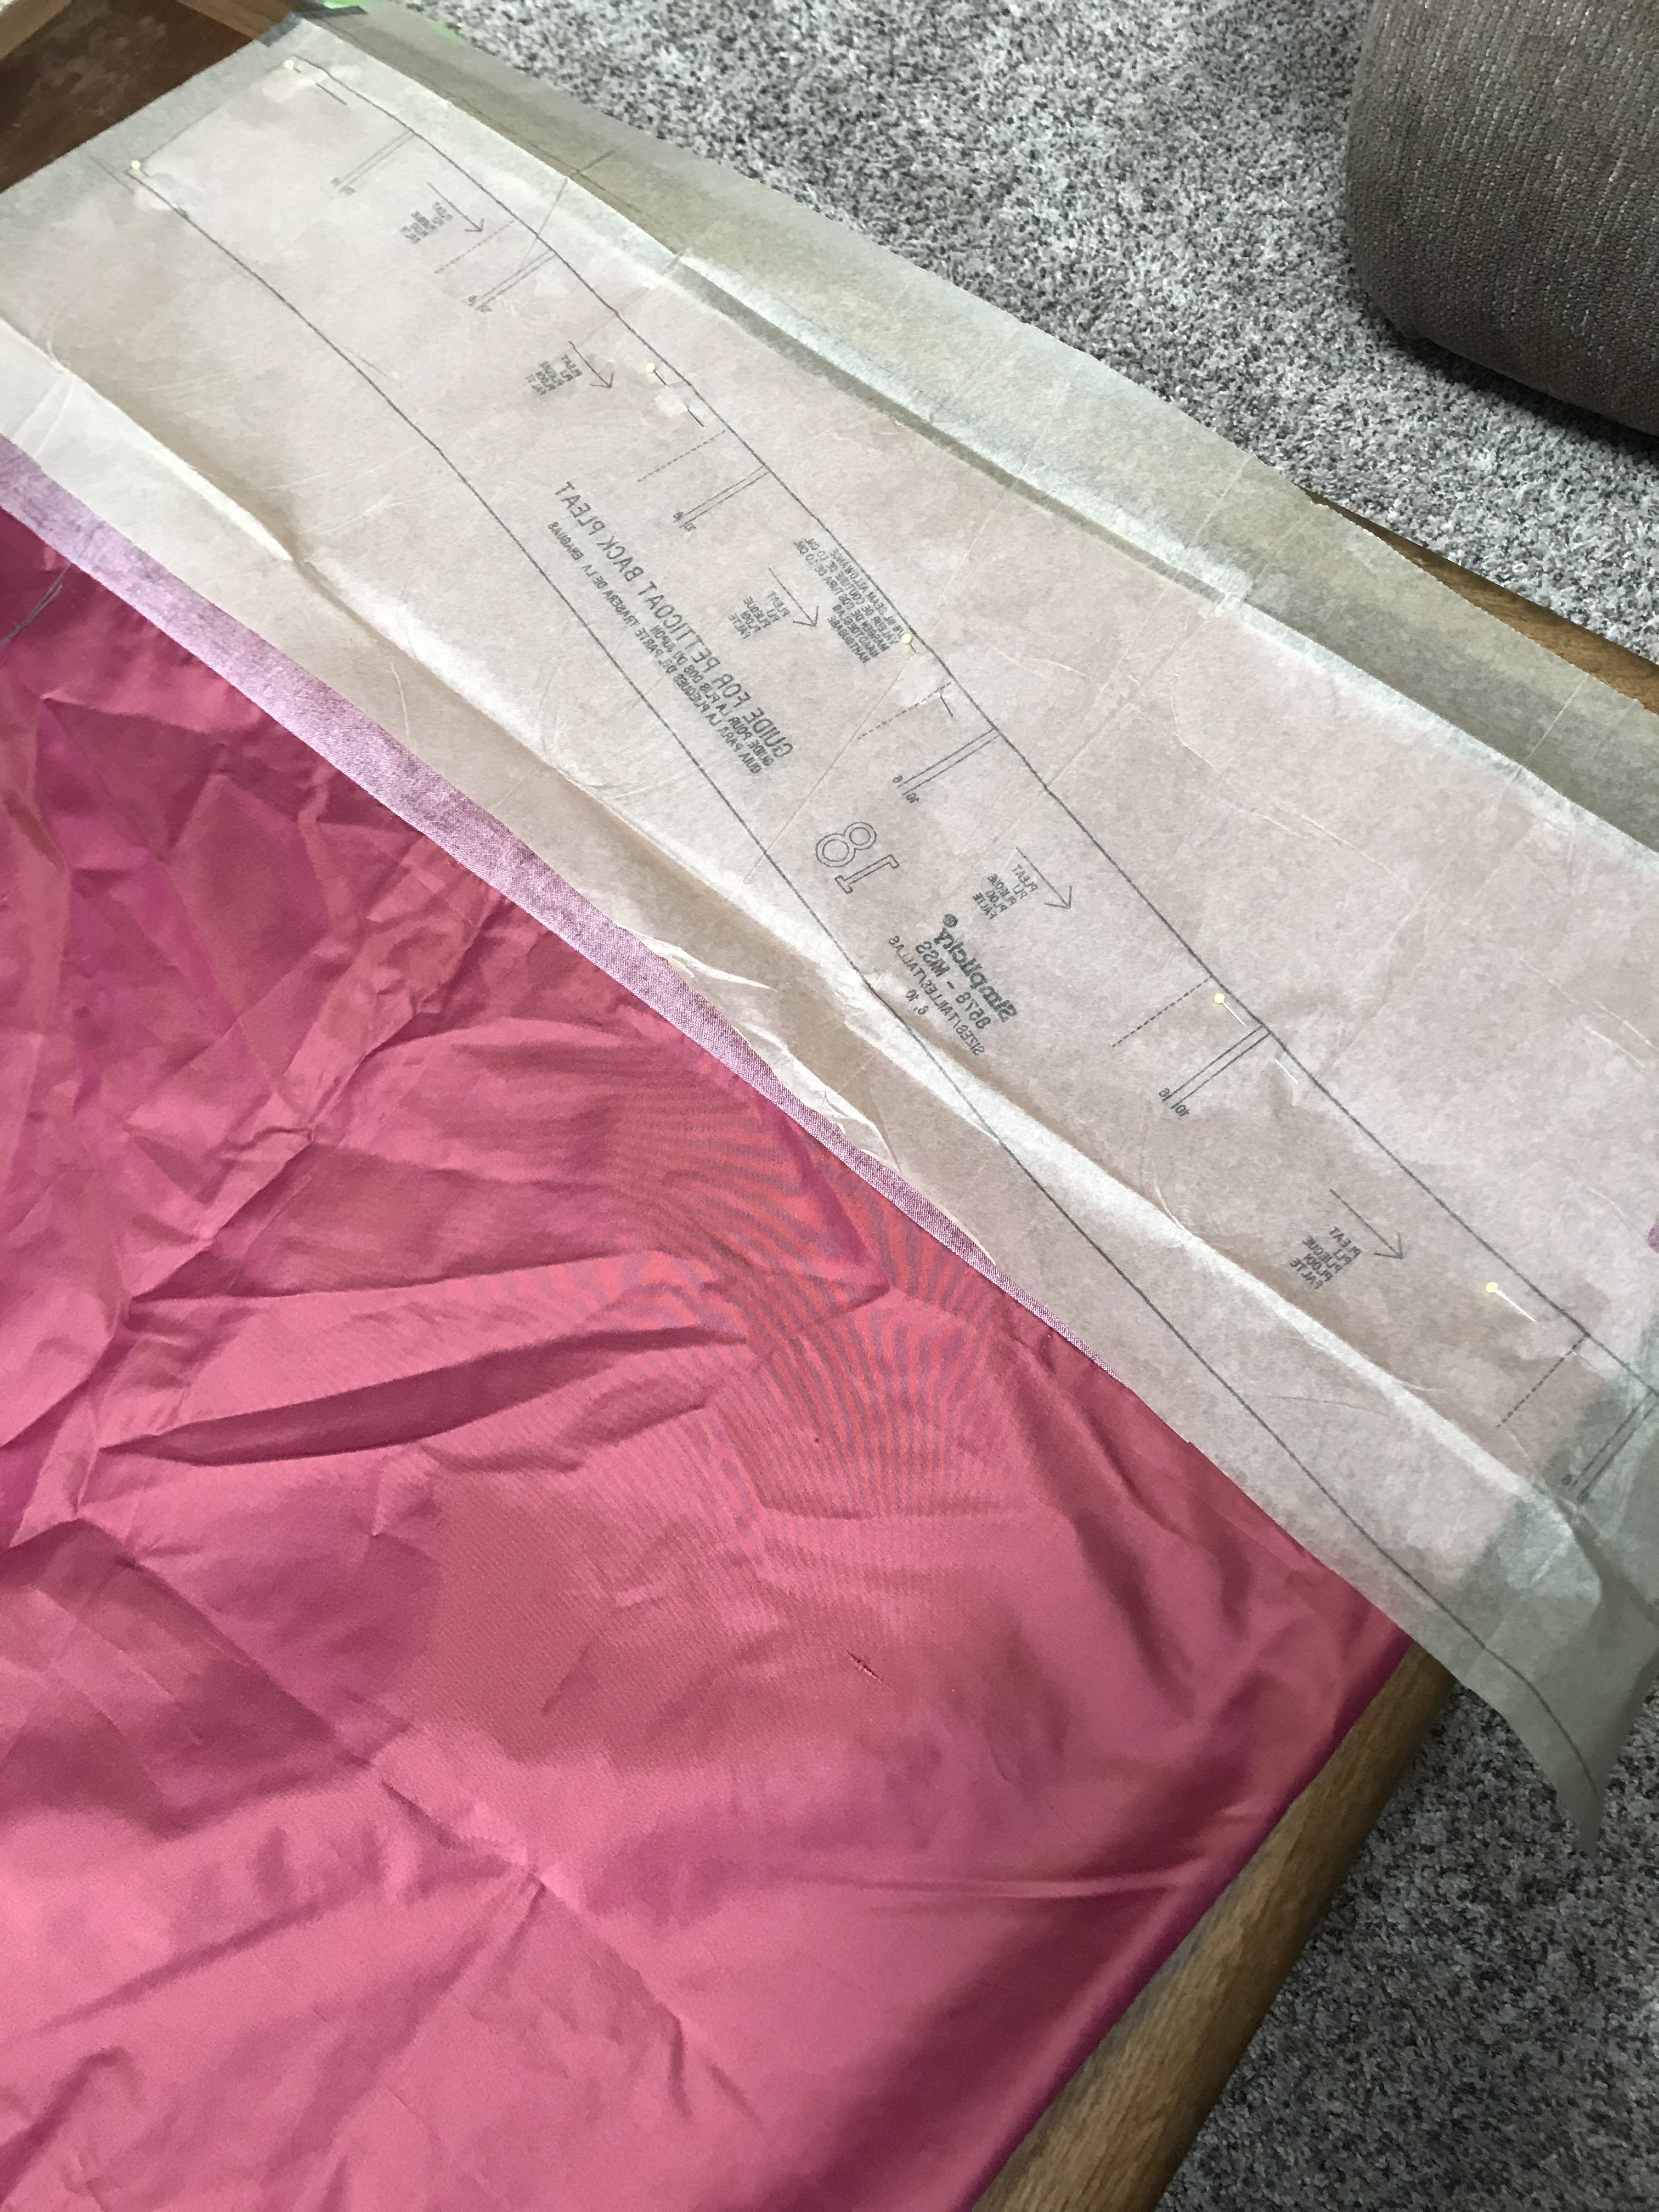
And ready for pleating! The petticoat and pet en l'air would be worn over my pocket hoops so the upper edge of the petticoat needed to be shaped in order for the hem of the petticoat to look even when worn.


I used the petticoat pleating template from Simplicity 8578 as a guide for cutting to top edge of my petticoat, then pleated it,


And sewed on twill tape waist ties.


And the petticoat was done! All ready now for me to finish the pet en l'air to go with it!


As every single piece of this petticoat is a rectangle - including the trim, it fits the July 2022 Historical Sew Monthly challenge "Geometry - Make something with pattern pieces based on basic geometry, or that somehow incorporates geometric design elements."

What the item is: 1770’s silk petticoat
The Challenge: Geometry - the petticoat is entirely constructed of rectangles. The front is one rectangle. The back is 2 - the top third of the back is a rectangle of cotton (not seen when the petticoat is worn with a jacket or gown) and the bottom 2/3rds is a rectangle of silk. All of the trim (including the roses!) is gathered rectangles of silk.
Material: Silk taffeta and cotton sheeting.
Pattern: none for the majority of the petticoat, but I did use Simplicity 8578 as a template to get the top shape correct for going over pocket hoops.
Year: 1760’s and 1770’s
Notions: thread
How historically accurate is it? It’s all hand sewn, and my material choice is accurate. It’s even accurate to use a cheaper fabric for the parts of the petticoat that won’t be seen, the way I did. However, that “cheap” fabric would be more likely to be linen, rather than the cotton I used. The trim pattern is decent I think, though I didn’t base it off an extant garment. The petticoat definitely came out a bit on the short side as I was short on silk. So let’s say 85-90%.
Hours to complete: I’m not sure. The petticoat itself went together quickly, but the trim took forever!
First worn: For Pictures, 12/28/22
Total cost: The silk was given to me by a friend who was de-stashing. Everything else was stash, left over from other projects. So $0.


Saturday, January 14, 2023

Testing the Isle Jeans

 Blue Jeans. The majority of mine are still store-bought. Shirts and tops? Just about all are me-made. Same with dresses, skirts, and pants that aren’t jeans. But jeans? Well I can make them. I have made them. I’ve collected plenty of denim to make myself some more to replace my fast wearing-out thrifted jeans. However, I just haven’t made the collection of jeans I’ve intended too. Other sewing projects keep distracting me.


Thus, when Chalk and Notch put out a tester call for a jeans pattern I decided to apply. A pattern test would be the perfect way to ensure I made a pair of jeans! It was a high waisted jeans pattern featuring both a flare-legged and a wide-legged view. The flares looked like a ton of fun!

That said, I really didn’t expect to get picked as a tester. Chalk and Notch is a pretty popular pattern company and they usually have a lot of testing applicants so I don’t often get picked. Thus, I was completely surprised, and very excited, when I did get picked this time!

And also a little nervous. You see, I applied to test this pattern right after our offer on our house had been accepted, and the test would take place the week before we closed on our house. Hopefully I could manage it!

The printer and my sewing stuff would just need to be some of the last things we packed before moving. . . I could get this done! 

Thankfully I already had all the materials I needed in my stash - stretch denim, top stitching thread, and a jeans zipper.

Now I only had two yards of the stretch denim I wanted to use, not the 3 yards required for my size, but with some careful laying out, I made it work.

I cut out a size 10 as I’d recently gained a bit of weight and that was the size that best matched my new measurements.

As expected with Chalk and Notch patterns the instructions were very thorough and give you a professional looking garment when followed.

As this was a pattern test, I was a good girl and took the time to read, follow, and give feedback on the instructions.

In my normal sewing instructions often get ignored.

I finished the jeans two days before we closed on our house - my very last sewing project in the apartment. After that my sewing area was all packed up.


The finished pants looked fantastic and were very comfortable.

Very comfortable. Honestly, with as much as the denim stretches, I should have made a size smaller than I did. 


I used a fabric that stretched the recommended amount for this pattern, but the pattern does advise you to size down if you prefer a more form-fitting jean. I should have followed that instruction. This size would fit me comfortably if the fabric had no stretch at all.


Since moving I’ve lost the weight I’d gained (thanks moving and stairs!) so I definitely have to wear a belt with these now. But they’re still comfortable. And I still like the way they look.

I fully intend to make myself another pair or two in the correct size from the final pattern. I have more denim in my stash!


On my next pair I’ll probably make the front pockets a bit deeper or a different style all together. They look fantastic, but they’re a bit shallow for my phone.


I love the high waist on these jeans! It hides the fact that this blouse I made last summer turned out a bit too short-waisted for me. (Simplicity 8445 btw. This version can only be worn with my very high waisted pants and skirts, but I do intend to make another version that fits better in the future.)


I wore the jeans the day we closed on our house, and promptly got them covered in burrs and stick-tights as I explored 
our land that afternoon.


The jeans have been in regular wardrobe rotation ever since!

Thank you Chalk and Notch team for choosing me to test this pattern so I would finally add another pair of me-made jeans to my wardrobe!


The Isle Jeans pattern is now available on the Chalk and Notch website and the release sale is going on until 1/20/23! If you’re looking for a high-waisted, versatile jeans pattern with great instructions this one is certainly worth checking out!

*I received this pattern for free in exchange for testing but I was not required to blog about it in any way, shape, or form.