Pages

Sunday, February 26, 2023

My Flannel, Kirsten-esque, Christmas Dress

 I had no intention of making myself a Christmas dress this year. I figured I wouldn’t have the time. 

However, 2 weeks before Christmas I walked in to Joann’s to buy some flannel to make my grandma and my godmother some pj pants as Christmas gifts.


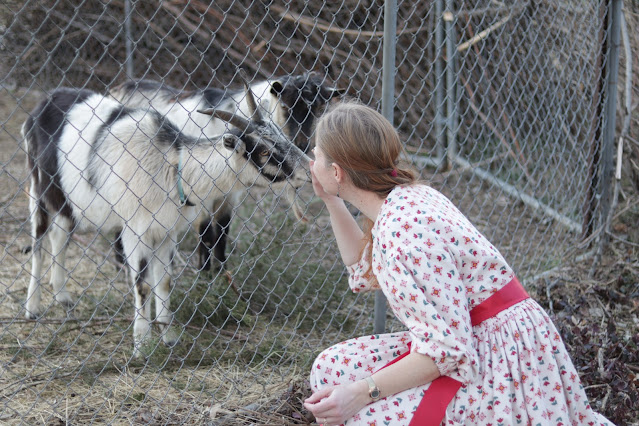
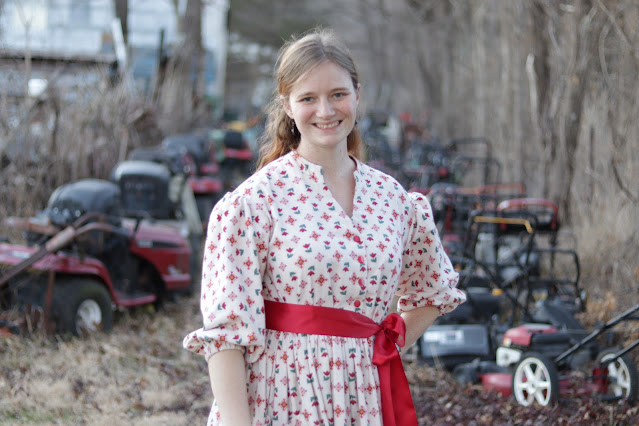
While browsing the flannel I found this cream flannel with red flowers. It was so pretty. It reminded me of the American Girl Kirsten. And it would make such a soft and cozy winter dress.


I couldn’t help myself. Recalling running short on fabric for my sister’s dress, I bought 5 yards to make myself a dress.


It was on sale for a really good price! Totally justifiable!


We happened to be visiting my parents that weekend to get our Christmas tree, so upon returning to their house I went down to my old bedroom and went through my pattern stash, considering my options for this dress.


Since the fabric reminded me of Kirsten, I wanted the dress to be reminiscent of the 1850’s - Kirsten’s time period. Full Skirt, full sleeves, slightly gathered bodice. Buttons down the front would be preferable, as that’s how women’s dresses were typically made during that era. (Though young girls’ dresses typically buttoned up the back.)


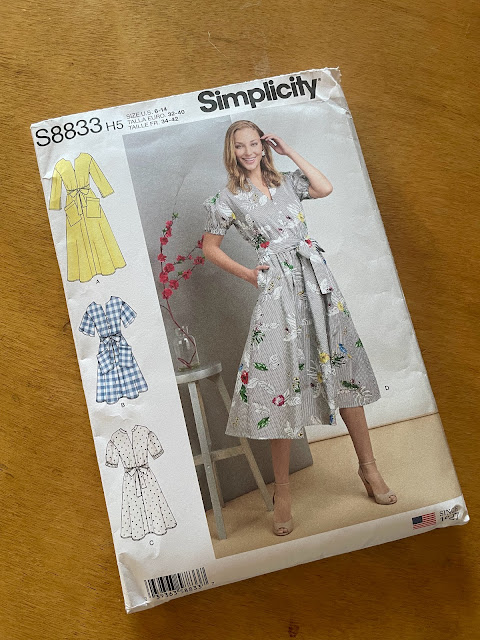
Looking through my options I picked Simplicity 8833. It looked like an excellent starting point for what I had in mind.


The bodice had slightly dropped armscyes, similar to the 1850’s. There were no darts, just some gathering at the waist (this is achieved by elastic, which is rather un-1850’s, but perfect for a modern comfy house dress!) Views C and D had short puffed sleeves, which I could lengthen to 3/4 length (my preferred sleeve length). B and D had buttons down the front. C and D had a standing collar, another reference to my 1850’s inspiration.  Now the skirt shape wasn’t exactly what I was going for, I wanted something very full and tightly gathered, not a flared a-line, but that would be easy enough to swap out!


Upon cutting my dress out I ran into a slight issue - the button closure was FAKE! 

The dress was just meant to be pulled on over your head, with no closure, buttons only for decoration. That’s rather convenient and all, but I want real, functional, buttons! Who likes fake things anyway?!?! 


To fix this annoyance, I added an extra inch to the center front bodice seam to form an underlap, and extended the neckline facing all the way down to the waist, adding the same extra inch as the bodice pieces got.


I combined the length of the view A sleeves with the width of the C and D sleeves to get the sleeve shape and length I wanted. These would be finished off with an elastic cuff when the dress was sewn up.


And I cut three skirt panels, each the full width of the fabric, using the length of the View A skirt as my guide, to make my very full gathered, tea length, skirt.


I decided to use the big patch pockets from the pattern - they were fun and functional, despite not being 1850's inspired.


I did not find the time before Christmas to make my dress - there were too many gifts to finish, along with the Christmas dresses for my niece and my sister


Instead I wore outfits I already had for Christmas Eve and Christmas Day, and made my dress in the week between Christmas and New Years. 


It was done in time for me to wear for my family's Christmas celebration New Year's weekend. Still within the 12 days of Christmas - so it still counts as a Christmas dress!


That said, the dress isn't *too* Christmas-y, so I intend to wear it until the weather gets too warm.


It makes a delightful addition to my flannel dress collection!

Saturday, February 25, 2023

A Coral Necklace Should be Pretty Quick to Make. . . Right??

 A coral necklace. Felicity, the American Girl had one, and as I intend to re-create Felicity’s dresses for myself, clearly I needed one too. 

Coral necklaces were fashionable in the late18th and early 19th century, so one would be something I could wear with multiple history ensembles, not just the Felicity outfits I’m slowly (very slowly) making.


With this in mind I bought 3 different sizes of red glass beads (much more readily available and affordable than coral) and some silk cord to string them on. I did a bit of reading and learned that the cord should be knotted between each bead. I saved extant coral jewelry on Pinterest to get an idea of what my necklace should look like. Then I did more reading about the types of knots I should make between each bead. And finally, about a year after I bought my supplies, I began stringing my beads and making little knots between each one at the end of 2020.


I threaded two needles with the silk cord and threaded each bead on both pieces of cord, then knotted the two cords together between each bead. And I utterly failed to get a single picture of the process.

It’s was a very slow and tedious process. I’d intended to make a double strand necklace like I’d seen in Regency portraits, but with each little bead I strung that seamed more and more overwhelming. Eventually I decided just to make a double stranded bracelet instead, and I finished that at the end of 2021.

Yeah, that’s right, it took me a YEAR to make one little bracelet. Admittedly, it only took that long because I kept deciding the project was too tedious and abandoning it for months on end. I most likely could have finished it in a timely manner if I’d only put my mind to it and done it. But I had no motivation to do that.


Once the bracelet was done I decided to forget about the necklace idea for a while. If a bracelet had taken me a year to finish, how long would a necklace take?!?!


Only a day it would turn out. Less than that actually.

In May of 2022 my husband brought Covid home from work so we had a nice 10 days of being quarantined at home. (As sucky as being sick is, the introvert in me rather appreciates an excuse to stay home.) For the most part during that time I felt well enough to get a lot of fun sewing projects done, however, there was one day I didn’t feel like getting out of bed. So after resting, reading, and napping, I pulled out the red glass beads and set about stringing and knotting a coral necklace for myself. 


I decided to do a single strand necklace for myself this time rather than attempt a double strand like I did for the bracelet. (I’m referring to strands of beads here, not strands of silk cord, each bead is still strung on two strands of silk cord.)


And by the end of the afternoon that necklace was done! Not perfect at all, some of my knots and the gaps between the beads are far from even, but done nonetheless!


I now had a set of coral jewelry! I might go back later and mark a nicer necklace with more even knots, now that I know the technique and have proved to myself that one little piece of jewelry doesn’t have to take a year to make, but for now I’m thrilled with this set.


I wore it with my 18-teens dress for the Federalist era fashion show I participated in back in September.


And again for my Pet en Lair photo shoot in December.


And when I finish the next installment of my Felicity series (very close on that actually) I’ll wear the necklace with that too!


To finish the story of my coral jewelry off, the necklace was my entry for challenge #3 of The Historical Sew Monthly last year: 


What the item is: Coral Necklace

The Challenge: Non-Woven - there’s nothing woven here! Just twisted cord, knotted between each bead, glass beads, and a metal clasp.

Material: Red glass beads 

Pattern: none

Year: Late 18th century and Early 19th

Notions: Heavy silk thread and necklace clasp

How historically accurate is it? The thread/string material is correct. The beads would most likely be actual coral during that time, not glass. The clasp style is not correct as far as I know. My knots are not very pretty, and I’m sure they would have looked better in the era.

To summarize: the look is mostly good, there’s no plastic, and the string type is correct. We’ll say 60%

Hours to complete: 2-3

First worn: September 3rd, for a 1799-1820 fashion show

Total cost: probably $10ish, but it’s been over two years since I bought the materials so I really can’t remember.

Saturday, February 18, 2023

The Ren Fest, a Linen Petticoat, and Fairy Houses

 My sister came to stay with me for 3 days last fall, and it was absolutely delightful. The weekend began with a trip to Joann’s where we bought fabric for Christmas dresses (both hers and our niece’s) and ended with her coming along when my husband and I went to look at a house - the house we wound up buying.


In between, we went yarn shopping, made fairy houses, went to estate sales, and went to the Renaissance Festival - twice! 

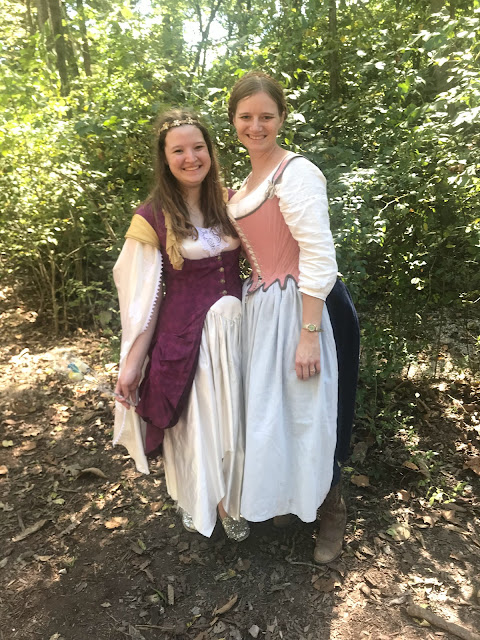
And clearly, we dressed up for the Ren Fest!


My sister wore the “Zelda” overdress I made for myself several years ago, over a thrifted white dress she’s refashioned and worn for several other costumes.


I decided to take the opportunity to wear my Augusta Stays. I made them two years earlier, and they still hadn’t had an outing!


So, stays, shift, apron, pockets, bum roll (still un-blogged, but it’s the Francis Rump from Scroop Patterns), and a plain 18th century petticoat.


There was only one issue. I was rather short on “plain” 18th century petticoats. The majority of my 18th century petticoats are silk, and silk is not well suited for Ren Faire life.


Thus, a new, washable, 1780’s petticoat was an order. Thinking through my stashed fabric options, I decided a navy blue linen petticoat would be just the thing.


I pulled out the linen I had left over from this skirt. I had just over 2 yards - perfect! But there was an issue.


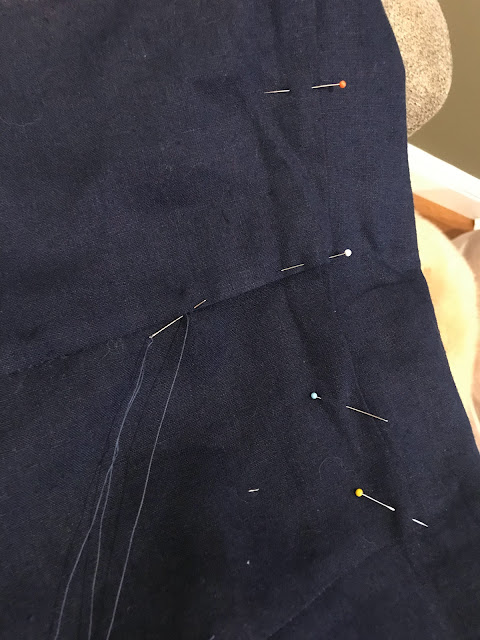
I’d also used this linen for part of the sash of my Wildwood Wrap dress, so it was missing a good sized chunk out of one corner. 


Some piecing was required to fix that problem. Good thing piecing is period!


Once I fell-stitched the piecing in place, I had two large rectangles on fabric and the rest was easy!


I sewed up the side seams with a running back stitch, and left the top 10 or so inches open on each side for pocket access. Then the bottom was hemmed, the pocket slits were hemmed, and the top  was pleated.


I basted the pleats in place, then tried on the petticoat over my Francis Rump and had my sister help me level the hem. (Yes, this was the day before we were planning on going to the Ren Fest.)


Once the shape the top edge needed to be was marked I settled back in the recliner with my hand sewing to attatch the waist ties, my sister took over the couch with her crochet, and we proceeded to watch about half of the 1995 Pride and Prejudice.


And with that my petticoat was done!


Costumes ready for the next day, my sister and I took a walk around the neighborhood, gathered up some sticks and pine cones. You could get two free tickets to the Ren Fest if you showed up with fairy houses for their contest, so, as my sister and I planned to go two days in a row with different groups of people, we decided we might as well make fairy houses and get in for free!


Sticks, pinecones, hot glue, after a couple hours our fairy houses for free entry were done and we were ready to meet our aunt and cousin at the Ren fest the next day!


They too had made fairy houses to get in, and we enjoyed looking at all the different houses in the fairy garden and gathering ideas for the next year.


Some people got really detailed with their houses!


After admiring the fairy houses we spent the afternoon visiting different vendors and such.


Day one was for shopping! The following day we returned with another friend, and once again began in the Fairy Garden to show her our houses.

A Fairy in the Fairy Garden!

And then proceeded to watch different shows and do more exploring. Breaking up our visit into two different days definitly made it more relaxing and enjoyable than trying to fit everything into one day. Highly reccomend!


As a final note, since the linen petticoat I made for the weekend happened to be navy, it worked for the September 2022 Historical Sew Monthly challenge - Blue!

What the item is: 1780’s Navy Linen Petticoat
The Challenge: Blue - it’s Navy Blue!
Material: linen
Pattern: none, it’s just two rectangles sewn together, pleated, and leveled over my false rump.
Year: 1780’s, due to the rump I leveled it over, but could be passible for other decades as well.
Notions: Thread and linen tape.
How historically accurate is it? I’d say 90%, at least. The material and color are both good for this era. It’s all handsewn using what I know of sewing techniques from the era. It’s pieced together, which is fine for this era. The only issue was my thread was a poly/cotton blend - it should have been linen.
Hours to complete: Maybe about 10 hours. That includes piecing back together the corner of the fabric that had been cut into for a different project a while back.
First worn: September 24th, 2022 for the Ren Faire
Total cost: Nothing! Everything was stash, most of it given to me at some point in the past.