Pages

Thursday, August 29, 2019

And More Back to School Clothes

"A short sleeved hoodie???" I asked.
"Yes," she said, "A short sleeved hoodie."
"Ok," I said, "if you're sure. . ."
"I am," she said. "I've had one before and I liked it."


That conversation is how I wound up making this short sleeved hoodie for my sister. And you know what? Despite my initial reservations, I actually like it! My sister knew what she was doing with this idea!


Back when I told my sister to pick out a couple patterns from the Winter Wear Designs website for this Back 2 School blog tour, I directed her attention to the Banded Tee pattern. It's a pattern I've admired several times, but never got around to making for myself. So, I thought I might make it for my sister. As soon as she saw the hood option, she loved the idea - but her vision for this top was a little different than mine.


I've long admired this pattern because all edges - the bottom, the sleeves, and the neckline are finished with bands, so no hemming is required at all! I don't particularly enjoy hemming knits - so I'm automatically interested in any knit garment pattern which doesn't require hemming. The hood option was never really something I'd paid attention to. For my sister however, the hood was the reason to make this pattern.


Thus, she requested I make her the Banded Tee, with the hood, and the tulip sleeves from the Classic Shell pattern I'd made her for Easter. This short tulip-sleeved hoodie idea led to the discussion recorded above.


As you can see, I made the hoodie, just as she'd requested. When it was done I was actually surprised by how much I liked it.


It is CUTE!! This girl has style!


That said, I couldn't let her have all the fun when it came to designing her new school clothes. I wanted to exercise a bit of my own creativity. Thus, I decided to make her a dress.


Last month, Winter Wear Designs released the new Creative Cap dolmen pattern. Despite the fact I already have a tried and true dolmen top pattern, this pattern interested me. The more I saw of it, the more I liked it.


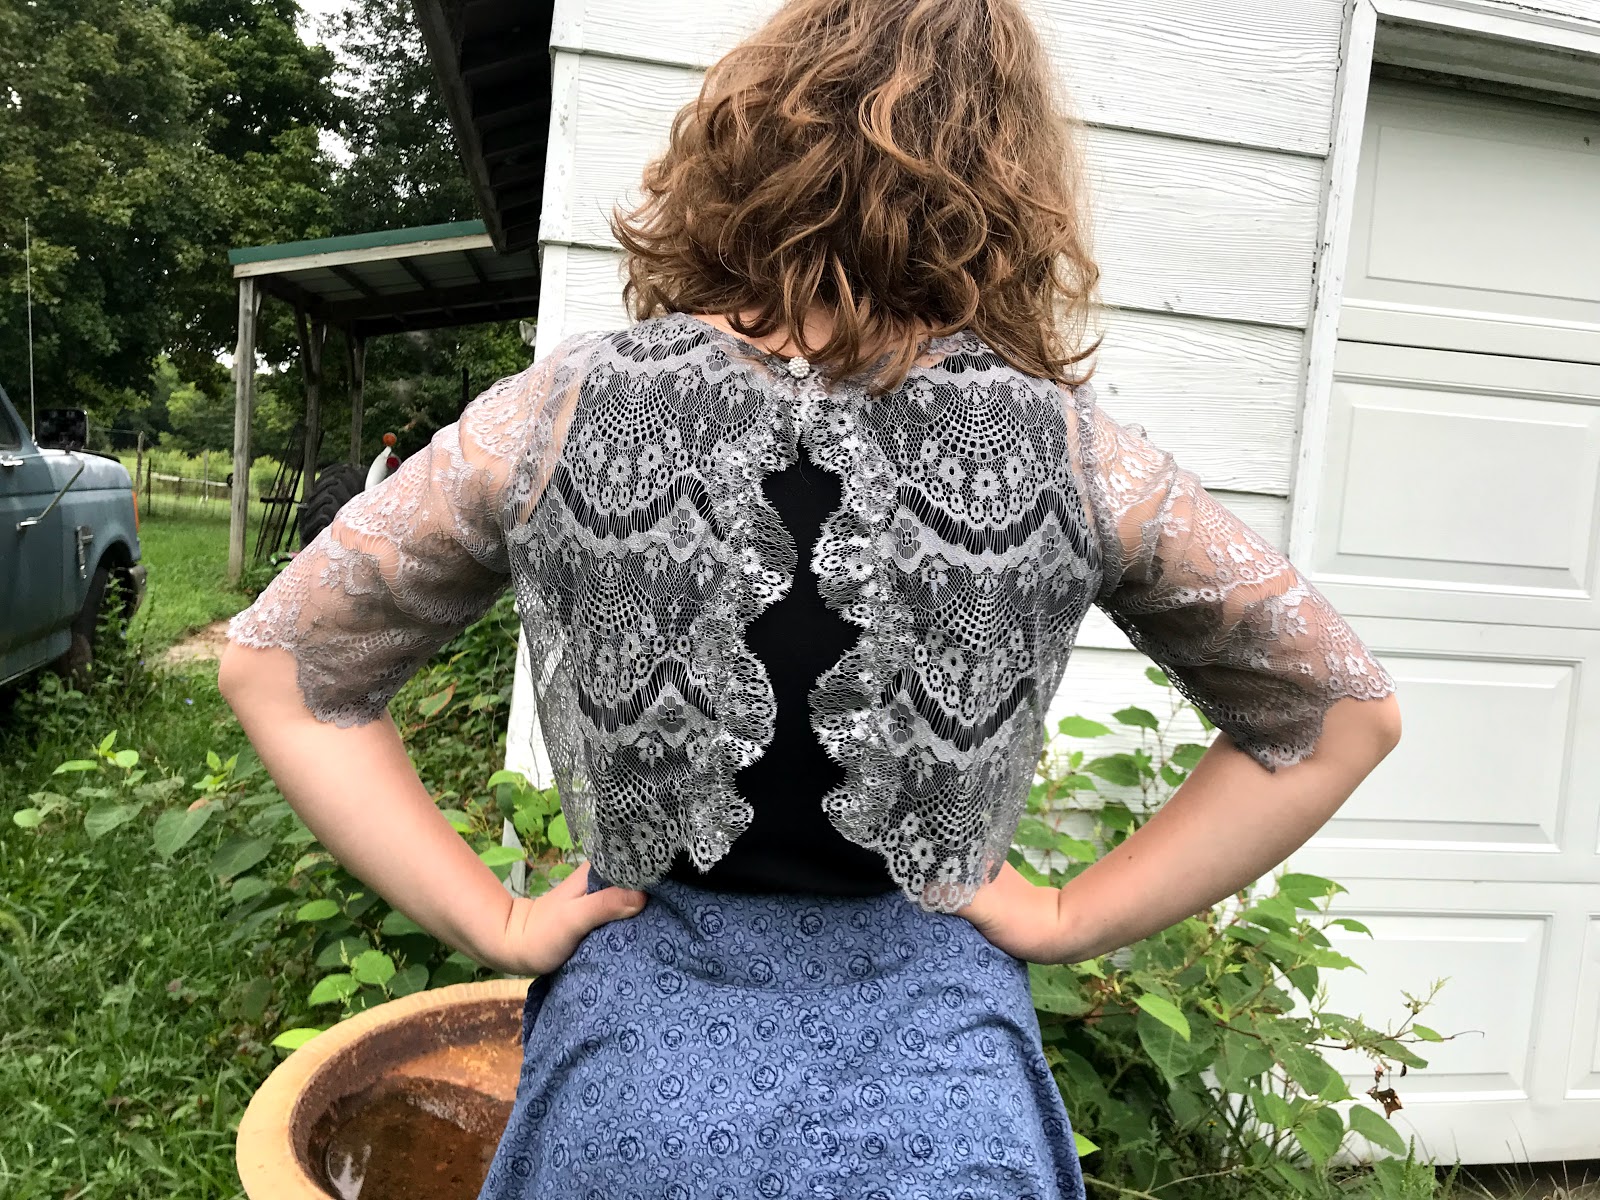
I loved the v-back option with the criss-crossed straps.


And I really liked both the front and back color blocked yoke options.


I decided it would be a fun pattern to make for my sister for this blog tour. But just making her another top sounded a little boring - especially since the hoodie top had turned out so fantastic. Thus, I decided to lengthen this pattern into a dress.


I added a little extra swing to the pattern below the waist (because I like fuller skirts), and about 10" of length, and the dress pattern was good to go!


The pattern pieces already had the waistline marked on them, so I transferred those markings to the fabric when I cut the pieces out. Then, to add a bit of shape to the dress, as sewed elastic around the waistline on the inside of the dress per this tutorial.


I probably could have made the elastic a little tighter, as it's rather loose on my sister - but at least it's comfy!


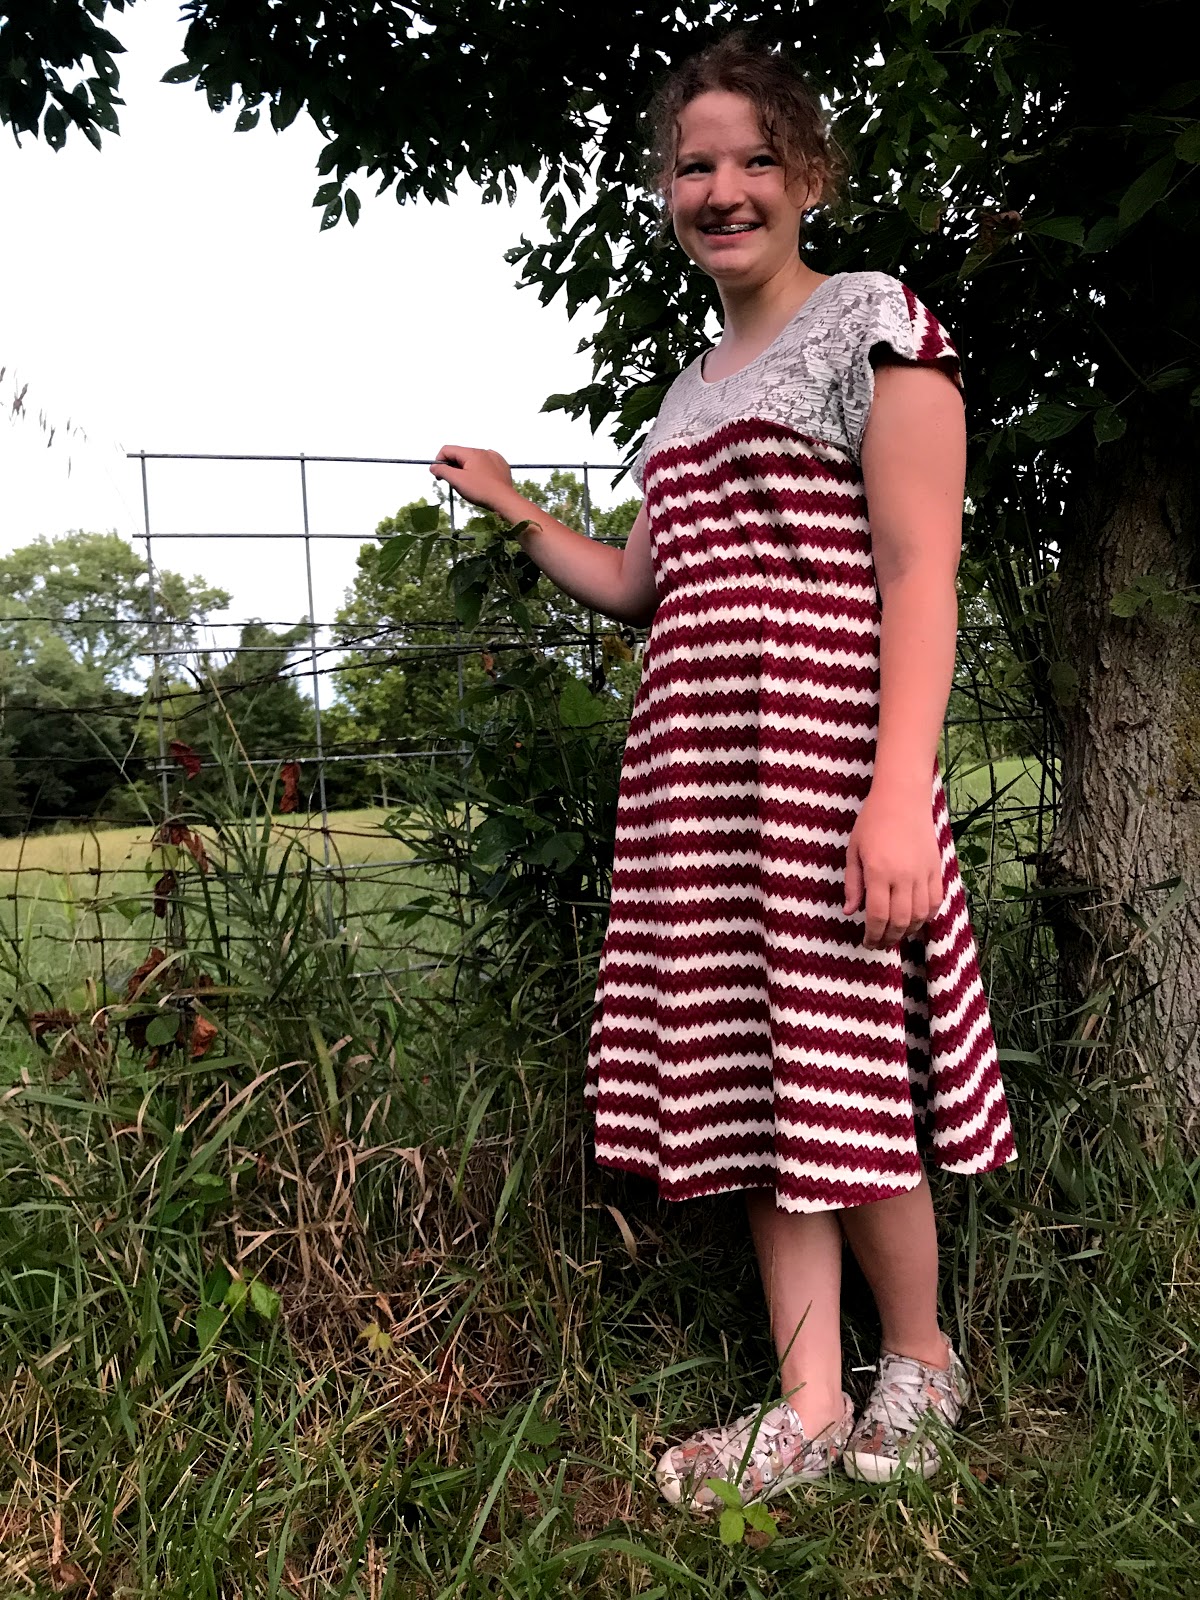
Over all, I love the shape of the finished dress! It turned out just as I'd hoped - a comfy, easy wearing, knit dress just right for class or home!


The stretch lace I used for the yoke keeps the front of the dress from being "too plain".


And the fancy v-back definitely keeps it out of boring territory!


Simple, but still fun and interesting - that's what this dress is!


And with that - a skirt outfit, a short sleeve hoodie, and a comfy knit dress - my sister's official Back 2 School collection is done. But, of course, she and I both have lots more ideas when it comes to things I ought to make for her!


Don't miss out on any of these inspirational posts:

Monday:


Tuesday:


Diane of Sewing with D


Wednesday:


Jessica of Jot Designs


Thursday:


Friday:


Liv of Liviality


Tuesday, August 27, 2019

The First Day of School Outfit

Summer Break was short this year!! Two weeks ago, two out of the three kids I nanny went back to school, and my little sister, my baby sister, started high school! Where did the summer go? It seems just yesterday the school year ended and I was looking forward to a summer of entertaining the kids with library trips, afternoons at the pool, and days just spent at the house reading fun books out loud to all three or baking cookies together. Now another summer full of days like that are past. And let's not talk about where the years have gone. . . my sister, in high school!?!?!


With the new school year comes the Winter Wear Designs Back 2 School blog tour - which I use as an excuse to make make my sister a new first day of school outfit that we design together. This year, I went the long way around making her just what she requested.


In preparation for this blog tour I handed my sister my computer and told her to pick a couple of patterns from the Winter Wear Designs website and I'd make them up for her for the new school year.


The very first pattern to catch her eye was the Crop Dress. While it is a beautiful dress, it's not really what I had in mind when I said "pick out some back to school patterns". It's more of a "special occasion" pattern than a "school" pattern. Thus I vetoed the idea, and my sister went back to looking at patterns.


After a bit of looking and a bit of discussion, we settled on the Boulevard Skirt  (which she's been wanting me to make for her since I made myself one back in the spring) and a couple different top patterns. While these hadn't been her first choice, she seemed relatively excited about them, so I printed out patterns, pulled together fabrics, and began making her a first day of school outfit.


As my sister has been wanting a Boulevard Skirt for months now, that was the first thing I got started on. She picked out a beautiful blue, rose-printed quilting cotton from my stash and requested a hi-low skirt from it.


I had two yards of this fabric, which was gifted to me by my grandma several years ago. That wasn't quite enough fabric for the full length hi-low, like I'd made myself, but it was just enough for the knee length hi-low. As my sister really liked the fabric, she agreed to the shorter skirt option.


While not quite as dramatic as the full length option, it still flows out elegantly as she walks!


The finished skirt met my sister's expectations, so next we just had to decide what to pair with it. We'd picked out a couple different shirt patterns on the WWD website, but once the skirt was done, the shirt options we'd considered both just seemed too fussy to pair with it.


This skirt needed a basic top which would compliment it, rather than compete with it as the focal point of the outfit. Options were discussed. My fabric stash was dug through. What would work well with a rose-printed, button-front, hi-low, skirt??


In my stash we found a scrap of sparkly black cotton/spandex jersey (left over from the remnant I used to make this tank top and trim these). It looked great with the blue rose printed skirt! The only problem was, well, there wasn't enough of the sparkly jersey left to make an entire shirt!


After considering our options, we decided to use the sparkly fabric for the front of a tank top. I had some solid black cotton/spandex jersey we could use for the back of the tank top.


With this decided I pulled out the Starting Point Tank pattern, squeezed the front onto my sparkly fabric scrap, cut what little fabric was left after that into 2" strips to piece together for neck and arm bands, then cut out the back from the solid black jersey and sewed up the tank top. All in under an hour start to finish!


The finished sparkly tank top was just the thing to pair with the blue rose skirt for my sister's first day of class!


Unfortunately, the kittens could not go to class with her. They had to stay home.


When all was said and done, the first day of school outfit I made my sister was absolutely adorable, but I began to feel a little bad for not making my sister what she had really wanted - the Crop Dress. Thus, I decided to make one more addition for this outfit.


I found a remnant of silver lace in my fabric stash (bought at Joann's for a project we decided against using it on) and I used it to make the crop top part of the Crop Dress pattern.


This little lace crop top dresses up the skirt and tank top outfit, taking it from "school outfit" to "special occasion outfit"


It was fun to make this fancy little piece and surprise my sister with it!


I love how it looks with the Boulevard Skirt, dressing it up but not detracting from it!


I can also envision this worn with skinny jeans for a less dressy look.


My sister has also suggested I make her some solid colored dresses to wear with this lace top.


So perhaps I will actually make her the Crop Dress, now that I've already made her the top portion of it!


I think we've come full circle and I could have saved some myself some work by making her the dress she really wanted right from the beginning - but then she wouldn't have gotten a sparkly tank top and the button front skirt she asked for months ago. And every girl needs a sparkly tank top!


*I received these patterns for free in exchange for blogging about them, but all opinions expressed are my own.


Don't miss out on any of these inspirational posts:

Monday:


Tuesday:


Diane of Sewing with D


Wednesday:


Jessica of Jot Designs


Thursday:


Friday:


Liv of Liviality

Friday, August 23, 2019

The Watermelon Joey Tank

I bought 1 yard of watermelon print fabric for the bodice of my watermelon dress. After making the dress I still had over half of that length left - and it needed to be turned into something awesome!

But what can one do with less than a yard of 44” wide cotton? Well it turns out, with careful positioning, piecing, and pattern hacking, one can make view A of the Joey Tank, by Made Again Patterns.

After testing several different pattern layouts on my little piece of fabric, I went with the option pictured above as it allowed the front to still be cut on the fold and required very little piecing. The piecing required, across the top of the front piece, actually looked intentional when all was said and done, so that was a win. I even added some dark green flat piping to highlight the fabric join.


To accommodate my fabric shortage, I changed the shape of the upper back a bit - and I really like how that turned out!


After cutting out the tank itself, I turned all my left over fabric scraps into bias tape. The itty-bitty scraps I stitched together yielded enough bias tape to make straps, but not enough to bind the armholes the way the Joey Tank instructions recommend. Thus, those would need to be finished in a different way, but that was ok, because I had I plan.

The Joey tank isn't ideal for wearing with a normal bra. And I don't like wearing strapless bras. Thus, I decided to add a shelf bra to this tank of watermelon-y goodness.


The shelf bra is made from cotton/spandex jersey with a layer of power net added to the front panel for a little extra support.


I cut the jersey to have the same neckline and armhole shape as the tank itself, then cut it narrower below the armhole so it would be tight enough to be some what supportive. I omitted the bust darts, as those wouldn't be needed in a knit support layer. I cut the shelf bra long enough to go from the neckline to right below my bust. Then I cut a matching back piece from the jersey and sewed up the side seams.


Around the bottom I attached elastic. 


This got folded up and zig-zagged in place, just like you do with elastic on a swim suit.


Once the elastic was securely stitched in place, the shelf bra was ready to be added to my watermelon tank top.


I sewed it in like a facing, effectively finishing the neckline and armholes all at once.


The result? A cute and comfy tank top which I don't have to wear a bra with!!


I love it!! And I definitely plan on making more Joey tanks with shelf bras in the future.


Next time I do this however, I do believe I will go ahead and bind the arm holes with bias tape as the pattern recommends. That will keep the shelf bra fabric from peaking out around the edges while raising the armholes just a touch from where they are on this tank top - which would be more comfortable for me.


So there you go, my watermelon fabric has been used up completely, hardly a scrap was wasted.

\
And I have wound up with not one, but two fabulous watermelon garments which I enjoy wearing immensely.


Not bad for a single yard of fabric purchased off the clearance rack at JoAnn's!


*I received this pattern free of charge in exchange for testing it earlier this year, but all thoughts and opinions are my own.