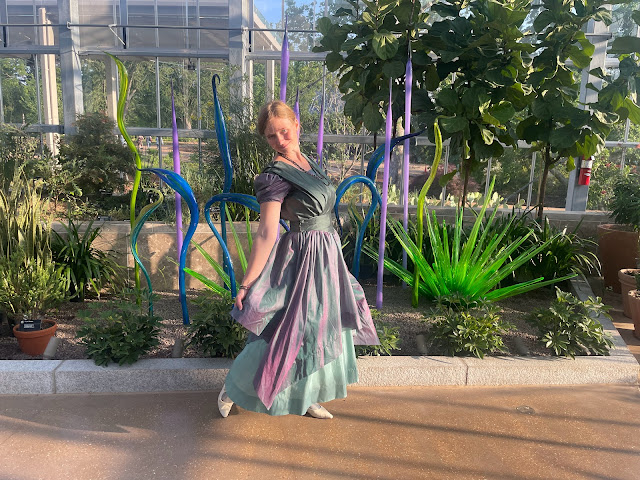
Well I thought I would begin blogging my 1910's and 1920's makes, from the Historical Sewing Society outing at the beginning of this month, in the order I made them - undergarments, 1921 day dress, 1916 evening dress. However, I have yet to get pictures of the corset, petticoat, and combinations, so rather than delay blogging the entire project for who knows how long until I get those pictures, I decided I might as well blog things in reverse order - and hopefully by the week I'm ready to blog the under things, I'll have some pictures!
And thus, without further ado, let's talk about my 1916 evening gown!
As with the majority of my historical sewing projects, I've been planning this gown for years. The 1910's was never really an era that had my attention, until 2017 when the Dreamstress shared her 1916 "Gather ye Rosebuds" evening dress. I fell in love with that dress! Suddenly 1910's, and specifically 1916, was on my to-do list!
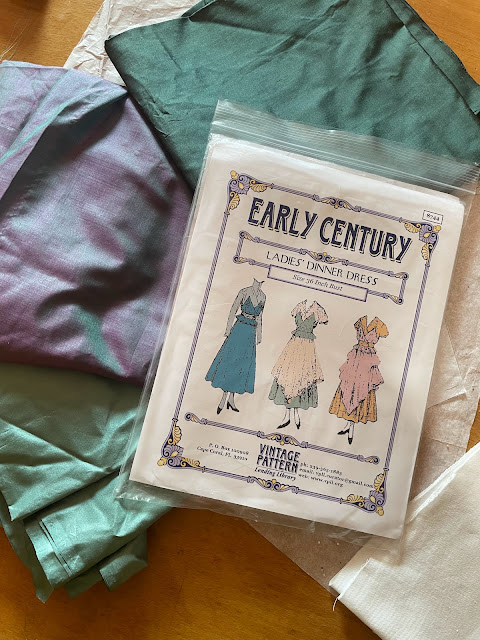
2017 was also the year I did the World Race. In Cambodia (Asia really was the best continent for fabric shopping!) I bought some silk. 5 meters of of a stunning green and purple changeable/shot light weight silk, and one meter of a dark green heavier silk, which paired perfectly with the changeable silk.
By the time I made it home from the World Race I'd pretty much decided these fabrics needed to become a 1916 evening gown. And over the past 6 years I have spent an awful lot of time on Pinterest looking at inspiration and dreaming of my gown.
I quickly realized I wouldn't be exactly replicating any one 1916 extant dress or fashion plate as I was rather limited by how much fabric I had. Yes, I had 5 whole meters of changeable silk, but that silk was only 32" wide - so 5 meters of it was the equivalent of 2.5 meters of the 60" wide silk I normally work with. Add to that 1 meter of 44" wide dark green silk, and we're talking less than 4 yards of "normal" width silk. I was sure it could be done somehow, but I would have to let the fabric dictate the style as I was making the dress, rather than getting hung up on one particular style I wanted to re-create.
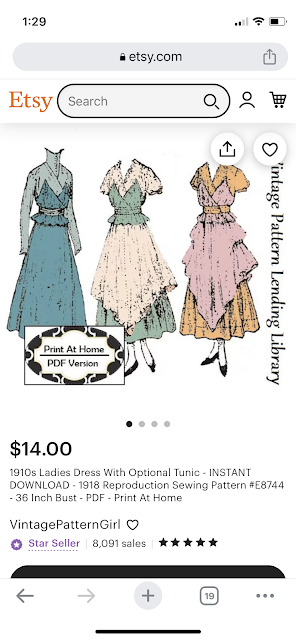
I was particularly inspired by both the blue and the pink dresses in the above plate, and came to the conclusion that I would use my changeable silk as a floaty over skirt and my green silk for most of the bodice. What either of these elements would look like or what the rest of the dress (primarily the underskirt) would be made from, I had no idea.
In December of 2018 I participated in "Designin' December" and won the prize of a gift card to the Vintage Pattern Lending Library. I spent days drooling over all the options on the website, and finally decided to use my gift card on a couple of 1910's patterns. One of which was the 1918 Dinner Dress Pattern. Now this pattern didn't look exactly like the 1916 evening dress of my dreams, but I thought it would be a good starting point.
Thus, when I was actually ready to start making my 1916 dress in May, that's what I had to start with - a limited amount of beautiful fabric, a vague plan, and a pattern to hack.
While I worked on my undergarments and day dress, I spent my free time continuing to browse Pinterest in an effort to really nail down what I wanted this dress to look like within the fabric and pattern parameters I had. I came to the conclusion I would need a third fabric to use for the underskirt. A dig through my silk stash reveled the leftover silk from my mom's mother of the groom dress - it looked great with my Cambodian silks! And there appeared to be just enough left for a plain tea length skirt.
10 days before the event I cut into my fabric - the idea was still a little fuzzy, but it was there and it was time to make this dress happen!


No comments:
Post a Comment