4 Days before my wedding I suddenly remembered I didn't have a wedding veil yet. I had plans for a wedding veil. I'd picked a design, a length, and even obtained the materials I needed, but in the weeks following the completion of my wedding dress, I'd gotten wrapped up in other wedding preparations and sewing (my mom's dress, bridesmaids' dresses, flower girls' dresses, ring bearer vest, usher vest, and miscellaneous other things. . .) and my need for a veil slipped my mind.
Good thing I remembered to make the veil when I did so I wasn't frantically making it the night before the wedding! (As it was, I made my garter the day before the wedding, because I completely forgot about that little thing until last minute!)
As I said, I had the veil all planned out well before I got around to making it. Back before I got engaged, I came across this picture of a draped veil on Pinterest and fell in love with the look.
So elegant, and different from the standard gathered veils, while still looking classic! I looked through picture after picture of draped veils on Pinterest and fell more and more in love with the style.
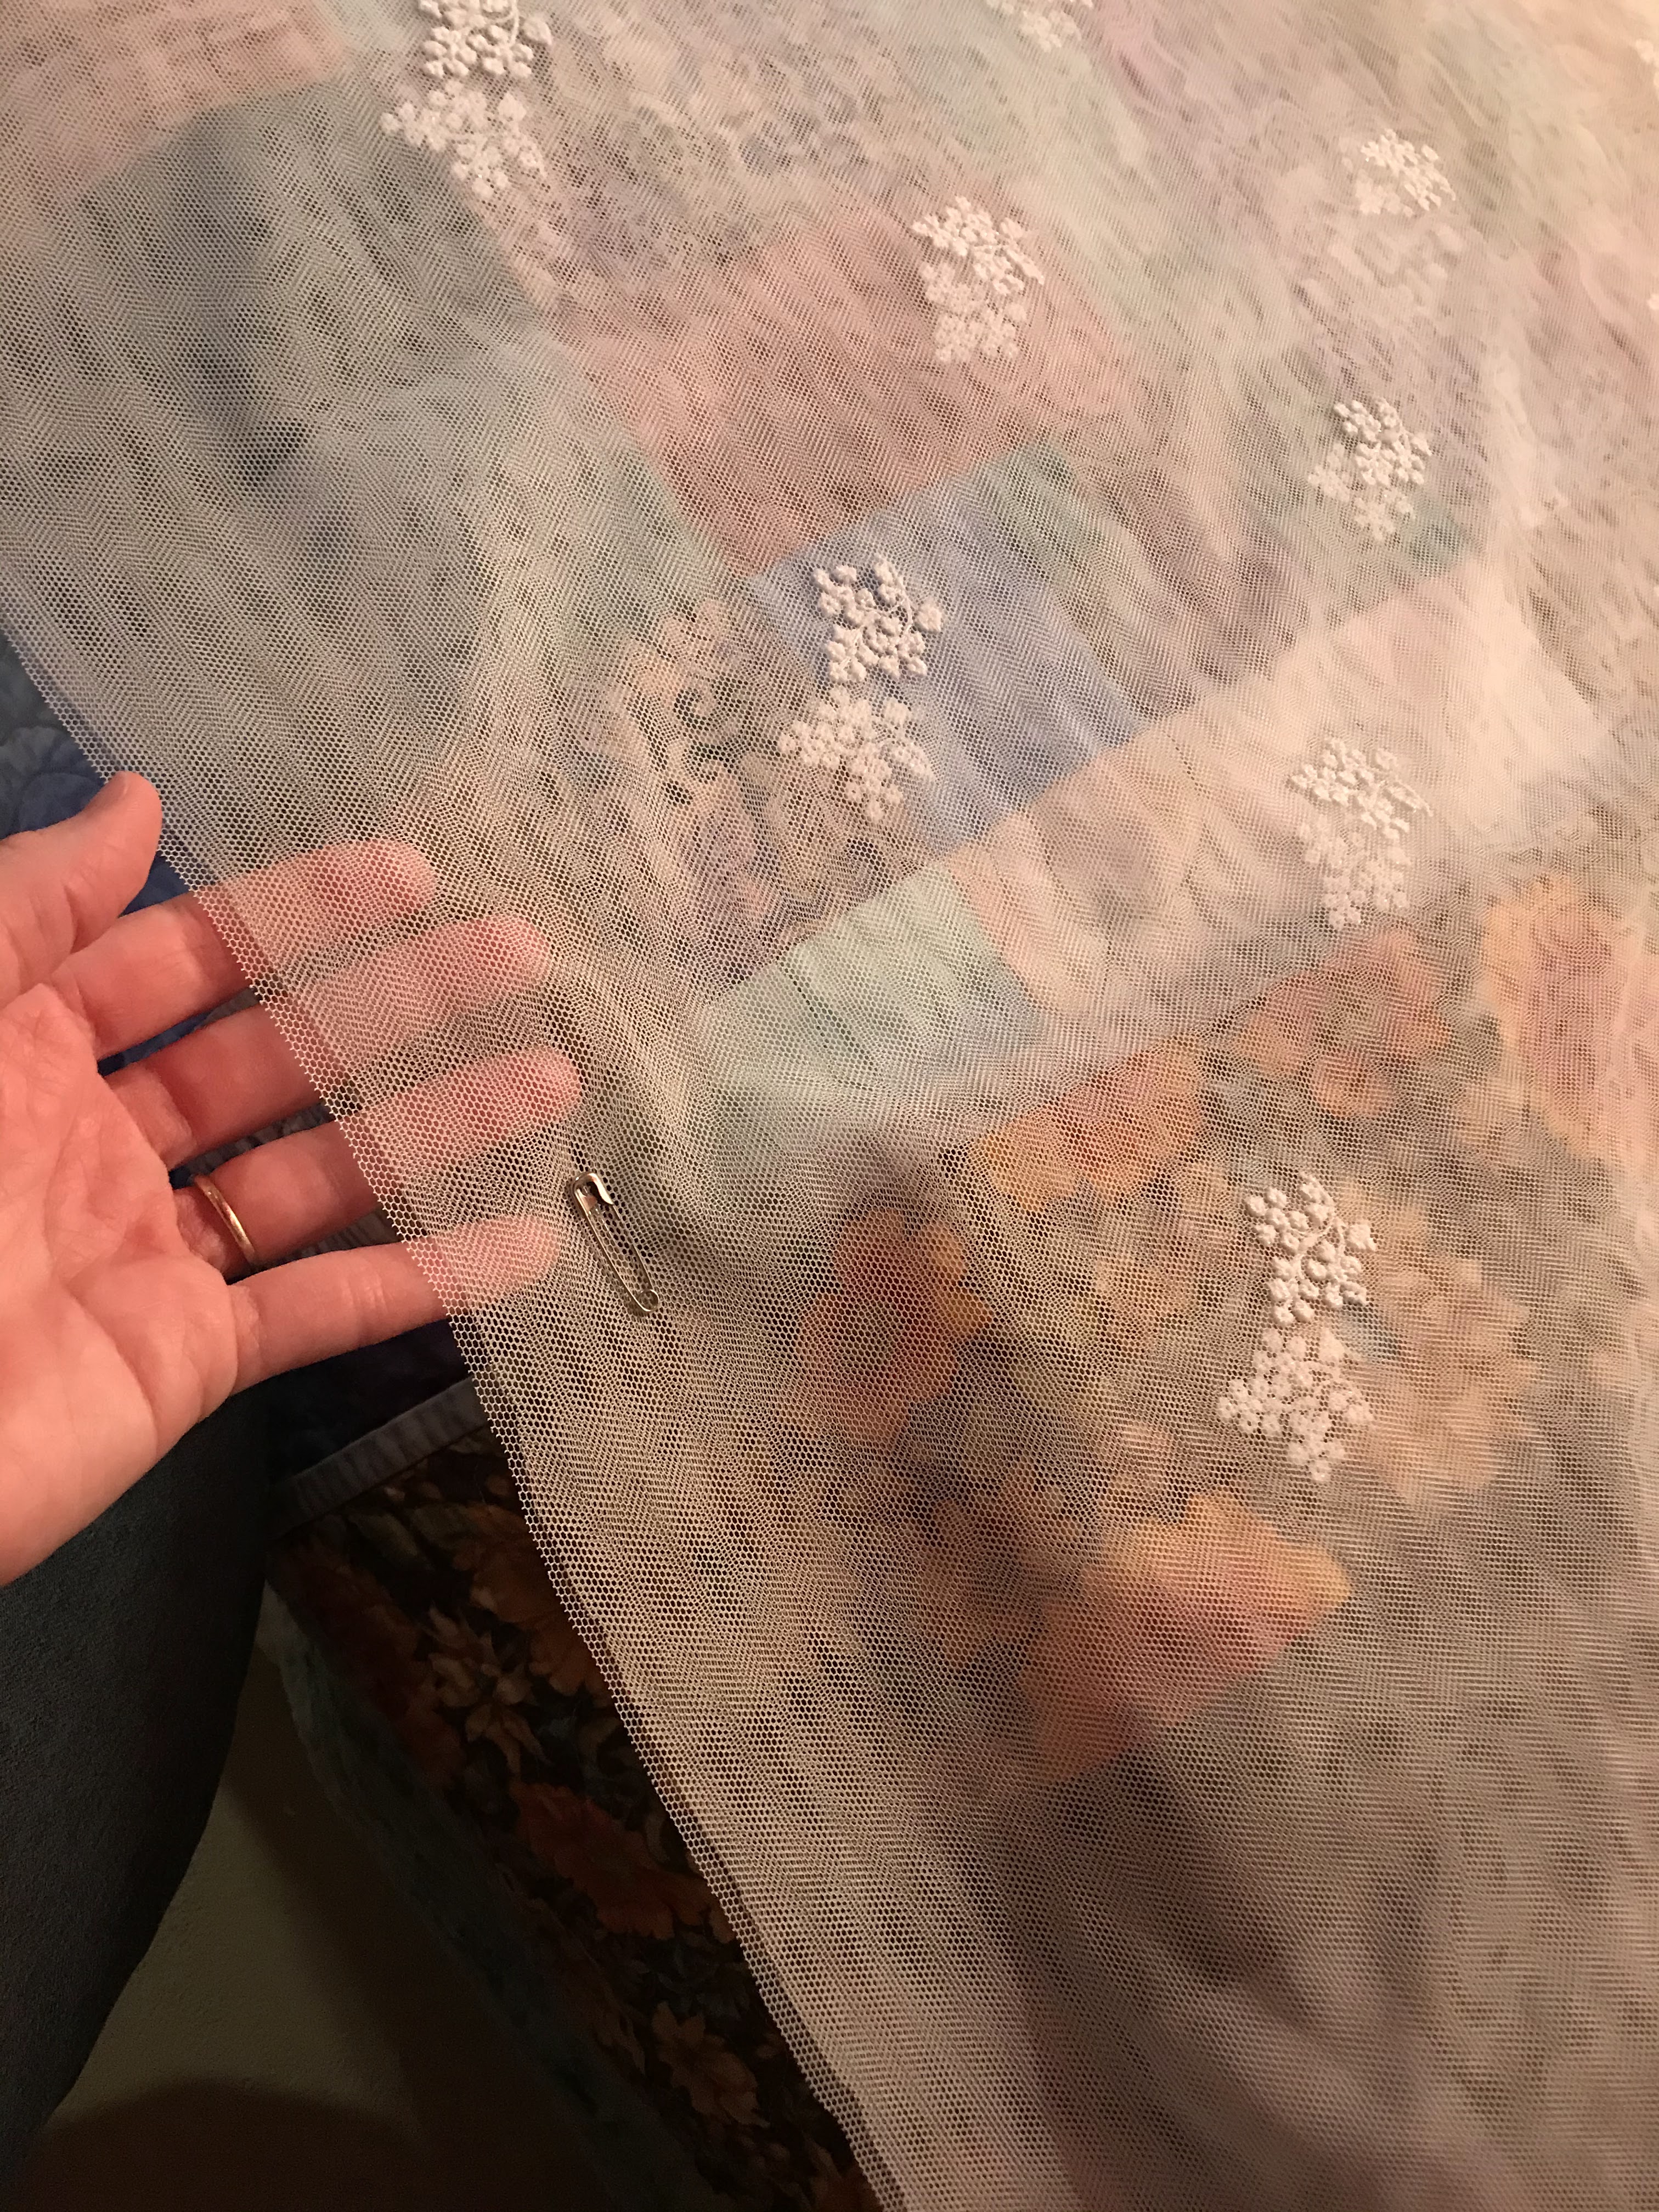
By the time I was actually ready to make my veil, I had a few more particulars in place. I knew I didn't want a lace edging on my wedding veil, because I was afraid it would look heavy and affect the drape, but I wasn't sure I wanted plain tulle either. The material I would use for my veil was a mystery to me until I watched the 2020 adaption of EMMA. Emma's wedding veil in the movie was tulle with little flowers embroidered all over it. It looked fantastic and resembled the top half of the embroidered net lace I had for the
overskirt of my wedding dress. The net lace was extra wide so there would be enough for both the the overskirt and veil - Material problem solved!
So, I knew the style I wanted and the material I would use, the next thing to figure out was how long I wanted my veil to be.
The style of the veil was decided well before I got engaged, and the material was picked right around the time I got engaged, but I didn't consider what length I wanted my veil to be until my wedding dress was almost done.
At that point I started wondering, "What length would look best with my dress?"
Since my dress was heavily influenced my historical styles, I decided to look back to Victorian fashion to determine my veil length as well. My dress most closely resembled the silhouettes and styles of the 1840's and 1850's, so I looked at bridal fashion plates and portraits from these decades and noted the veil lengths.
The majority of the bridal veils from the era seemed to end about 9"-12" from the floor, so I decided that's how long my veil would be too. During one of my final dress fittings I had my mom measure from the approximant place on my head that the veil would be anchored to about a foot above the floor. This told me how long to cut the embroidered net when I got around to making the veil.
Style, material, and length decided on, the hard part was done! I just needed to make the thing, but how was this style of veil constructed?
My first assumption was that the veil just hung from the flower crown, where it was attached at two separate points spaced out from each other a bit. Then I realized this wasn't going to work.
First off, my florist was making me a real flower crown, which would be delivered the day of the wedding. Thus, I wouldn't have it in my possession ahead of time to attach the veil too.
Second, the weight of the veil would have pulled the flower crown right off the back of my head if there wasn't a major anchoring system in place. That sounded like a headache to me.
The delicate circlette of blossoms I desired would not have been able to support the dramatically long veil I had planned. Another method of veil attachment would need to be obtained. So, I did what any bride in my predicament would do and googled, "how to make a draped wedding veil".
I came across
this post on Wedding Bee briefly explaining how one bride made her draped veil. Hair extension clips. I needed hair extension clips. I went to the local beauty supply store to pick some up real quick, but they were all out and had no idea when any would be back in stock. So I went to Amazon and ordered the things. This was at least two or three weeks before my wedding.
In the few days it took for the hair extension clips to arrive on my door step, I got side tracked by other wedding projects, and the making the veil got pushed to the back burner.
Which brings me to making the veil four days before my wedding. . .
It was Tuesday evening, and my wedding was on Saturday. I had to get the veil done that evening because the rest of the week was full. Yard clean-up to be done to transform my parents' property into my dream wedding chapel. Programs to be printed and stamped. Table runners to be cut. Favors to be packaged. Décor to be prepared. Dishes to be washed. Wedding cake to be picked up. Vendors to be communicated with. Oh yeah, and there was also supposed to be a wedding rehearsal somewhere in there? That would take up a full evening!
Thus, on Tuesday evening out came what was left of my embroidered net lace! I couldn't remember the exact length I had decided on, so I just eyeballed it and cut a very large rectangle with rounded corners.
I placed two safety pins in the top edge at the approximant locations I thought the hair extension clips might need to be attached.
I then took the veil and held it up to my head, suspended by the safety pins, in front of a full-length mirror to see if I liked the shape and amount of drape it had.
I adjusted the location of the safety pins until I was satisfied with the drape, then I sewed on the hair extension clips where the safety pins were.
I slightly gathered the netting where I sewed it to the clips because I thought the vail hung better that way.

And that was it! After less than an hour of work, my veil was done!
Honestly, it took me longer to decide how to make the veil, than it took me to actually make the veil!
On my wedding day, after my hair and make-up were done and my dress was on, my sister-in-law pinned the veil in place for me.
I looked in the mirror, and suddenly I felt like a bride. After all the preparations and business and stress of planning and hosting a wedding at home, it was an amazing feeling.
I was getting MARRIED!!!!!
My sister and best friends were there to stand up beside me.
My dad was there to walk me down the aisle.
And at the end of that aisle was the man I loved!
I could as for nothing more!!
As for the veil, it wound up being a bit longer than I'd initially planned, but I loved it!
Since I opted not to have a train on my dress, a long vail was the perfect finishing touch!
The only issue I ran into was that long veil was heavy!
The short little hair extension clips had a hard time supporting the weight of it. Longer combs of some sort probably would have worked better.
My sister-in-law had to re-anchor the veil in my hair at the beginning of the reception because it was starting to pull loose. No big deal, just something to note if I ever make another veil of this style.
Like I said, I love my veil! It was the perfect finishing touch to my bridal ensemble!
If you've missed any part of my wedding dress series, you can catch up here:
Heirloom Lace Details:
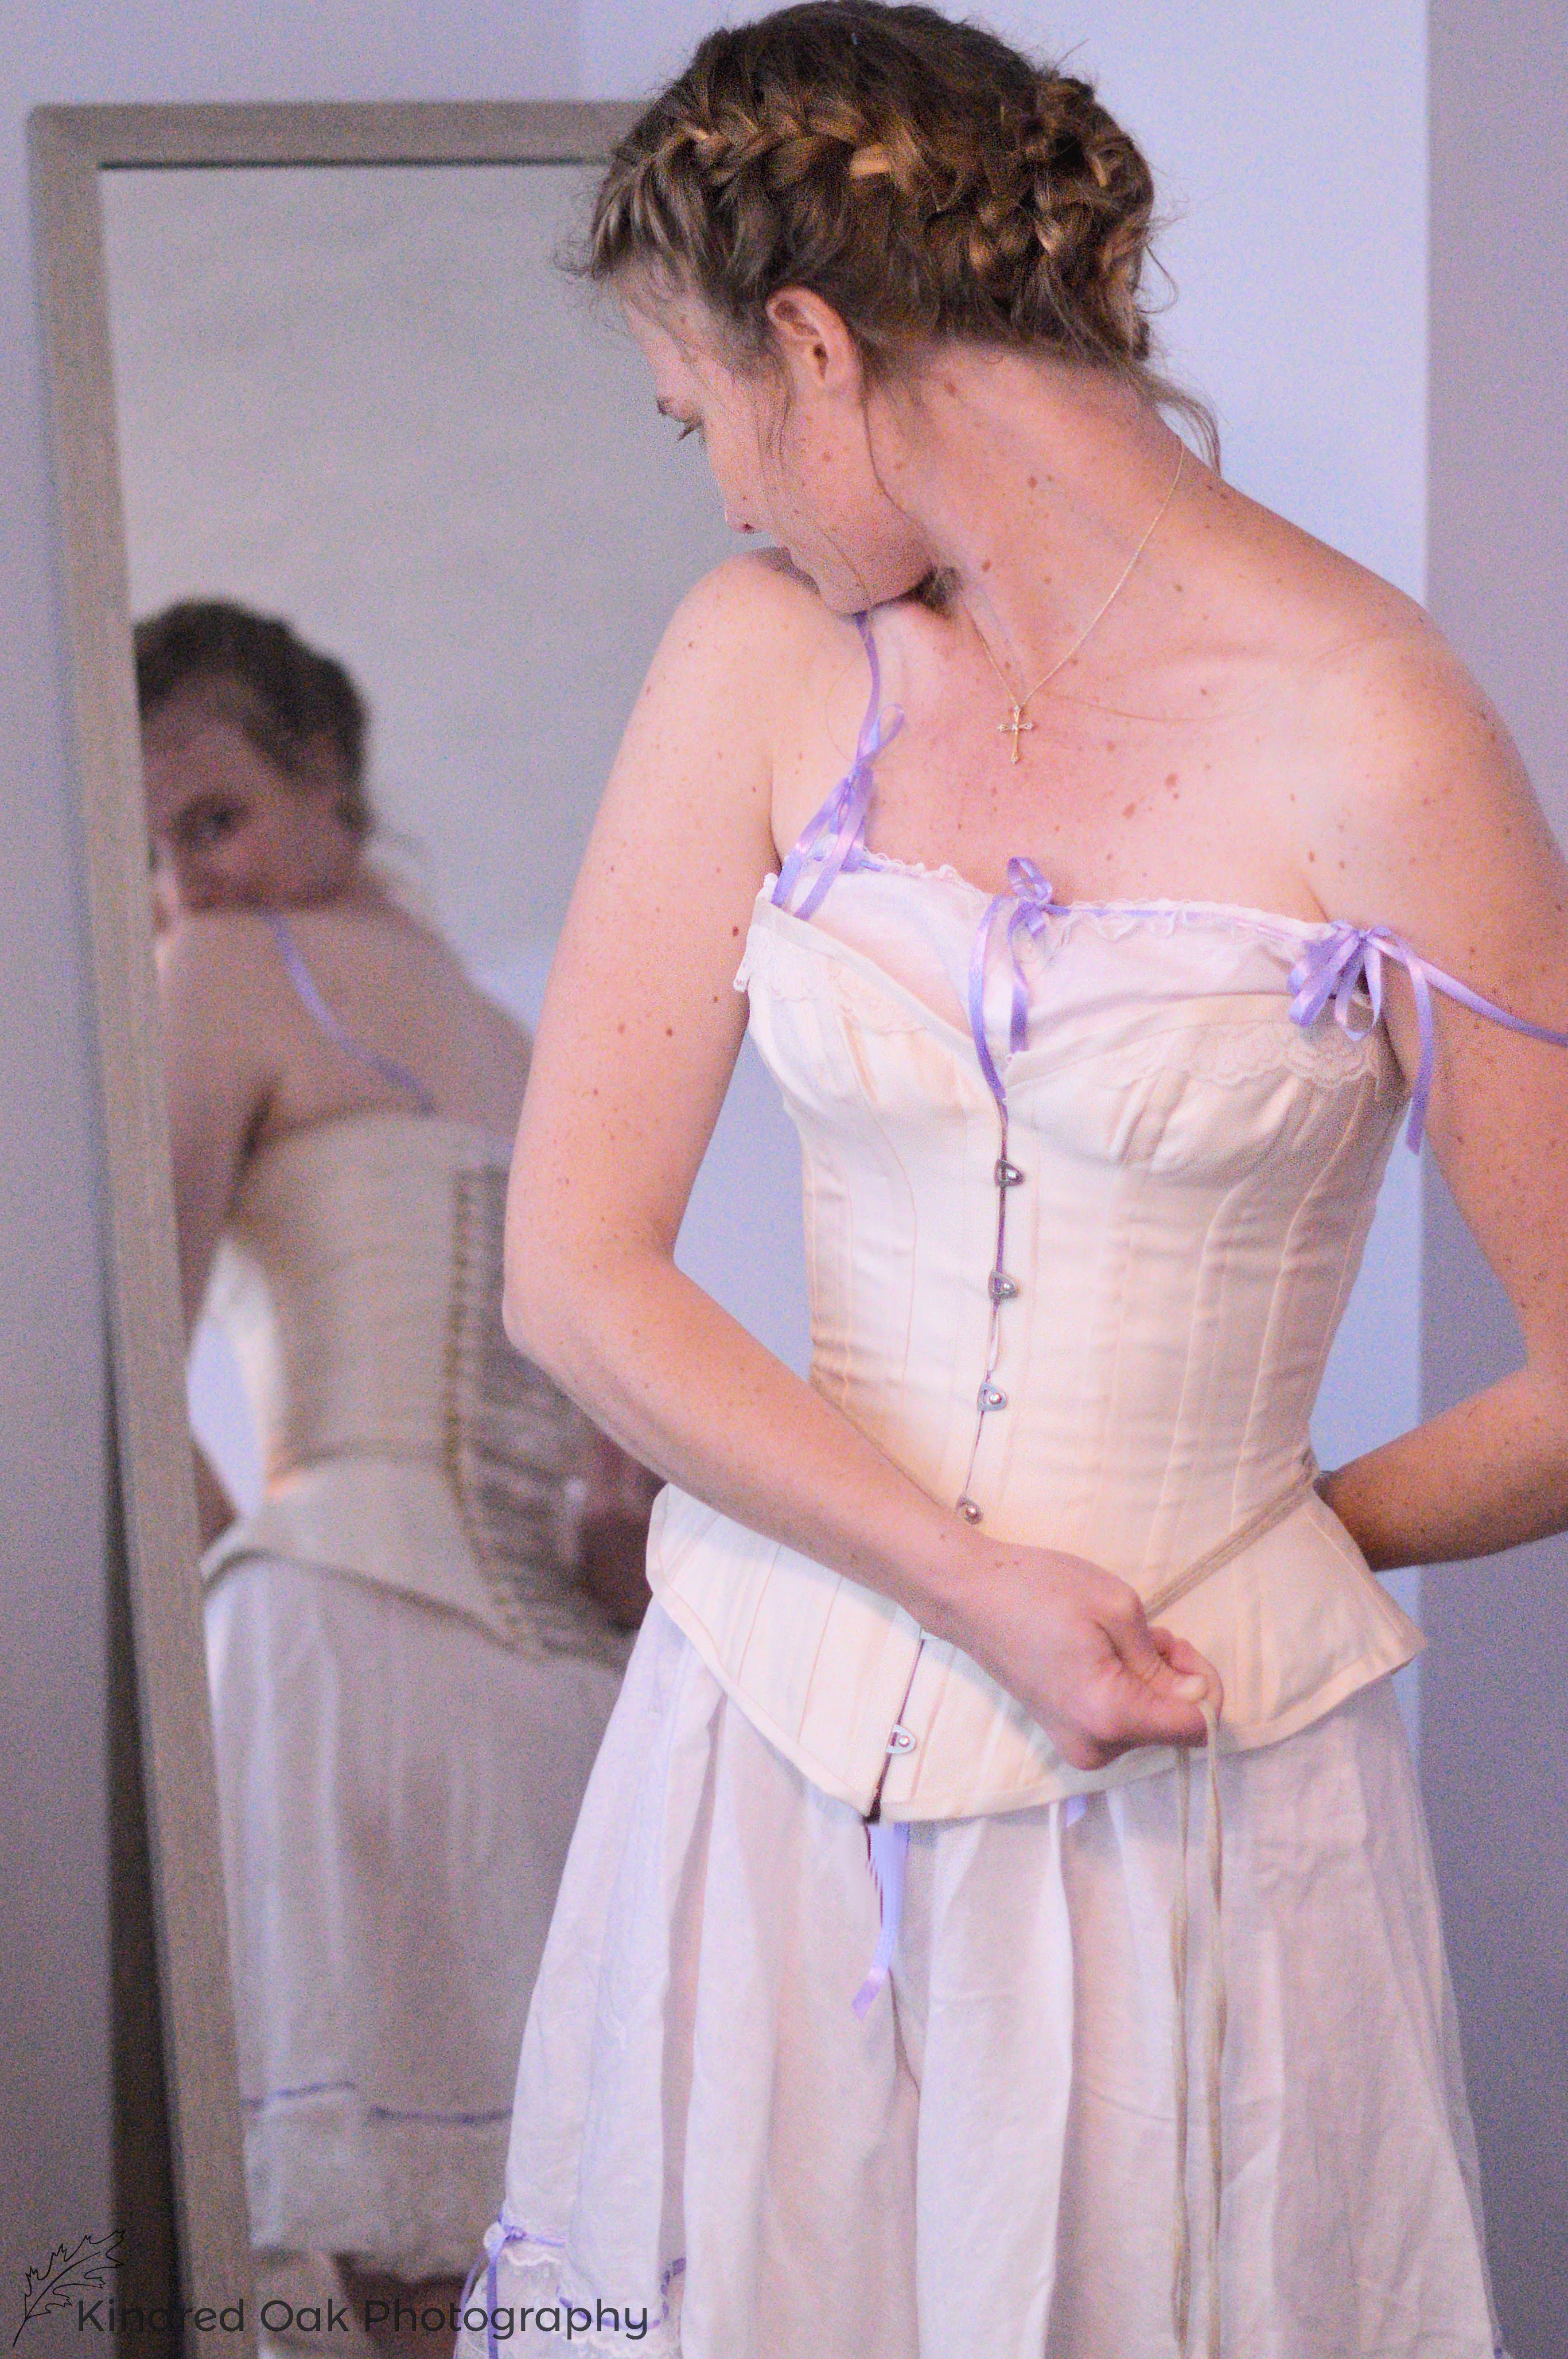
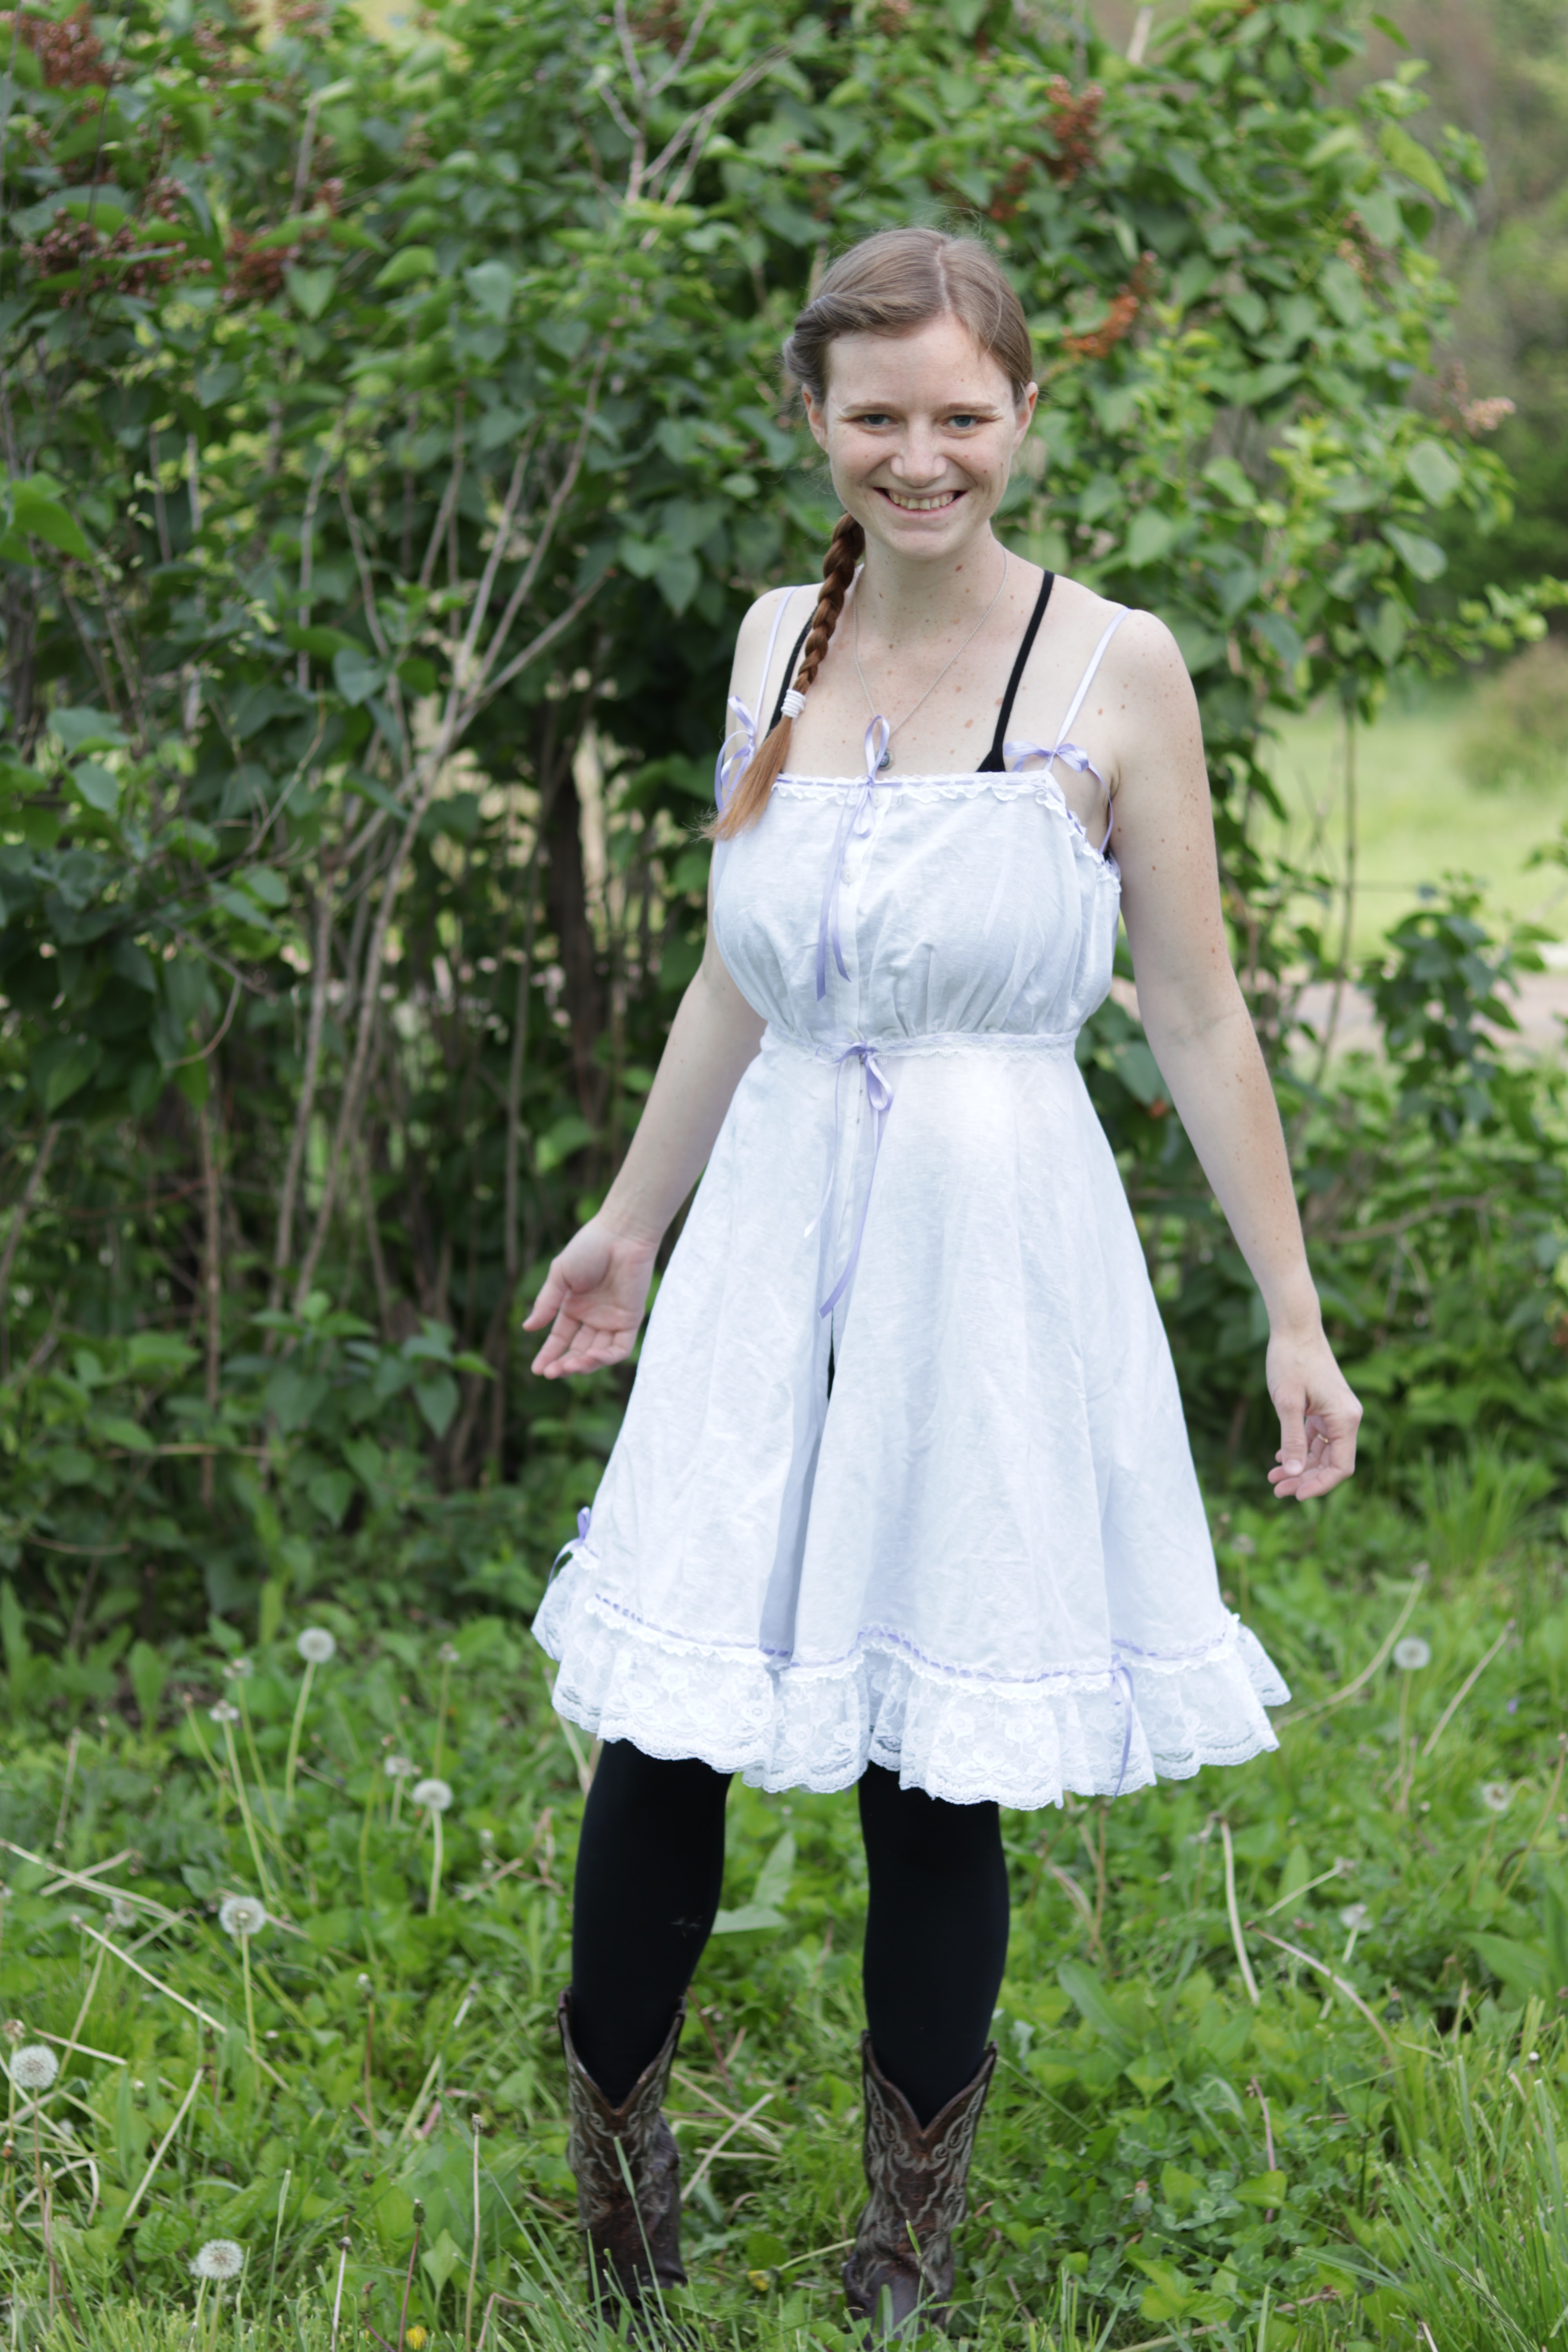
And the Undergarments: