I've told you all about my wedding dress, from conception of the idea to final stitch. I've shared about making my veil. I've discussed the silk corset and petticoat I made specifically for the occasion. But we're still missing part of my bridal trousseau. What did I wear under the corset and the petticoat? Any historical clothing enthusiast will tell you the importance of wearing a layer under the corset to prevent chafing and pinching. A shift/chemise of some sort. I wanted to be comfortable on my wedding day, so clearly this wasn't something I would skip! Thus, without further ado, let's talk about what I wore under everything else on my wedding day!
Edwardian Combinations! I could have worn an old Victorian chemise, but I wanted something new, pretty, frilly, and lacey for my wedding!
Combinations came about in the 1870's. A chemise and a pair of split-crotch drawers were the underwear of the day, and combinations are simply a combination of those two garments - basically a split-crotch romper to be worn under the corset.
By the Edwardian Era/Turn of the Century these combinations often boasted incredible insertion lace work, lots of frills, and very full legs. Perfectly wedding-worthy in my mind! (And useful after the wedding too since I can wear them under my
Edwardian evening gown, and any other Edwardian outfits I make in the future!)
For my combinations I decided to combine a couple different Wearing History combination patterns to get just what I wanted. My plan was a pair of combinations from about 1900. Wearing History has a handful of combination patterns from about 1910 - 1917. A little late for me, but a good starting point!
For the bottom half of my combinations I used
the 1910 pattern. The drawers part of this pattern is moderately full and fitted through the hips with either darts or a separate yoke. I wanted really full drawers like those from a decade earlier. So I slashed the pattern from the hem up to the end of the darts. I then folded the marked darts into place at the top edge of the pattern which allowed those slashes to spread wide open making the leg very full.
These drawers are so full they're basically a skirt for each leg! Just the early Edwardian shape I desired!

As for the bodice/chemise part of my combinations I wanted that to be fairly low cut and have very narrow straps so I wouldn't worry about it peaking out from under my wedding dress bodice. The bodice on the 1910 pattern had more coverage than what I needed. So I decided to use the top half of the
1917 combinations pattern - the view with the ribbon straps- for my bodice pattern.
I cut the bodice pieces a little longer than the pattern indicated since the 19-teens waistline was a bit higher than the earlier 1900's waistline and I didn't want my combinations to be too short waisted. As it was, the finished bodice could have actually used another inch or two of length beyond what I added, so I'll keep that in mind if I ever use this combination of patterns to make another set of Edwardian combinations in the future.
(Dang, how many times can I say "combination" in one blog post?)
I cut the combinations out of a very lightweight cotton/linen blend from Joann's. (Joann's calls it their "handkerchief linen" and it's the perfect weight for historical under things!) Experience has shown me that shifts and chemises made of linen are way more comfortable in hot weather than those made of all cotton, and I'd say this linen/cotton blend wears pretty well too.

I sewed up the bodice and drawers separately then gathered the bottom edge of the bodice into the waist of the drawers.
The bodice fastens down the front with buttons and the top several inches of the drawers close with hooks and thread bars.
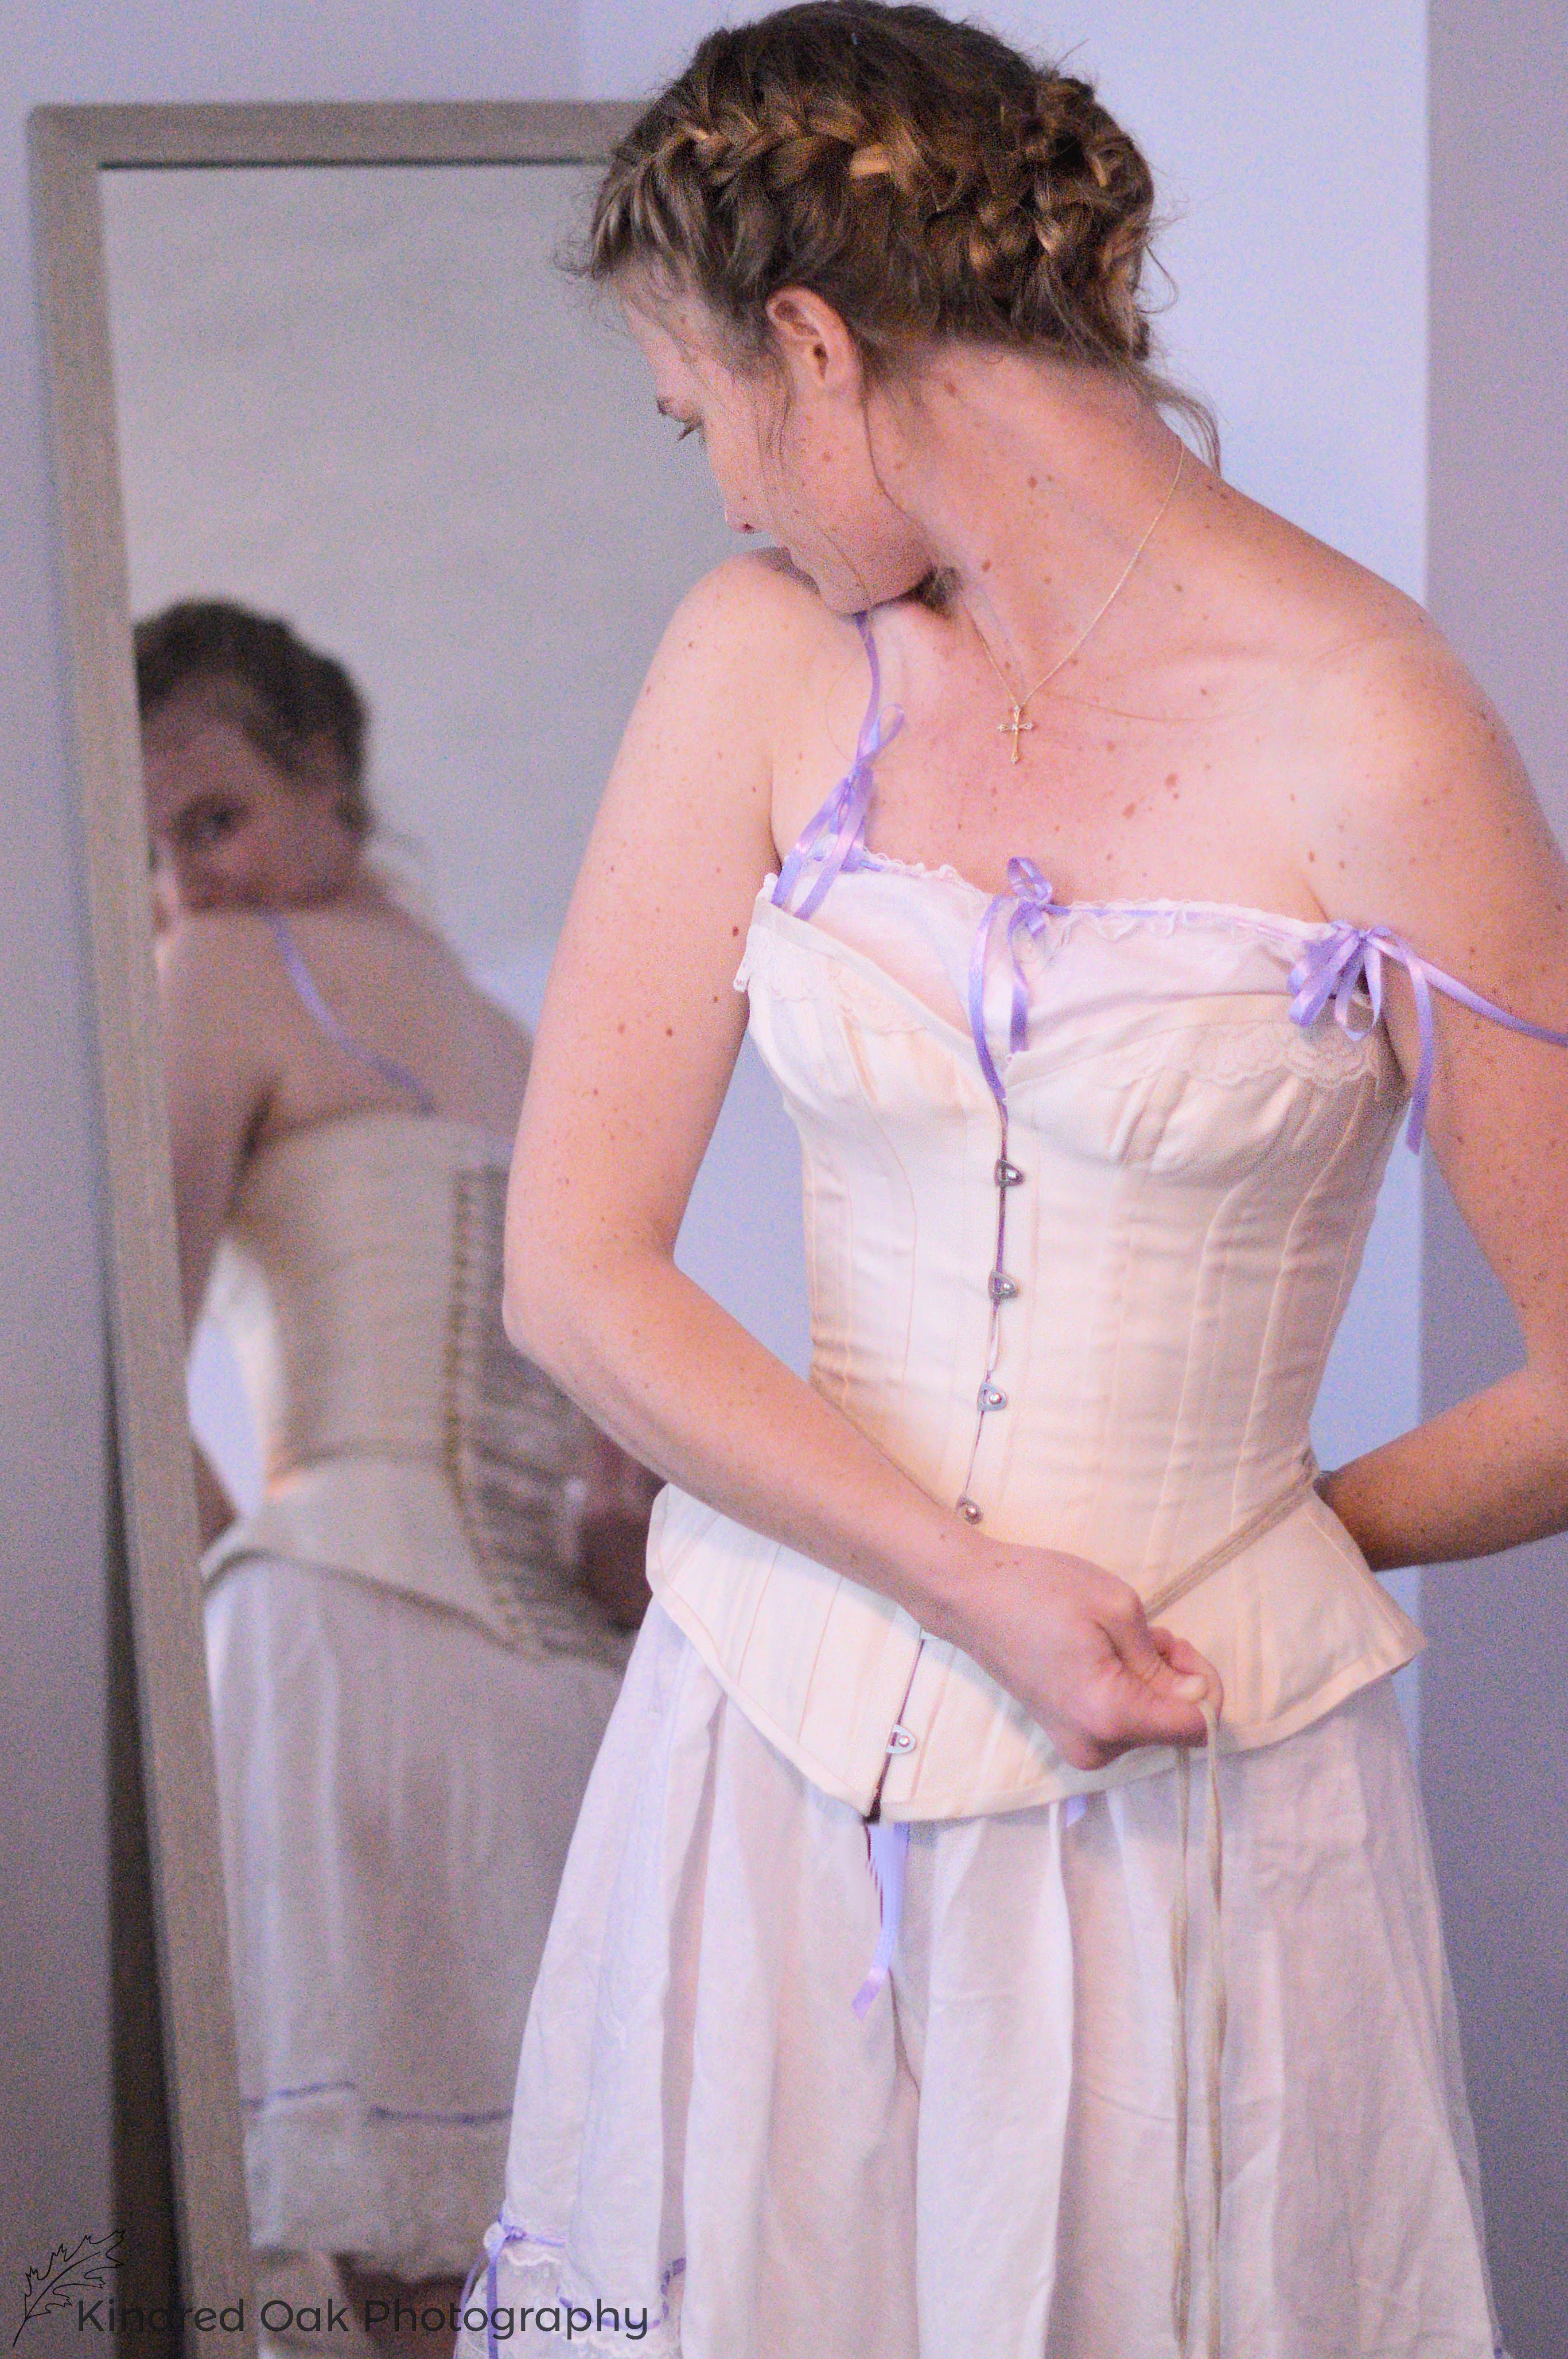
The quintessential floofy Edwardian combinations have lots and lots of insertion lace work, but I didn't have time to do that on these, so I compromised by just top stitching some lace from my stash on in the key areas.
A decently wide lace ruffle at the bottom of each leg, topped with some beading lace to weave ribbon through.
Some beading lace at the waistline for more ribbon.
And more beading lace for even more ribbon around the top edge of the bodice.
I threaded lavender satin ribbon through all of it since my wedding colors were lavender and forest green.
I used the same narrow lavender ribbon for the straps. I made the straps to tie in the front, so they could be untied and tucked inside once the corset was on, thus eliminating the risk of the straps slipping off the shoulder and showing underneath the gown.
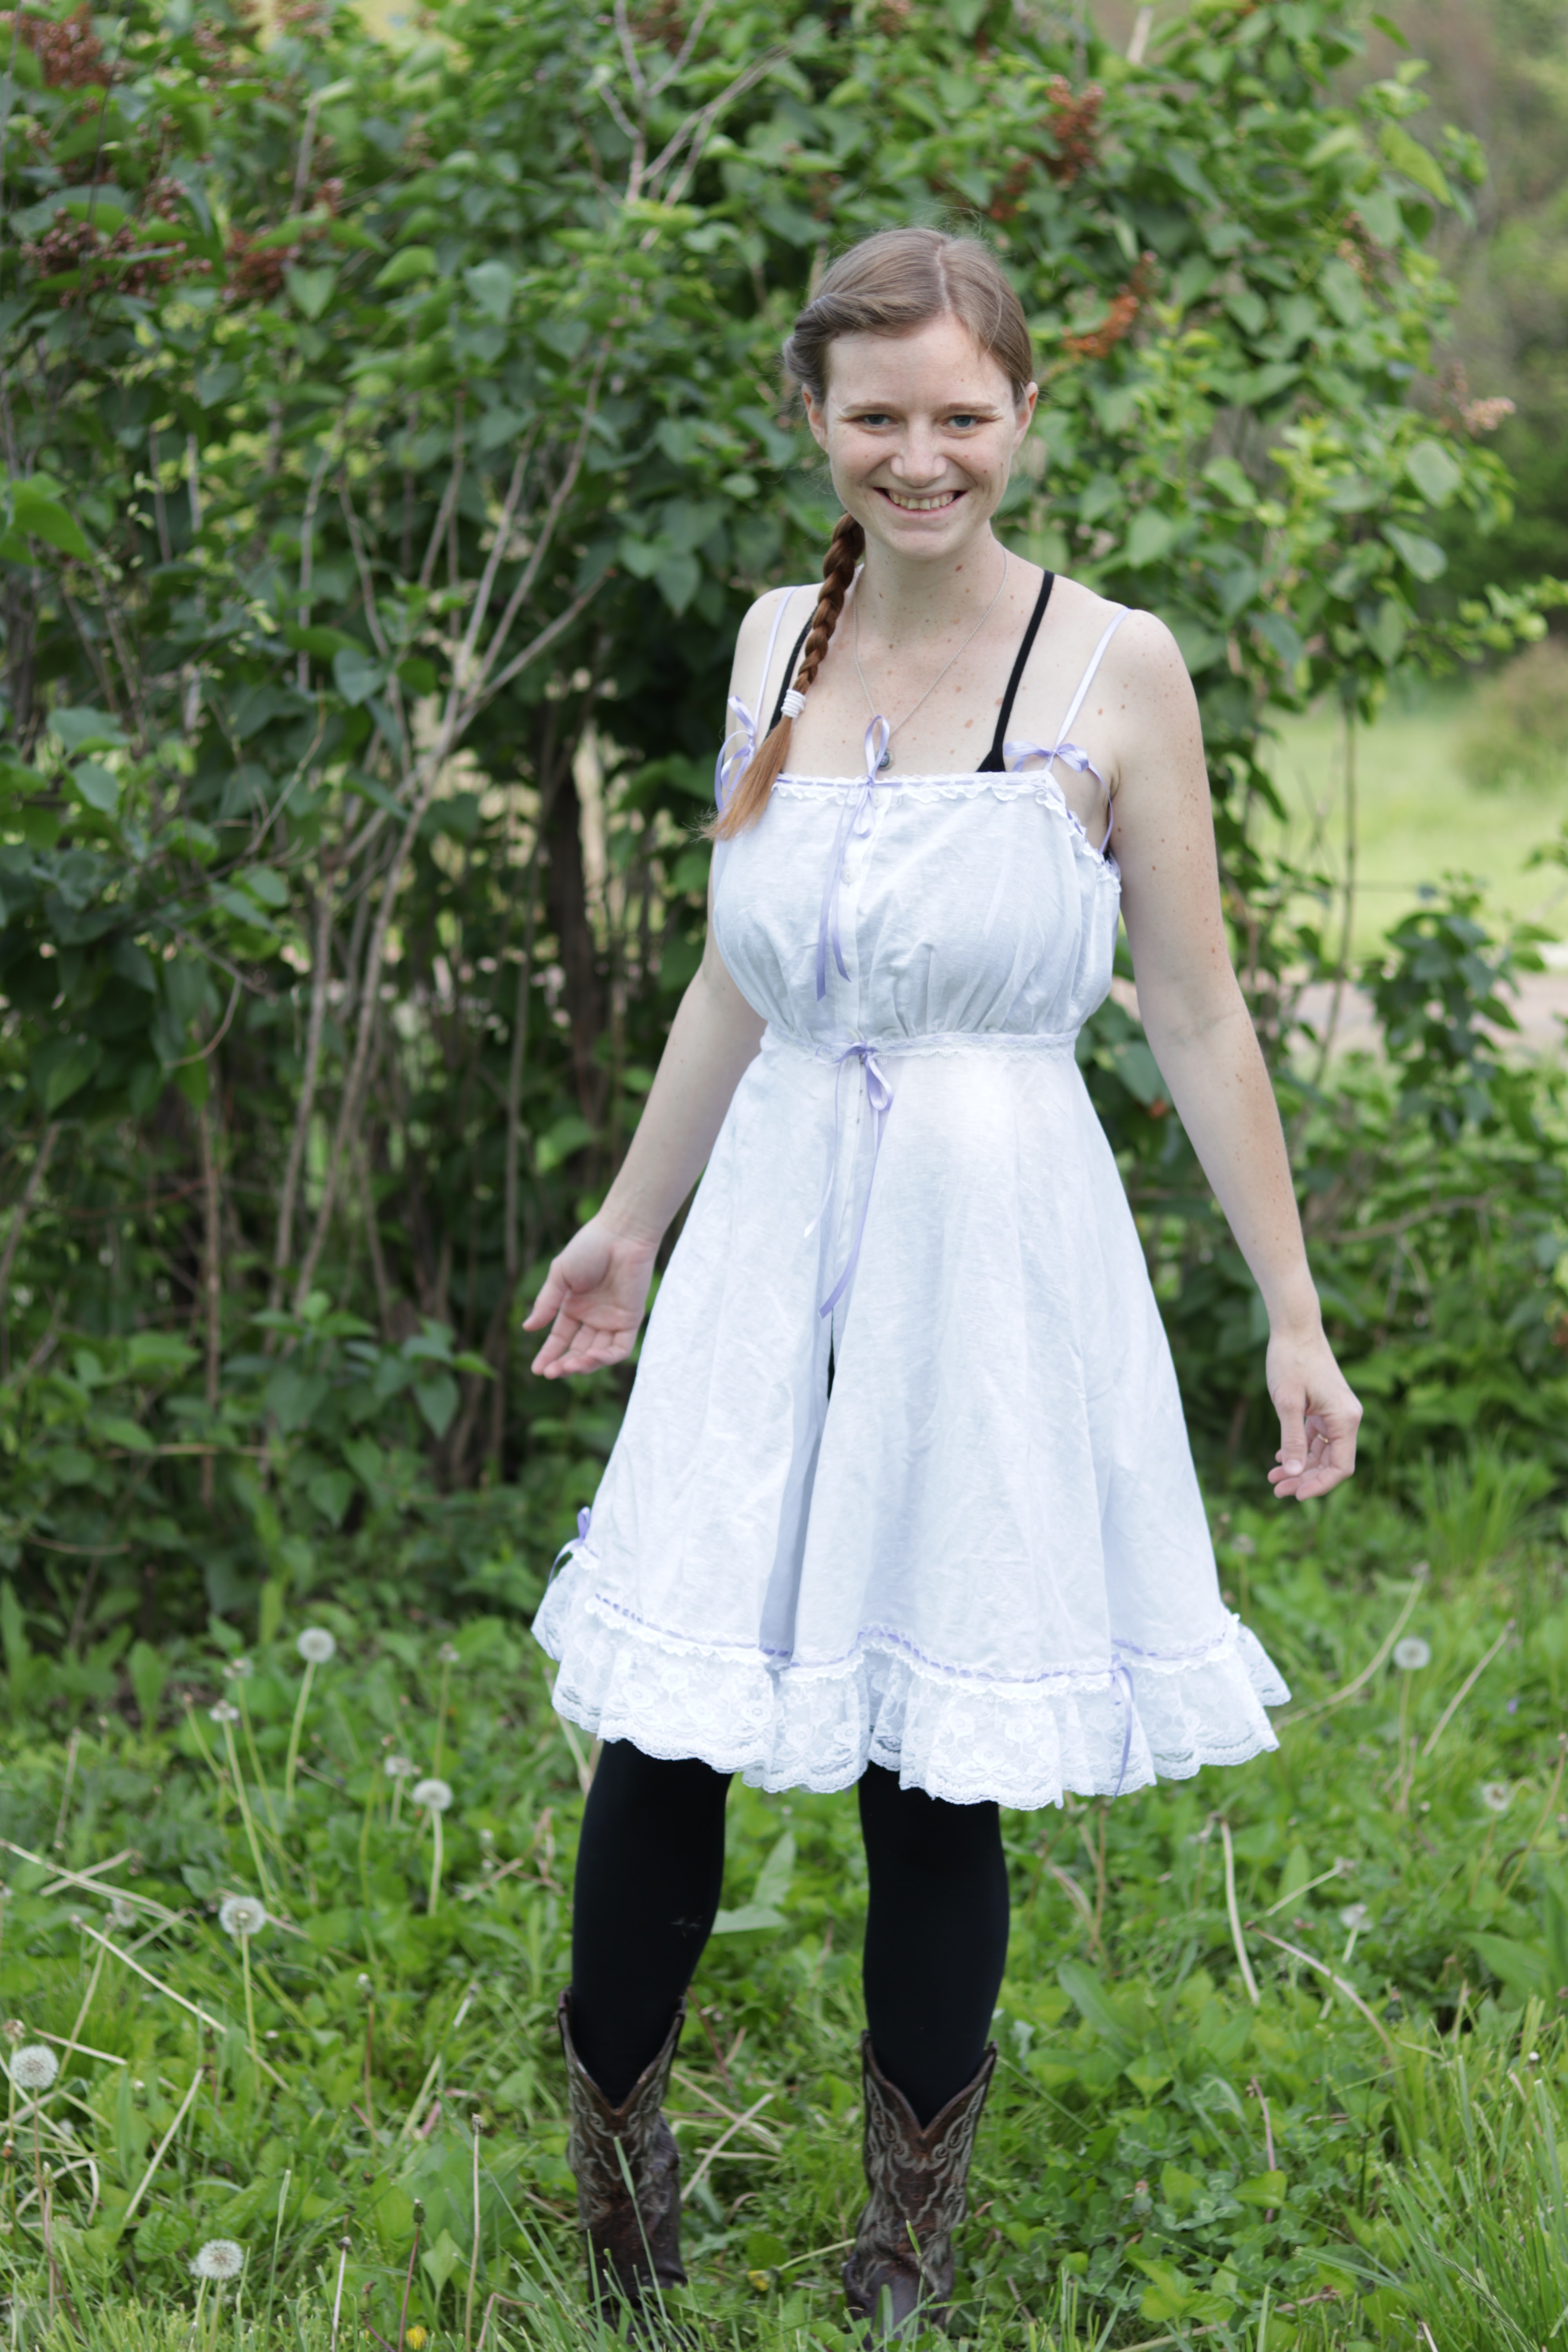
 |
| (Don't know what's up with the look on my face here, but I promise I was actually happy!) |
The finished combinations were just what I wanted!
Pretty, lacey, frilly, and floofy!
And comfortable! The perfect base layer for my wedding ensemble!
Now that all my wedding garments are (finally!) blogged, check back next week if you want to see lots of wedding pictures and read about the day itself!
If you've missed any part of my wedding dress series, you can catch up here:
Heirloom Lace Details:
And the Undergarments:


Those boots!
ReplyDelete