Last year, the two week children's theater camp play was Mulan. There were 25 kids in the play and I made about 90% of the costumes from scratch. It was an exhasting, crazy, stressful, two weeks. The end result, was absolutely fabulous.
This year the play was Cinderella. There were 17 kids in the play, and I only had to make a small percentage of the costumes from scratch, plus alter a few others. The two weeks passed with minimal stress and exhaustion, and the end result was still fabulous to see on stage.

When all was said and done, the only costumes I had to make from scratch were the rag dresses for the Cinderella's (the roll was double cast), a tunic for the king, a tunic and cape for Prince, and four mouse costumes, which could easily be converted to horse costumes with the appearance of the Fairy Godmother.

The Mouse to Horse costumes were probably my favorite, as they required the most creativity, and end result was absolutely adorable!
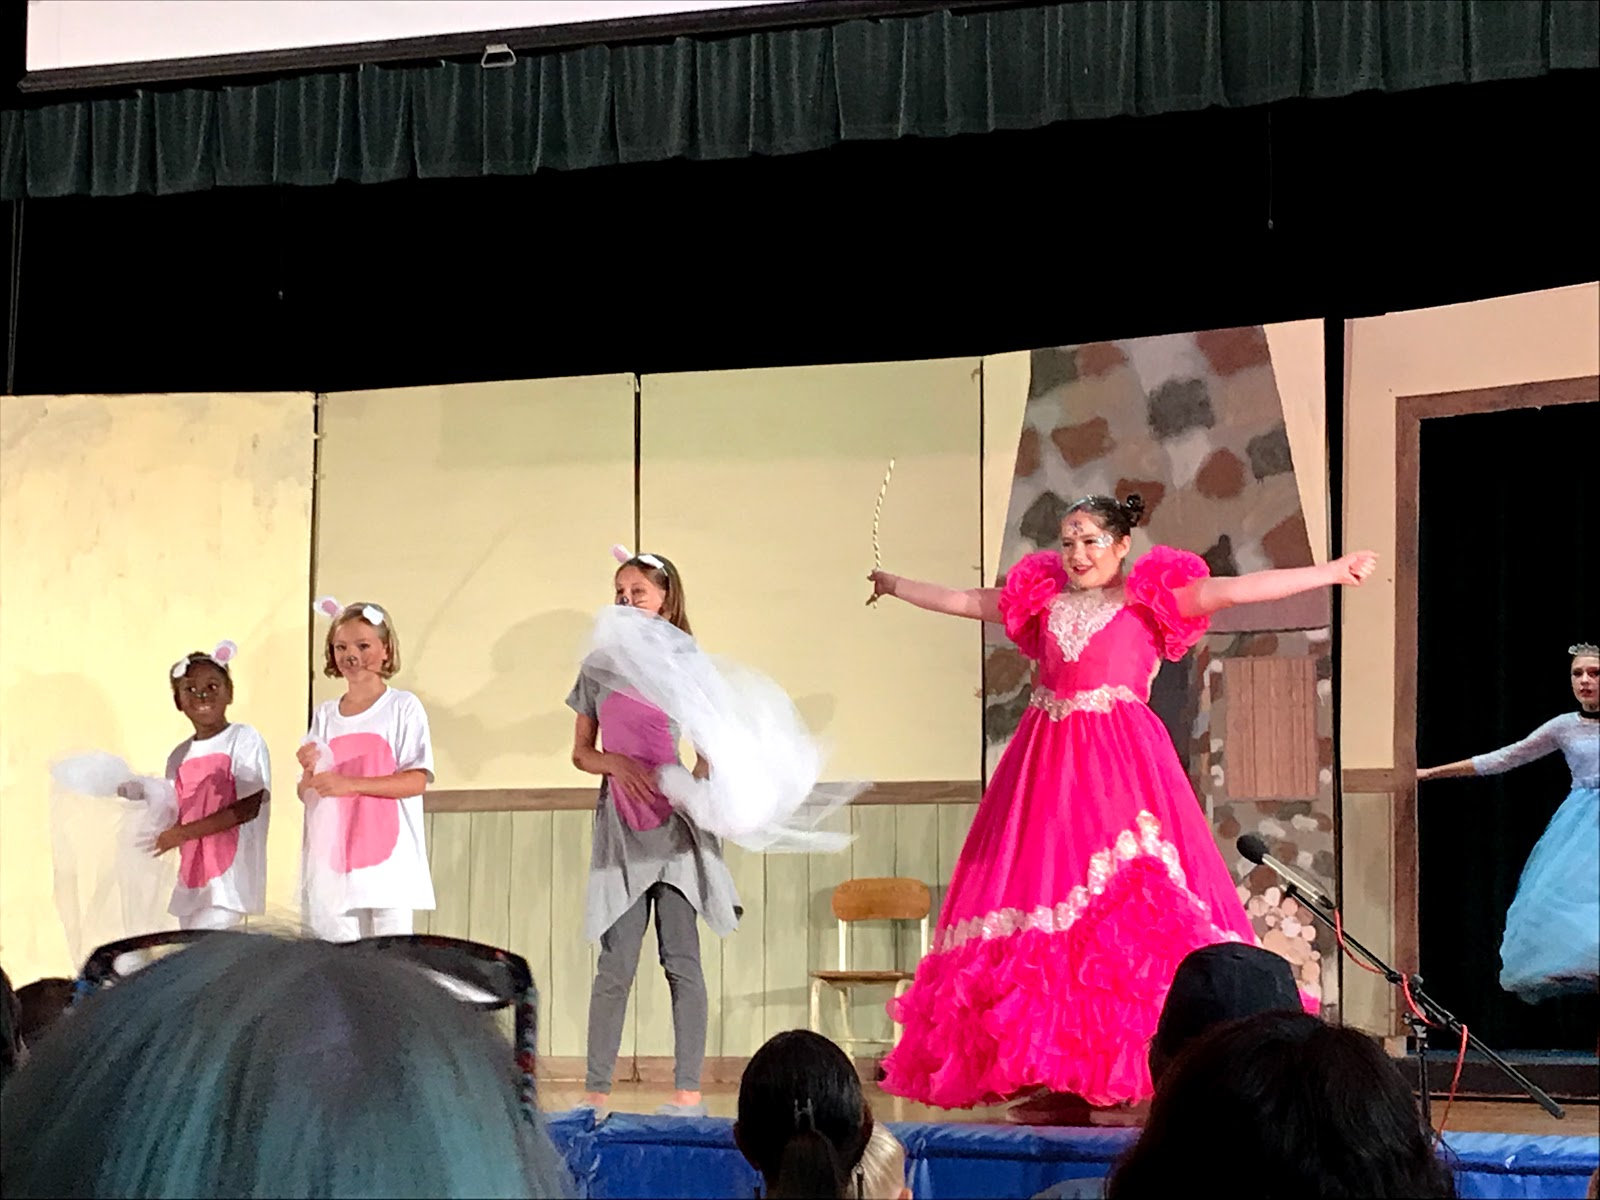
*A quick note that most of the following pictures were taken at dress rehearsal before the set was completely finished and not all actors are in full costume and make-up.*

I sewed pink bellies onto the front of all the white T-shirts and removed the rabbit-ear hood from the tunic which was being re-used from last year.

Onto the back of the T-shirts and tunic, I attached mouse tails, made from some gray cord I found at Hobby Lobby.

The tails were quickly sewn onto the shirts, a few inches above the hem, using a zig-zag stitch on the sewing machine.


I free-hand cut large mouse ear shapes out of white felt, then smaller mouse ear shapes out of the pink felt. I layered the pink ears on top of the white ears and top stitched the pink in place using the sewing machine.

Then I sewed a white square of felt, about the same width of the bottom of the ears, to the base of each ear. These pieces of felt would be used to attach the ears to the headbands for the kids to wear.

Once the ears themselves were assembled, I laid a pair face down on a table and laid the head band on top so the base of the ears themselves were flush with the top of the headband and the squares of felt were underneath the headband. I positioned the ears so they'd look right when the head band was worn, then pulled out the hot glue gun.

I put a bead of hot glue on the back of the ears, then wrapped the square of felt tightly around the headband, gluing the loose end to the back of the ears. I could have sewn the felt around the headband, but hot glue was quicker and easier. And, as I had 8 sets of ears to make, quick and easy it needed to be.

Thus, the mouse ears were made! Four sets of ears later, I was ready to move on to the next four sets of ears - horse ears this time!

I would have loved to figure out how to make horse masks or heads for the kids to wear on stage, but there simply wasn't the time for that project. Thus, horse ears on a headband it would be! Ears alone, however, do not make a horse. Tails and manes are also required.

When considering how to construct these manes and tails, I decided yarn would be the most cost-effective option. As I didn't have any white yarn at home, I took a trip down the Hobby Lobby yarn aisle. And on the yarn aisle, I found this "Scrub-ology" stuff:

It's apparently a "yarn" intended for making dish-scrubby-things out of. It's kind of shiny and sparkly, and thicker, with a different texture, than regular yarn. It was just the thing for making magical horse tails. I used two full skeins of this shiny, scrubby, yarn to make tails and manes for four kids.

The tails were quite easy to make. I wrapped the scrubby yarn around and around a book the way you do to make yarn dolls. Once I thought there was enough yarn wrapped around the book I tied it all together at the top, and cut it straight across the bottom to get it off the book.

Once the yarn was off the book, I tied another piece of yarn around the top of the bundle of yarn to make a tail "head" - just like you do to make a rag doll head, only the tail head wasn't stuffed with anything.

So the tail could easily be attached to the costume when the mice became horses in the middle of the play, I sewed skirt/trouser hooks to the "head" of each tail.

I sewed corresponding bars to the back of each T-shirt just above the mouse tails.

When it was time for the mice to transform, the horse tails could easily be hooked into place by a stage hand, hiding the mouse tails.

This worked splendidly, the mice were able to be quickly transformed and the hooks proved to be "secure enough" as no horses lost their tails on stage!
 |
| Dress rehearsal - The carriage looked more like a pumpkin and less like a Chevy for the actual performance. |
The manes were a little more time consuming to make than the tails were.

For each mane I cut a length of ribbon twice as long as I wanted the manes to be. I folded the ribbon in half and sandwiched loops of scrubby yarn between the two layers of ribbon. I pinned the first few inches of looped yarn in place between the ribbons, then began sewing down the middle of the ribbon with the sewing machine.

As I sewed along the middle of the ribbon I continued to loop the yarn back and forth, back and forth, between the two layers of ribbon. After the first few inches of mane, I found it easier to loop the yarn as I sewed, rather than loop it all ahead of time and pin it in place. I ended the yarn loops about 2" from the end of the ribbon.

I wrapped the the ribbon ends around the very top center of headbands and hot glued them in place.

Once all the manes were glued to the horse headbands, they were ready for ears!

I was less confident in my ability to free-hand horse ears than I was in my ability to free-hand mouse ears. Thus, I took to the internet in search of a horse ear pattern. I figured there had to be a free one out there somewhere! And I was right.

"Out there somewhere" I found the Free Unicorn Pillow pattern by Rebecca Page Patterns. After looking at the picture in the pattern listing where a child is holding the unicorn pillow I decided the ears would be just about the right size for the kids to wear. So I downloaded the pattern, printed out the ears, and set to cutting the large ear piece out of white felt and the smaller ear piece out of pink felt. Then I top stitched the pink onto the white, just like I did with the mouse ears.

I folded the ears in half to give them the right shape then stitched a square of felt to the bottom, just like I did with the mouse ears.

And the ears were ready to attach to the headbands!

One ear on either side of the mane.

A little bit of hot glue.

The square of felt wrapped tightly around the headband and glued to the back of the ear.

And with that, the horse ear headbands were done!

16 ears, 8 tails, 8 headbands, 4 manes. All put together this gave us 4 little mice.

Who turned into horses.

And took Cinderella to the Ball in her Pumpkin Carriage!