As I've mentioned it in a couple of different recent posts, I figured it's about time I actually blogged about it - the bridesmaid's dress I made myself for my brother's wedding. Eight months ago. Yeah, this post might be a little overdue.
When my sister-in-law asked me to be a bridesmaid, she told me I could make own dress if I wanted to. She just wanted all the bridemaids in floor-length dresses in different shades ranging from champagne, to pink, to burgundy. Perfect!
Shopping stresses me out, making my dress was a much more appealing option. Along with that, the loose color scheme and description (floor-length) gave me plenty of room for creativity. This could be fun! All I had to do was pick a starting point. Design or fabric first? Fabric! No, design. Wait a second. . .
Both the fabric and the design changed a few different times between initial plan and actually making the dress two weeks before the wedding.
I began with a vague idea of what I wanted. Maybe this 1930’s evening gown, with a few modifications. Perhaps I could use the same pattern I used for my Easter dress several years ago, and just use a nicer fabric. Or what about the bodice from this pattern, with a long gathered skirt added?
Before I could settle on any one design, I decided I ought to pick my fabric. My dress would be pink. What shade of pink? Well, that just depended on what I could find that I liked at Joann’s. I took my sister-in-law along for this fabric shopping expedition to get her opinions and make sure she approved of whatever I got. (It was her wedding after all.) Nothing really stood out, but there were a couple decent options.
I finally picked a pale pink textured chiffon and a matching pink peach skin lining fabric. There wasn’t quite as much of the chiffon as I would have liked, but I thought I could make it work.
I was still less than enthused with my current design options, but I more or less settled on the Simplicity 8051 bodice with a long skirt idea. (At this point I cut out the green sundress so I could test out the pattern)
As soon as I decided this, but before I got around to actually starting on the dress, my plans changed. I was looking through the Vogue pattern book during a pattern sale, and I found it. My dress pattern. A design that pretty much screamed “this is it!”. Vogue V9168!
I’m not sure why this pattern appealed to me so strongly, but it did. Different than anything else I’d considered, this two piece dress, consisting of a bias-cut slip and sheet over dress, reminded me somewhat of 1910’s era dresses, and I just had to make it. There was no doubt left in my mind.
I showed the pattern to my sister-in-law, and she approved it - with one condition. I needed to make it sleeveless. I was slightly disappointed to lose those lovely floaty sleeves, but I agreed, and got on with the fun task of re-designing the bodice. (And when I say fun, I really do mean it! This dress was overall a very fun creative experience! Way better than buying a dress would have been!)
While I considered my bodice options for the chiffon overdress, I began by making the long bias-cut slip included in the pattern out of the pale pink peach skin I’d initially bought as lining material.
The faced neckline of the slip didn’t want to lay quite right (bias cut stuff can be fiddley), so I had to mess with it a bit until I decided it looked decent enough to be seen (since it would be peeking out from beneath the over dress). I quickly decided if I ever used this pattern again I would be finishing the neckline a different way. Bias tape, fold-over elastic, anything other than the messy facing the pattern included.
Other than the neckline woes however, the slip turned out very nicely. It fit beautifully, and the bias cut just felt elegant.
Once the slip was done, it was back to finalizing the design of the over dress. And I had a problem. Even with leaving off the sleeves, I simply did not have enough of my baby pink chiffon to cut the over dress with its long, full, bias-cut skirt. I tried to solve this problem by visiting several Joann’s stores in neighboring towns to see if anywhere had any more of this fabric. Nowhere did.
One Joann’s however, happened to have a bolt of dusty rose metallic chiffon in their clearance rack. It was a gorgeous color, which I liked even more then the textured chiffon I already had at home. Plus, it was an insanely good price. There wasn’t a ton of this material left on the bolt, but I took it to the cutting table anyway, just hoping there would be enough fabric for my dress. There was. Just barely.
With new fabric acquired (and approved by the sister-in-law, of course, who agreed with me that this new color was even better than the last) it was time to actually make this sleeveless over dress. Now I could have just made the bodice included in the pattern and left off the sleeves, but that didn’t really appeal to me. I wanted to do something different with the back of the dress. Since I was leaving off the fun sleeves, there was going to be a fun back. I just had to figure out what it would look like.
What sort of fun back would work well with the low, drapey, bodice front included in the pattern?
This question was answered when I saw a picture of the back of the Parasol Jumpsuit, by Ensemble Patterns, on Instagram.
Now I’d tested the update of the Parasol pattern for Ensemble Patterns, so I’d definitely seen this pattern before. However, as I’d just made the Parasol pants, not being interested in jumpsuits, I guess I’d never actually noticed how lovely the bodice was. I knew it had a cross-over front, but it also had a beautiful cross-over back and the sides crossed over as well. What a fun design! With a minor alteration to make the front bodice drape a little more like the front bodice of my Vogue pattern, I knew this was just the bodice my dress needed! (And the pattern has been in my stash this whole time I was trying to decide what sort of bodice to make!)
The cross-over bodice on V9168 was cut low and drapey to show off the slip below. The Parasol bodice was nicely fitted with a couple of bust darts and cut with a high enough front neckline to, uhh, prevent any indecent exposure.
I know that pattern makers work very hard to make wrap and cross-over bodices which don't gape at the neckline, but for my purposes, I needed to make the Parasol neckline a little more gape-y.
I did this by removing the bust dart and moving the extra fullness from the dart to pleats at the waistline. First, I decided approximately where on the waistline I wanted my pleats to be. Then I cut my pattern piece from that point to the tip of the dart.
Next, I folded the dart into the pattern piece, which simultaneously opened up the slash I'd just cut.
I filled in the new open space with scrap paper and my pattern was ready to go! No darts left, just extra fullness to be pleated into the waistline. The combination of the re-distributed fullness and the thin drapey chiffon I was using would give me the low, gapey, neckline I needed.
Finally, I was actually ready to sew my over dress!
I cut my skirt panels with a little extra length, because, judging by the pattern envelope picture, I was afraid the skirt might come out a little short to wear with heels.
I needn't have bothered with the extra length. After I let the skirt hang on the dress form for a few days to let the bias stretch, it was super long.
I put on the heels I'd be wearing for the wedding and my mom leveled the hem for me.
I absolutely wanted my dress to have pockets, but pockets are rather hard to hide in semi-sheer chiffon. So, I decided to just embrace the visibility and made slant pockets in the skirt, rather than my standard in-seam pockets.
They certainly aren't the prettiest pockets I've ever made, but I don't think they're too distracting to the overall dress design and they do their job.
The entire dress is constructed with french seams, as that's about the only way to make the seams of a chiffon garment look neat and tidy.
As you do with french seams, I first sewed each seam with the fabric wrong sides together and trimmed the seam allowance down. Then I added an extra, possibly unnecessary, step before sewing each seam the second time, wrong sides together.
I melted my seam allowances. (What can I say? Fire is fun!) Chiffon frays easily. This particular chiffon happens to be polyester, which melts easily. Thus, I decided to melt my seam allowances inside the french seams with a lighter to prevent the narrow seams from fraying. Like I said, possibly completely unnecessary, but very satisfying.
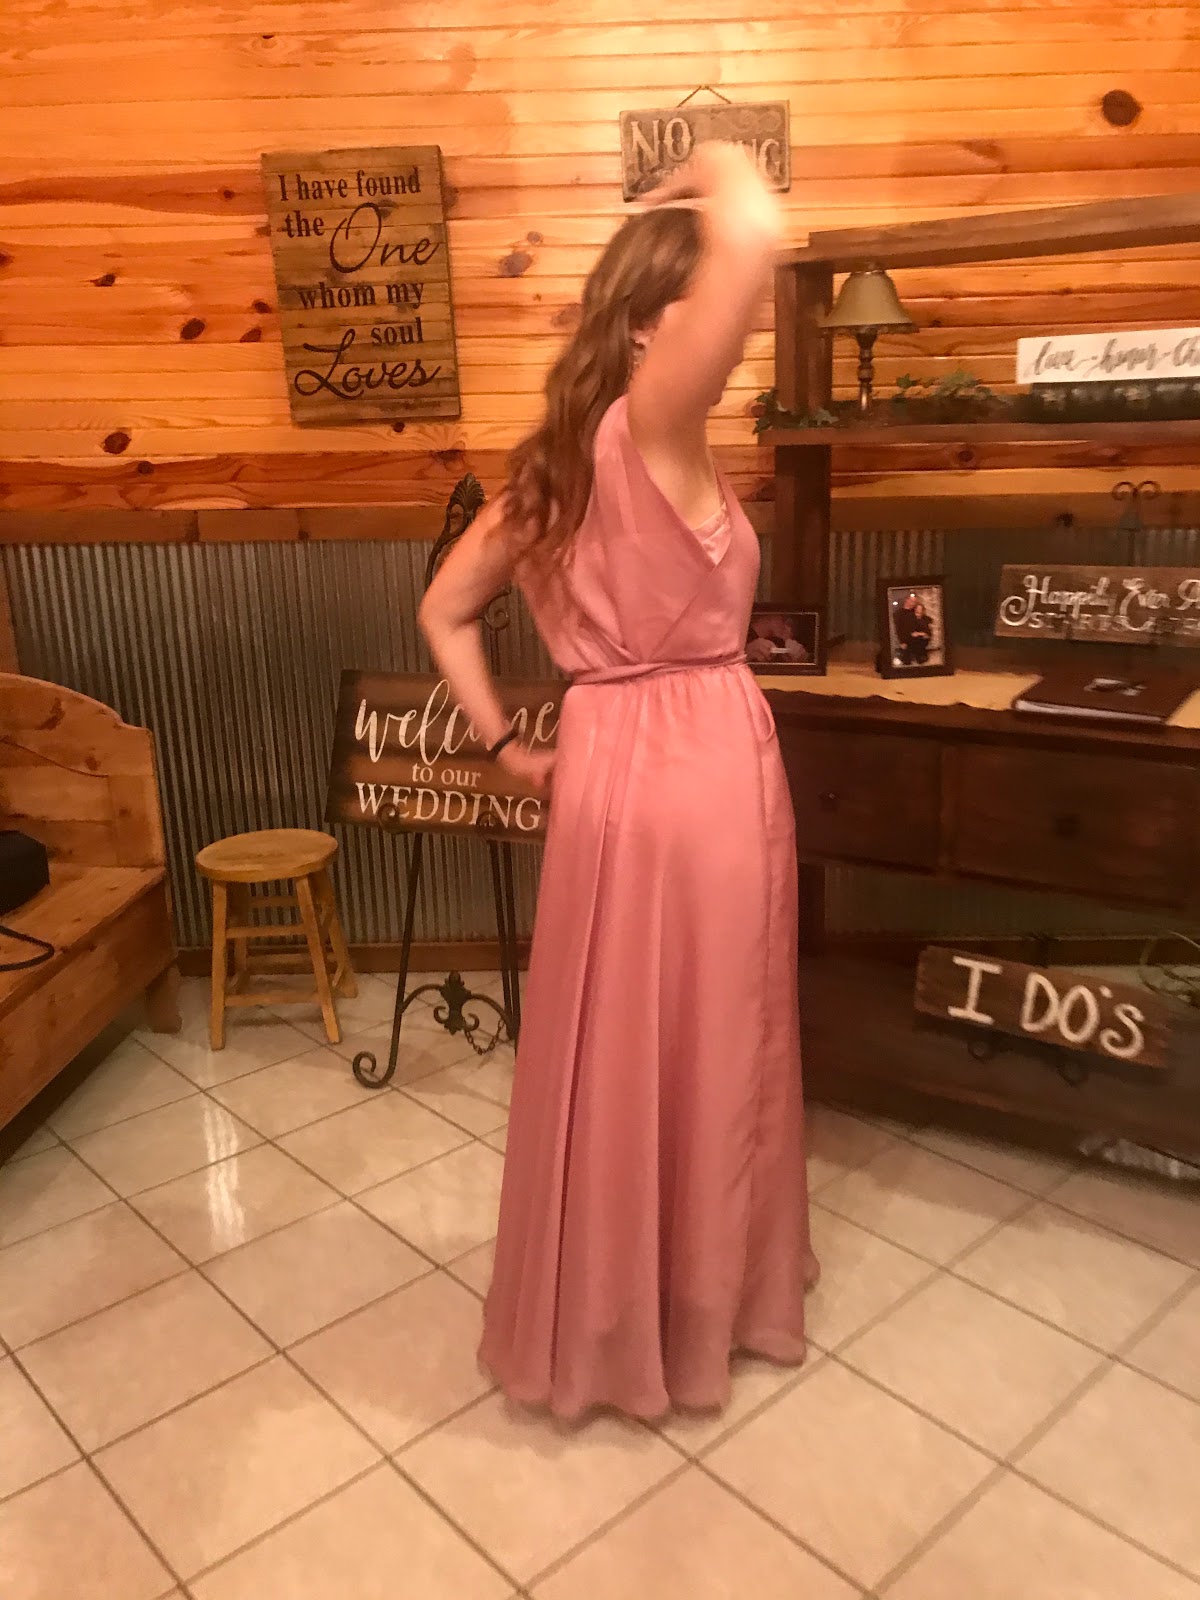
The waistline seam is a very wide french seam, which doubles as an elastic casing. Unfortunately, the white elastic shows through the sheer chiffon. It's not a big deal however, as when the dress is worn, that's covered by a nice wide sash, which I chose to fasten with a rhinestone slide buckle (and a few hidden safety pins for good measure).
I tried on the finished dress and was absolutely thrilled! It was soft, and floaty, and elegant. Just what I wanted! There was only one issue. Due to the blouseyness of the bodice and the loose cross-over design, the straps kept wanting to slip down off my shoulders.
That wouldn't do, so I fixed the issue by making little ribbon loops which would snap around my bra straps to hold my dress straps in place on my shoulders.
These were quicker and easier to sew in than I'd anticipated, which was fabulous as I finished my dress less than a week before the wedding.
The dress was incredibly comfortable and fun to wear!
The loose fit of bodice made it easy to fit and fast to sew - which was a relief since I was working on a close deadline.
Despite all the changes I had to make to the materials and design as I went along, it was absolutely worth making my bridesmaid's dress myself!