Wednesday, March 27, 2024

Bows and a Cap for the Dragonfly Volante

 Upon completing my Dragonfly Volante, I decided I ought to make a few little accessories to go with it, so it would be ready to wear when an occasion arose. A stomacher, sleeve ruffles, bows, and some sort of cap to go on my head.


That was my proposed list, and I got through half of it back in the fall of 2021. 

The stomacher? I cut that out, made a plan, and never actually made it. Two years later when I was ready to wear the gown I couldn't find the pieces I'd cut out, so I started again from scratch.

The sleeve ruffles? I had a vague plan for those, but never actually did anything with that plan. When I finally did wear the gown, I just wore a set of the sleeve ruffles I made to go with my Sacque Back Bird Gown (apparently I'm drawn to fabric featuring flying creatures) back in 2019. 

The bows? These I actually did make!


In my stash there was a length of mint green rayon satin ribbon. I divided it into 3 and turned it into fancy bows.


I laid out the ribbon in a sort of flat bow shape, with 2 sets of loops rather than one, so as to make a variation of a "4-loop bow".


Then I ran a row of gathering stitches straight down the center and gathered the ribbon up to make the cutest little floofy bows! One to trim each sleeve cuff with, and one for the cap.


The cap? Yes, that happened too!


I looked online at paintings of women in the 1720's and '30's wearing Robe Volantes to see what sort of headgear they were wearing. A mostly flat, mostly circular, little cap, trimmed with a ruffle, seemed to be the choice of the day.


To make my own I cut out a simi-circle and a long narrow strip from some lightweight linen, and roll-hemmed the edges of each.


The long strip got pleated, then folded in half length-wise and slightly whip-gathered.


This gave me a delightfully long, curly, floofy, linen ruffle.


I whip-stitched it around the curved edges of my simi-circle.


I made a little box pleat along the flat edge of the "circle" to help the cap cup my head slightly.


The pleat was covered with one of my green bows, and the cap was done!


Ready to wear with my gown, whenever I found an excuse to do so!


Wednesday, March 13, 2024

Making the Dragonfly Volante

 Historical Accuracy was already out the window for my Robe Volante thanks to my Spectacular fabric choice, so when it came to assembling the gown, I went straight to the sewing machine. No need to hand sew the whole thing!


Volantes could have a fitted bodice lining, with the loose outer layer draped over top. Or, the lining could be skipped entirely, giving you just a nice loose tent dress type garment. There are extant examples of both types. I chose the second option for my gown. A lining was one more thing to fuss with and fit - and I just wanted to make the pretty dress! Also, as I mentioned in my last post, I made this the summer I got married. At that time I was quite certain I would find myself pregnant very soon (too bad that plan didn't pan out. . .), so I figured a loose, almost completely unfitted, garment in my costume wardrobe would come in handy in the near future. If not all Volantes in the era had a fitted lining, I saw no reason to put a fitted lining in mine. 


Upon deciding to skip the lining, I forged ahead and sewed up the center front and back seams on the sewing machine, being sure to match the stripes n the fabric across seamlines. Where needed, I serged raw edges to prevent unraveling, but the center front and back were cut on the selvedge edges so this was unnecessary there.


Then I pleated the back. As I mentioned in my last post, early Volantes (1720's and 30's) could really have any arrangement of pleats and gathers in the back. My favorite arrangement of those I looked at was a set of 4 box pleats across the top, so that's what I did with mine. Four box pleats, each featuring butterflies and dragon flies in the center.


For the front panels, I sewed up the center front seam with a very large (several inches) seam allowance, and left the seam entirely open above the waist.


This gave me a V-shaped front opening perfect for showing off a stomacher on the finished gown.


The extra wide seam allowances were then folded back and stitched down on either side if the opening to form a facing. And yes, this part was handsewn. All the interior construction was done by machine, but anything that could be seen on the outside I tried to hand sew.

Once the center front seam and opening were addressed, I sewed up the side seams (leaving pocket slits open of course!), then pleated the front shoulder straps in a manner similar to the Volantes I'd seen online. I pinned the shoulders together then tried on the gown.


It resembled a shapeless tent, but that was kind of the goal, right? Things were coming along nicely! 


I proceeded to make the sleeves (by machine) and the pleated cuffs to go on them (also by machine, but with hand finishings.)


I hand sewed my shoulder straps in place. (really the best way to do any 18th century shoulder straps and sleeves.)


Then set the sleeves with a whole bunch of little pleats. Later 18th century sleeves are usually set with 2-3 larger pleats, but earlier sleeves could have lots of little pleats, and that sounded fun to me, so that's what I did. (Has it become obvious yet that this whole thing was a "that looks/sounds fun so I'm going to do it" type of project, rather than a heavily researched and planned project?)


As with the shoulder straps, the sleeves were hand sewn in place.


Thanks to their loose fit and all the little pleats, these sleeves were easier to set than later 18th century sleeves. (I now highly recommend the early 18th century, it's fun!)


Once the sleeves were on, I tried on the gown again and decided I really ought to make this shapeless tent a bit more shapely.


So I extended the front shoulder pleats, pinning them all the way down to the waist to make the bodice a bit more fitted.


I hand sewed those in place.


Then I bound the back neckline.


And put the whole thing on my dress form - it looked just about right now!


I trimmed up the hem to what I thought was about the right length, then finished it with a hem facing. 


The gown was done!


 To celebrate I embroidered my initials and the year into the back neckline - just for fun!

Now I just needed to figure out a stomacher, sleeve ruffles, and head gear to go with the gown, then I could find an excuse to wear it!


With this in mind, I put the gown away in my costume trunk - where it stayed for the next 2 years. . .

More on that, next time!


Wednesday, March 6, 2024

The Beginnings of the Dragonfly Robe Volante

 I have a really hard time resisting fabric. Especially cheap fabric.

I really like butterfly and dragonfly prints. Really like them.


A large amount of cheap fabric featuring butterflies and dragonflies? Yeah, that came home with me.


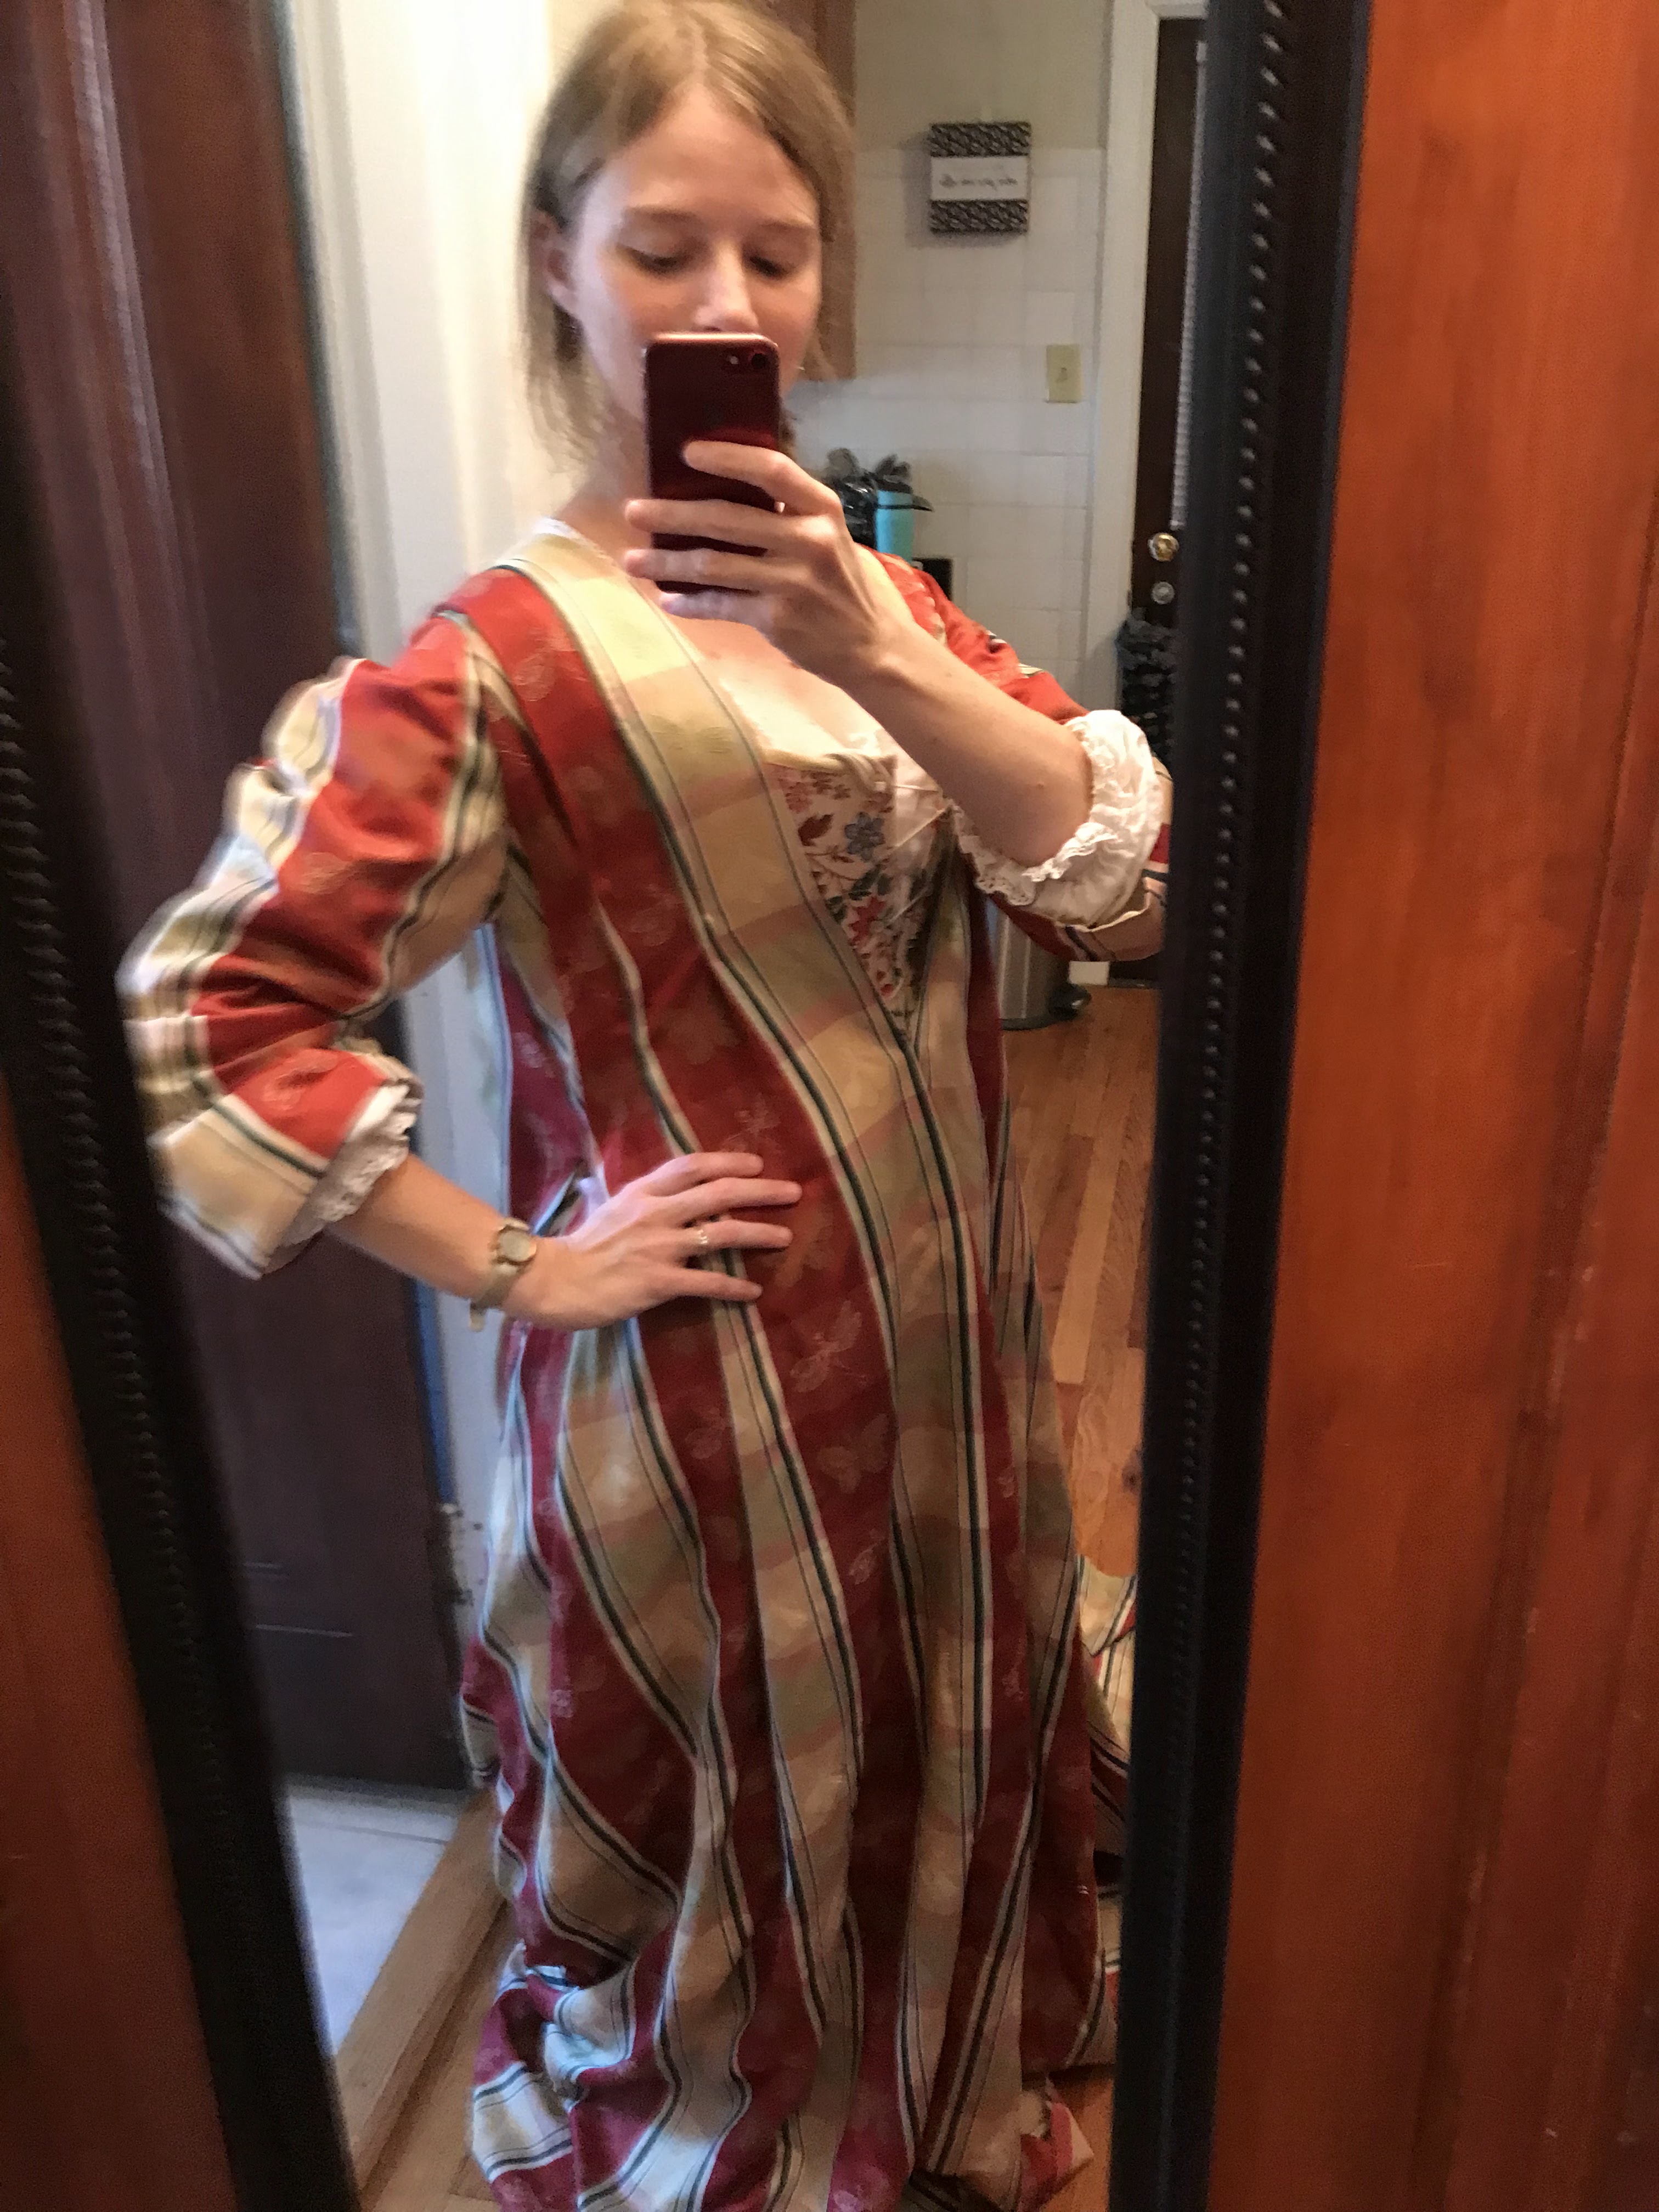
It was a large bundle of some sort of poly/cotton drapery cloth (best I can figure) at my local antique mall. $7.50. That's right - seven dollars and fifty cents! Stripes of red and yellow and green, with motifs of butterflies, dragonflies, and bees woven into the design - pretty and intriguing!
I left it behind. That's right, I left it. And instantly regretted it.
I left it behind because I have a LARGE fabric stash - and I really, really, didn't need to add to it. What would I make out of a large amount of insect covered drapery fabric anyway??
But. The butterflies. The amazing price.
I couldn't resist. The next morning I went back and bought the fabric.


Now what would I make from it? 
This was summer 2021, shortly after I got married. A year earlier, my friend Anna made the most delightful Robe Volante, and after reading all about it, this style of dress from the early 1700's really intrigued me. I decided I might as well us my quantity of stripey insect fabric to make my own Volante.
Was my fabric choice historically accurate? Noooo. . . . .
But I felt like it had the "spirit" of some of the bizarre silks from the era, so I could get away with it. Besides, how often do I actually need a perfectly accurate 1730's dress? Probably never. So I might as well embrace the slight bizarre-ness of this insect drapery fabric, and make the early 18th century tent dress.


So, with that said, what is the Robe Volante? It is the 1720's - 1740's precursor to the iconic Robe a la Francaise. Like the Francaise, it features loose flowing back pleats, but unlike the Francaise, the front is rather loose and pleated as well. This blog post tells some of the history and shares several beautiful examples of the Volante and it's related garments.


   After reading everything I could find online about the Volante and its sisters - the Battante and Casaque - I decided I wanted my Volante to resemble those from the 1720's. Later Volantes featured the same double-stacked box pleats in the back as the Robe a la Francaise, but the earlier ones from the 20's could have any arrangement of pleats or gathers in the back - and that sounded fun to me! Also, earlier gowns were often worn over bell-shaped hoopskirts (similar to the farthingales of earlier centuries), whereas later gowns were worn over oblong paniers. I do love my pocket hoops for later in the 18th century, but for this project being able to just wear one of my normal hoop skirts was appealing. Thus, 1720's (ish) it would be!


With all of this decided, it was time to figure out my pattern!

There's a Volante pattern, and a Casaque (the shorter version of the Volante) pattern  in The Cut of Women's Clothes, by Nora Waugh, which I examined closely. The shapes weren't complicated - this should be pretty easy to make. I could either drape the pattern, or size it up from the book - then I found an even easier option!


My friend gave me a Burnley and Trowbridge gift card. Perusing their website, trying to decide how to best spend my gift card, I found the Mill Farm Casaque pattern. I could lengthen that and use it to make my Volante! (Just like this blogger did!) 
And just like that, my gift card was spent on the pattern.


The pattern arrived in the mail a couple days later and I eagerly cut the pieces out. I held up the front pieces to myself and measured to see how much length I needed to add for my Volante plans.


Then I laid out the fabric and pattern on our small apartment living room floor (It was a tight squeeze. looking back at these pictures now makes me very thankful for our house. I've got plenty of room to cut stuff out now!), and cut that thing out.


I made sure to match up the stripes along the center front, center back, and side seams.


Cutting out the body was easy. Then I got to the sleeves. I looked at the Mill Farm sleeve pattern piece. I looked at the sleeves patterns in Cut of Women's Clothes. I pulled out Patterns of Fashion 1 and looked at the 1740's Mantua sleeve in there. The shapes of the sleeves in the book and the shape of the pattern piece didn't match. Well this was inconvenient. (You may recall I had a similar sleeve issue with my Strawberry Sacque last fall. Commercial patterns are apparently not great at having correctly shaped 18th century sleeves.)


It came to mind that the Larkin & Smith English Gown pattern does have accurately shaped sleeves - there was only one slight issue. 1760's and 1770's sleeves are considerably more fitted than 1720's - 1740's sleeves. Thus, that sleeve pattern would be too small for my Volante. Now what?
An idea dawned on me, a local friend, a couple sizes larger than me owned the Larkin and Smith pattern too - and her larger sleeve pattern might just work for my Volante sleeves. 
I texted her and asked if I could borrow the pattern piece. She dropped it by, and it worked beautifully!
Perfectly shaped, loose, 18th century sleeves!


Next time I'll tell you how all the pieces went together!