Monday, July 22, 2019

Making a "Hooverette" Dress From the "Dottie Angel" Pattern

There was a recently acquired piece of fabric in my fabric stash which I had prewashed, and was ironing flat before folding it neatly to be put away. As I was ironing this length of plaid fabric, it hit me that this material just had to be turned into a 1930’s style wrap dress, or “hooverette”. This thought became a minor fixation on 30’s wrap dresses and soon I was scouring the internet, looking at pictures of vintage 30’s dresses and reading blog posts about making dresses similar to what I had in mind.


A day or two later, I had a wrap dress for myself cut out and ready to sew together. By this time I’d changed my mind about the fabric I wanted to use for the project. I’d put away the plaid for a different project (my 4th of July dress to be exact) and instead pulled out a floral quilting cotton from my grandma for this 1930’s inspired wrap dress.


As I read about "Hooverette" house dresses and looked at 1930's ads and patterns for these garments, I learned a few things. Many of them had cut-on sleeves, though set-in sleeves did appear on occasion. The skirt and bodice were typically cut as one, from shoulder to hem, with no waist seam. They could close with either with ties or buttons, but ties appear to have been most common. The front skirt generally boasted a patch pocket because all good dresses, especially house dresses, have pockets. And finally, the front could be wrapped both left over right, and right over left. If you were to stain whichever side was on top, you could just flip flop the wrap so the stain would be hidden under the opposite side and nobody would know


With these features in mind, I set about finding a pattern to use. After a quick look through my pattern stash I decided to use Simplicity 1080, which is apparently known as the "Dottie Angel" frock pattern. This pattern featured cut-on sleeves and no waist seam. Plus, it already featured cute patch pockets. Thus I decided it would work well for my "Hooverette" base pattern. I just needed to make a few, minor, changes.


I lengthened the sleeves a bit and didn't cut the front on the fold. Instead I added about 6" of width to the center front skirt, and cut the front bodice at an angle from shoulder to the newly widened waistline. This would give me the wrap front I wanted. I drafted a front facing to match.


I added some width to the hem of the back panel, for a little extra skirt fullness. As originally drafted, the skirt was straighter than I preferred. After cutting out the back panel, I discovered the back neckline was lower than I would have liked, so I added an extra little panel to raise it to a "normal" back neckline level. Low back necklines can be a fun design element, but I didn't think it suited this style of dress.


I traced the shape of the original back neckline onto a piece of paper, then drew in where I wanted the new back neckline to be. 


I then used this piece of paper as my pattern piece to cut out the fabric to fill in that low back neckline.


This extra panel of fabric is definitely noticeable on the back of the finished dress, so we'll just call it a design feature. There are worse things in life than pieced together dress backs. If I ever use this pattern again though, I'll remember the back neckline is low and fix that prior to cutting if I want it otherwise.


Now, as far as the "intentional" design features go. . .


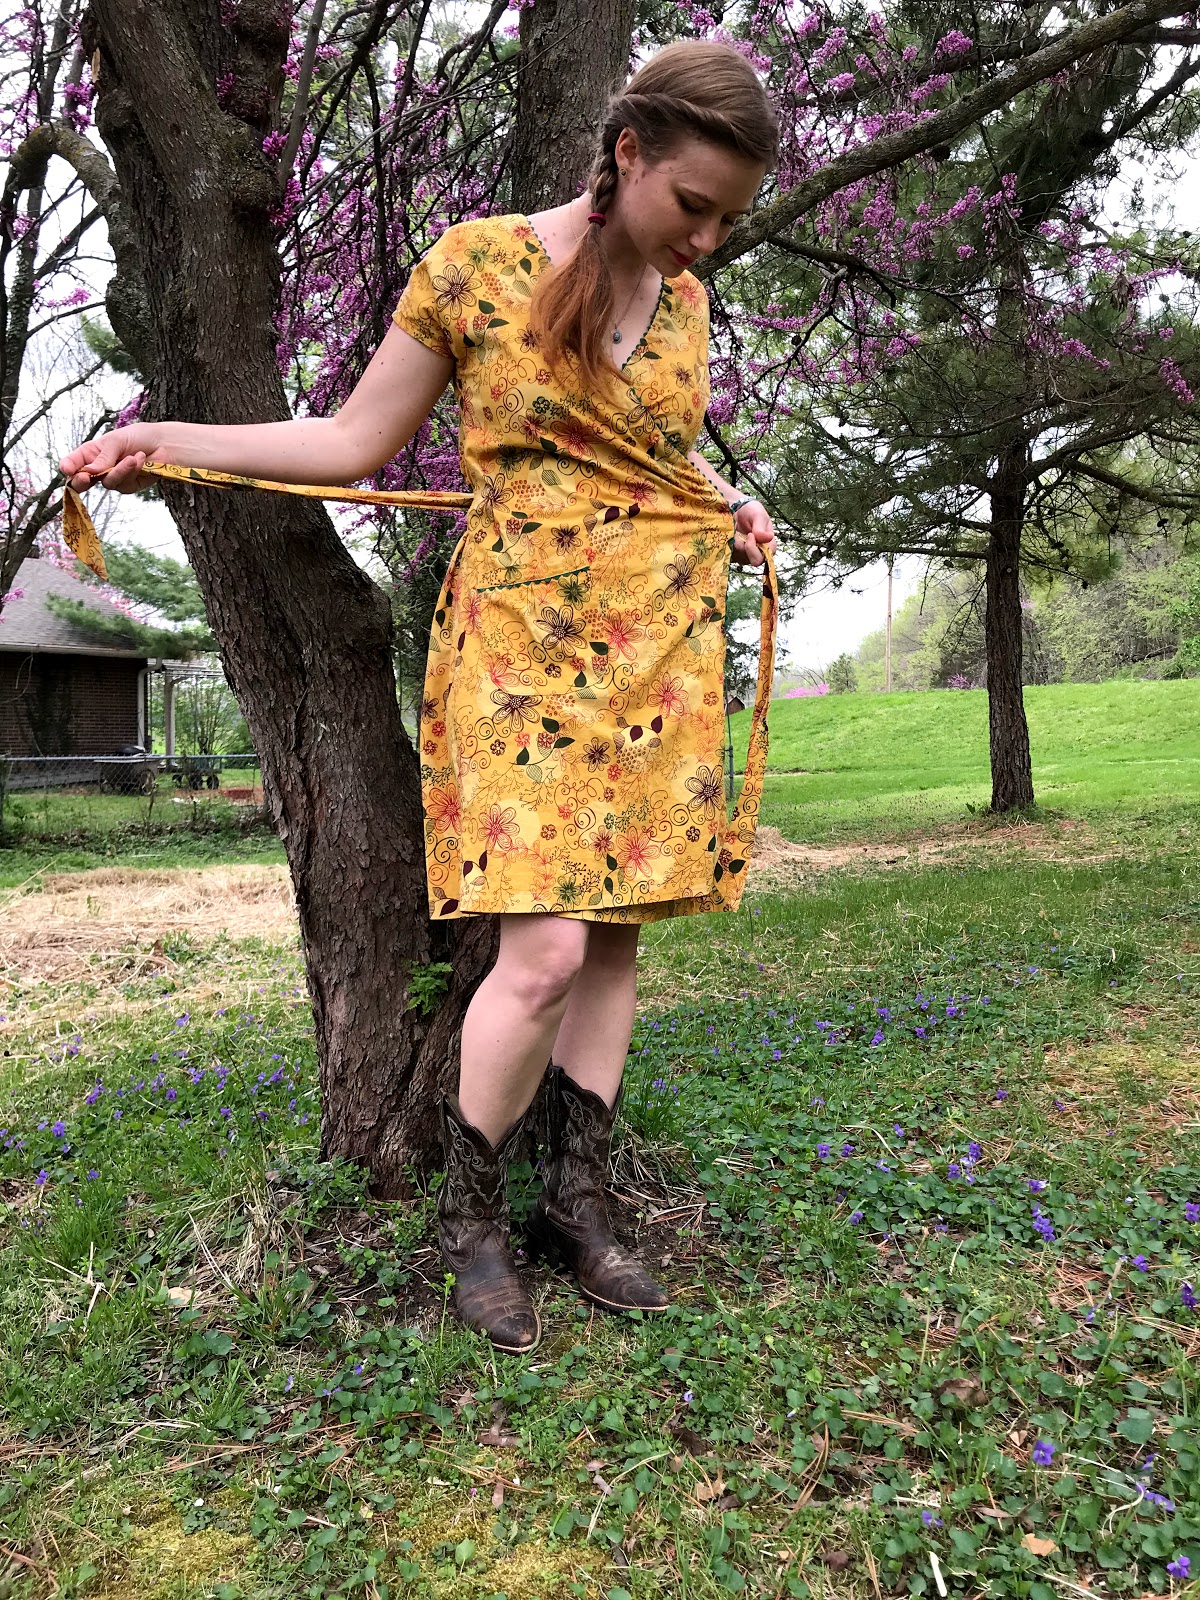
The dress fastens with fabric ties and can be closed either right over left or left over right - fully reversible in that regard.


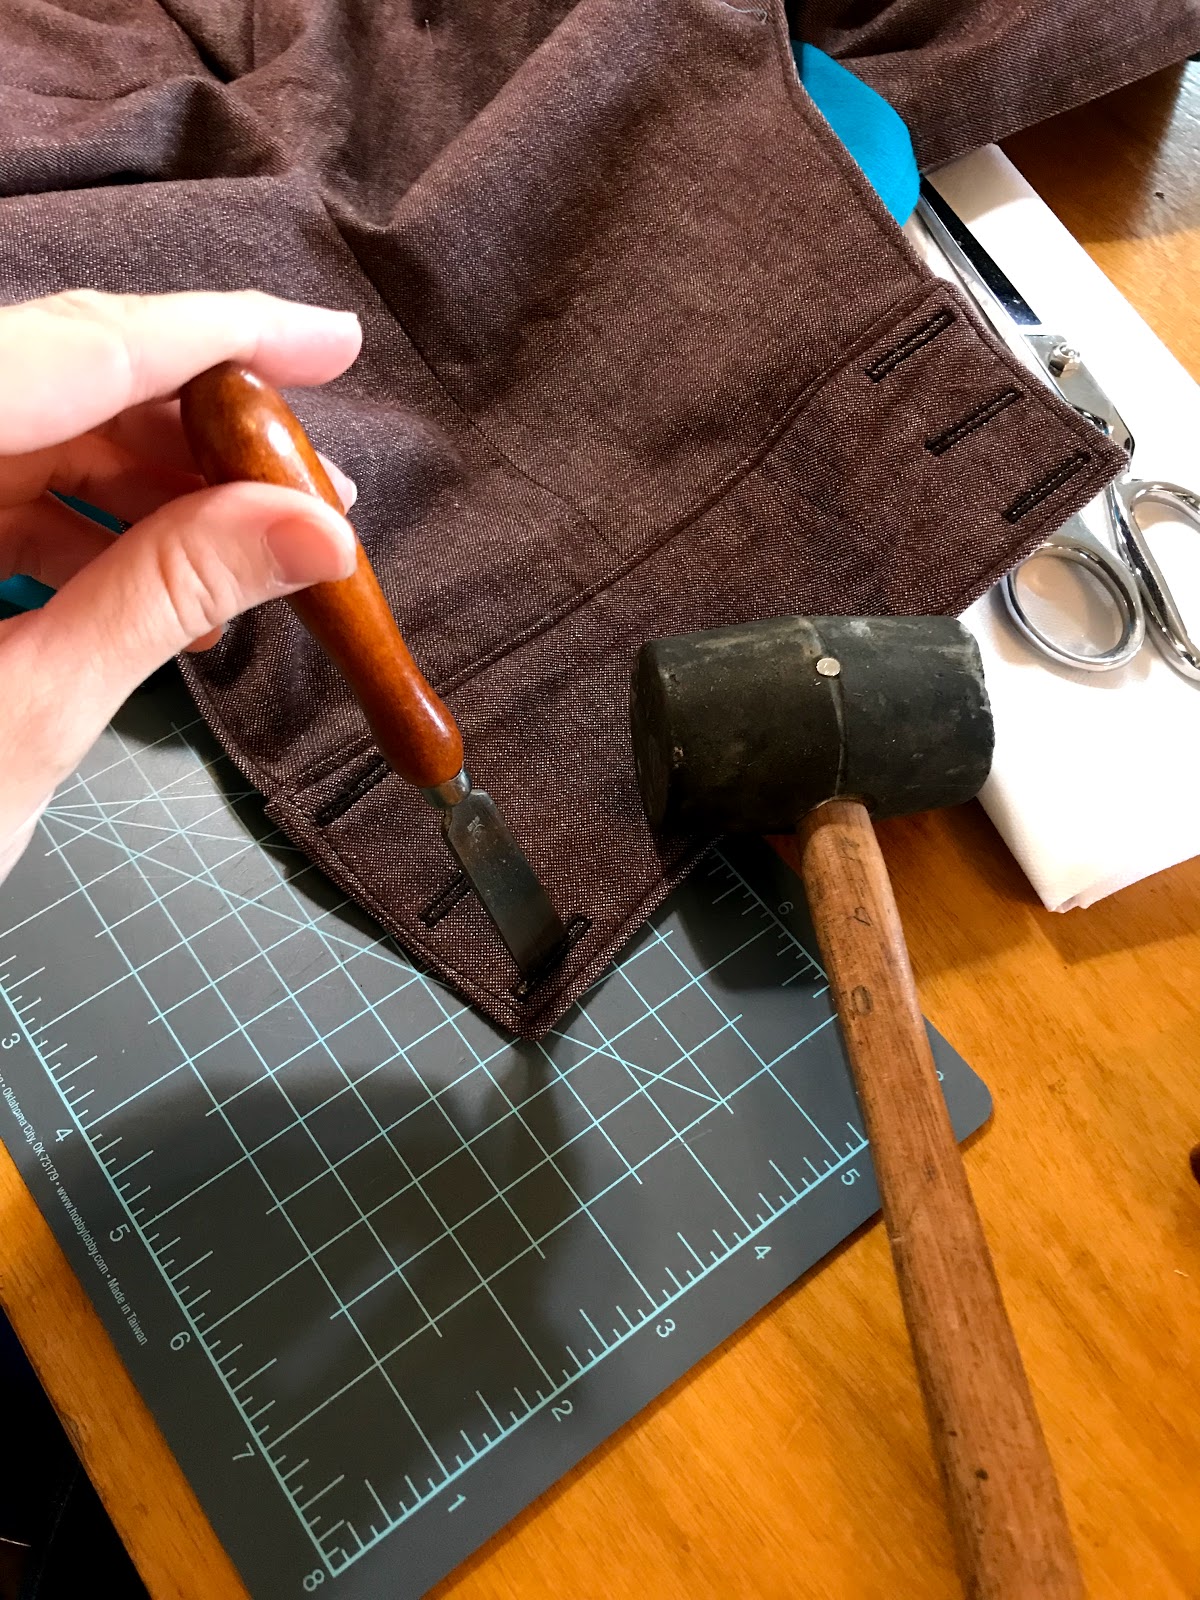
I left a 2" opening in either side seam at waist level for the ties to be threaded through.


The ties wrap around the waist and get tied securely in the front


The skirt and the bodice both have enough of an overlap that I'm not concerned about wardrobe malfunctions.


I added patch pockets to both sides of the front, so there's always one visible, and one hidden, no matter how I have the dress wrapped


I trimmed the pockets with green rick-rack to make them a little extra visible.


The neckline too is trimmed in green rick-rack to draw attention to the wrap feature of this dress and keep the style lines from being hidden in a sea of print.


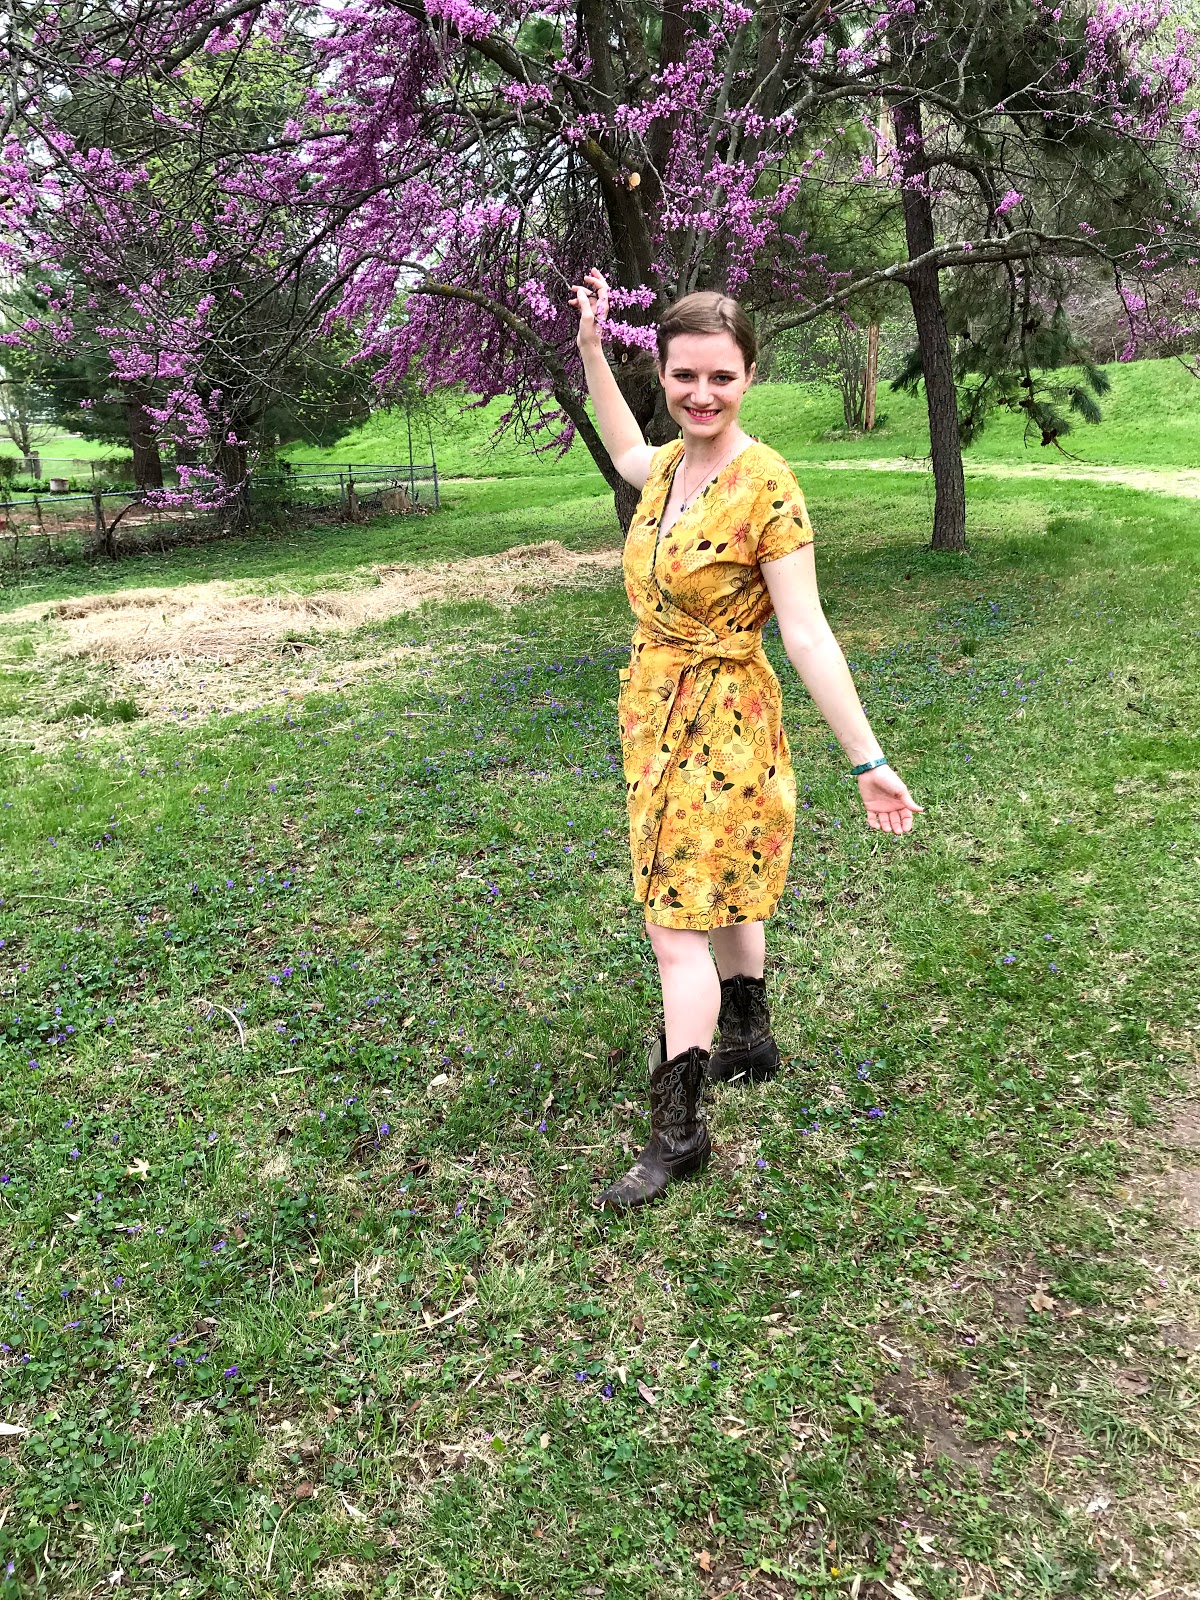
Speaking of the print, I really do love this fabric. Yellow isn't generally a color I gravitate toward, but this fabric caught my eye because it reminds me of sunsets, and fall leaves, and all sorts of pretty things. I think this dress might be the only yellow garment I own, and it is a welcome addition to my wardrobe. Perhaps everyone needs a yellow dress.


All in all, I'd say my attempt at a 1930's inspired wrap dress was successful. I would up with a garment I like and wear regularly. 


Are there things I wish I'd done differently? Of course! The skirt, for one thing, is too short for the 1930's. I wish I'd cut it a few inches longer.


The sleeves are almost, but not quite, tight. So, I wish I'd cut those fuller.


These, however, are just little things. Little things to keep in mind for next time I suddenly decide I need to make a 1930's house dress right away.


Because, knowing me, there may very well be a "next time".

Wednesday, July 10, 2019

Making the Made Again Patterns Joey Tank While Jet Lagged

Signing up for a pattern test while I was out of the country may have been a risky thing to do. The test was due to end about 3 days after I returned home. As it was for a fairly simple garment, I figured I'd be able to complete the test on time. As long as I wasn't too horribly jet lagged that first weekend home. Sewing while jet lagged? Sounds fine, doesn't it?


It was a bit of a gamble, but thankfully, I was able to complete the pattern test garment on time - and I even managed to sew a pair of shorts to go with it during that first weekend home.


I arrived home from Japan on a Friday morning. I was exhausted, but I needed to stay awake most of the day to get myself back on U.S. time instead of Japan time. Thus, while forcing myself to stay awake and drinking lots of coffee, I printed out the test pattern and assembled it. Then I located the fabric I wanted to use for the project.


After a solid 10 hours of sleep Friday night, on Saturday morning I cut out the pattern. Saturday afternoon, I helped my grandpa fix a fence where his cows were escaping. Saturday evening, I sewed up the pattern. 


After another good night's sleep in my own bed and church on Sunday morning, I decided to whip up a pair of shorts from a tried-and-true pattern to complete the outfit for pictures. Thus, on Sunday afternoon, I made a pair of shorts.


First thing Monday morning, I had my sister photograph my new outfit, then I emailed the pictures and my feedback to the pattern designer. It was a pattern worth testing - even while slightly jet lagged.


So, the real question is, what is this pattern I couldn't resist testing and what made it special enough to entice me to commit to sewing when jet lagged?


It's the Joey Tank by Made Again Patterns, and I just had to test it because it's a pattern specifically designed to use for refashioning/upcycling thrifted or otherwise unappreciated garments!!! (Also, it's a woven tank top, and I'm always on the lookout for woven tank patterns since I wear tank tops all summer long and happen to have a large stash of woven fabrics.)


I love refashioning, and hate the idea of textiles being thrown out until they are well and truly worn out (and even once they reach that stage, they've got to be used as rags for a while before I can even consider throwing them away.) Thus, when I read about the launch of Made Again Patterns on Instagram, I was instantly excited. This is pattern company is focused on designing patterns with the purpose of refashioning in mind and the pattern instructions walk you through how to "harvest" fabric from your source garment or other thrifted textile. This is an idea I was instantly behind and more than happy to support by volunteering my time to test this initial pattern and give my feedback on it.


Now you may be wondering exactly what my Joey tank began as. Well, it came to me about two years ago, while I was in Ghana, as a pencil skirt.


The skirt was gifted to a squad mate, who wore it for a while then gifted it to me. It got crammed in my over stuffed pack when I left Ghana specifically because I liked the fabric and hoped to use it for something, some day. The skirt itself wasn't my style and didn't fit me - but the fabric! Oh I like African fabrics!


 Once I seam ripped all three seams and the darts out, there was just barely enough fabric in this skirt to make my Joey tank. 


The front of the tank fit on the front of the skirt. The back of the tank fit on the back of the skirt. The facings were nestled into corners. The "excess" fabric was turned into bias tape for binding the arm holes and making the straps.


The resulting tank top is soft and wonderful! I love that I finally got to turn this African skirt into something I'll wear often! It reminds me of the season of my life where I spent three months in Africa, and my desire to go back and explore more of that continent one day. It reminds me of the dresses the ladies wore to church every Sunday, and how wondrously colorful the clothing was! American garments are so dull and boring by comparison. There is something wonderful about giving a garment new life as something I'll wear regularly!


After I finished the tank I decided it deserved a pair of matching shorts to go with it. I just so happened to have a bit of brown denim in my stash which would serve this purpose admirably!


I picked up the brown denim from an antique mall last fall, with no real plans for it. It was a narrow yardage and I definitely didn't have enough of it to make a pair of pants. Thus, it was the perfect thing to turn into a pair of shorts. I paired the denim with Kwik Sew K3854, view B.


This is quite possibly my favorite shorts pattern. I've made it four times now (though I've only blogged one other project from it), so I'm very familiar with how it goes together and can make it quickly. The button front construction looks complicated, but it's really not!


Making these shorts gave me an excise to try out the buttonhole chisels I brought home from Japan!


Since my Joey Tank is teal and brown, I decided to use teal cotton for the pocket and waistband linings of my brown shorts. It was fun to tie the outfit together in a little way that's not seen when the shorts are worn - a sewing secret if you will. For an extra little pop of teal, I zig-zagged all my seam allowances in teal thread. (I could have serged the seam allowances, but I was to lazy to re-thread my serger in teal thread, so I decided a zig-zag would do the job.)


The whole outfit is quintessentially summer - and has a story to tell! It was very much worth signing up to test the Joey Tank even though I knew I'd be slightly jet-lagged while sewing it. 

Monday, July 8, 2019

New Dresses for the 4th of July!

Growing up, almost every 4th of July, my cousins and I would have brand-new matching American flag shirts to wear. I have fond memories of those July 4ths of my childhood, the family gatherings, the homemade ice cream, the fireworks, and the special red, white, and blue matching shirts. Now, as the Fourth approaches each year, I can't help but contemplate a new red, white, and blue outfit to wear on the holiday. It's just fun!


This year, my 4th of July outfit began months ahead of time. Back in March, my mom, sister, brother’s girlfriend, and I took a trip to a little Mennonite fabric store about an hour away from home for an enjoyable afternoon of fabric shopping. I, of course, left the store with a variety of fabric. Within the next week, I pre-washed all my purchases, ironed them, folded them neatly, and put them away. For once in my life, I was organized and on top of things.


While doing this, I considered what I might use each piece of fabric for. Most fabrics from this collection could be used for any number of projects. An apron? An Edwardian dress? A 1790’s dress? Anything was possible! There was one piece, however, that just begged to be turned into a specific dress for a specific occasion. The dark red, navy blue, and gray plaid would pair perfectly with Simplicity 8231, also known as the Mississippi Avenue Dress by Sew House 7, and I would have to wear it for the 4th or July! 


Thus, the fabric got put away until the week before the 4th of July, after I arrived home from my trip to Japan. At this point, out came the fabric, and I made my plaid Independence Day dress in one afternoon. The plaid fabric and my chosen pattern worked together just as splendidly as I’d hoped!


I had about two yards of this interesting 44" wide, plaid fabric of undetermined fiber content. This was just barely enough fabric for the dress I wanted to make - nothing but scraps were left over when I finished cutting the dress out!


I specifically did not match the plaid of the center front panel to the side panels, as I wanted the shape of the front panel to be obvious. That center, somewhat triangular, front panel is what drew my attention to this pattern when I first saw it in the Simplicity pattern book over a year ago.


I cut the length halfway between the two length options offered in the pattern. Thus, my dress ends right below the knee, rather than above it, or at mid-calf, as the pattern shows.


This pattern did not include pockets, which just wasn't going to work for me. So I added patch pockets to the side panels. I based these pockets on those of the Tea House Dress and Montevilla Dress, both by Sew House 7.


I also re-configured the shoulder ties so they threaded through the shoulder seams, gathering up the shoulders when pulled tight, rather than tying them around around the shoulder strap as the pattern recommended.


I finished off the neckline and armholes with some pretty bias tape I brought home from Japan last month.


Now, according to the Simplicity size chart, my measurements put me in a size 14 for Simplicity patterns (Please keep in mind that Simplicity sizing, and that of McCall's, Butterick, and Vogue for that matter, is vastly different from what current store sizing is.) However, I always cut a 12, due to the amount of excess ease added to the patterns. Simplicity size 12, has almost always fit me perfectly. This dress, however, came out a little snugger in the hips than I would have preferred and rides up on my backside a bit. So, I would have been better off to cut this pattern out in a size 14. As is, I find the dress perfectly wearable - this is just something to bear in mind for any future makes of this pattern.


After I finished my 4th of July dress, I decided I wanted to make my sister something new for the Fourth as well. At first I thought I'd make her a basic knit shirt or tank top. However, my stash of patriotic knit fabrics is woefully lacking, so that wouldn't have happened without a fabric shopping trip - which I'm trying to avoid at the moment as my stash is getting out of control. Then I remembered, I'd recently seen a length of red, white, and blue quilting cotton in my stash when I was looking for something else. I had no idea where the fabric had come from, but I decided it just might work for a top of some sort for my sister, so I pulled it out.

  
Upon unfolding the material, I discovered I had a good 3 yards of it - enough to make my sister a whole dress rather than just a simple top! Thus, a 4th of July dress she would have!


I didn't have a whole lot of time to make my sister's dress, just a couple of evenings after work, so I decided to just make her a classic, simple, sundress with a gathered skirt and a darted bodice.


I used the Night and Day Dress pattern by Charm Patterns, for the bodice. This was simply because I already had the pattern out so I could trace my size off for different project, and it was easy enough to trace off my sister's size while I was at it.


I traced off the size that corresponded with her high bust and bust measurements, and the bodice fits great through the chest. However, it is a little big in the waist - which I suppose is to be expected since her waist measurement is an inch smaller than the measurement listed on the size chart. Next time I use this bodice pattern for her I may have to mess with the fit a bit.


The skirt is simply two 44" widths of fabric, gathered to fit - no pattern required! I added pockets to the side seams, because a dress without pockets is just sad.


I made the dress without telling my sister about it - just in case I didn't actually get it finished in time. Thus, she was surprised, and thrilled, when I gave it to her on the 3rd of July! I'd finished it just in time!


She told me multiple times how much she loved her new sundress, and even let me braid her hair with ribbons to match!


I don't get to braid her hair near as often as I like!


And so, the new red, white, and blue outfit for Independence Day tradition from my childhood continues!


As does the homemade ice cream tradition! Yum!!


*The majority of the photos in this post were taken by my youngest brother, who is now the proud new owner of a camera!