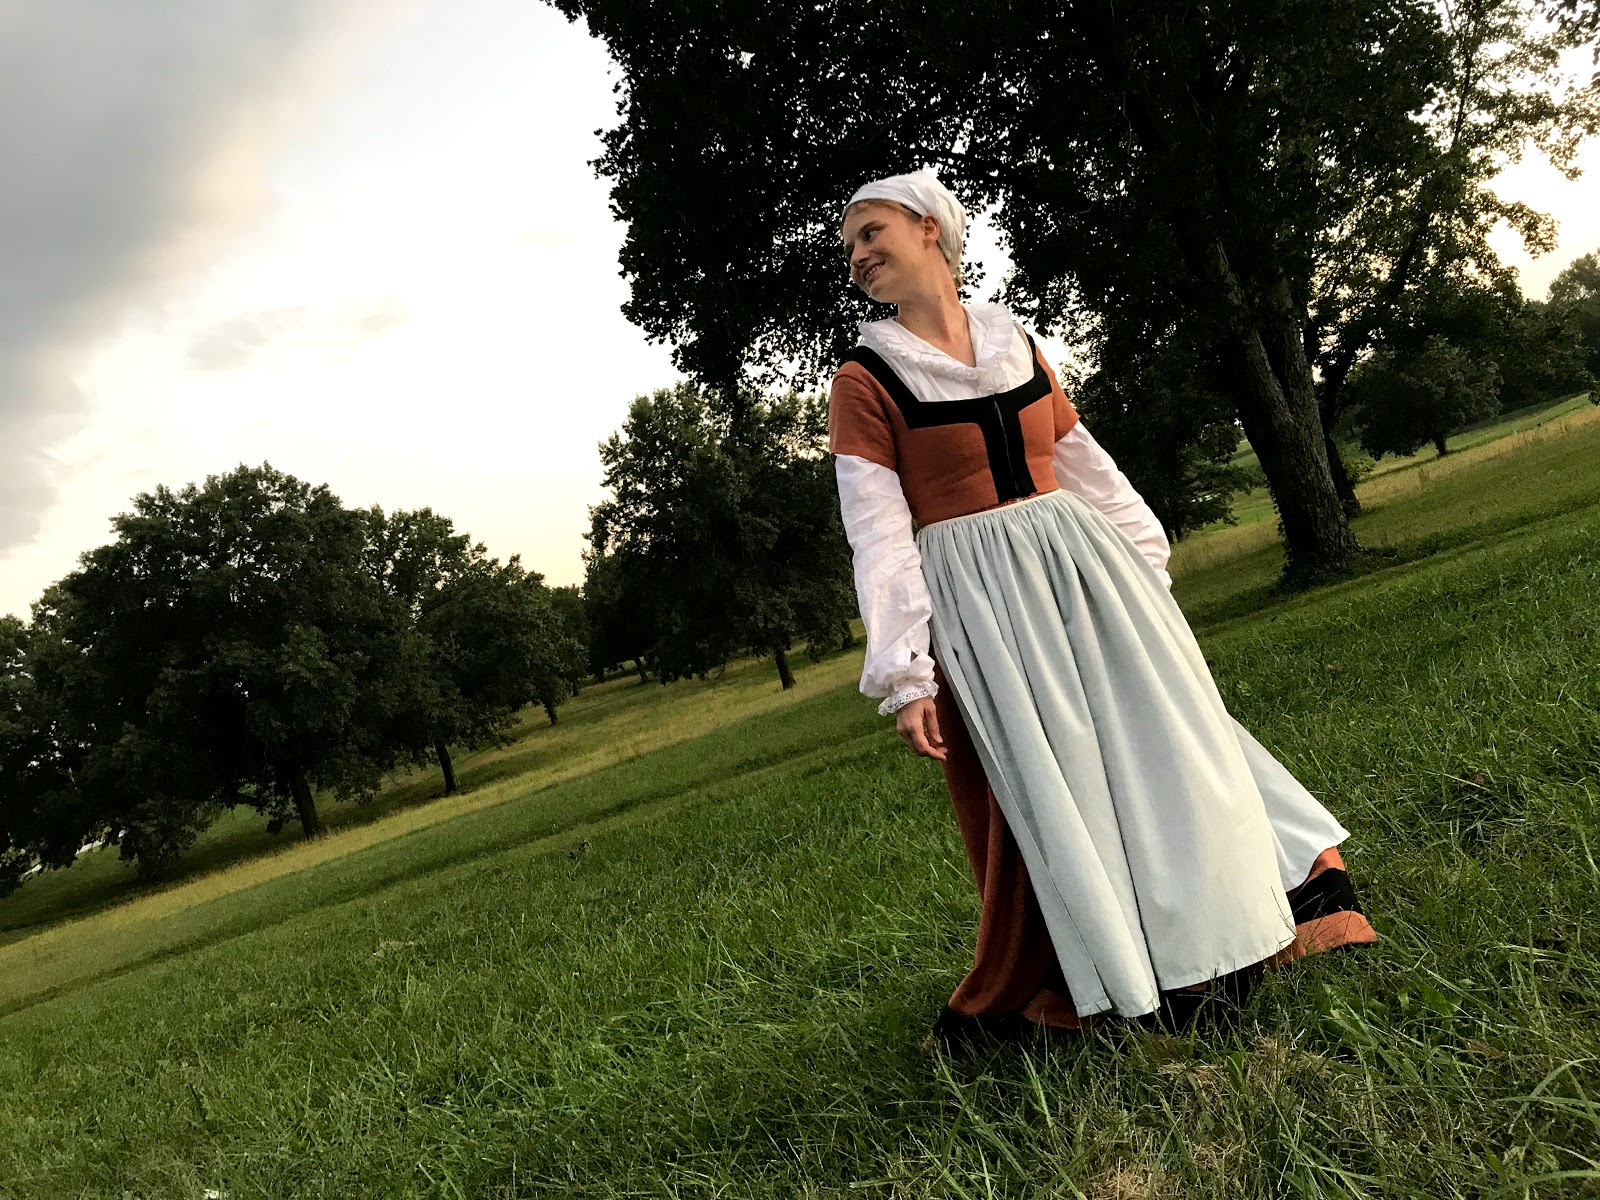
Once I decided against just picking a pattern and making myself a pretty princess-y dress to wear to the Renaissance Festival, I had to decide what sort of dress I would actually be making. Thus, I took to Pintrest. I looked at Renaissance paintings. I looked at other people's Renaissance era outfits. I found pictures of a couple different extant Renaissance gowns. I followed links to peoples' blogs and read all about how they made different styles of gowns and why. And eventually, when all was said and done, I decided to make a 16th century German gown.
The
Katafalk blog was very influential in that decision. I read through all her posts about the making of her blue German dress and her birch colored German dress. The more I read about it, and the more I thought about it, the more I liked this style of dress. Plus, doing a German look just made sense as I have a lot of German ancestry on my dad's side. Thus, a German Renaissance dress it would be!
With this decided, I began to do a bit more internet research with an emphasis on 16th century German attire rather than Renaissance clothing at large. I discovered the website
germanrenaissance.net which features pages about dress in specific German regions throughout the Renaissance era. Even though in the end I didn't exactly recreate the look of a specific region, the information I read and the pictures I looked at here were very helpful and informative! I specifically appreciated the
page on the costume of Westphalia.
My dress would be wool, with a wide square neckline, trim, or guards, of wool in another color, and attached sleeves. From what I could gather reading online, it seems attached sleeves are a hallmark of a German Renaissance gown. It seems gowns of other areas often had separate sleeves which would tie or be pinned to the gown bodice. (I could be wrong on this however, as I didn't really research this project in depth, just gathered info from the internet.)

All the materials for my gown were easily found in my fabric stash, so nothing new had to be bought other than thread. I picked a 3 yard piece of wool in a beautiful burnt orange color from
the collection of wool my aunt gave me last year. This piece of wool was definitely itchy, so I'd rejected it for past projects, but I decided it would be fine for this one since the bodice would be both lined and flat-lined, and the dress would be worn over
my smock, so the wool wouldn't be against my skin at all. Thus the itchiness of this piece would cause me no discomfort.
The linen for the lining was harvested from a skirt I thrifted years ago, the cotton canvas for the interlining was in my stash, left over from another projects, as was the black wool I used for the guards and the brown cotton I used for the pockets.
I considered drafting or draping my own pattern, or sizing up a pattern from Tudor Tailor, but in the end I had less than a week to make my dress so I decided to start with a commercial pattern instead. I chose to use McCall's M7763, by Angela Clayton, and altered it to suit what I needed.
As I would just be using straight panels for the skirt, all I needed was the bodice and sleeve pattern. I traced out the relevant pattern pieces on parchment paper then set to altering them. I lowered and re-shaped the back neckline, and shifted the sleeve seam from under the arm to the back of the arm to get a more historically accurate shape. I used the "sleeve lining" piece for this, as it was a plain, straight, sleeve pattern, unlike the over sleeve pattern included in M7763, which is very, very, puffed (Not the look I was going for here with my plain wool gown).
I cut my newly altered pattern out of the linen skirt I was using for the bodice lining, then basted it together and tried it on to check fit. I decided to take it in a little bit, but overall it fit pretty well so I moved on to cutting out my dress!
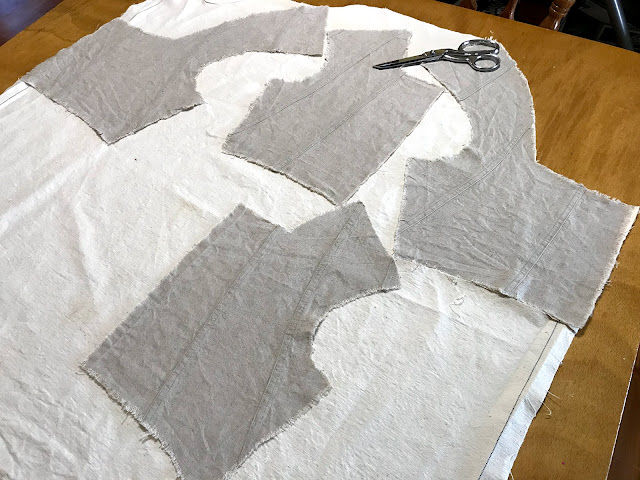
I disassembled my linen lining mock-up (Which looked pretty bedraggled by this point as I'd decided to throw it in the washing machine, without finishing the edges first, just to make sure the linen had shrunk all it was going to shrink before I used it in my final dress), and used it as the pattern to cut out the other layers of the dress. I cut out a duck canvas interlining as a support layer for my bodice, then cut the bodice out for wool as well. I would not be wearing any sort of structured support garment with this dress, (Which I read somewhere is a historically plausible choice for 16th century German, but I don't know how accurate that is.) so it was important the bodice itself be sturdy and tight fitting to provide as much support as possible.
The final bit of pattern work I had to do was for the guards, or trim, around the neckline and front opening of the bodice.
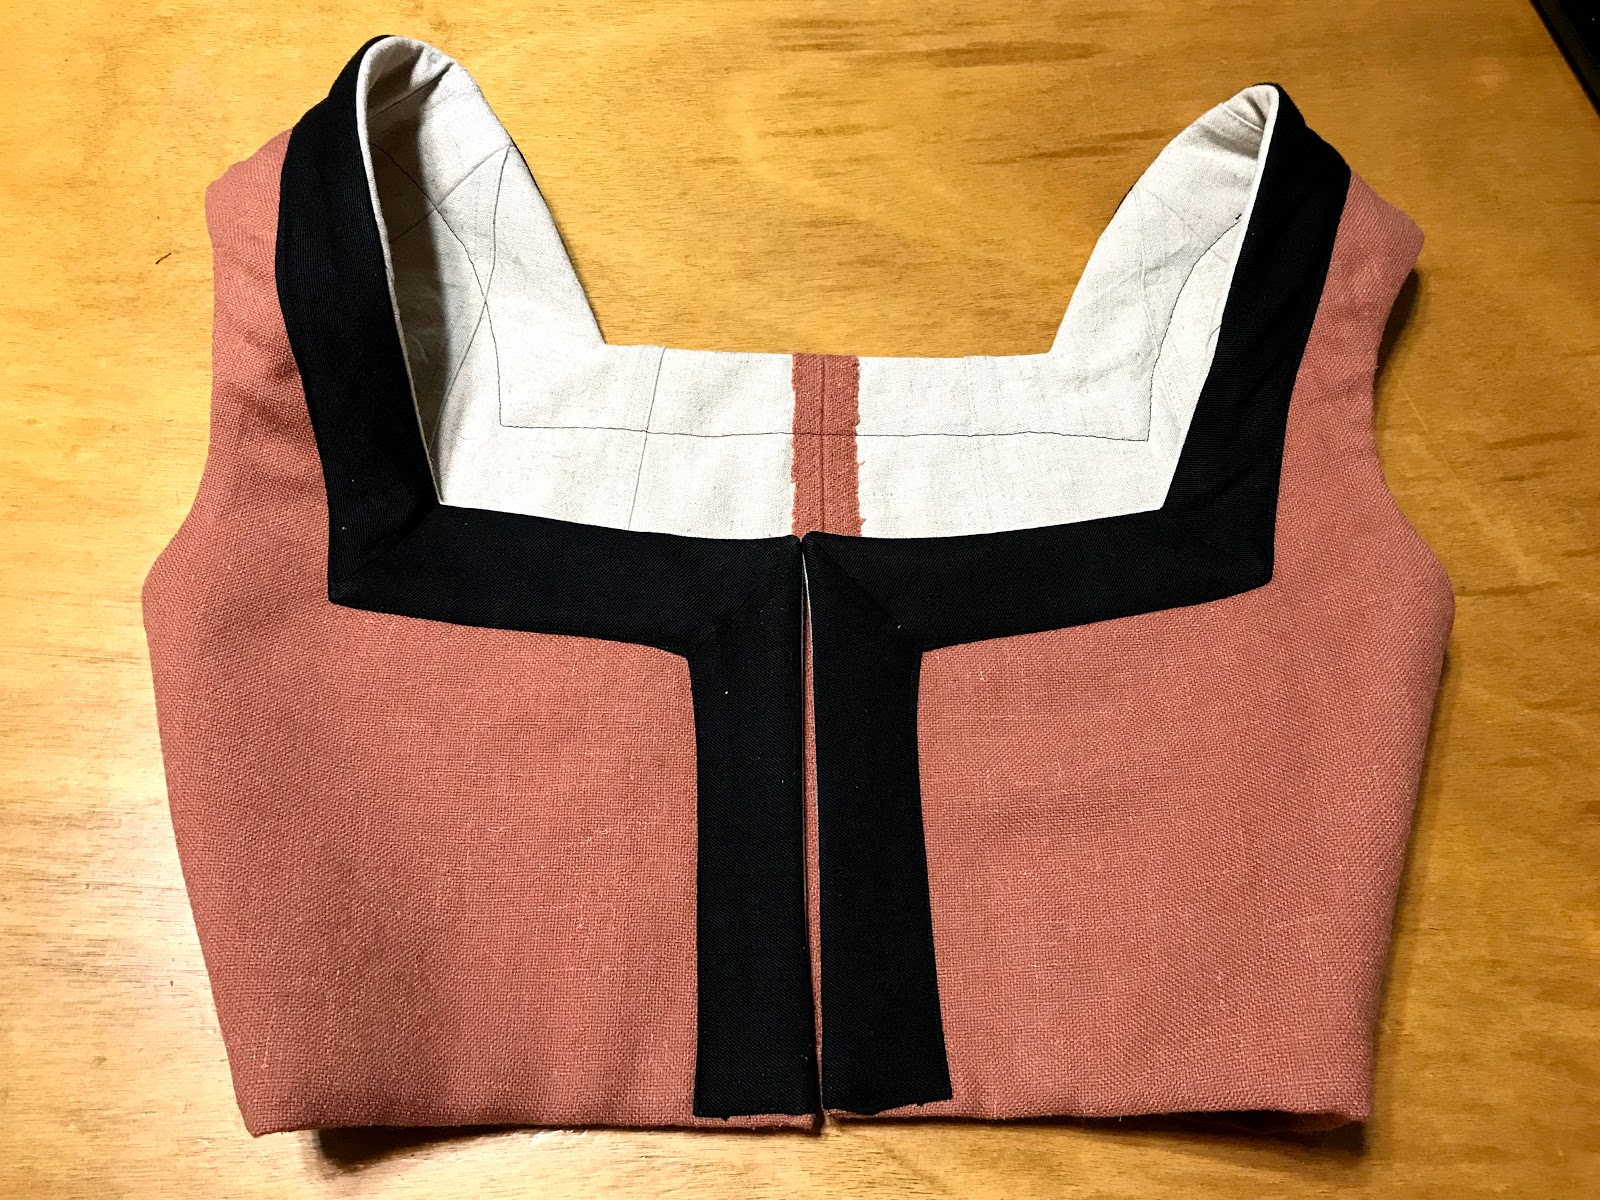
I traced each section of the neckline, more or less drafting a 3" wide external facing with mitered corners. Having a seam at each corner allowed for a more economical use of fabric than a single facing drafted without seams would have. I cut the guards out of the black wool left over from my
1840's dress. I considered making the guards green, or another color, but black was the most common color for guards in the paintings and prints I looked at, so that's what I went with.
I constructed my dress with primarily modern sewing techniques, with a little bit of Victorian thrown in, as that's what I'm most familiar with. As much as I'd love to learn about historically accurate 16th century clothing construction, I didn't really know where to start with that in the limited time frame I had. The finished dress is about 80% machine sewn.
I chose to flat line the bodice, the way Victorian bodices are done, rather than bag line it, as modern bodices are. I appreciate how the exposed seam allowances allow for easy alterations later on, where as bag lined bodices are a pain to alter! I know many people find seam visible seam allowances on the inside of a bodice to be messy and unprofessional looking, but personally I appreciate the look of exposed seam allowances whip stitched down on the inside of the garment.
I sewed on the black neckline guards just as I would an exposed facing on a modern garment. I pinned it with the right side of the guard against the wrong side (inside) of the bodice, sewed along the edge, clipped corners, then turned it right side out.
The free edge of the guards then got top stitched down by machine. Once that was done, the bodice was more or less finished.
Except for one thing, the sleeves. When I made my linen lining mock-up I found the sleeves to be rather movement restricting. This could have been fixed with some pattern alterations, but I was on a time crunch and didn't feel like dealing with that. So I improvised.
I constructed the sleeves separately from the bodice, then hand sewed them on, about 2/3rds of the way around. I left the sleeve disconnected from the bodice under the arm, as this allowed for a full range of motion.
I have no idea if there is any sort of historical precedent for this, but it worked beautifully for me. Along with allowing me to move my arms however I pleased, I also appreciated the underarm "air vents" as it was nearly 90 degrees on the day we visited the Renaissance Festival.

As you can see, I chose to make short sleeves rather than long sleeves for my dress. I was a little short on fabric once I'd cut out the bodice and skirt panels and I did not have quite enough left to make long sleeves. I'd read somewhere in my research for this project that there was evidence that some German gowns had short sleeves. These gowns could be worn over a long sleeved under gown, or separate long oversleeves might be pinned to the bottom of short sleeves. So, at a later date, I will probably make a separate set of sleeves for this dress, but I decided to just wear the dress with short sleeves on that very hot day I visited the Ren Fest. This was comfortable, and it allowed me to show off my pretty puffy
smock sleeves.

Once the sleeves were sorted out, it was on to the skirt! I made the skirt from two panels of 60" wide wool, put pockets in the side seams, and cut a slash about 10" deep at the center front. The slash was then faced with some brown denim (left over from
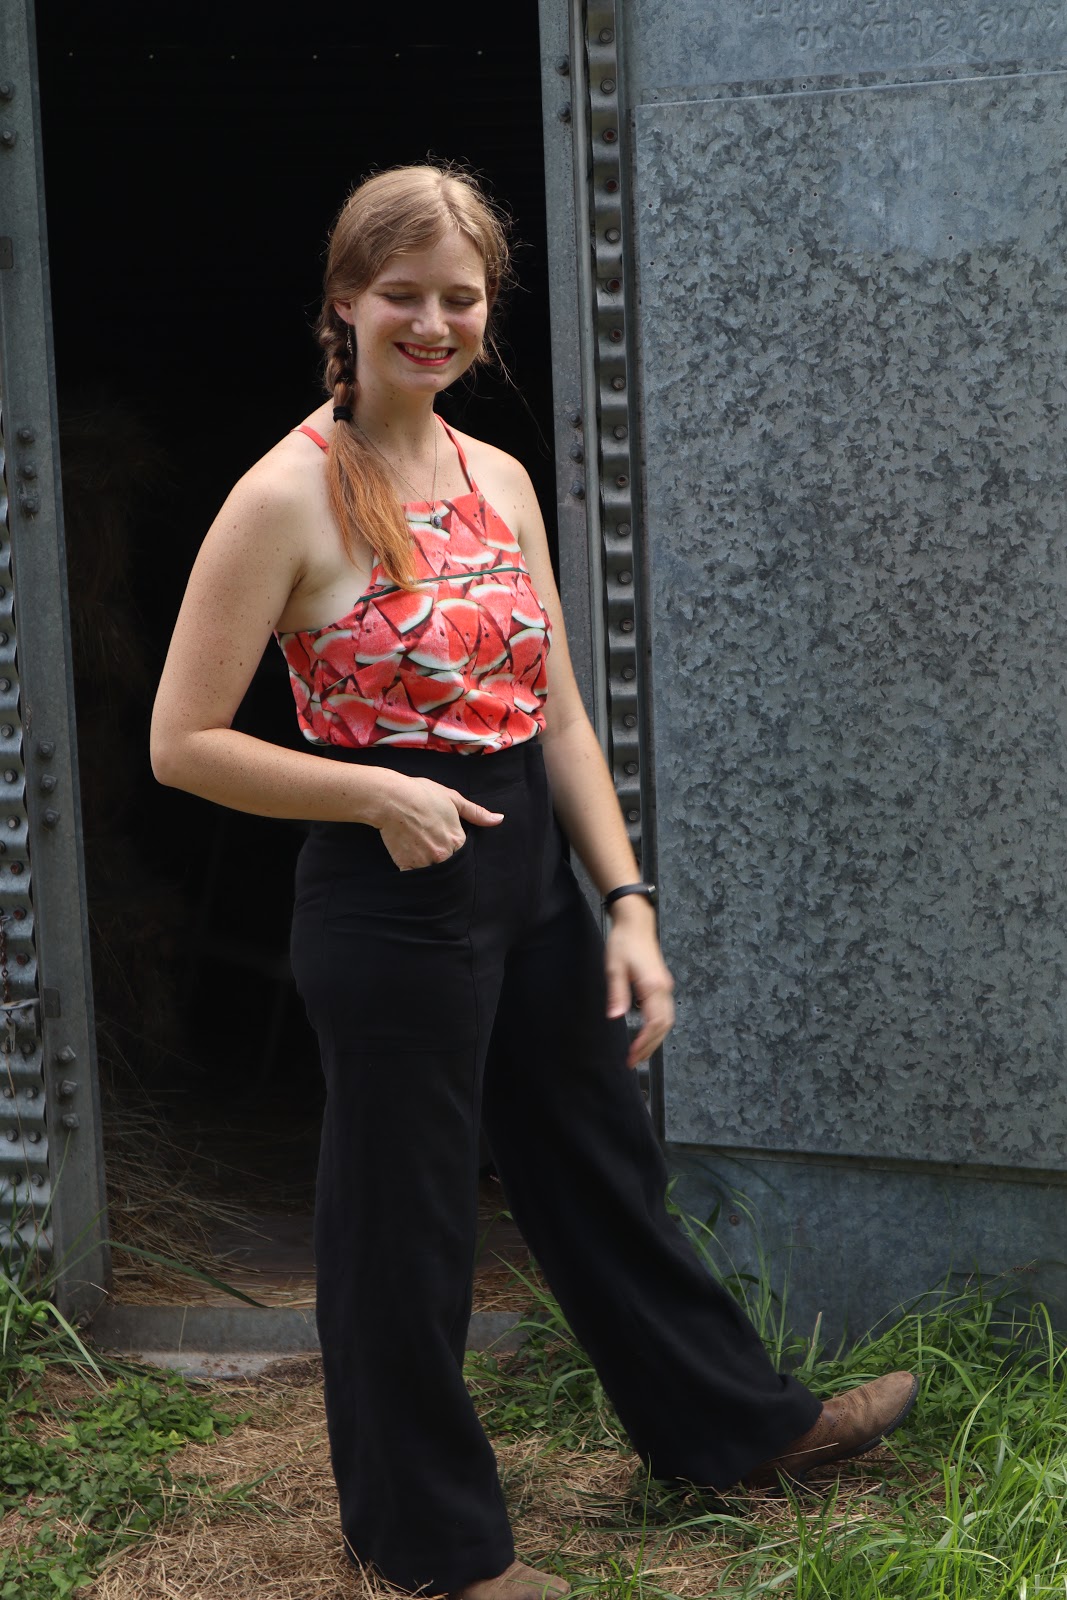
these shorts) to finish it off, and the top edge of the skirt was cartridge pleated, then whip stitched to the bottom edge of the bodice.
I don't believe that facing is at all historically accurate, but it does it's job of finishing off the skirt opening neatly and was quick and easy to do.
The hem of the skirt, meanwhile, also got a facing of brown denim. I'm not sure if hem facings were used at all during the 16th century, but they are my favorite method of finishing skirt hems, so I went with it anyway. On the outside of the skirt, just a couple inches above the hem, is a band of black wool to match the neckline guards on the bodice.
And finally, on the night before I was to go to the Renaissance Festival, my 16th century German gown was finished with hooks and eyes down the front opening. I consulted Patterns of Fashion 3, by Janet Arnold, to figure out what sort of fastenings would be best, and it turns out hooks and eyes are the most historically accurate choice here!
I alternated hooks and eyes on either side of the opening, as advised in The Tudor Tailor, by Jane Malcolm-Davies and Ninya Mikhaila, which gives a much more secure closure than having all the hooks on one side and all the eyes on the other does. Now I think I need to go back and change the hooks and eyes on all my historical dresses to be like this - but I really don't relish the idea of re-sewing on all those hooks and eyes on all those dresses, so there's a good chance that will never actually happen.
The final hook and eye were sewn on around midnight the night before I was to visit the Renaissance Festival with my best friend. It was finished! I had a dress to wear!
It's a super comfortable dress to wear, and I'm honestly thrilled with how it turned out.
This orange wool dress suits me perfectly!
Historical Sew Monthly September 2019 - Everyday
What the item is: Wool German Renaissance Gown
How it fits the challenge: It's a rather basic wool gown which could have been worn for every day life.
Material: Wool - plain weave woolen orange, twill weave worsted black. Linen-rayon blend (harvested from a thrifted skirt) for the lining. Cotton duck canvas for interlining. Light weight denim for hem facing.
Pattern: I adapted McCall's M7763
Year: First half of the 1500's
Notions: Thread, hooks and eyes.
How historically accurate is it? Not very. This is my first attempt at anything even remotely correct for any era before the mid to late 18th century, so I still have a lot to learn.
Here's what I think I got right: Wool would be an accurate choice for a gown like this. (Honestly, I'm not even sure gown is the correct term for this garment, but I don't know what else to call it) The hooks and eyes up the front would be an accurate fastening. Cartridge pleated skirts were done in the era I believe, so that's accurate. Looking at paintings online, short sleeves attached to gowns were a thing, but they would have had long wool sleeves pinned to them. Due to the current heat, I opted to skip those pin-on sleeves for now. (And I wanted to show off my smock sleeves, even though the smock is from about 50 years later than the gown.)
As for what I know is wrong: The lining should be 100% linen, not a linen-rayon blend, the interlining should also be linen, not canvas. Actually, I'm not even sure interlining would have been a thing, but as I was wearing this without a supportive undergarment, I decided to add an interlining for the support it gives. This is about 80% machine sewn, and I know almost nothing about construction methods from the era. I do not believe a hem facing is accurate. The sleeves are sewn to the bodice around the top of the sleeve, but left free at the bottom for ease of movement, and I don't believe that's accurate for sewn-on sleeves.
All in all, no more, and quite possibly less than, 40% accurate. I don't know enough about this era to make something very accurate yet!
Hours to complete: Not sure on hours, but it took 3 evenings of work.
First worn: 9/29/19 for the Renaissance Festival.
Total cost: The orange wool was gifted to me, the black wool cost $6 a yard and was left over from another project. I used less than half a yard. The lining started out as a $3 skirt from a thrift store. The duck canvas cost me 50 cents. The hooks and eyes were about $2. I spent $2 on a spool of orange thread. The denim used for the hem facing was left over from another project. It originally came from thrift store, and I don't remember how much it cost. The pattern was picked up for $2 on sale. So all together, under $15 for this project.