Friday, April 19, 2019

Making Professor Minerva McGonagall's Plaid Hat

This is absolutely my favorite thing I made the first week of April. (And that's saying something because that particular week was a very productive one in the sewing room!)


My high school biology and chemistry teacher contacted me in March, asking if I could take on a commision for her. The school she now teaches at was having a "Hairy Pawter" themed open house, and she needed a Minerva McGonagall costume for the event.


Now this was right up my alley (especially considering I made myself a Minerva McGonagall inspired 1890's outfit last summer), so I was thrilled to accept the commision from one of my favorite former teachers!

Image found on Tumbler

She already had a black blouse, and it was decided a black graduation robe (something easily acquired second hand in a college town) would work well for the robe portion of Professor McGonagall's outfit. Thus, all I needed to make for the costume was a plain black skirt and Professor Mcgonagall's distinctive green plaid hat (seen for the first time in the second Harry Potter movie.)


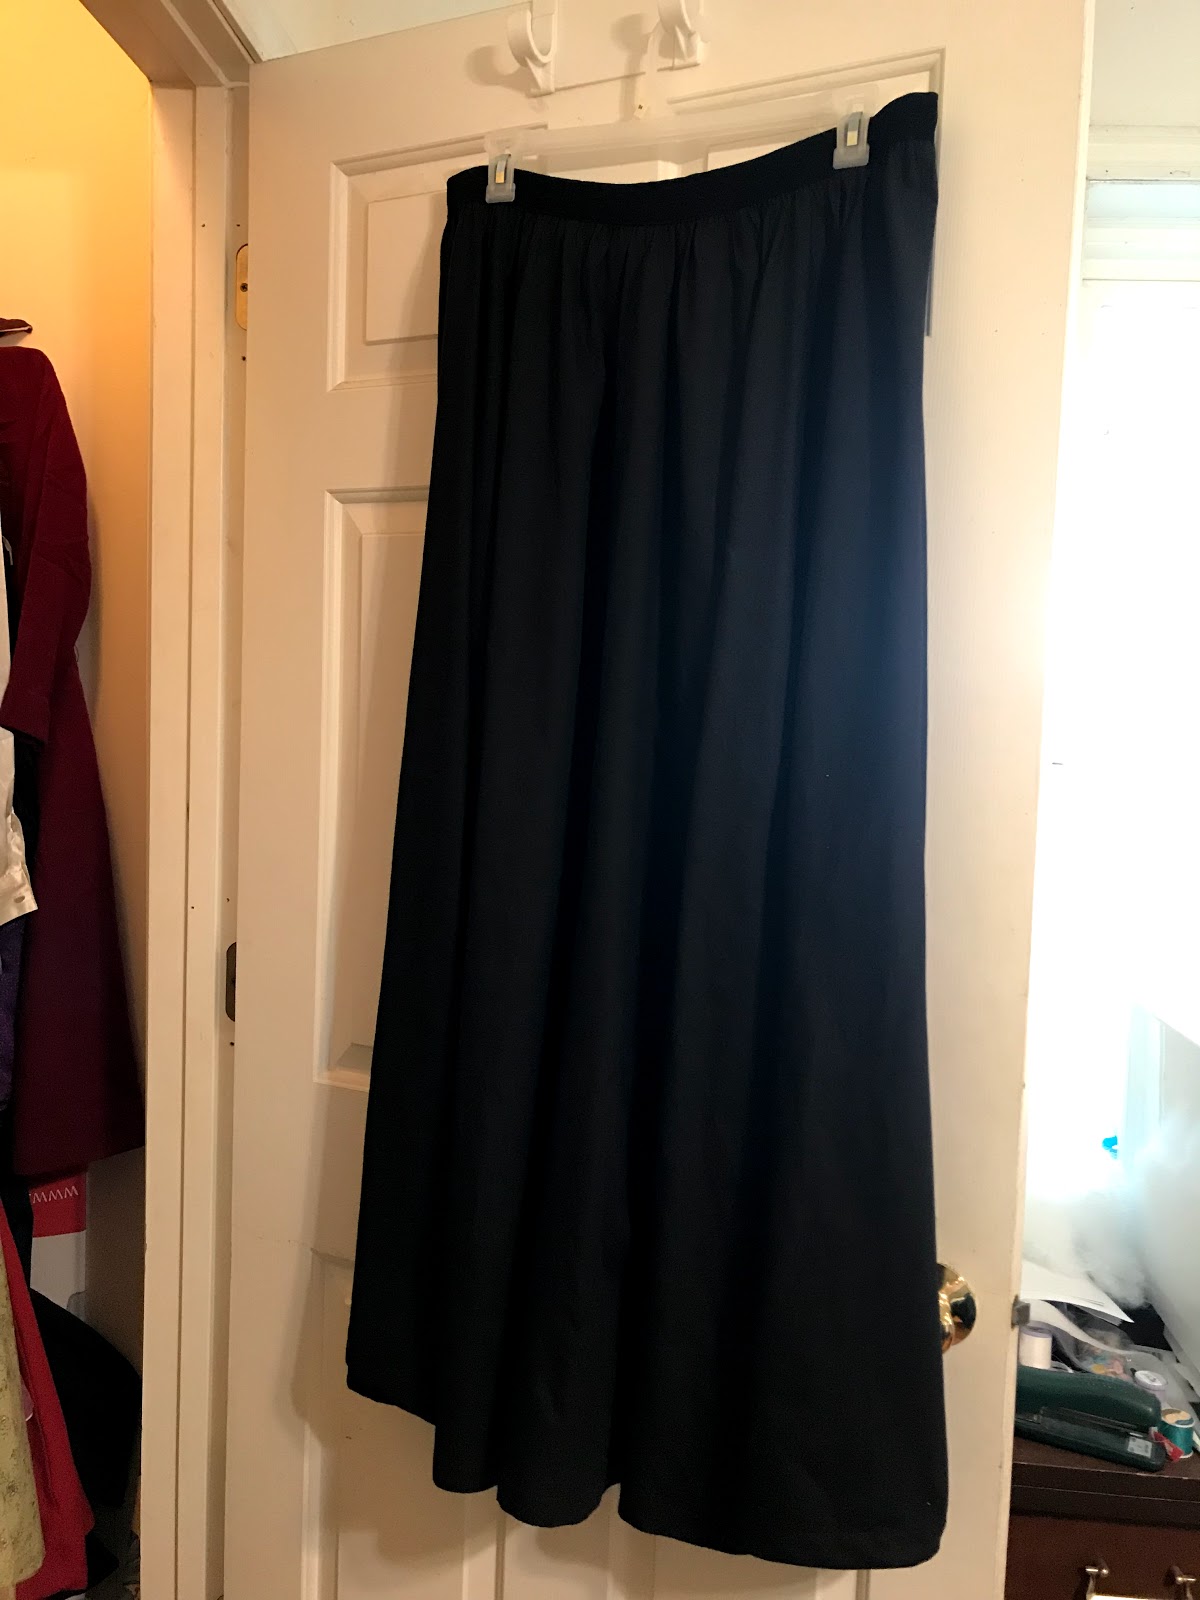
The simple elastic waist black skirt was easily assembled in a couple hours one morning, then it was on to the fun part of the commision - the hat!


I decided to use Simplicity 4677 (a reprint of a 1970's pattern), view 1, for the hat itself, as it appeared to be just the right shape and size. For the brim, I adapted the brim pieces from Simplicity 1293, view E. I drafted the earflap pattern myself.


As for materials, the main fabric is a plaid cotton flannel, the brim is stiffened with interfacing, and the crown is stiffened with a sew-in foam interfacing and lined with the black poly/cotton broadcloth leftover from making the skirt (mentioned at the beginning of this post). All the fabrics and interfacings came from Joann's.


I cut out the foam interfacing for the crown without any seam allowance, then centered it on the crown lining.


I attached the foam to the lining, by zig-zag stitching all along the outer edge of the foam.


After that, I decided the lining and interfacing could be anchored together a bit better, so I decided to do some basic quilting.


I marked lines from the point of the crown to the bottom edge, and sewed along them.


Once that was done, I was satisfied the hat would be able to hold it's shape, and the lining would not be droopy in any way.


So I sewed up the center back seam of the lining.


Per the instructions of Simplicity 4677, I left the middle 3" of this center back seam open so I'd be able to turn the hat right side out later.


With the lining all ready to go, it was on to the visible, pretty, part of the hat.


It was obvious from the 45 degree angle of the plaid in all the pictures I referenced, that Professor McGonagall's plaid hat was cut on the bias. So, that's how I cut my reproduction.


I re-shaped the front brim from Simplicity 1293 ever so slightly to curve smoothly in the center front, rather than ending in a point.


As the underside of the brim and earflap pieces were likely to be seen, each piece was "lined" with the same fabric. Once all the pieces were cut out, I interfaced them.


The front and back brims were fused with a stiff apparel interfacing - the type of stuff used to interface shirt collars. This would lend the perfect amount of structure to the brim.


The earflaps didn't need any stiffness added to them, just a bit of structure. So, I used non fusible interfacing on them, and instead opted to interline them with another piece of flannel - this one cut on the straight of grain, rather than the bias, to prevent the ear flaps from stretching out of shape. For the ties at the end of the earflaps I decided to use a black and metallic ribbon-type trim acquired on clearance from Hobby Lobby. It coordinated nicely with the plaid, and I already had it in my stash!


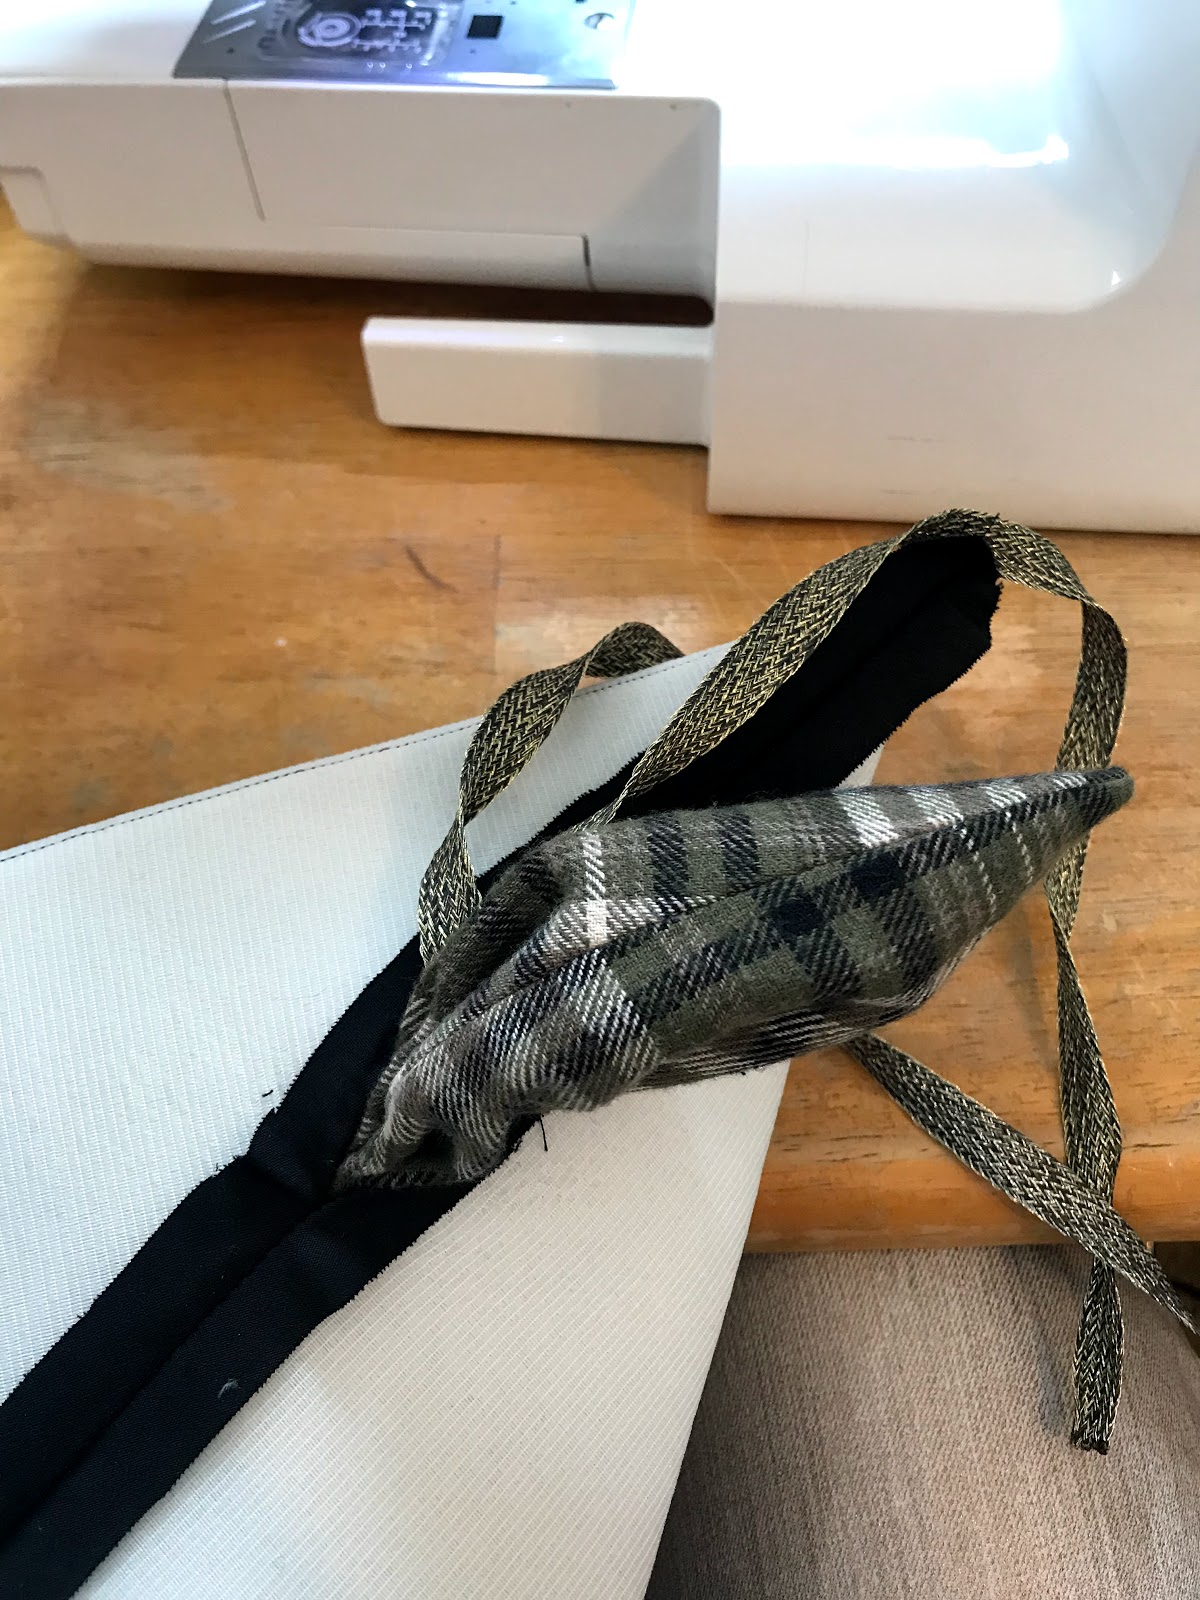
Once all the pieces were properly interfaced or flatlined, I sewed the top fabrics and linings of each piece right sides together, leaving the top edge, where they would attach to the crown of the hat, open.


I sewed up the back seam of the crown, turned everything right side out (and pressed it flat), then pinned the brim and earflap pieces to the bottom edge of the crown.


Once it was all pinned in place, the plaid hat was placed inside the crown lining. The brim and ear flaps were sandwiched between the crown and crown lining pieces and everything was pinned together.


Finally, I sewed everything together all around the bottom edge of the crown.


Then I turned the hat right side out, by pulling everything through the opening left in the center back seam of the crown lining.


Once everything was pulled through, I used the ladder stitch to close up the opening, and the hat was done!


The ear flaps can be tied down under the chin. . .


Or up behind the head!


I think either way, the trim I used for the ties blends in very nicely. 


The original hat in the Harry Potter movies, had matching fabric ties. I decided against making those because I didn't want to turn itty-bitty tubes of fabric right side out. That can be time consuming and finicky! Thus, I'm very pleased with how the not-entirely-matching tied turned out.


The hat took under two hours to make - which is pretty quick considering I'd never made a hat quite like this before so I was figuring out the pattern and order of construction as I went along!


My former teacher was thrilled with her hat when I delivered it, and I hear she was instantly recognizable as Minerva McGonagall at the "Hairy Pawter" open house the following Saturday - which is just what we wanted!


And now? I want to make a hat list like this for myself! I think I need one in my costume wardrobe! (or even in my everyday wardrobe??)

Monday, April 15, 2019

Bishop-Sleeved Shirts

There was one day, about 2 months ago (maybe longer now) where I cut out 8 knit shirts, all to be sewn up in the following week. Three of these shirts were for a commission. Two were for my mom. One was for my sister. And two were for me. Here are those two shirts.


Yes, they have their differences, but they also have one striking similarity - both have wonderfully puffy bishop sleeves.

Bishop Sleeve: a long full sleeve usually gathered on a wristband and adapted from a bishop's robe. (Merriam-Webster Dictionary)


Now the unseen similarities are these: both shirts were added to my very long to-make list around the same time last fall, both shirts are rather hacked versions of tried-and-true patterns, and both are made from fabrics I've been hoarding saving for quite some time.


The red shirt began with the Brooks Blouse pattern by Brijee Patterns, and the pink shirt began as the Outer Banks Boat Neck by Winter Wear Designs. Both patterns went through some changes to match the ideas I had in my head.


First up, the Outer Banks Boatneck! Now I believe this is the seventh shirt I've made from the pattern. Personally I'm not a fan of bateau necklines on myself, but the fit of this pattern is excellent, and I can change up the neckline to be just about any shape I choose. 


This time I opted to cut the neckline square, finish it with a facing, and add decorative top stitching all the way around.


I do like how this neckline shape worked out, and will have to repeat it in the future on another top!


As for the sleeves, these will most certainly be repeated on future garments as well, but I can't take the credit for them. They're not my own personal hack or anything. No, these fabulous, long cuffed, bishop sleeves were much easier than that - no pattern hackery required!


Back in December, Winter Wear Designs released a knit sleeve add-on collection. Three beautiful, fun, sleeve patterns which are compatible with any of the knit tops in the Winter Wear pattern collection. And, even better, there's a coupon code available in the Winter Wear Designs Facebook group which makes this sleeve collection free!


As soon as I saw the sleeve collection, these bishop sleeves had my attention, so I downloaded the pattern the day it came out. Then it only took me a month or two to get around to doing anything with it.


 Eventually, this square-necked, bishoped-sleeved shirt got made, from a beautiful rose-pink rayon french terry, I acquired at Walmart last summer. My sister calls the finished top my "Medieval Princess Shirt" due to the sleeves and the neckline.


I do love how this shirt turned out, and I just might feel like a princess while wearing it, so I'll accept the title my sister gave it!


And now, onto the fabulously hacked, full-sleeved, Brooks Blouse!


I acquired the fabric for this shirt over a year ago at a little Amish store - for 50 cents a yard!


It's a textured cotton knit without a whole lot of stretch to it. It would not have been suitable for a tight fitted garment, due to the lack of significant stretch, but this fabric had just the right amount of body to it to be perfect for the Brooks Blouse!


The Brooks blouse was inspired by 1940's designs, with a loose fit through the top, and inverted box pleats at the waist, making this blouse very easy to tuck into skirts and pants. The pattern works well with both drapey wovens and sturdy knits. If made from a woven material, the blouse is made to button up the back and the neckline is finished with a facing. If made from a knit, there is no need for buttons, so the back of the blouse is cut on the fold, and the neckline is finished with a neckband, rather than a facing.


For my red knit Brooks blouse, I decided to combine both the knit and woven options. The back of the shirt is cut on the fold, no buttons or other closure method required, while the neckline is finished with a facing. (Which I top-stitched in place, because I don't like facings that don't stay put, but don't mind visible top stitching.)


As for the neckline shape, I combined two different options for that as well. Last summer, I made two different Brooks blouses, one in knit, one in woven, both with a V-neck. This time I wanted something different, so I combined the V-neck option, with the boat-neck option, to get a notched boat neck style neckline. I quite like the result!


Now the neckline wasn't the only thing I changed on the pattern for my red knit blouse. As mentioned at the very beginning of this post, the sleeves are really the crowning glory of this make.


The pattern features only straight sleeves, but those are easy enough to change up! To make bishop sleeves, I used the slash and spread technique, cutting my pattern piece from the bottom of the sleeve to the shoulder in three different places so the sleeve was comprised of 4 different long strips all attached together at the shoulder.


Once the sleeve pattern was cut, I slid the long strips apart from each other to make the sleeve hem nice and wide. I taped scrap paper behind the strips to make one solid sleeve piece, and my bishop sleeve pattern was ready to go.


I cut out my shirt, and sewed it up. The bottom of the sleeves got gathered into narrow cuffs.


And the bishop sleeves are just as puffy and awesome as I'd hoped they would be!


There's just something about wearing puffed sleeves of any sort that makes one feel fabulous!


Both of these bishop-sleeved shirts have been welcome additions to my wardrobe, and I can almost guarantee I'll be adding similar sleeves to future garments!