Showing posts with label Capsule Wardrobe. Show all posts

Monday, March 19, 2018

The Work and Play Capsule Wardrobe

6 garments. They all make fantastic individual additions to my wardrobe, but they can also be worn together in multiple combinations. This is the mini capsule wardrobe I made for the pattern review contest. 1 cardigan, 2 pairs of pants, and 3 shirts.


When I began to plan my capsule wardrobe I knew immediately that I wanted to make it as versatile as possible. I wanted a wardrobe that would look "at home" in both "work" and "play" situations. I wanted my outfits to transition from a more formal look to a fun look with the exchange of just one garment.


For maximum versatility, I made the first item of my capsule wardrobe, the cardigan, reversible. After I made the cardigan, the next step of assembling this mix and match collection was to make two pairs of pants. In keeping with my goal of having a variety of looks with just the one set of clothing, I made these pants to be opposite of eachother. The first pair are loose, flowy, and made of dark gray wool. The second pair are skinny jeans made of bright metallic gold stretch denim.


When it came to the shirts, I knew right away that I wanted to make all three in different styles. One would be a button up blouse, one would be a tank top, and one would be a basic T shirt. These three things would look great with both pair of pants, and my cardigan.


After I picked out my fabrics and patterns for the shirts, I decided to start with most boring one - a plain, black, T-shirt. A wonderful wardrobe staple that I clearly needed. Easy to sew, but not very exciting.


To make the shirt I used my basic dolman T-shirt pattern and a remnant of  black Ponte de Roma from my stash. The stability of the ponte lent an edge of formality to this otherwise casual pattern, making the the T-shirt look just right with my wide-legged pants. Unfortunately, I didn't have quite as much of the fabric as I thought I had, so I had to piece together the back of the shirt. I used the ponte for a yoke, and some plain black jersey for the rest. I'm not complaining though, because I love the visual interest that the back now has. A happy accident indeed, as this top now can't be called boring at all!  


As another design feature, I also added sleeve ruffles. They add just the right amount of fun to this "boring" black T-shirt!

My next shirt, a tank top, didn't need any design changes at all to make it interesting. The fabric took care of that. 


I acquired this purple, floral, patchwork, soft, drapey, mystery fabric in Malaysia. Once it arrived home with me, I immediately saw that it was just the fabric to turn into the Burda 6969 tank top. This pattern had been in my stash for quite a while now, waiting for just the right fabric!


The capsule wardrobe contest was just the push I needed to actually make the tank-top. I put off making it until now because it's been much too cold outside to think of wearing anything sleeveless! Thankfully, my reversible cardigan solved that delema for me, as this flowy purple tank top looks good layered under the cardigan, or alone with either of my newly made pairs of pants.


For my final shirt, a button up blouse, I decided to match my tank top in color and stick with purple for two reasons, a) it's one of my very favorite colors, and b) having two purple shirts created a very nice cohesive look for my capsule wardrobe. The color however, is where the resemblance between the two shirts ends. Where the tank is loose and flowey, the blouse is fitted. Where the tank has a wide, open, neckline, the blouse has a modest V.  And where the print of the tanktop fabric is a little bit of everything, the blouse blouse fabric is a uniform plaid. These differences though, do not mean the blouse is any less fun! Oh no, not at all!


When I decided to make a button up blouse as my third shirt, I immediately knew just what fabric I would use - this purple plaid I acquired at the mennonite fabric store a couple months ago. The only challenge was deciding what pattern I would use. After rifling through my pattern stash multiple times I finally decided on Simplicity 1460.


The scalloped neckline, fitted bodice, and peplum made this pattern catch my eye, and I'm so glad it did! This blouse features double diagonal bust darts, a dart formation I'm never before used, and they give the perfect fit. This pattern will definitely be used again!


Of the three shirts, this blouse is definitely my favorite. The other two shirts look best tucked into the wide-legged pants and worn loose with the skinny jeans, but thanks to the peplum, this shirt looks good worn either way with either pair of pants. Truly a versatile garment!


So there you have it, 6 items that can be worn in 12 combinations and look fabulous in all of them! I think I nailed this challenge! 


You can see my official Pattern Review entry on my capsule wardrobe, with links to my individual project reviews, here.

Tuesday, March 13, 2018

Why Not Metallic Gold Skinny Jeans?

I *think* I once said I had no interest in ever sewing myself jeans. Well, I was wrong.


This weekend I sewed myself a pair of jeans, real jeans, with a zipper fly, belt loops, rivets, a jeans button (the kind you hammer on, not sew on), lots of top stitching, and all.


Yes, I may have gone crazy. As you know, I made myself a pair of wide-legged wool pants as part of the Pattern Review capsule wardrobe contest. So, for my second pair of 'bottoms', I decided to make something that was the opposite of those.


Since the wool pants are, well, wide-legged, and rather conservative in color, I decided I would make myself a pair of narrow-legged pants in a flashier color. Skinny jeans. In metallic gold denim. 
Once that was decided, I went to Joann's the next time a pattern sale rolled around, and flipped through the Simplicity pattern book looking for a skinny jeans pattern. I found Simplicity 8516, and brought it home with me.


Originally I planned to make these jeans out of a purple stretch sateen I have in my stash, but then I did a bit of online fabric shopping (oops. . .), and this metallic stretch denim from fashionfabricsclub.com found its way to my front door to be turned into the skinny jeans instead. (It's a dangerous thing, the ability to have new fabric delivered right to your door.) Once that metallic denim got pre-washed, skinny jean making could commence.


The fun part of jean making is the pockets. I was excited to design and topstitch the back pockets, so I did that first thing to keep up my enthusiasm for the project. I used two colors of topstitching thread, ivory and bronze, and free-handed a design onto one pocket. I then mirrored the design on the other pocket.
I couldn't leave the front pockets out of the fun, so I decided to line them with this bright purple floral/patchwork fabric I brought home from Malaysia. It adds a pop of color to the inside of the jeans, making them lots of fun to wear. (As if metallic gold isn't fun enough on its own.)


The scariest part of making jeans, for me atleast, was the zipper fly. I just couldn't wrap my head around how one would construct such a thing. Luckily, the pattern instructions were incredibly clear and helpful, and in no time at all, the fly was done. And it turned out better than I expected!


The thing that took the longest on these jeans was All. The. Top. Stitching. The top stitching itself wasn't too bad, but rather it was re-threading the machine every time I needed to top stitch that took so much time.


As I mentioned above, I used two colors of top stitching thread for this project. Ivory and bronze both appear on almost every single top stitched seam. That's A LOT of re-threading.


Once I was done with all that top stitching, I decided that these jeans had better actually look 100% like jeans. So, I added rivets to the pockets and hammered a button onto the waistband. There!  
Hardware and everything, I had made a pair of jeans!


I pulled them on, buttoned them up, and felt like jumping for joy. They fit! They were comfortable! And they actually looked and felt like jeans! I'd done it!


These may not be the most perfectly fitted pair of jeans in existence, but that's ok. I made them, I'm proud of them, I will wear them, and they are an excellent start to my jeans making journey.


Because, now that I know I can make jeans, one of these days, I'll probably make another pair. Why not? 

Sunday, March 4, 2018

The Most Comfortable Wide-Legged Wool Pants in Existence

I looked in the full length mirror and frowned. These pants I'd just made were not all I expected them to be. I wasn't sure I like them on myself. They were a total departure from my everyday style, but,  oh. my. goodness. They were the most comfortable pants I'd ever worn - like sweatpants, only better.


When I set about planning my capsule wardrobe for the Pattern Review contest, I was stumped when it came to the "bottoms" my capsule would contain. I mostly just wear jeans, and as I have a whole drawer of those, I don't need to make myself any! So what would I make? Skirts? Pants? What Styles? What would I get the most wear out of? With these questions in my mind, I thought back to what I wore most last year on the World Race. I had only one pair of jeans I wore occasionally, a maxi skirt I wore often, and a split skirt I wore almost as often as the maxi skirt. 


Well, I have plenty of maxi skirts in my closet right now, so I decided against making another right now. Split skirts, however, I only have one of those, but did I really need another? No, not really. One is enough. What about something similar, though? Maybe a pair of wide-legged pants? Yes! I decided I would make myself a pair of wide-legged pants. I already had the perfect pattern and fabric in my stash!


Fabric might actually be a bit of an overstatement. I had a pattern, Burda 6573 (an impulse buy during a pattern sale because it reminded me of my split skirt), and a gray wool pleated skirt (an impulse buy at a thrift store, because I love sewing with wool) in my stash. 


The first thing I did was go to work on that skirt with a seam ripper and an iron to turn it into a flat piece of fabric. Thankfully, this resulted in an incredibly soft piece of wool fabric just big enough for all my pattern pieces! The second thing I did was go to work on the pattern to take it from "nice pattern" to "fabulous pattern". 


The pattern didn't have a true side seam, rather it had a narrow front panel and a wide back panel that wrapped around to the front of the pants. This put the "side seam" on the front of the pants, a feature that was highlighted by non-functional buttons at the waistband. I loved the resulting look, but I figured I could make it even better by adding another seam, and of course, making those front buttons functional. 


 I split that wide back panel into two pieces so that I would have separate back and side panels. The new side panel made the perfect home for some nice deep pockets - a must for any pair of pants!

The outside and inside view of the side panel pockets
Originally the pants were supposed to have an invisible zipper in the center back seam, but I decided to omit that and make functional button plackets on the front side seams instead.


The result was an incredibly comfortable pair of wide-legged, button-up, deep-pocketed, high-waisted wool pants.


I love the look of them from the back! The darts shape the back waist just perfectly!


Now the front of the pants, well, they're growing on me. These pants are definitely a departure from my everyday style, but the more I wear them, the more I like them. Have I mentioned that these pants are incredibly comfortable and have great pockets??


So now, when I put these pants on and look in the mirror, I puzzle over what kind of shirt will look best with them. Then I put that shirt on and wear the pants with confidence. Because pants as comfortable as these deserve to be worn outside the house, and it's time my personal style consisted of more than just jeans and dresses. Thus, despite my initial hesitations, these pants are getting worn, and my capsule wardrobe is one step closer to done!


One set of bottoms sewn, what will the next one be?

Sunday, February 25, 2018

Of Sweaters, Capsule Wardrobes, and Baby Goats

"One more sewing challenge? Why not?"
That was my thought when I saw the Pattern Review capsule wardrobe contest. A set of 6 garments, consisting of one "topper" (jacket/cardigan/ect.), two bottoms, and three tops, that mix and match well. What a great addition to my wardrobe that would be! Yes! I would do it! I was already planning on making myself a new cardigan, so I might as well make five things to go with it. (Never mind that I have a closet full of clothes that work with said cardigan) Thus, I signed up for the contest.

My bottle babies (each the smallest from sets of triplets!), Ruby and Milkyway.

Then baby goats took over my life. Literally. I went from having a pasture full of pregnant goats, and plenty of sewing time, to having a pen full of new mamas and babies, a field full of goats about to kid, a shed full of goats in labor, interrupted nights of sleep, and almost no sewing time. (And I'm not complaining about it because I really do love kidding season and baby goats are just the best, most adorable, little things!) Now, the thing to do in this situation is to acknowledge the fact you don't have time to take on any new sewing projects and put all current projects on the back burner. 


Unfortunately I'm stubborn and I haven't done that. Rather, my mind has kicked into overdrive and my sewing room is more cluttered than ever with patterns and fabric stacked together and waiting to be sewn into all sorts of awesome things - 1890's shirt waists, 1890's tea gowns, 18th century stays, 18th century gowns, 1950's inspired dresses, dresses for my sister, and capsule wardrobe pieces - and I have almost no time to sew any of it! My projects are piling up much faster than I can make them! I'm running out of room in my sewing room to actually do any sewing!


So, sewing this capsule wardrobe for myself. It sounds like a really crazy plan right now, doesn't it? Well actually, it's not. Most of the pieces I have planned are actually pretty simple and can be sewn up in a couple hours, whenever I can catch a bit of time in the sewing room. They are things I can actually get done right now, as opposed to the historical projects I have planned. Amidst all my plans for big sewing projects, I think these smaller projects are keeping me sane. At the end of each week I can look back and see that I've completed something other than feeding goats and cleaning out sheds, and that's pretty darned nice! The things I sew will stay sewn, where as, the goats I've fed, will need to be fed again the next day, and sheds will get dirty again.


My big historical projects? Those need to get boxed up for the next month or so until the goats are less crazy. But this capsule wardrobe? It's happening! 1 cardigan, 1 T-shirt, 1 tank top, 1 blouse, 2 pairs of pants. Those are my plans, and the first three items are already checked off the list! As I mentioned above, when I found out about the contest, I already had plans to sew a cardigan, so that was the first project on the cutting table!


In a lot of ways this cardigan was the definition of an easy sew. Only 5 seams and no hemming required! The only thing that made it slightly complicated was my decision to make it reversible.


I've had the idea to make a reversible, blanket-type, drapey cardigan for over a month now. I saw a friend wearing a sweater that met that description and my first thought was "I like that," quickly followed by "I could make that!" 
From that day on I was keeping my eyes open for just that right fabric. When I spotted a thick sweater knit on the clearance rack at Hobby Lobby, I knew I'd found what I was looking for!


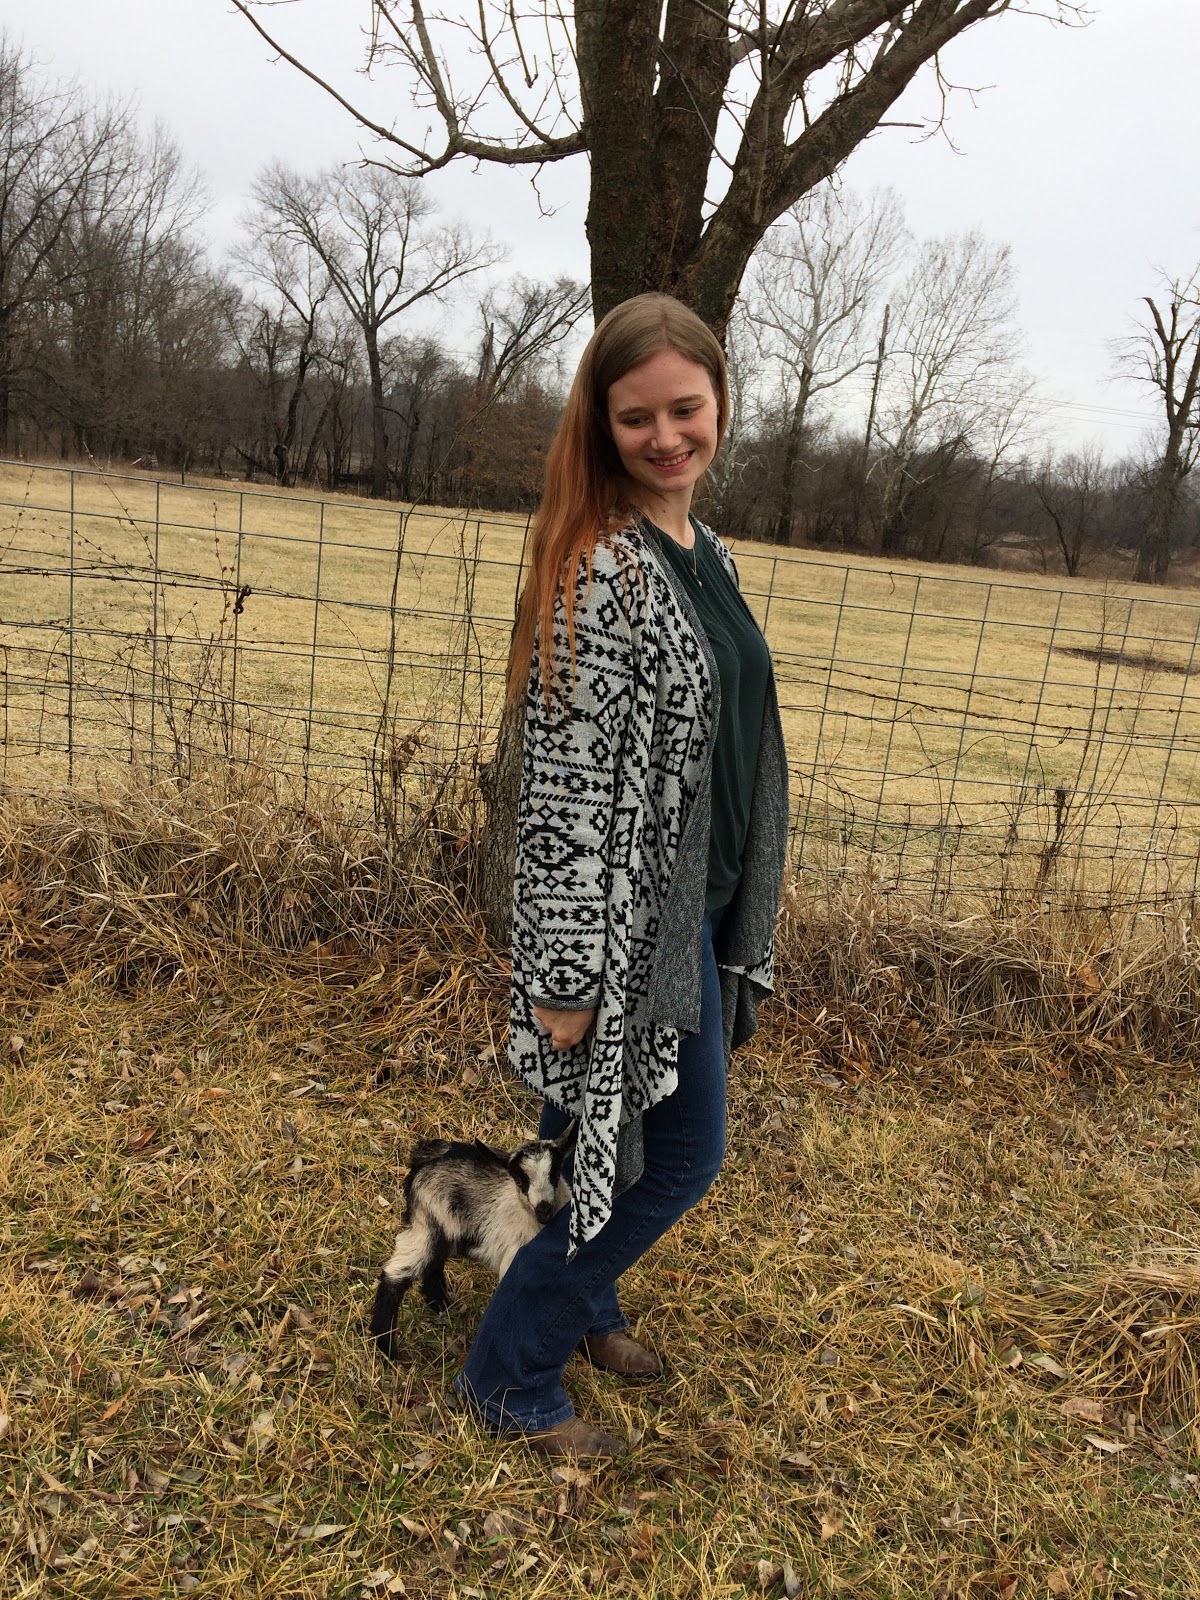
 One side of the fabric is a black and white tribal pattern, while the other is just black and white yarn knitted together to make a solid(ish) gray. Being a neutral color, with both a patterned and a solid side, my reversible sweater will go with just about anything!


Fabric in hand, I found Simplicity 8021 in my pattern stash and was happy to see it had the shape I was going for with this project! All I had to do was alter the neckline to get rid of the collar the pattern had. That was easy enough to do! I also, of course, added large patch pockets to the patterned side of my cardigan.


The body of the sweater only has one seam straight down the center back, (no side seams at all!), and I am thrilled with how my pattern matching on that one seam turned out! The pattern on two halves of the sweater is almost perfectly mirrored!


That one seam, along with the sleeve seams, is flat-felled so that it looks equally good on both the patterned and solid sides of sweater. No seam allowances seen anywhere!


My reversible blanket cardigan turned out just as I hoped it would - even though I made it in the middle of kidding season :)