Showing posts with label Unusual Fabric Source. Show all posts

Monday, January 6, 2025

The Green Taffeta "OOPS" Off-the-Shoulder Christmas Dress

 "On the Twelfth Day of Christmas my true love gave to me Twelve Drummers Drumming. . ."

Ok, I think I'd rather pass on that particular gift. I'll take the 3 french hens, the 5 golden rings,  the 6 geese a-laying (my chickens are on their winter strike right now, so any laying birds would be useful), or even the 8 maids a-milking (Although since all of my goats are currently dried off and pregnant, and even when they are in milk I rarely have 8 needing to be milked at the same time, 8 milk maids *might* be over kill.), but please - not the 12 drummers drumming. That sounds rather loud, and I have enough noise in my life right now, thank you very much!

It's been 5 months of silence on this blog however, so on this twelfth day of Christmas I have come to finally do some "drumming" so to speak and share about. . . Christmas? My Christmas Dress this year? Life? Maybe all three? I honestly can't tell you where this blog post is going to go (the intro has already gone very differently to what I've been rehearsing in my head the past week), so I suppose I'd better just start writing and we'll see where this goes.


I did make myself a Christmas dress this year. I finished it at about midnight, or a little after, the night before our first family Christmas gathering of the year. I made no Christmas gifts this year - but I did make Christmas outfits! Boy did I make Christmas outfits! 


After more Christmases than I had wanted where it was just my husband and I, this year that all changed. Our house is now much fuller and much more noisy than it used to be - and Christmas was much more exciting! 
This year there was a massive pile of toys under the Christmas tree to be unwrapped Christmas morning. 
This year we had kids (or atleast one kid. . .) singing "Joy to the World" in the kids Church Christmas Program.
This year there were more than two stockings hanging from the mantle (though the kids didn't know about their stockings until Christmas morning, because, ummmm, I didn't finish sewing those until Christmas eve - just in time for Santa Clause to fill them)
This year was a whole lot more hectic than last year - and contained a whole lot of answered prayers.
We don't know how long these kiddos will be with us, but we love them - and as I regularly tell our eldest whenever he asks - they'll have a home here as long as they need it. Be that only a little while, or forever.

This year the kids Christmas outfits were all done with days (or even a whole week in one instance!) to spare before they were needed, it was only mine that was done truly last minute - and my incredibly sloppy back zipper application is a testament to that.


Of course, the Christmas outfits were all planned months in advance! I started day dreaming about them probably in September or October (once I'd wrapped my head around the "instant family" situation in our lives and started thinking about the months to come).
I quickly decided that the dresses would be green - because our little lady would look darling in green - and they would be accented with some sort of festive plaid - so the boys could have matching plaid shirts. 


With that in mind, I picked up 4 yards of a Christmas-y cotton and metallic plaid from Hobby Lobby. Then I went to my fabric stash to pick out a solid green green fancy dress fabric to pair it with. After considering multiple options, I finally settled on the remainder of the green taffeta I thrifted years ago and used for the vests my brothers wore in my wedding and one of my sister's prom dresses. It was about time I used this beautiful fabric to make something for myself! 

Now all that was left was to pick a design!

As far as that went, lots of different ideas flitted around in my mind, but I wasn't in love with any of them until I noticed a 1950's style dress on the cover of an audiobook I was listening to.


That wide band framing a bateau neckline, the 3/4 length sleeves, and full skirt - yes! That was exactly what my Christmas dress should be! And I had the perfect pattern for it already in my stash - Butterick 6129.


View C looked like it would be exactly what I was wanting if I made a couple small adjustments.


Slightly longer sleeves, slightly fuller skirt, and slightly lower neckline. Totally doable!


I cut the dress out of green taffeta being careful to add my sleeve length and skirt fullness. Then I used an old flannel sheet to line the whole thing - my flannel house dresses (and this Christmas dress from a couple years ago) are my very favorite things to wear in the winter, so I decided to incorporate that coziness into this year's fancier Christmas Dress. (Honestly, I was tempted to skip the fancy dress this year and make my Christmas Dress out of the green herringbone flannel in the fabric photo a few pictures back, but alas, Joann's did not have enough yardage for me to be able to do that - probably a good thing since using what I already had saved me money.)


I used the thinner, more worn sections of this worn-out flannel sheet to line the parts of the dress that I specifically did not want to be bulky - such as the sleeves.


As for that neckline I wanted to lower, well I made that cut late one night as I was sewing the dress - and I think I was a little over-zealous.


This was not supposed to be an off-the-shoulder dress. Ooops.


As I mentioned at the beginning of this post, I finished my Christmas dress some time after midnight, the night before I had planned to wear it. (And these days with little ones in the house who get up first thing in the morning, me staying up past 10 pm - or even until 10 pm - is quite a feat!) I tried it on. And I hated the neckline. Oh well, too late to fix it now. I hung the dress up and went to bed.


I put on the dress the next morning, and paired it with the red bow belt I made to go with my red scalloped dress a few years back (I'd intended to make a matching plaid belt, but I ran out of time and wanted sleep, lol) I didn't hate it as much as I had the night before (Amazing what a few hours of sleep can do!), but I was still rather insecure about my bare shoulders. So I threw on a black cardigan to wear over it for church. 


That afternoon at our family Christmas gathering however, I decided to remove the cardigan and see what happened - and you know what? The more I wore the dress, the more I liked it!
Off-the-shoulder still wouldn't be my first choice, but I love how elegant this dress feels! 
Honestly, I'm just happy I managed to make myself a Christmas Dress this year - off-the-shoulder neckline, recycled belt, sloppy zipper, and all!


Merry Christmas and Happy New Year!

I will try not to let another 5 months pass before I post again, but no promises. My life certainly got busier in 2024, and I can't wait to see what 2025 brings!

Wednesday, June 26, 2024

A Refashioned Edwardian Blouse for the Anne Picnic

 Well it has been a while now, hasn't it. This month has been something. A roller coaster really of ups and downs - high ups and low downs - and I still feel like I'm trying to catch my breath. The month started off fantastically with our Anne of Green Gables Picnic!

Photo by @samithefae

And that picnic was everything we envisioned it being! But before I get ahead of myself, let me tell you the story of my outfit. . .

Photo by @samithefae

As explained in my introductory post on the subject last month, the idea for this Edwardian picnic outfit of mine really began with this white cotton nightgown. It just begged to be turned into a frilly Edwardian blouse!


Thus, I procured the Black Snail Edwardian Blouse pattern for the project. 


Now, would this one summer nightgown yield enough material to make the blouse as the pattern was written, or would I have to supplement with additional fabric and/or make some major alterations to the pattern for my plan to work? There was only one way to find out!


I began by dismantling the night gown. In the interest of preserving every possible scrap of material, scissors never made an appearance in this dismantling process. Out came the seam ripper! 


First, I seam ripped the button placket off the pin-ticked yoke, but left it attached to the body of the nightgown - I intended to use the existing button placket down the back of my blouse, rather than making a new one. 


Next, I carefully removed all the cotton bias tape and "crocheted" lace trim from the neckline, armscyes, and hem. I made sure not to damage any of this trim so I could re-use it on my blouse.

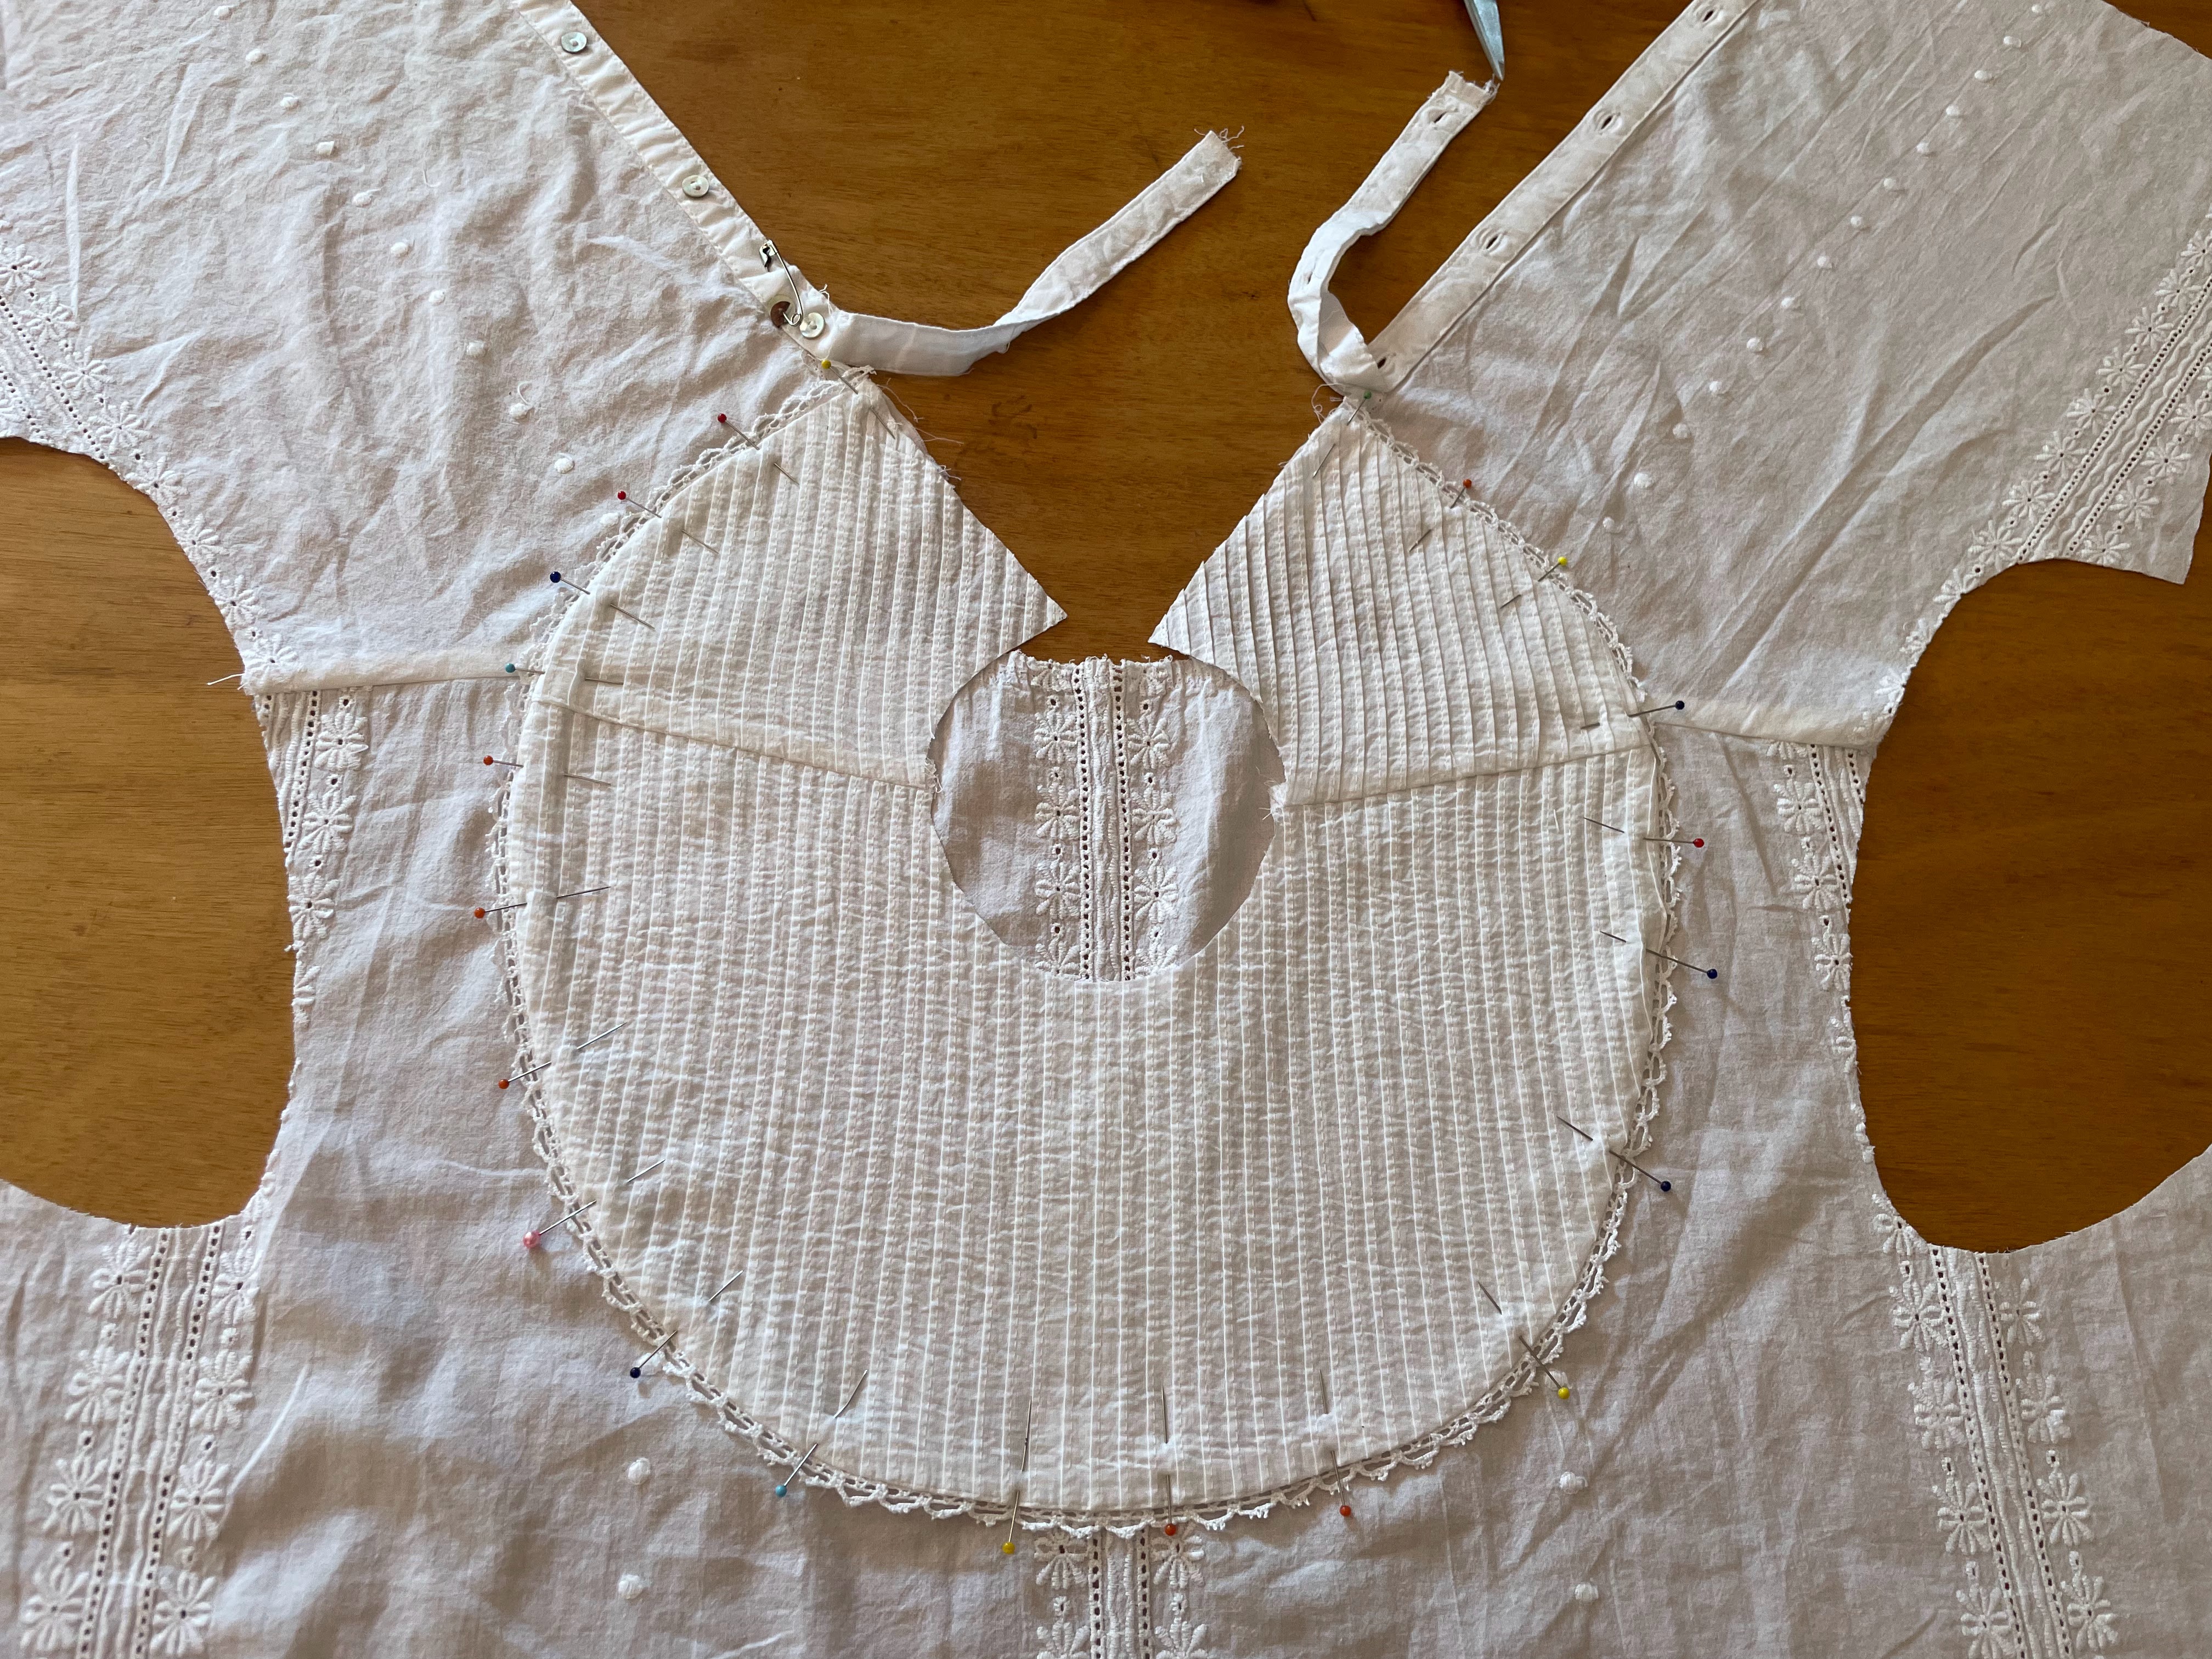
Finally, I removed the pin-tucked yoke from the body of the nightgown. It would be re-used as the yoke of the blouse.

Disassembly thus completed, I carefully ironed all the pieces of material, then assembled the pattern. Once the pattern was all taped together and the pieces cut out in my size, I took stock of the pattern and decided that my best option was to combine elements of view 1 and view 2 - and maybe, just maybe, I'd be able to get this whole blouse cut out of the one nightgown's worth of material.


I decided to start with the smallest piece - the yoke. It took a bit of finagling to figure out the best way to piece together the nightgown yoke pieces to have a large enough piece of flat material to cut out the blouse yoke - but eventually it happened! Even better, where the piecing had to happen resembled a shoulder seam, rather than a "I didn't have enough fabric seam" - and I call that a win!

Finagling really was the name of the game when it came to figuring out the pattern layout for this project.


  It was easy enough to figure out where and how to layout the front and the back of the blouse - the center front of the blouse when on the center back of the nightgown, and the center back of the blouse went on the center front of the nightgown to utilize the existing button placket - but the sleeves. Oh the sleeves.


Those gave me trouble! I really wanted the view 1 ruffly sleeves, but that sleeve pattern piece was huge (along with the separate ruffle pattern piece. . .), and I just couldn't figure out a way to make it work. I contemplated making the sleeves out of a different white fabric, but nothing in my stash suited (and I did not want to cut up the second nightgown, though I did consider it.) I contemplated majorly piecing together the sleeves from alllllllll the tiny scraps of fabric, but that wouldn't really work either. I resigned myself to making the less full view 2 sleeves - but even that pattern piece didn't quite fit, and those were not the sleeves I wanted. I wanted ruffles!!

Two days. For two days the pattern was laid out on the dissected nightgown on my living room floor. Every time I came in the room I swapped out the sleeve pattern piece - view 1, view 2, view 1, view 2 - and I spent a lot of time on Pinterest considering Edwardian sleeve options.


 Finally, an idea struck. I would use the view 2 sleeve that mostly fit onto the fabric I had available. Out of the larger leftover scraps, I would cut ruffles to go at the bottom of the sleeves - similar to the view 1 ruffles, only less long and less full. Both the bottom of the sleeve and the top of the ruffle would be gathered into a narrow cuff cut from some of the smaller scraps. 

Photo by @samithefae

This solution worked beautifully! No, the sleeves weren't as floofy as the huge view 1 sleeves would have been - but they were still beautiful and gave the right impression.

Photo by @samithefae

And I believe, they had just enough "puff" that even Anne would have been satisfied to wear this blouse!

Once the sleeve conundrum was solved, it was pretty smooth sailing!


I pieced together the pin-tucked yoke, and trimmed it all around the edge with some of the lace harvested from the nightgown.


Then I sewed together the shoulder seams (using French Seams for a clean finish) of the body of the blouse.


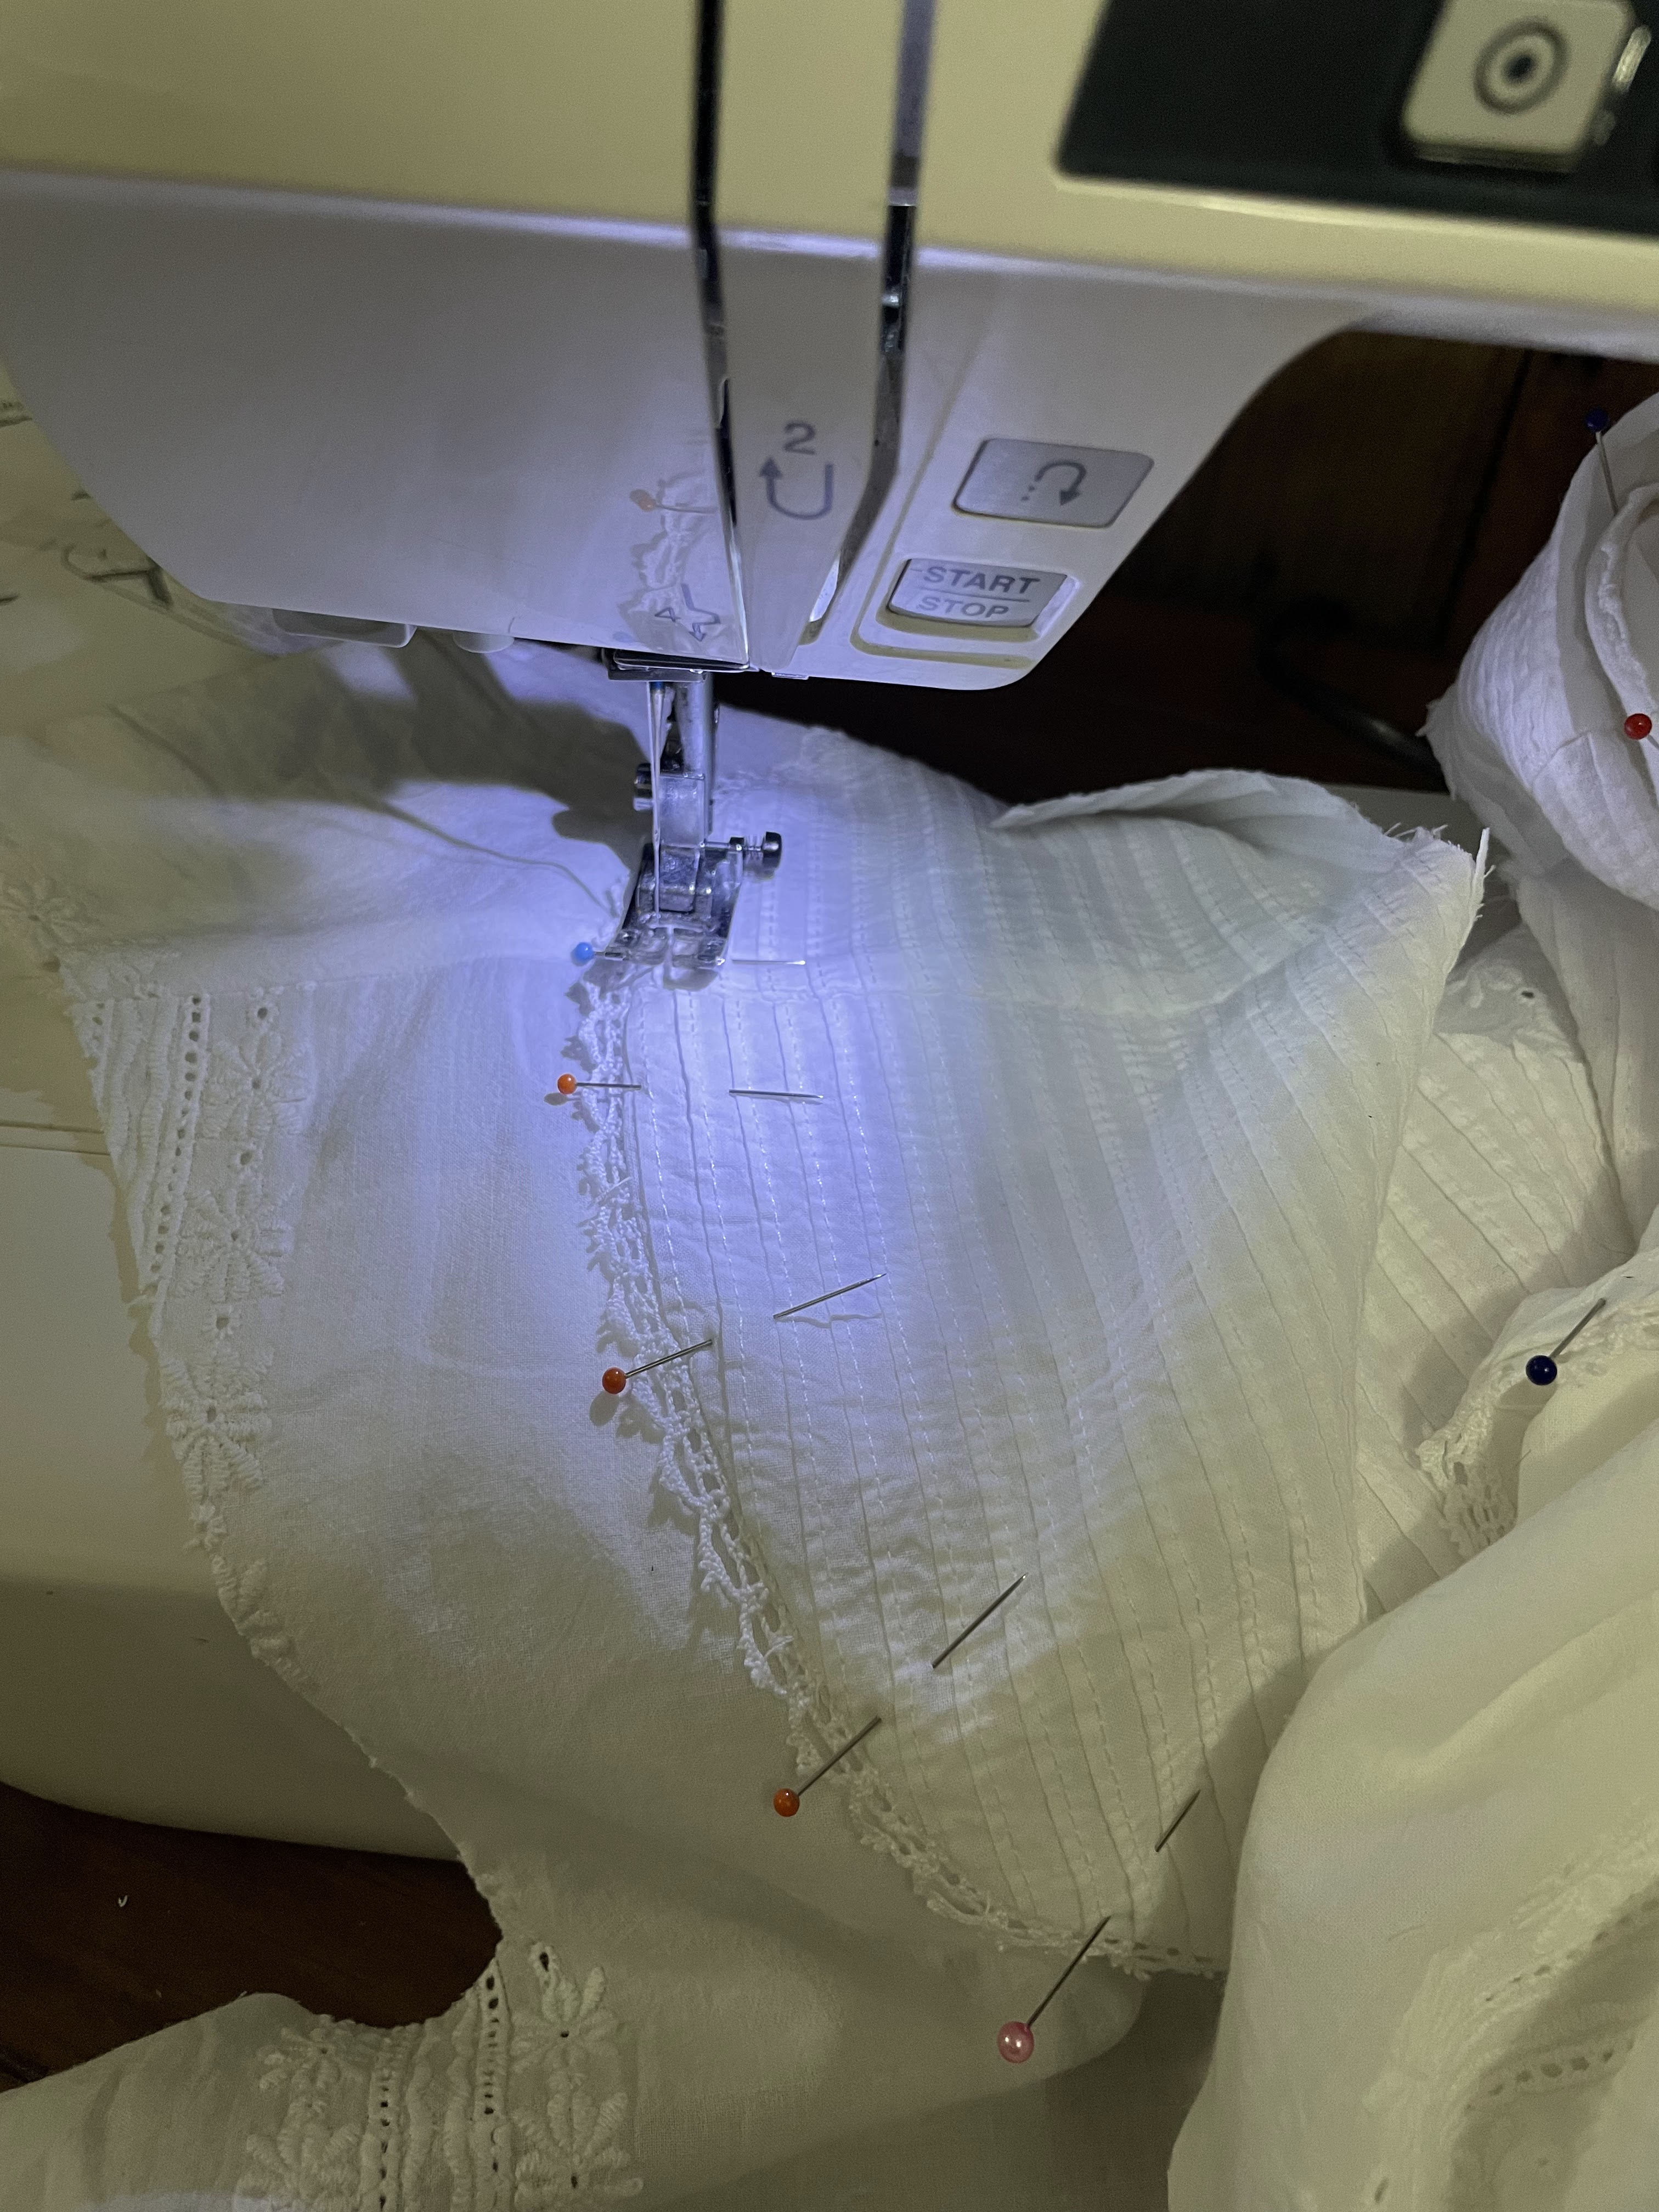
The yoke then got pinned on top of the body, and topstitched in place.


Once the yoke was sewn on, the excess material behind it got trimmed away and the seam allowance was finished with a narrow zig-zag stitch.

I made the collar out of a scrap of fabric - adding a few pintucks for fun and finishing the top edge with more of the harvested lace.


The collar was sewn on to the neckline, and that seam allowance was finished by encasing it in some of the bias tape harvested from the nightgown. (Thanks to my seam-ripping at the beginning, the only "new" notion required for this blouse was the thread to sew it together - buttons, lace, and bias tape were all there for the taking!)


Once the collar was on, the button placket could be attached to the yoke and collar - effectively finishing the closure for this blouse!


The pattern actually recommended only having buttons up to the bottom of the yoke, then using hooks and eyes and snaps to close the yoke and the collar, but it was very satisfactory to be able to re-use the button placket from the original nightgown!

Photo by @samithefae

And I like the look of buttons all the way up the back - even though it does appear to gape slightly at the top.

Button placket on, the side seams were sewn up (French Seams again), and the body of the blouse was gathered into the peplum (view 2 option).


The peplum was, admittedly, not cut out of the nightgown material, but rather a lightweight cotton harvested from a bed skirt in my stash. The material didn't exactly match, being a looser weave and a less white white than the nightgown material, but, as the peplum would be tucked into my skirt and never seen when the blouse was worn, it didn't have to be perfect!

Photo by @samithefae

The peplum was sewn on with a French Seam. Then the sleeves were assembled, the ruffles finished at the bottom with more of the harvested lace, and set. That seam allowance was then finished with the harvested bias tape.

Photo by @samithefae

And the blouse was done!!

Photo by @samithefae

Delicate and floofy - everything an Edwardian blouse should be!! 

And everything I dreamed that nightgown could be turned into!

Speaking of, since this was a re-fashion project, it fits the HSM #5 theme for this year - New Clothes from Old:

Make something new out of a worn-out garment or accessory. Or make something using recycled materials.

What the item is: An Edwardian Blouse

The Challenge: New Clothes from Old - this blouse is almost entirely made from a thrifted nightgown, the only new materiel in it is thread!

Material: Lightweight embroidered cotton, harvested from the aforementioned nightgown, and a bit of lightweight cotton harvest from a bed skirt for the peplum

Pattern: Black Snail Edwardian Blouse, with slight alterations

Year: 1904-1906ish

Notions: Buttons, cotton lace trim, and cotton bias tape, all harvested from the nightgown - and thread (fresh off a spool, since re-using the night gown's thread would have been tricky)

How historically accurate is it? Pretty good, it certainly resembles blouses of the era. Its all machine sewn, but by the early 1900's that's not unheard of. I'll give it atleast an 85%.

Hours to complete: I didn't keep track, but it wasn't bad. Maybe 6-8 hours total.

First worn: 6/1/24 for an Anne of Green Gables themed Picnic!

Total cost: Less than $1! The nightgown was picked up at a "by the pound" place, and it weighed less than a pound. Being just a blouse, this didn't require a ton of thread, and the bed skirt I used a bit of was also thrifted cheap - plus I've got plenty of that left for future projects.

Photo by @samithefae

Thanks for reading! Now hopefully I can get around to telling you about the rest of the outfit before another month goes by!

Wednesday, March 6, 2024

The Beginnings of the Dragonfly Robe Volante

 I have a really hard time resisting fabric. Especially cheap fabric.

I really like butterfly and dragonfly prints. Really like them.


A large amount of cheap fabric featuring butterflies and dragonflies? Yeah, that came home with me.


It was a large bundle of some sort of poly/cotton drapery cloth (best I can figure) at my local antique mall. $7.50. That's right - seven dollars and fifty cents! Stripes of red and yellow and green, with motifs of butterflies, dragonflies, and bees woven into the design - pretty and intriguing!
I left it behind. That's right, I left it. And instantly regretted it.
I left it behind because I have a LARGE fabric stash - and I really, really, didn't need to add to it. What would I make out of a large amount of insect covered drapery fabric anyway??
But. The butterflies. The amazing price.
I couldn't resist. The next morning I went back and bought the fabric.


Now what would I make from it? 
This was summer 2021, shortly after I got married. A year earlier, my friend Anna made the most delightful Robe Volante, and after reading all about it, this style of dress from the early 1700's really intrigued me. I decided I might as well us my quantity of stripey insect fabric to make my own Volante.
Was my fabric choice historically accurate? Noooo. . . . .
But I felt like it had the "spirit" of some of the bizarre silks from the era, so I could get away with it. Besides, how often do I actually need a perfectly accurate 1730's dress? Probably never. So I might as well embrace the slight bizarre-ness of this insect drapery fabric, and make the early 18th century tent dress.


So, with that said, what is the Robe Volante? It is the 1720's - 1740's precursor to the iconic Robe a la Francaise. Like the Francaise, it features loose flowing back pleats, but unlike the Francaise, the front is rather loose and pleated as well. This blog post tells some of the history and shares several beautiful examples of the Volante and it's related garments.


   After reading everything I could find online about the Volante and its sisters - the Battante and Casaque - I decided I wanted my Volante to resemble those from the 1720's. Later Volantes featured the same double-stacked box pleats in the back as the Robe a la Francaise, but the earlier ones from the 20's could have any arrangement of pleats or gathers in the back - and that sounded fun to me! Also, earlier gowns were often worn over bell-shaped hoopskirts (similar to the farthingales of earlier centuries), whereas later gowns were worn over oblong paniers. I do love my pocket hoops for later in the 18th century, but for this project being able to just wear one of my normal hoop skirts was appealing. Thus, 1720's (ish) it would be!


With all of this decided, it was time to figure out my pattern!

There's a Volante pattern, and a Casaque (the shorter version of the Volante) pattern  in The Cut of Women's Clothes, by Nora Waugh, which I examined closely. The shapes weren't complicated - this should be pretty easy to make. I could either drape the pattern, or size it up from the book - then I found an even easier option!


My friend gave me a Burnley and Trowbridge gift card. Perusing their website, trying to decide how to best spend my gift card, I found the Mill Farm Casaque pattern. I could lengthen that and use it to make my Volante! (Just like this blogger did!) 
And just like that, my gift card was spent on the pattern.


The pattern arrived in the mail a couple days later and I eagerly cut the pieces out. I held up the front pieces to myself and measured to see how much length I needed to add for my Volante plans.


Then I laid out the fabric and pattern on our small apartment living room floor (It was a tight squeeze. looking back at these pictures now makes me very thankful for our house. I've got plenty of room to cut stuff out now!), and cut that thing out.


I made sure to match up the stripes along the center front, center back, and side seams.


Cutting out the body was easy. Then I got to the sleeves. I looked at the Mill Farm sleeve pattern piece. I looked at the sleeves patterns in Cut of Women's Clothes. I pulled out Patterns of Fashion 1 and looked at the 1740's Mantua sleeve in there. The shapes of the sleeves in the book and the shape of the pattern piece didn't match. Well this was inconvenient. (You may recall I had a similar sleeve issue with my Strawberry Sacque last fall. Commercial patterns are apparently not great at having correctly shaped 18th century sleeves.)


It came to mind that the Larkin & Smith English Gown pattern does have accurately shaped sleeves - there was only one slight issue. 1760's and 1770's sleeves are considerably more fitted than 1720's - 1740's sleeves. Thus, that sleeve pattern would be too small for my Volante. Now what?
An idea dawned on me, a local friend, a couple sizes larger than me owned the Larkin and Smith pattern too - and her larger sleeve pattern might just work for my Volante sleeves. 
I texted her and asked if I could borrow the pattern piece. She dropped it by, and it worked beautifully!
Perfectly shaped, loose, 18th century sleeves!


Next time I'll tell you how all the pieces went together!