Thursday, May 10, 2018

Confident Summer Will Come

Spring took forever to come this year - we had snow three times in April! Then, when spring finally did come, the days sure warmed up in a hurry. Almost overnight the trees were covered in leaves and the spring flowers have all seemed to bloom at once! We went from wearing coats to wearing tank tops in under a week. Suddenly it was obvious my sister needed some warm weather clothes! Thus, when I had the opportunity to be part of the "Get Ready For Summer" blog tour, and make my sister a summer outfit, I took it!


When I agreed to be part of the blog tour I knew immediately what I wanted to make. My sister has outgrown just about every sundress she owns, so a sundress it would be! I had a floral knit sitting in my stash, just waiting for such a project. All I needed was a pattern.


The pattern was provided by Ellie and Mac Patterns. After a quick glance around their website, I found just the sundress pattern I was looking for. The junior's and women's Be Confident Dress has a tank-top style bodice and a full circle skirt with a hi-low hem. It looked like something my sister would enjoy wearing, while being quick and easy for me to make.


I was right on both accounts. In fact, the dress was almost too quick and easy to make, so I had to change it up a bit! I decided to bind the neck and arm holes, and also add an extra design detail while I was at it.


 Rather than cutting the back neckline according to the pattern, I decided to cut it as a V. Then I added ties to it. Just a little extra something to add a bit of detail to an otherwise basic dress.


Those ties fly out beautifully whenever my sister spins! Because, in a dress with a full circle skirt like this, how can you not spin? For that reason, a pair of shorts is a must under this dress :)


Now, when she's not spinning, the skirt is just about the perfect length - right above the knees in the front, and right below in the back. It suits the design, and the girl, perfectly. Unfortunately, this is the longest length included in the pattern for the dress. The pattern contains 7 different skirt lengths; tunic, mini, mid-thigh, petite, regular, tall, and taller. I wasn't sure what length to cut for my sister, but I knew I didn't want the dress to wind up too short! Thus, I cut the skirt out at the longest length, figuring it would be easier to cut fabric off later than add it on.


Well, it's a good thing I cut the skirt the length I did - because I didn't have to shorten it at all! My sister's still growing, and not all that tall yet, only 5'2". So, if I make this dress again for her once she grows a bit more, I'll probably have to add a bit of extra length to the skirt pattern. Thankfully, that's not too much of a problem - but it would be nice if "taller" were just a bit longer!


All in all, this dress is cute, cool, and comfortable - and my sister loves it! What more could you ask for from a summer sundress?


I received the Be Confident Dress pattern for free in exchange for this blog post, but all thoughts and opinions are my own. 


Please visit all the wonderful bloggers on the Get Ready for Summer Sewing Patterns Blog Tour for some incredible inspirations.
  1. May 7th: Seams Sew Lo
  2. May 8th: Tenille's Thread
  3. May 9th: Seams Sew Lo
  4. May 10th: The Sewing Goatherd
  5. May 11th: Aurora Designs Fabrics
  6. May 14th: Our Play Place
  7. May 15th: Sewjourns
  8. May 16th: Aurora Designs Fabric
  9. May 17th: QuiltsbyJoann
  10. May 18th: Liviality
  11. May 19th: Momma You Can Make It
  12. May 21st: Margarita on the Ross
  13. May 22nd: Sewing Blue
  14. May 23rd: Kathy's Kwilts and More
  15. May 24th: Momma Newey's Makes
  16. May 25th: Jot Designs USA
  17. May 28th: The Scatty Sewer
  18. May 29th: Granma Texas Sews
  19. May 30th: Fee Bricolo
  20. May 31st: My Sewing Roots
a Rafflecopter giveaway

Wednesday, May 9, 2018

Sewing Fun, Fabulous, Tunics

Have you ever seen something that is totally your style, but at the same point you're not sure if it's something you would actually wear? A testing call for a lovely tunic with pockets and a hanky-hem came across my my facebook feed. It was the Beltaine Fires Tunic by Mother Grimm Designs, and it totally sparked my interest.


Pockets, large, beautiful pockets, and a fun pointy hem, what could be better? These design elements were calling my name! But at the same point. . . tunic. I love the looks of tunics, but I never really wear them (probably because I haven't yet jumped on the "leggings as pants" train.) As I try not to make clothes for myself that I won't actually wear, I was about to pass on testing this pattern, despite the large fabulous pockets. Then I realized - I could test this pattern for my sister! She now fits in the smaller sizes of women's patterns and she's all about the tunics and leggings life!! I didn't have to pass on testing this pocketed, pointy- hemmed, goodness after all.


I applied to test the pattern, got accepted, then went shopping in my fabric stash. Thankfully, I had the perfect fabric already on hand. (I have two rules for myself when I apply to test patterns. 1 - I have to actually like the design and the final garment will have to be one I (or my sister) will actually wear. 2 - I ought to already have appropriate fabric in stash. I really need to shrink my stash! This second "rule" however, isn't exactly hard and fast.)


The pattern calls for knit fabrics with lots of stretch and drape, so from my stash I selected a dark brown, mystery synthetic, rib-type knit. To accent this, I found a pair of teal cotton/lycra sweatpants to harvest fabric from for the pockets, waistband, neckband, and bottom ruffle.


This pattern has several options, it can be made with a plain hem or a handkerchief hem, with or without pockets, with or without a waistband, and with or without a ruffle, or other trim, at the bottom. Also, it comes in 17 sizes (bust measurement 32"-57.5"), and three hight options (petite, regular, and tall.) As the hanky hem and pockets originally drew my attention to this design, those are the options I chose to test. I also opted to add trim at the bottom, just for fun, and proceeded to sew up the tunic in one afternoon. As, for the time being (it will probably change next week at the rate she's growing), my sister is only 5'2", I made the "petite" height option for her. The finished tunic fit splendidly, and she absolutely loved it, immediately requesting another just like it!


Well, I'd agreed to make at least two tunics during testing anyway, so making another was easily done. For the second tunic, we decided to do the hanky hem, pockets, and ruffle, just like the first, but skip the waistband on this one.


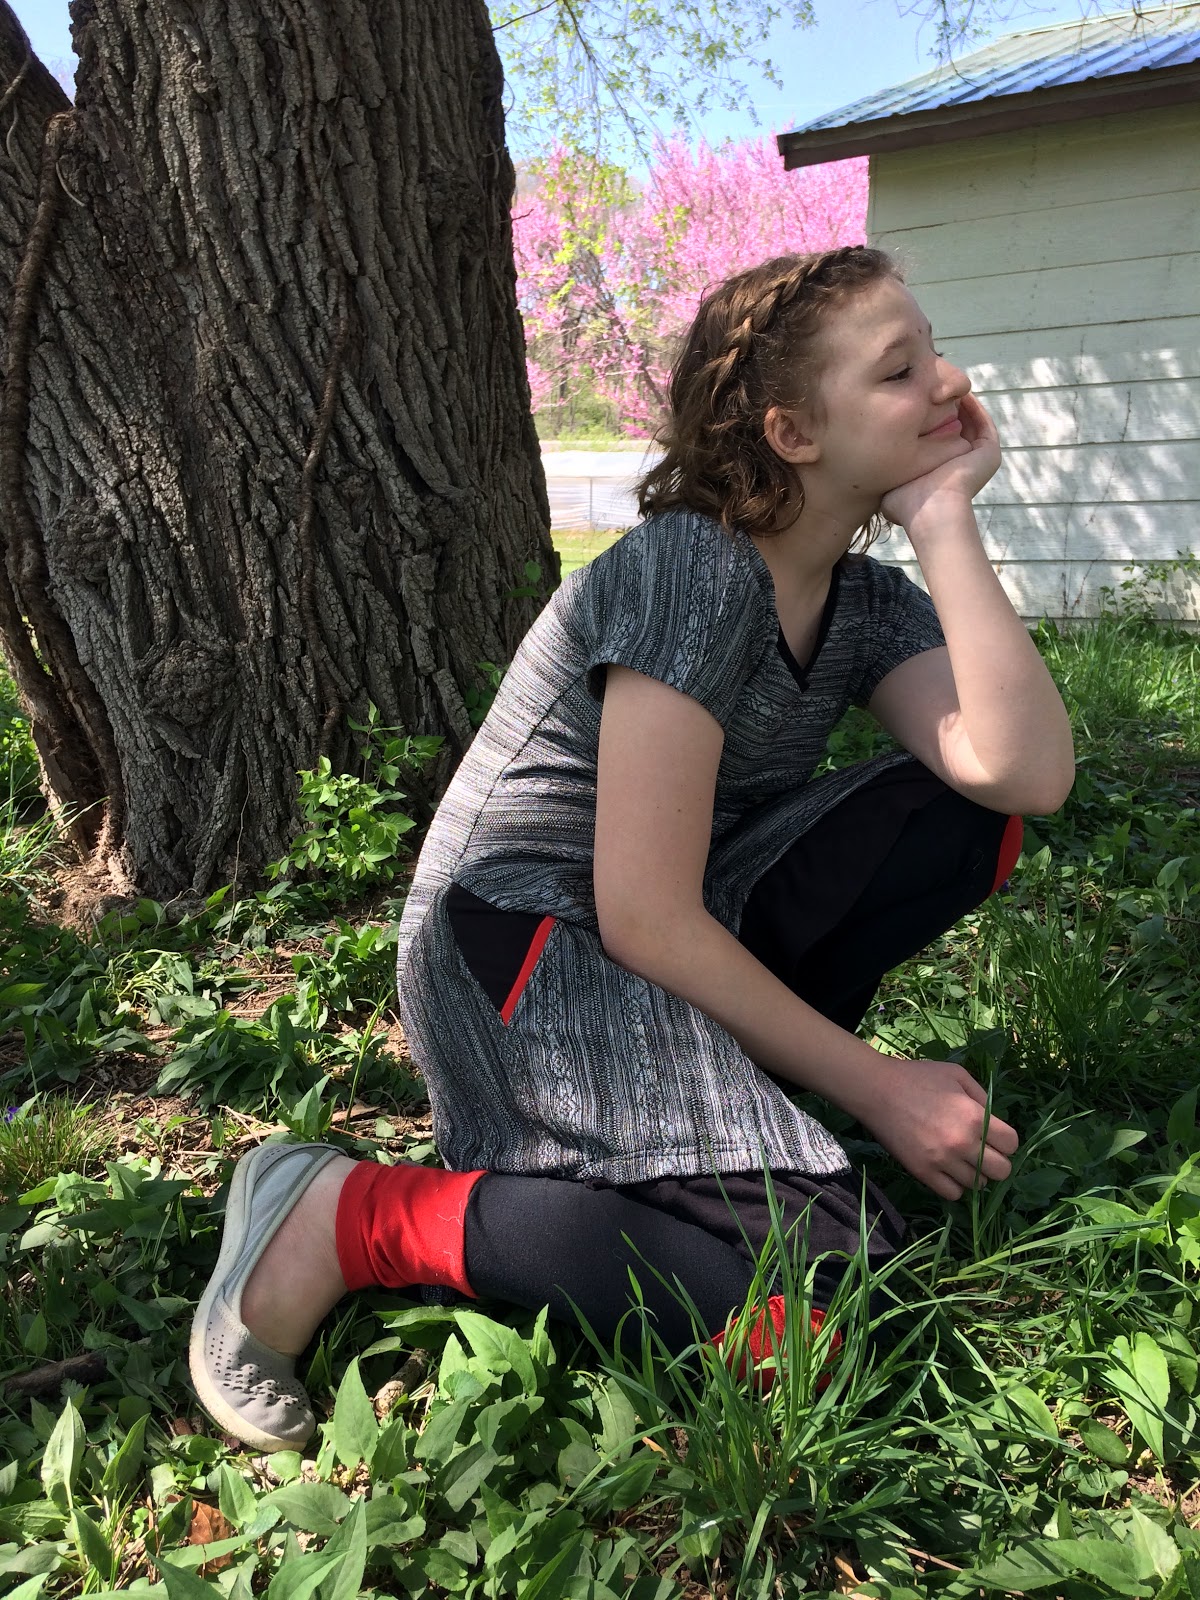
A few months ago, I made my sister a pair of black and red leggings with red heart patches on the knees, and I really wanted to make her a tunic to go with them! Thus, for the next tunic I picked fabrics with that goal in mind. 


From my stash I picked a gray and black knit jacquard. (At least that's what I think it is. It's a mystery knit from a thrift store that appears to have a high spandex content.) With black and red accents it would match the leggings perfectly!


Once this tunic was done, my sister loved it just as much as the first. But how could she not?


It has pockets, a ruffle, and a fun hemline - seems like a winning combination to me! 


Now, despite my initial hesitancy, after making this pattern for my sister and seeing all the other fabulous tunics made during testing, I want one for myself! So, I may have to get on that. I might just lengthen it a bit to be a dress :)


If this pattern interests you, it can be found here. It's on sale through 5/12/18 with the code BELTAINE25. I received this pattern for free in exchange for testing, but all thoughts and opinions are my own. I was under no obligation to write this blog post, I just really like this tunic and felt like sharing!


Monday, May 7, 2018

The Yellow 1893 "Misses' Empire Gown"

My entire Christmas list last year was sewing books. Modern sewing books, historical sewing books, pattern drafting books, all sorts of sewing books. My friends and family were quite obliging, and my sewing library grew a bit in December. Now, at this point (4 months after Christmas) many of those books have been referred to and put to good use, but the first book I used was 59 Authentic Turn-of-the-Century Fashion Patterns.


I wanted to make my sister a new 1890's dress (She's outgrown her last one), and this book is all patterns from the 1890's! It mostly contains women's patterns, but there are also several patterns for boys', girls', and young ladies' (called Misses') clothing too.


Yes, patterns for young ladies' dresses!! Designs for that awkward age where you are no longer a little girl, but not yet a grown woman either. The age group modern sewing patterns are never made for. (No longer fit in a girls' size 8, but don't yet fit in a women's size small? Too old for "little girl" designs, too young for more mature women's styles? Too bad, modern sewing patterns have nearly nothing for you.) This book of patterns from 1890-96 has patterns for that age group of girls!  And not just one or two patterns either, but several, in all sorts of designs for all sorts of occasions!


As you may have guessed by all the exclamation points in the previous paragraph, I was pretty ecstatic about this discovery when I received the book for Christmas. I could make my sister a dress, in her size, in an age appropriate style, without having to mash together and adapt half a dozen patterns. All I had to do was pick one dress from the book, draft the pattern according to the diagrams given, and then sew it up!


After some deliberation, and consulting with my sister who would actually be wearing the dress, I decided to make the "Misses' Empire Gown", from 1893. Diagrams and measurements are given for each dress. To draft the pattern, you follow these while adjusting the measurements as needed to fit your intended recipient, and basically make a dot-to-dot. Connect the dots, and you have a workable pattern. 


Honestly, I was amazed by how easy this was to do! I made the pattern in a couple hours one afternoon, then sewed a mock-up that evening. The bodice mock-up fit my sister perfectly on the first try! I did have to adjust the sleeves a couple times before they fit properly; but sleeves, what do you expect? Sleeves are never easy.


Once the pattern was made, sewing up the dress was no problem at all! The main body of the dress is made from a yellow quilters cotton, acquired on a day trip I took with my friends back in January. It's accented with a tiny blue, green, and mustard colored plaid shirting I found at the Mennonite fabric store. I trimmed the dress with some pink vintage velvet ribbon and a scrap of lace from my stash.


When all was said and done, my sister was thrilled with her new dress, and it's been worn many times since completion! She's worn it to church, to homeschool co-op, and even to afternoon tea (in a house built in the 1850s!). 


It's a dress that fits her, is beautiful, comfortable, and completely age-appropriate for the era. What more could you ask for?


Saturday, May 5, 2018

The Fabulous Paisley Blouse

Please tell me I'm not the only one who looks at the clothes people are wearing, admires the fabric, and thinks "I wish I had that garment to refashion! The fabric is beautiful! I wanna make something from it!" Such a thought process was how this shirt came to be.


One of my friends on the World Race acquired a lovely pair of soft and flowy rayon paisley pants. I rather like paisley prints, and this paisley was beautiful - large, colorful  swirly, and just irregular enough to be interesting. I commented to my friend if she ever didn't want the pants anymore she could send them my way. I loved the fabric! At the end of the Race, she did just that, gifting me the pants to refashion. Now what would I turn them into?


A pair of pants does not yield an awful lot of fabric, but I was confident I would be able to turn these paisley trousers into something fabulous. It would just require the right design. Thus, the pants stayed packed up, along with all my other fabric acquired on the Race, until inspiration struck.


One day I came across a beautiful blouse, made from  McCalls 7687, on Pattern Review, and that was it. I knew what the paisley pants would become! The pattern for the button-back blouse was pretty, had fun, interesting details, and most importantly, was ideal for refashioning, thanks to the princess seams! So the next time McCall's patterns were on sale, I snatched this one up! Just a few slight pattern alterations had to be made to fit both personal preference and the amount of fabric I had available.


I adjusted my center front pattern piece to have v-neck rather than a high round neckline, then proceeded to cut out my entire blouse from the pants. The narrow(ish) pattern pieces for the body of the shirt all fit onto the legs! (though I did have to do a bit of piecing on the side back pieces) Unfortunately, once the front and back of the shirt were cut out, there was no way I would be getting any of the pattern's several included sleeve options cut from the remaining material. I was going to have to figure out the sleeves on my own!


At this point, all that was left of the pants was the waistband and ties. The front waistband, and the front waistband lining, became the sleeve caps. The ties became the sleeve ruffles. The resulting sleeves keep the feel of the pattern design, even though they're not near as long and voluminous as the original sleeves! 


For the back of the shirt I decided on green buttons. The buttons I'd painted for my 1940's style wrap dress were just the perfect shade, so I pulled out my nail polish and painted a few more to match. I quite like the way they look all down the back of the blouse!


Actually I quite like just about everything on this top! It's soft and comfortable and pretty. The sleeves turned out beautifully, despite the fact I had no pattern for them. And I absolutely love the fabric! I'd say I managed to turn it into something fabulous, just as I'd hoped!


Monday, April 30, 2018

I Gave Velvet Another Try

Yep, the title says it all. I decided to give it another chance. How could I not? I needed an 1890's belt, and the one I decided to re-create was. . . Velvet. Soft, beautiful, tricky to work with, velvet. Well, I wanted to make that belt, so I decided to conquer this textile! By completely avoiding the iron and the sewing machine. . . Small steps, you know, small steps.


Once I finished my 1890's shirtwaist, to go with my wool skirt, I realized I needed a belt to complete the outfit. Without one, the ensemble was clearly missing something. So, I began looking through the books on my shelf to find inspiration for this belt.


On my bookshelf I have a rather thick volume titled "Montgomery Ward & Co. Catalogue & Buyers' Guide 1895" It's a reprint of an entire 1895 catalogue published by Skyhorse Publishing, and is one of my favorite books to sit and look through! Nearly 1,000 pages full of illustrations and descriptions of everyday items from the 1890's - including clothing!


One page is full of ladies' belts, so this is the page I found myself poring over while planning the next addition to my 1890's wardrobe. After taking into account the materials I had on hand, I decided to make a belt resembling number 13002 - "Black Velvet Belt, cloth lined, two inches wide: fancy oxidized buckle."
Well, I had a bit of black velvet, and some black wool for the lining, in my stash, but no "fancy oxidized buckle." Where was I to find one of those?


Honestly, I have no idea. After looking at picture after picture of antique belt buckles, and considering the buckle options I could find locally, I settled on this pearl-encrusted slide buckle from Joann's. I can't claim it's historically accurate, but it's pretty and adds a completed look to my outfit.


With the design settled on, and the materials acquired, I was ready to make my belt! There was just one problem - after making my sister's riding habit I was in no hurry to make anything else in velvet.  So, I put off making the belt for a few weeks and began to consider what other materials I could use for it. Leather? I couldn't find any that affordable and suitable. Satin? Not the look I was going for. Silk webbing (another belt material mentioned in Montgomery Ward)? Not to be found. Finally, I decided I was going to make my velvet belt, and I was going to finish it by the end of the month for Historical Sew Monthly, so, I got a move on.


First, since it was the iron and sewing machine that caused me so many headaches last time, I decided I would use neither on this project. So, I took a piece of cotton belting the correct width and length, and cut a strip of velvet an inch wider. 


I folded the edges of the velvet over the belting, and pinned it in place - with an awful lot of pins. Then I handsewed the velvet to the belting, with no problems whatsoever!


No sewing machine or iron had been used and I had a strip of velvet covered belting that actually looked good! Next up was the lining.


I took a strip of wool, cut it the same width as my belt (2"), then pressed all the edges under about 1/4 inch. (While doing this I made sure to have the velvet belt on a completely different surface from the iron. I was taking no chances.) Once that was done I laid the wool over the back of the belt, completely covering the edges of the velvet, and handsewed it in place.


All the hand sewing went surprisingly quick. Before I knew it I was attaching the buckle and had a completed belt! My attempt at sewing with velvet again had gone well!


Challenge 4 - Buttons and Fastenings.

What the item is: An 1890's belt to be worn with my skirt and shirtwaist.

Material: Velvet for the outside, cotton belting for the inside, wool for the lining.

Pattern: My own - based on a picture and description found in a re-print of a 1895 Montgomery and Ward catalogue.

Year: 1895

Notions: Slide buckle and thread

How historically accurate is it? Well, the look is about right and the belt matches the description found in the catalogue. It's two inches wide, made of velvet, and backed in cloth. But, the velvet is polyester, the belt is completely hand sewn (not really accurate for this period), and the design of the buckle isn't particularly accurate either (I'll probably replace it when I find something better). So, maybe 40% accurate.

Hours to complete: 3

First worn: For pictures 4/28

Total cost: about $10