It took a couple months, but last fall I finally got around to making myself something with a scalloped neckline. I applied the neckline I had in mind to the Outer Banks Boat neck by Winter Wear Designs, because I really love the fit of that pattern on me.
The first version of my scalloped necked Outer Banks tee turned out just as fabulously as I'd hoped, so I immediately made myself a second one. I wore the first version to our family Thanksgiving dinner, where my aunts liked the scalloped neckline so much I decided to make a scallop-necked shirt for each of them as a Christmas gift. Then this spring, I decided to make myself another one for my Easter outfit. And while I was making one, I figured I might as well make two. Thus, I also made this one, out of a floral print cotton spandex jersey, with the poet sleeves from the Winter Wear Designs sleeve add-on pack (These sleeve patterns are free with a code found in the "files" section of WWD Facebook group!)
And while I was making this floral, scalloped, Outer Banks Boat Neck, I took pictures of each step so I could share a tutorial on how to make a scalloped neckline. Thus (several months later than I intended to write it), without further adieu, here is how I added the scalloped neckline to the shirt pattern. This method can be used with almost any top pattern, so pick your favorite and have fun!
Step 1: Decide what basic shape (pre-scallops) you want your neckline to have. There won't be much stretch in the neckline when all is said and done, so it's best to make the neckline large enough to fit over the head with minimal stretching. A boat neck, scoop neck, v-neck, or square neckline will all work. I chose to do a v-neck, so I drew that onto my pattern.
Step 2: Add Scallops to your new basic neckline shape. Find a round object about the size you want your scallops to be. For me, the rounded end of my tape dispenser turned out to be just right! Starting at the center fold line of your pattern piece, trace around the round object, then move it up the neckline, placing it right next to the scallop you just traced, and trace it again. Repeat this until the whole neckline on the pattern piece is scalloped, then do the same on the neckline of the back pattern piece. Please note: I made sure to have the scallops end where the seam allowance began at the shoulder seams so no scallops would be caught in that seam.
Step 3: Trace the new scalloped neckline and make corresponding front and back facings for the new neckline. A good facing is usually about 2"-3" wide.
Step 4: Cut out all pattern pieces from your chosen fabric and interface your facing pieces. For knit garments, I use whatever knit interfacing I can find at Joann's. If you're applying a scalloped neckline to a woven garment, any light to mid weight interfacing you prefer will do.
Step 5: Sew the shoulder seams of the shirt body pieces and the facing pieces.
Step 6: Right sides together, pin the facing to the skirt neckline, matching up the shoulder seams and all the scallops. Don't be stingy with the pins here - for best results pin each individual scallop.
Step 7: Carefully sew around each scallop stitching the facing to the neckline. At each divot in between the scallops, sink your needle into your fabric and lift your presser foot in order to pivot.
Step 8: Clip between each scallop - making sure to cut right up to the seam line, but not through it - and trim the seam allowance around each scallop down to 1/8".
Step 10: Press that new scalloped neckline nice and flat.
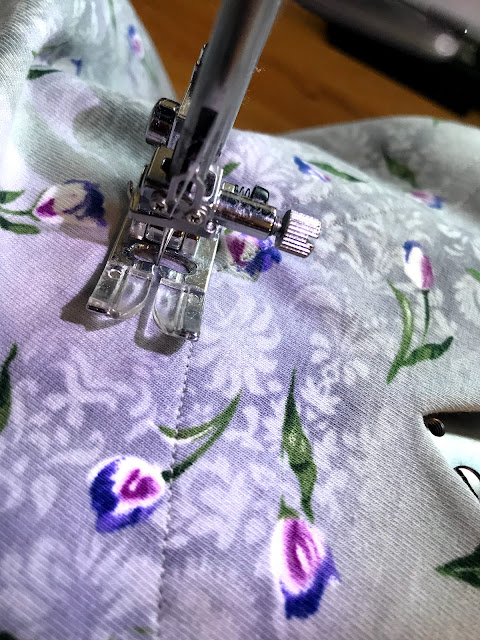
Now you could be done here and proceed to finish your shirt like normal according to the pattern instructions, but personally, I like to add a couple rows of top stitching around the neckline to hold the facing in place inside the shirt.
I find facings that flip out super annoying and don't mind the look of a top stitched down facing usually, but others have different preferences.
After deciding whether or not you want a top stitched down facing, go ahead and finish your top according to the pattern directions, side seams, sleeves, hem, etc..
 |
| Close up of my top stitched facing. I did two rows of top stitching as I felt it looked more intentional than just one row did. |
And with that, your scalloped neckline shirt is done!!
With this pattern I have successfully made scalloped-necked shirts out of cotton-spandex jersey, rayon-spandex jersey, 100% rayon jersey, double-brushed polyester-spandex jersey, and knit crape (or Liverpool).
I have yet to encounter a knit fabric I have not been able to turn into a scalloped-necked top, provided I properly interface the scallops.
So that's it! Thus far I've made 6 Outer Banks Boatnecks with scalloped necklines, and I'm sure I'll make more in the future!
This simple "hack" really is a great way to dress up an otherwise "basic" top!


This is so wonderful!! Thank you for sharing - I can't wait to try this!
ReplyDeleteI'm glad you enjoyed it!
DeleteYou are absolutely delightful! Beautiful turnout And wonderful directions! God bless!!!
ReplyDelete