
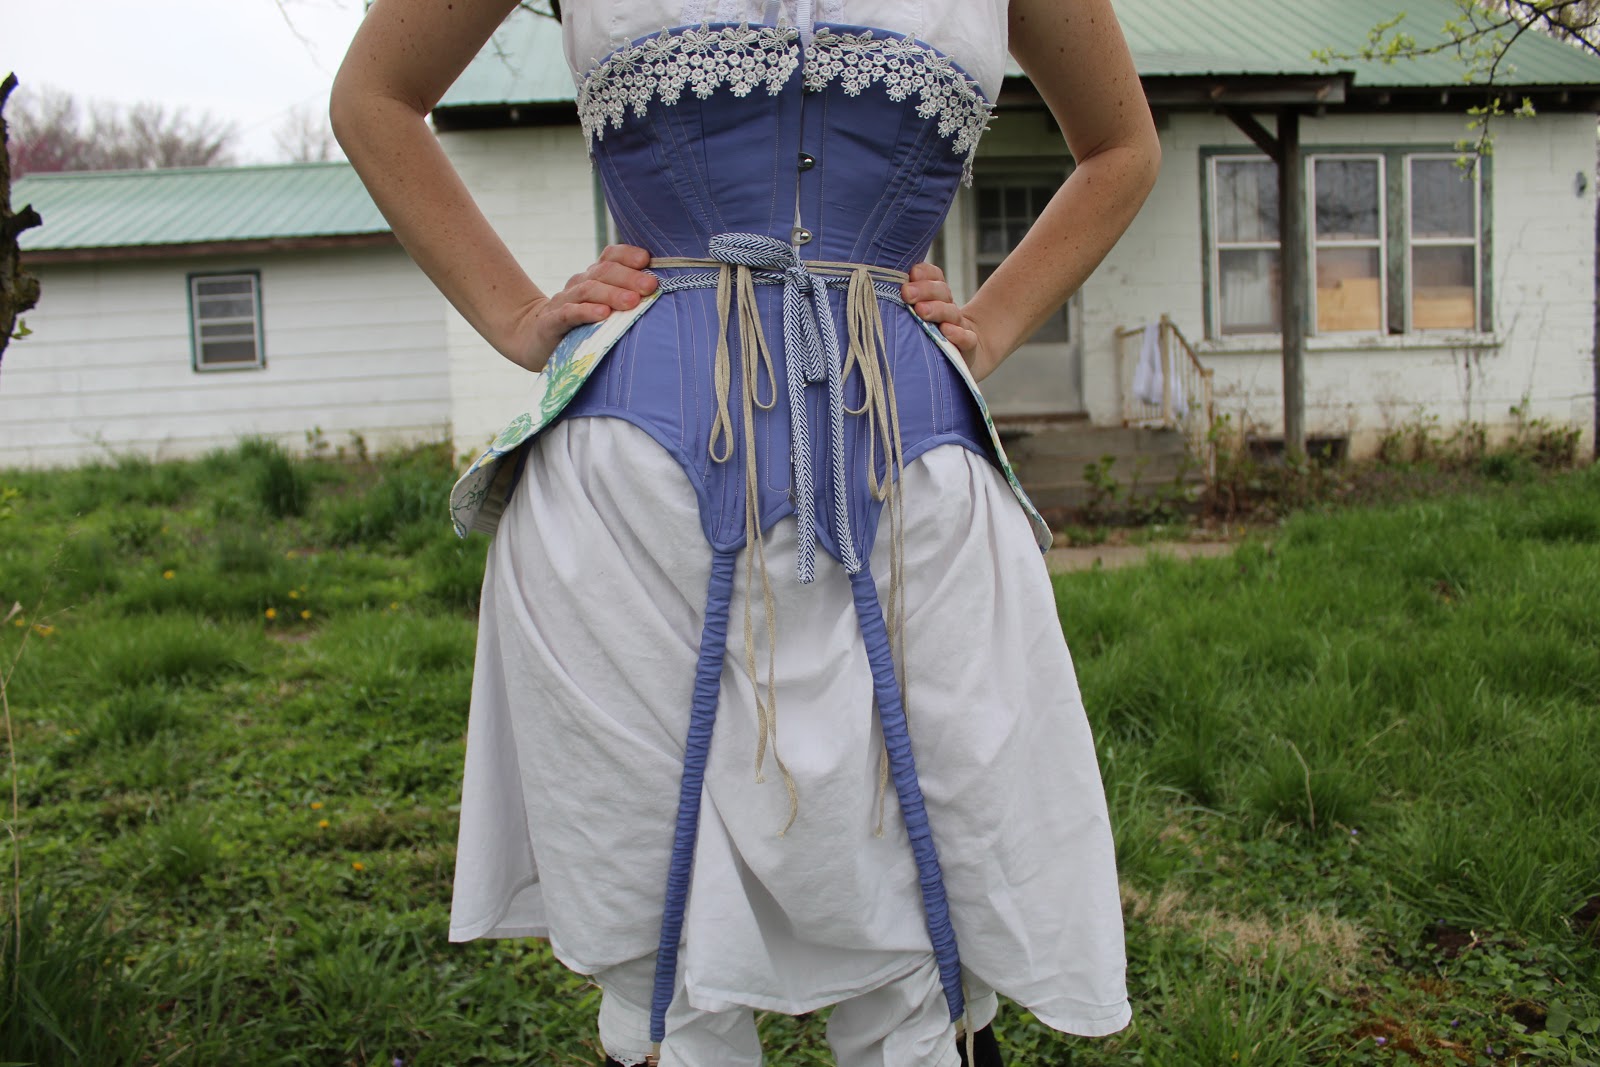
Upon completing my S-bend corset, I decided I'd better also make myself a bum pad of some sort to help achieve the Edwardian silhouette. So, I took to Pinterest to see what sort of bum pads/hip padding were actually worn in 1901.
 |
| Scott Hip Pad. FIDM Museum |
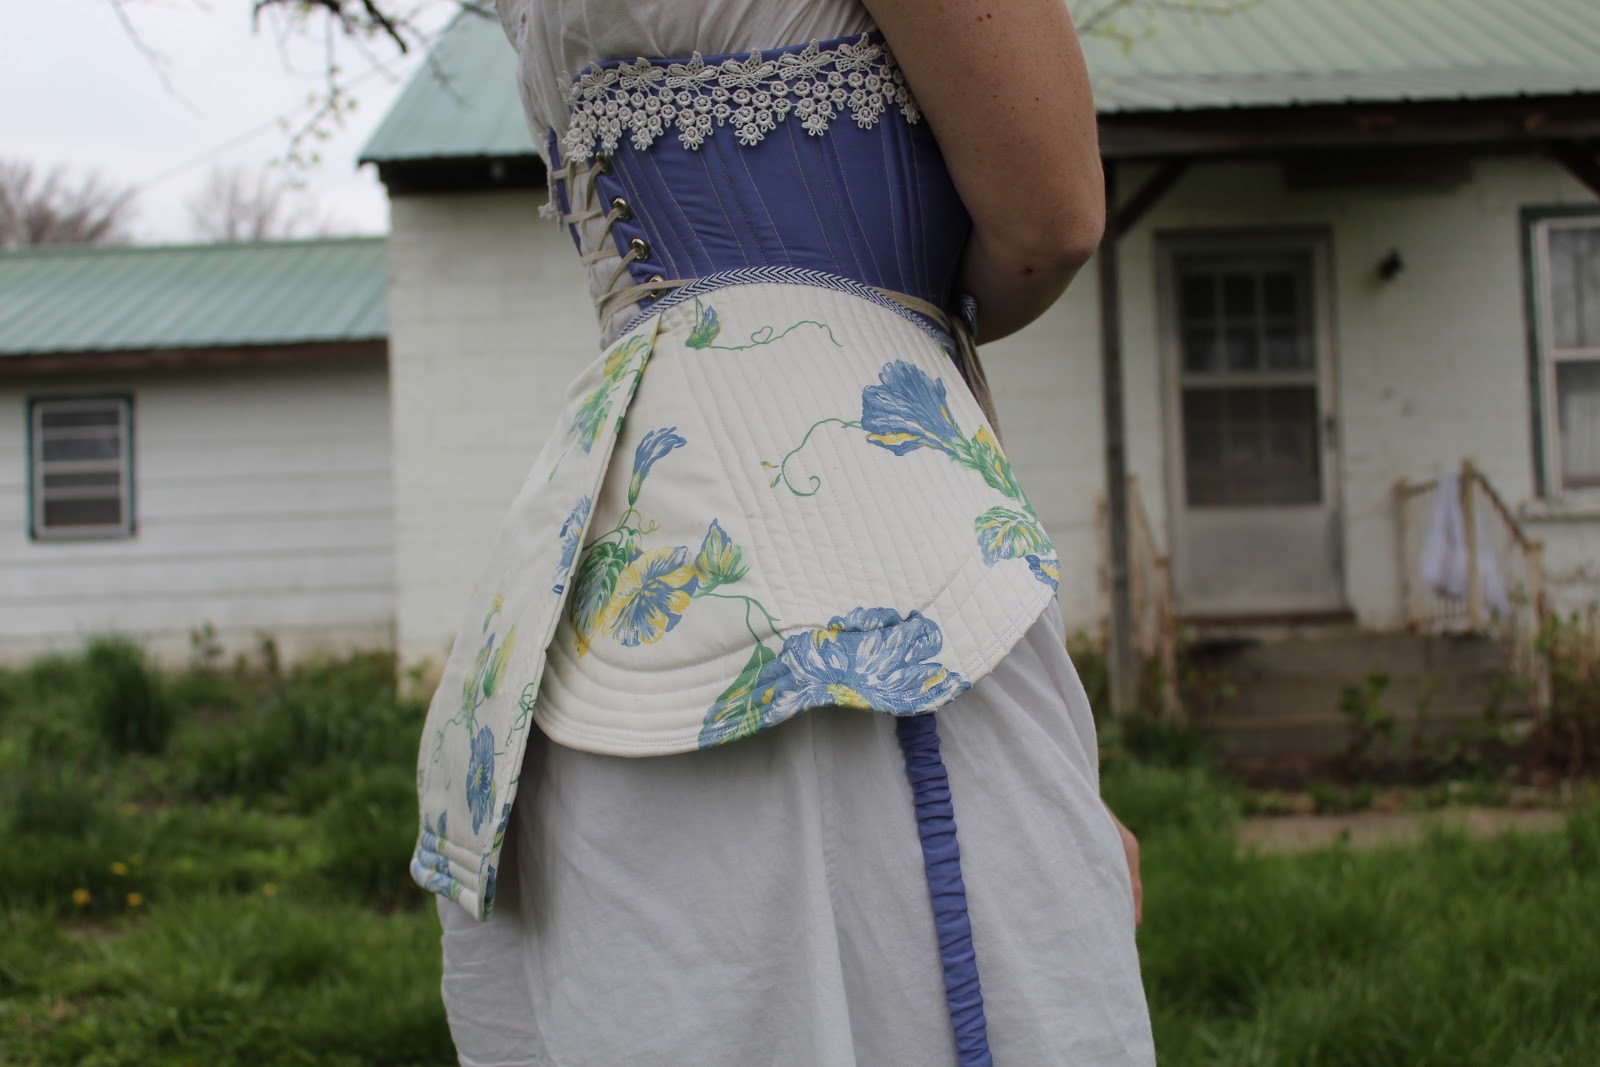
Upon deciding what type of hip/bum padding I wanted to make, I decided to jump right in and get it done. I picked my inspiration one morning, pulled some materials out of my stash, and by noon that day I was the proud new owner of a set of "Scott hip pads".

I decided to use a pretty floral polished cotton from my stash. It was pretty, it was handy, and I had no intention of using it for anything else, so it would do just fine for this project. Once I had my fabric, I free-hand cut the approximate shapes of the inspiration hip pads. Perhaps I should have actually made a pattern, but I didn't feel like it at the time. (Along that train of thought, a mock-up wouldn't have been a bad idea either. . .)

Once I had the cotton cut out for my hip pads, it was time to figure out what sort of stuffing they needed. They didn't need to be poofy; they just needed a little bit of "oomph" and body. After a bit of consideration, I decided cotton batting would serve the purpose well.

I had a decent sized scrap of batting left over from the padding in the skirt of my 1840's black wool dress. With careful cutting and positioning, along with a little bit of piecing, there was just barely enough batting for my hip pads.

Each piece of polished cotton was backed with a piece of batting so each pad would have two layers of batting inside it. I layered the polished cotton backed in batting right sides together then sewed around the edges of each pad using the walking foot on my sewing machine.

Each pad was then turned right side out, and got several rows of quilting sewn along the outer edge.

This didn't take long at all, and pretty soon the 3 separate pads were ready to be sewn together and attached to a waist tape.

I used cotton twill tape from my stash for the waist band.

I just folded the twill tape in half over the upper edge of the hip pads and zig-zag stitched it in place, leaving a length of twill tape coming off each end to be tied around the waist, just like the waist tie on the original.

And with that my hip pads were done!


After trying the hip padding on underneath an 1890's petticoat, I decided the front edges needed to be a bit softer, so they would curve around the body better, as you could definitely see the outline of the front edge of the hip pad under the petticoat.

So I added several more rows of quilting to the front edges of the side pads.

This did make the side pads a bit more flexible, and they do curve nicely around the hips. . .

. . . but the front edge of the hip padding is still visible under one petticoat. . .

. . .Two petticoats. . .

. . . And a skirt.

So perhaps I made my hip pads just a bit too big?

I'm wondering if perhaps I should consider this set of hip pads a trial run and attempt to make another set which won't show through petticoats?

I haven't decided yet.

This set of padding was super quick and easy to make, so theoretically another bum pad would also be a simple make.

This one does give my pink silk Edwardian skirt a beautiful shape.


And, since they were made completely from stashed materials, they count as my entry for the Historical Sew Monthly No-Buy challenge (#7, but this year the rules have changed so you can complete the Historical Sew Monthly challenges in any order you wish.)
What the item is: "Scott" hip pads
How it fits the challenge: All materials came from stash, most were gifted to me by someone de-stashing, or left over from other projects.
Material: Polished cotton, cotton batting, cotton twill tape
Pattern: None, I made my own.
Year: c. 1900
Notions: thread
How historically accurate is it? They have the correct shape. The materials are plausible, but not perfect. I used what I had on hand rather than sourcing stuffing and such more similar to the original hip pads I was referencing. They are all machine sewn, which is accurate to the era, but the machinery used to construct hip pads in a factory in 1900 would have been very different from my domestic sewing machine in 2020. So, 75% I think.
Hours to complete: Less than 3, including patterning.
First worn: Only for fittings and pictures so far - my Edwardian event had to be cancelled due to Covid-19.
Total cost: The polished cotton was given to me by someone de-stashing. The batting was left over from another project. The twill tape was bought on clearance over a year ago for less than $1 per yard. So, well under $5 total.

That is so interesting! I've never seen a design quite like those. I like how the print coordinates with your corset. It all looks so pretty together.
ReplyDeleteIf I may say so, looking at the shapes of the original and your version I believe your side pieces need a more dramatic swoop backwards and the back needs to be more rounded or elliptical almost where as yours looks square with rounded corners.
You might could try cutting down the edges of this pair until you get it right and if you still don't want to make another pair perhaps you could then bind the then raw edges with tape.
I have never studied bum rolls at all. This is just what I see from looking at pictures of the two versions. I am really intrigued by the grommets in the original. Any idea what those would be for?
Thank you! I agree with your assessment of the shapes. Thank you for putting into words the differences you see! I never would have thought of cutting down and re-binding, but now I might need to give that a try. I've heard the grommets are for ventilation - I just didn't take the time to add grommets to mine this time.
DeleteYou're welcome! I felt your done-ness with the project because I have been there myself so many times and I just immediately thought what would I do here? Plus figuring out someone else's difficulties is a great procrastination of your own ; P
DeleteI'm glad I could give you a fresh idea, because you have given me so much inspiration from your projects.
Ah, ventilation would make sense!!
Hi there. Altering the shapes will definitely make a difference, but have in mind: The Scott was made for "very slight figures having no side or back hip" according to the label on the original. If you have (side) hips it might stand out more than you wish and you probably have to take this into consideration when altering the shapes :)
ReplyDeleteIf you want to go in a different direction than altering the shapes of the hip pads you should try putting it under your corset. That way you smooth out those pesky edges. It's how patents usually show bum pad placement in my experience :)