For the past several years, I've taken the week between Christmas and New Years to make something for myself. I spend the weeks leading up to Christmas frantically sewing my gifts for everyone else, so the week after Christmas I make a gift for myself. Last year, this took the form of some new garments to wear on my trip to Uganda. (This dress, and this dress, and the skirt with secret pockets!) The two years previously I used this week to make my "Designin' December" entry for the challenge hosted by Linda of "Nice Dress, Thanks, I made it!". In 2018 I copied a designer dress, and in 2017 I copied a designer coat. This year, it's "Designin' December" again, with a vintage designer dress as my chosen garment to copy.
Honestly, with my personal style, it's a bit surprising that this is the first year I've decided to go vintage for this challenge!
I think in the past, one of the things that's held me back from doing a vintage designer copy, is the sheer amount of amazing designer vintage garments there are out there. So many fantastic designs I'd love to make for myself! How could I possibly pick one?
Add that to the fact the most eye-catching, tempting, vintage designer garments are a bit more elaborate than I have time for in this week between Christmas and New Years, and they're not always the most suited for day to day wear either.
This year, however, I found the perfect dress to re-create. Vintage. Designer. Eye-catching, yet fairly straight forward when it came to the actual pattern pieces. Perfectly wearable in every day life and in line with my personal style. And, as the cherry on top, something I already had the perfect patterns and fabric for in my stash!
 |
| Claire McCardell Day Dress, 1stdibs.com |
A 1950's, Claire McCardell, striped cotton day dress.
 |
| Claire McCardell Day Dress, 1stdibs.com |
I came across this dress on Pinterest, where it's linked to a website called 1st Dibs, which appears to sell all sorts of vintage stuff. The listing for this dress helpfully includes all sorts of photos of the dress from different angles, helping me to unlock important patterning and construction details!
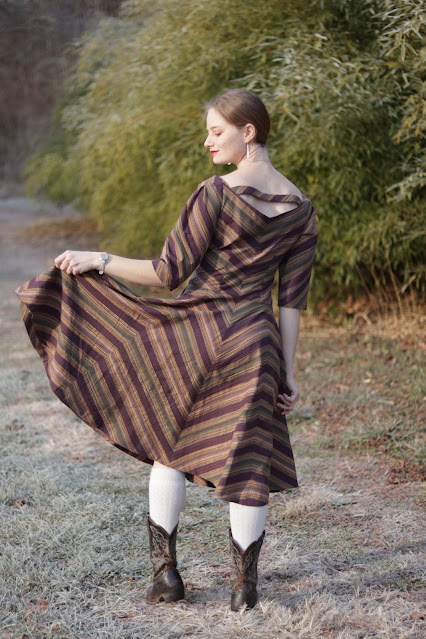
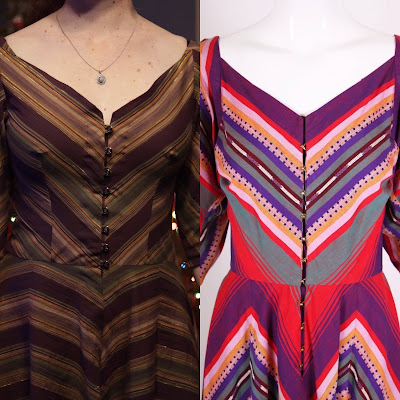
On first glance I could easily tell that the entire thing was cut on the bias to make the most of the stripes with a chevron design featured on the front and back of the bodice and throughout the skirt.
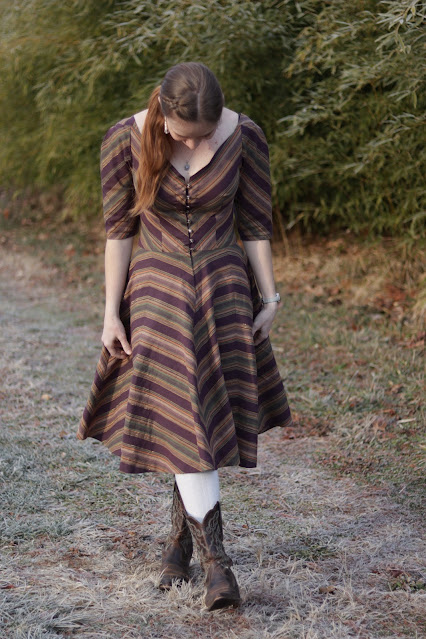
The bodice fastened up the front and featured almost off the shoulder raglan sleeves.

The skirt was a partial circle, cut as 8 panels, 4 in the front and 4 in the back, to make the chevron effect.
With these features in mind I went to my pattern stash and pulled out one pattern for the bodice, and another for the skirt.
Butterick B6022 was perfect for my bodice base! It had the front and back V-neck and the off the shoulder raglan sleeves I needed. The Charm Patterns Night and Day Dress pattern included a 4-panel flared skirt option, which I was confident I could split into an 8 paneled skirt easily.
I started by tracing the bodice of the Butterick pattern. I shortened the bodice by an inch and a half as it was drafted to end at high-hip and I wanted my bodice to end a bit closer to my actual waist, and altered it to be front opening instead of back opening. I also altered the sleeve piece to have some fullness up near the shoulder and be about 3/4 length, rather than long and straight as the pattern was drafted.

Tracing the pattern was a fantastic use for some slightly torn-up tissue paper left over from Christmas gifts.
For the skirt I just pulled out my already traced pattern pieces and folded them in half. Added seam allowance to the folded side, cut out 8 of these half-pieces rather than 4 full pieces, and I was good to go.
Pattern sorted, out came the fabric! 3 yards cotton, found at a thrift store several years ago, with a fantastic irregular stripe pattern featuring metallic threads running through it. It didn't exactly match the Claire McCardell dress fabric, but it had the right overall feel.
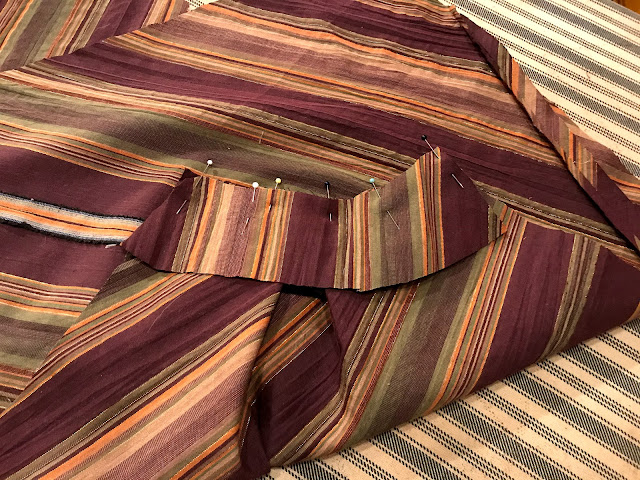
I would have felt more comfortable if I'd had 4 yards of fabric to work with for this design, rather than just 3, but with careful cutting and a little inconspicuous piecing on one of the back skirt panels and a sleeve, I made it work.
Since I was short of fabric, I used some quilting cotton scraps from my stash to make the pockets in the skirt (according to the description in the dress listing the original has pockets too! I would have added pockets regardless, but this is fun to know!), and the neckline facings.
From my vast collection of scraps, I chose a coffee print, because it was just cool.
It was an amazing feeling once I had all the skirt panels cut out and could see the chevrons coming together! I sewed up the skirt first thing because I was very excited about it!
Once the skirt was all sewn together, it was on to the bodice! The original didn't have any darts, but I decided to add darts to mine regardless, as I wanted the fit the darts would provide. This sadly broke up my stripes a bit, but I think it was worth it for the fit.
When I cut out the bodice, I was careful to match the stripes at the center front and back seams, but I didn't worry about the side seams at all - so you can imagine my surprise and thrill when I went to sew my side seams and found the stripes matched up beautifully! Well, almost. . . they are different colored stripes that match up, but the effect is fabulous!

For the sleeves I didn't bother worrying about any stripe matching or making them symmetrical at all. As long as the stripes were going at an angle similar to that on the original, I was happy.
To get the slight fullness at the top of the sleeve, I cut mine to be wider than the original pattern piece, then pleated it into a facing I cut using the original sleeve pattern as a guide.
This seamed to go great, and I was very pleased with the results, until I tried my almost finished dress on, prior to adding the closures.
The inspiration dress had almost off the shoulder sleeves. My pattern yielded very off the shoulder sleeves - something I'd missed looking at the pattern envelope thanks to the large collar the pattern featured. If I'd realized this off the shoulder thing earlier, I could have adjusted the pattern accordingly when I cut out the sleeves. As it was, I was going to have to alter the nearly finished dress.
I fixed the issue by piecing in a bit of bias cut fabric over the shoulder. We'll call this a design feature. . . or making the design my own. . . something like that.
Once the shoulder pieces were sewn in, the dress still had the annoying habit of wanting to fall off my shoulders. As I didn't want to deal with the constant pulling back up the shoulders while wearing the dress issue I could see arising here, I added a band of fabric across the back neckline to hold everything in place.
I don't really love this addition, but it does make the dress way more comfortable to wear!
Sleeves and shoulders all sorted out the only thing left was to add the closures. The original fastened with shiny gold hooks and eyes down the front, so I was planning on hooks and eyes as well. Then I remembered something I had in my stash - 8 pretty little buttons, black with gold shanks and roses, which I bought at the market in Peru back when I did the World Race in 2017.
As soon as I thought of them I knew this dress was the perfect thing to use these special buttons on. They were too perfect not to use!
I had 8 buttons, just enough for the bodice of the dress.
I made some button loops, and sewed them on.
Since I had a limited amount of buttons, the skirt closes with hooks and eyes - perfectly functional.
The final little detail was little ribbon loops to snap around my bra straps to keep them hidden.
I don't generally bother adding these things, but with as wide as this neckline is, I thought they were a necessary finishing touch!
And with that - my Designin' December dress was done!
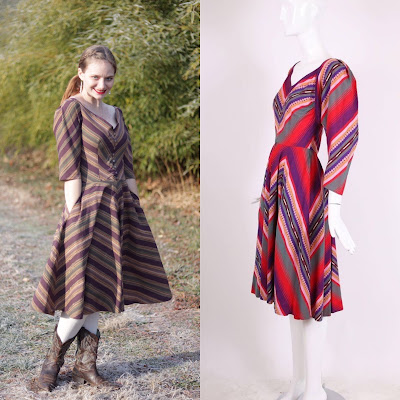
I think it compares quite nicely to the original.
Even with the issues I ran into in the making. . .
I absolutely love it!
I needed some more dresses with sleeves in my closet!
I can't wait to wear this one all the time!
 |
| All photos of the original dress came from 1stdibs.com |
Thank you Linda for hosting Designin' December yet again! I'm thrilled with the results!











What a beautiful dress, a skilled homage to Claire McCardell! Her designs still seem contemporary and practical. She designed pieces that she wanted and needed in her wardrobe, and was gratified to find that other women wanted those same pieces. It's well worth looking through her designs for ideas!
ReplyDeleteYour pattern matching is exceptional! And it makes all your seems stand out and look so clean.
ReplyDelete