Thursday, January 4, 2024

A Glowing Garden Stroll in Victorian

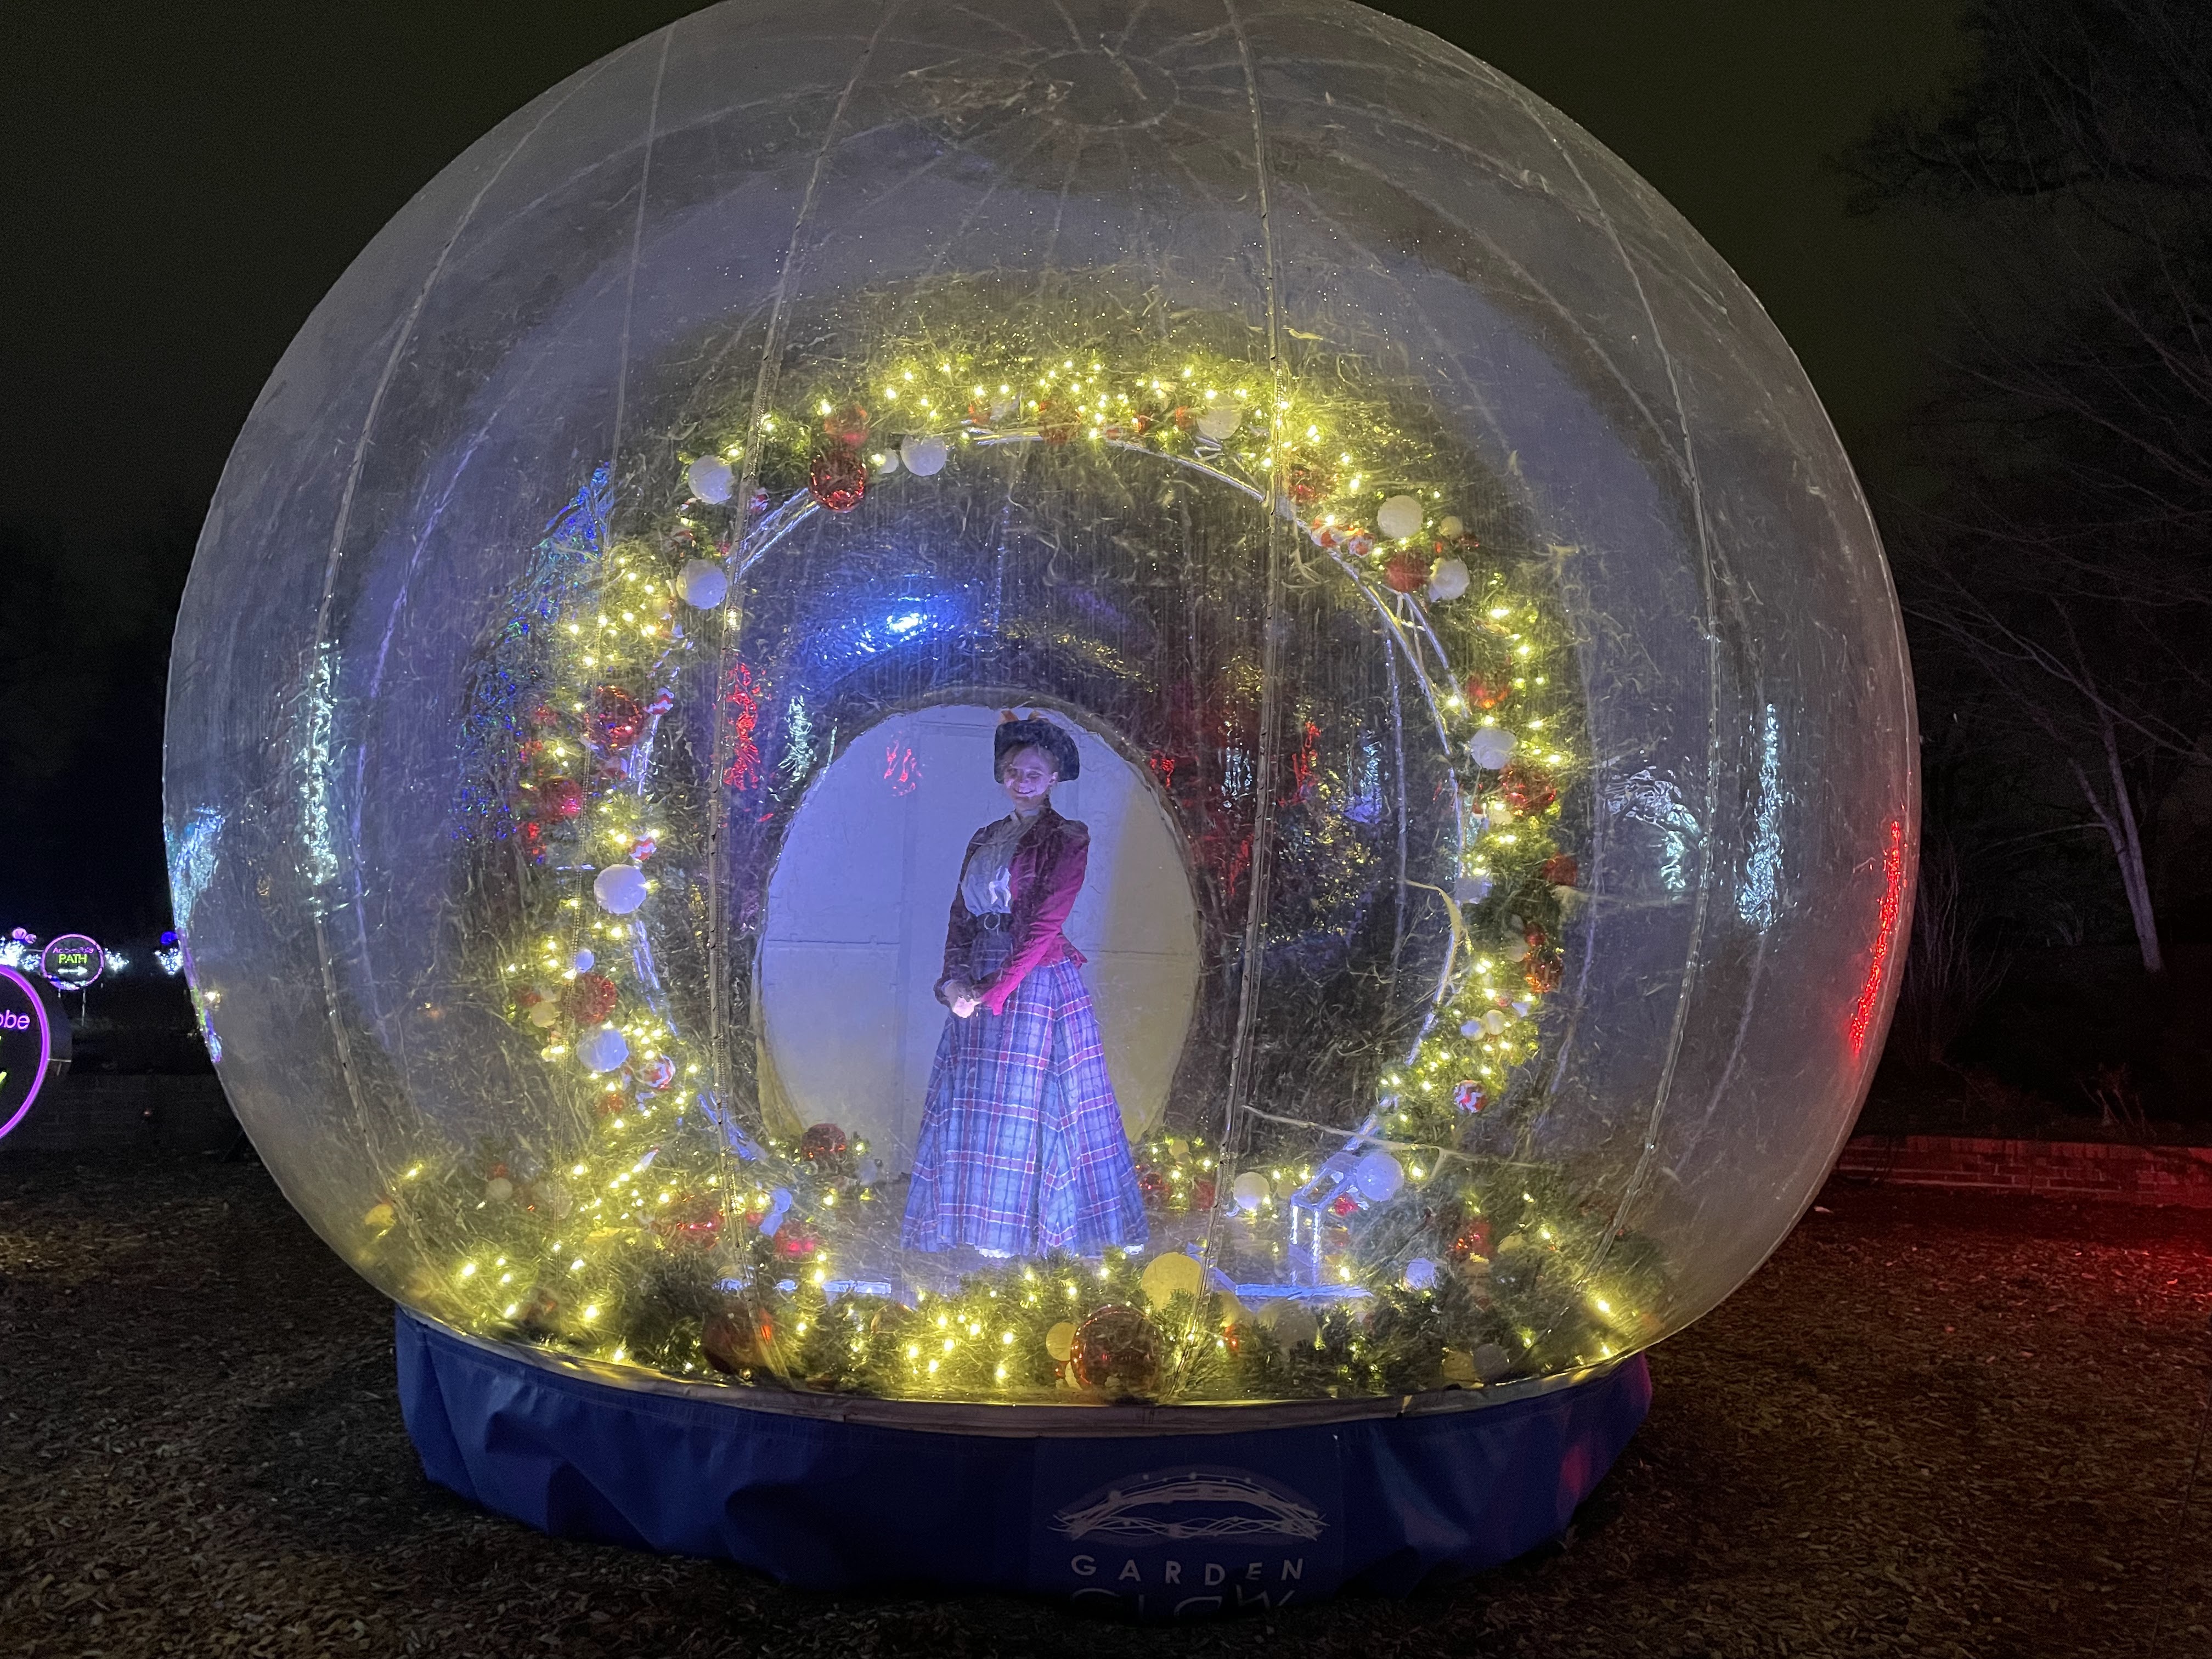
 For years now my two best friends and I have had a tradition of going to the Botanical Gardens during the Christmas season for the "Garden Glow" - always an enjoyable evening of wondering through and admiring the lights while drinking hot chocolate or apple cider and chatting. The gardens are beautiful, day or night, and seeing them all decorated with Christmas lights is a special kind of thrill!


Last year, as we were preparing to go to the gardens, it crossed my mind that I could dress up for the event. Why not? The gardens were founded in the Victorian era, so why not? I had a couple cozy wool Victorian ensembles in my closet that would be warmer to wear than my standard jeans and jacket - so why not go all-out and dress up for the occasion?


I floated the idea to my two bestfriends, and they were enthusiastic supporters of the idea! So, I did it.


I wore my 1898 winter ensemble to the gardens. With a long sleeve shirt and leggings underneath I was quite warm and cozy - my cheeks and ears were just a touch chilly.


Dressing up certainly added a layer of charm to the evening!


It was totally worth it! So this year, I decided to do it again.


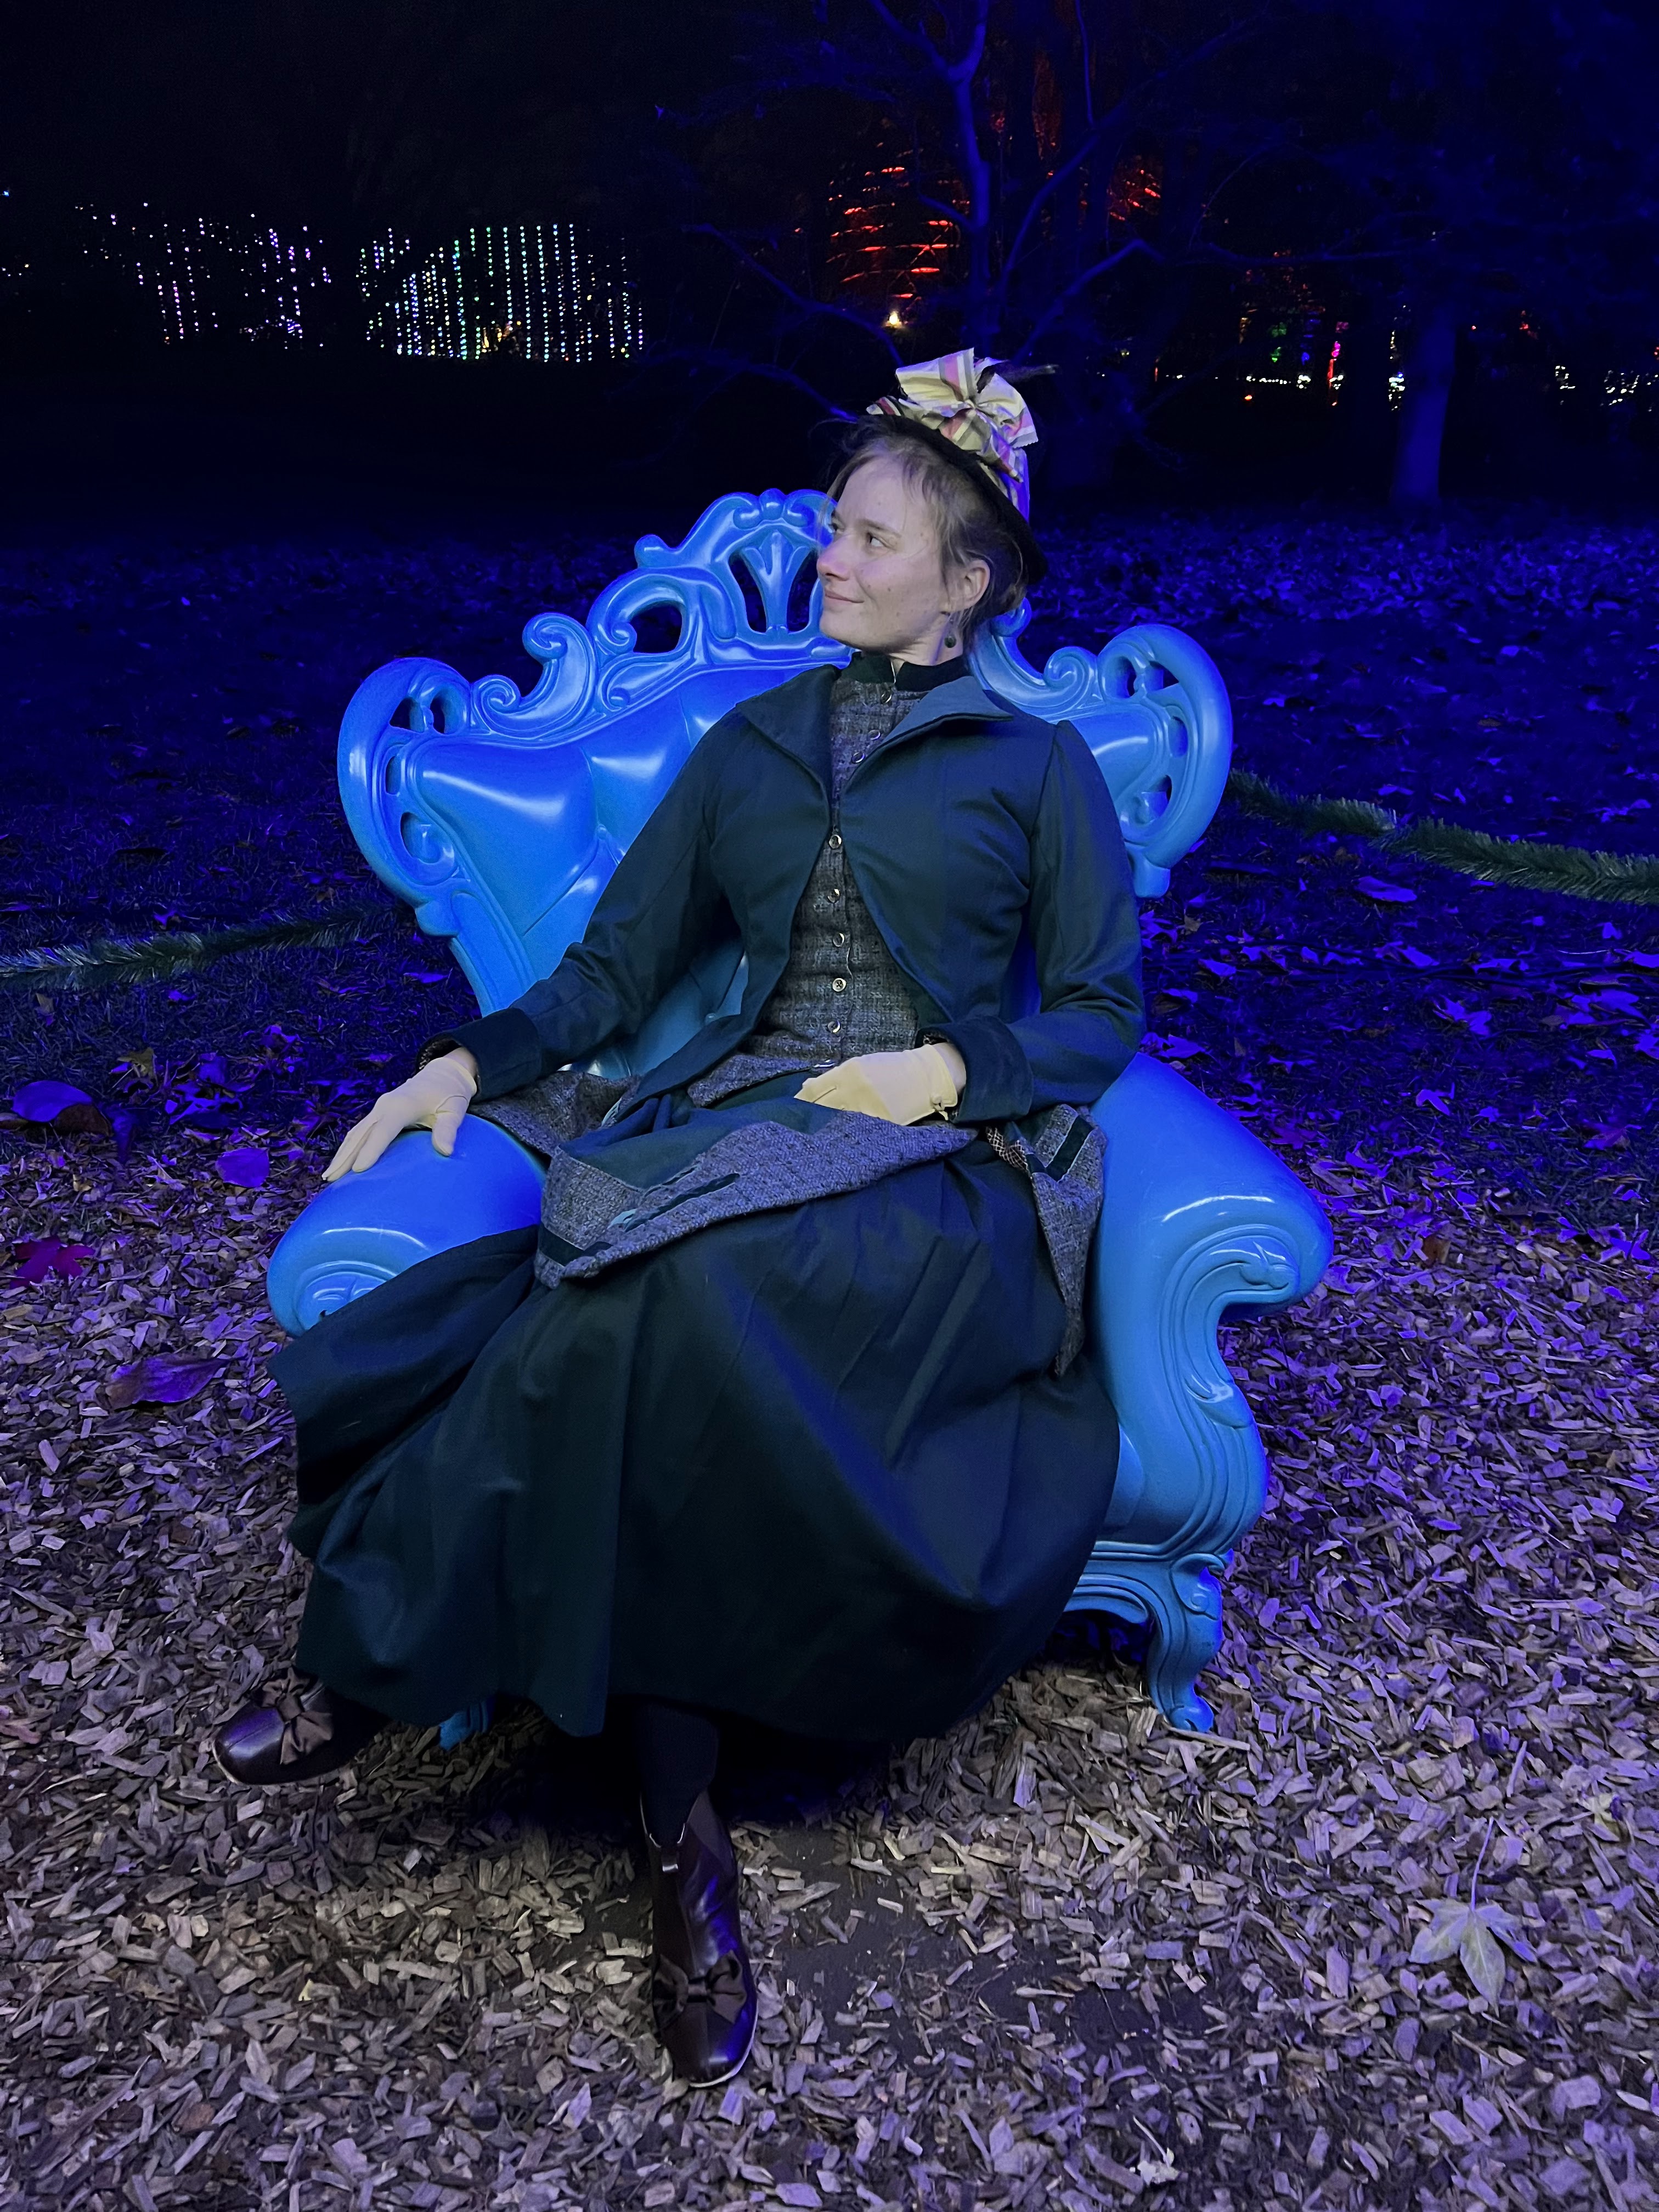
Our group size grew by two, and my costume slightly grew as well - in the back atleast.


I wore my 1884 ice skating dress. 


And once more, the evening was delightful! 


The entirety of the gardens are, of course, stunning. However, a particular highlight for me was touring the founder's Victorian home - all decorated for Christmas!


It was charming! 


Old homes have a special place in my heart - and getting to tour them in costume is just the best!


I'm thankful to my sister-in-law for photographing me in the house.


Pretty lights, good friends, yummy drinks, the evening has always been very enjoyable. A tradition worth repeating year after year.


Dressing up for the occasion? Now that's just the cherry on top!


As we are still within the 12 days of Christmas, 

(and I insist on observing all of them by doing Christmas-y things and keeping my Christmas decorations up until after Epiphany) 

Merry Christmas and Happy New Year!

Monday, January 1, 2024

Jingle Bells, Jingle Dress, Jingle All the Way!

 "Mommy, can Aunt Lyssa make me a Christmas Dress that jingles?" my niece asked.

"I don't know if you can do this," my sister-in-law said over the phone, "but she has requested a Christmas Dress that jingles."

If I can't make my niece the exact dress she wants, then what even is the point of sewing for her? Of course I could make her a dress that jingled! I didn't know what it would look like (other than jingley), but I was sure I could make it happen!


I've stuck with fairly casual, kid friendly, easily washable, fabrics for my niece's Christmas dresses thus far, just barely dipping my toes into the fancy fabrics realm with last year's organza trimmed dress. This year however, I thought my niece would appreciate something fancier, almost princess-like. Satin and lace it would be!


I had a lovely cranberry colored embroidered net lace in my stash. (I believe I picked it up from the City Sewing Room at some point.) There was only a yard of it, so not a whole lot to work with, but enough to make it a focal point of the dress. (Along with the jingle bells of course!) One of the great things about kids clothes is they require way less fabric than adult clothes! Perfect for the smaller cuts of beautiful fabrics I've collected!


With the feature fabric and jingle bells decided on, I spent weeks pondering the design. How did one make an elegant, jingley, dress? I took to Pinterest to find some inspiration in vintage and historical kids clothes. The above lace child's dress from the early 20th century gave me a starting point. I liked the basque waist, bows, short puffed sleeves, and of course the lace overlay. All it was missing? A good place to attach jingle bells! (Also, I didn't think I had enough cranberry lace to use it for the entire dress. gone are the days I could make my niece a full skirted dress from only 1 yard of fabric. We're firmly in yard and a half territory now.) I found solutions for these two issues in mid-19th century children's dresses.


Those shoulder strap thingys? Called bretelles? (These were a feature on my purple ball gown you may remember. . .) They looked like an excellent base to attach jingle bells to! And, the way they divided up the bodice would give me a good way to break up the lace and make it stretch.


Plan formed, I went to my pattern stash to find a starting point.


I picked McCall's 3023, a recent acquisition from a thrift store. It featured a basque waist like I wanted, a square neckline (my favorite!), and the bodice was already divided up the way I wanted it to be. I would just need to lengthen the skirt and replace the shoulder ruffles with flat bretelles. 


Pattern picked, I went fabric shopping. After considering all the different options at Hobby Lobby, my mom helped me choose a bright gold satin for the bretelles and sleeve bands and a champaign colored satin to go under the cranberry lace. This would be a Christmas Dress fit for a princess!


Along with the fancy fabric, this dress would require some fancy sewing as well. I did more hand sewing on this dress than her previous three Christmas dresses put together! It started with basting together the lace and satin for the center sections of the bodice. . .


And ended with sewing on buttons, shoulder bows, and, of course, Jingle Bells!

I finished the dress in time to give it to my niece at Thanksgiving, so she would have it to wear the whole Christmas season. And she loved it!


I think the face says it all! 


She wore the dress for Christmas and spent the whole day showing off her bells to the whole family, shaking them, and singing "Jingle, Jingle, Jingle!"


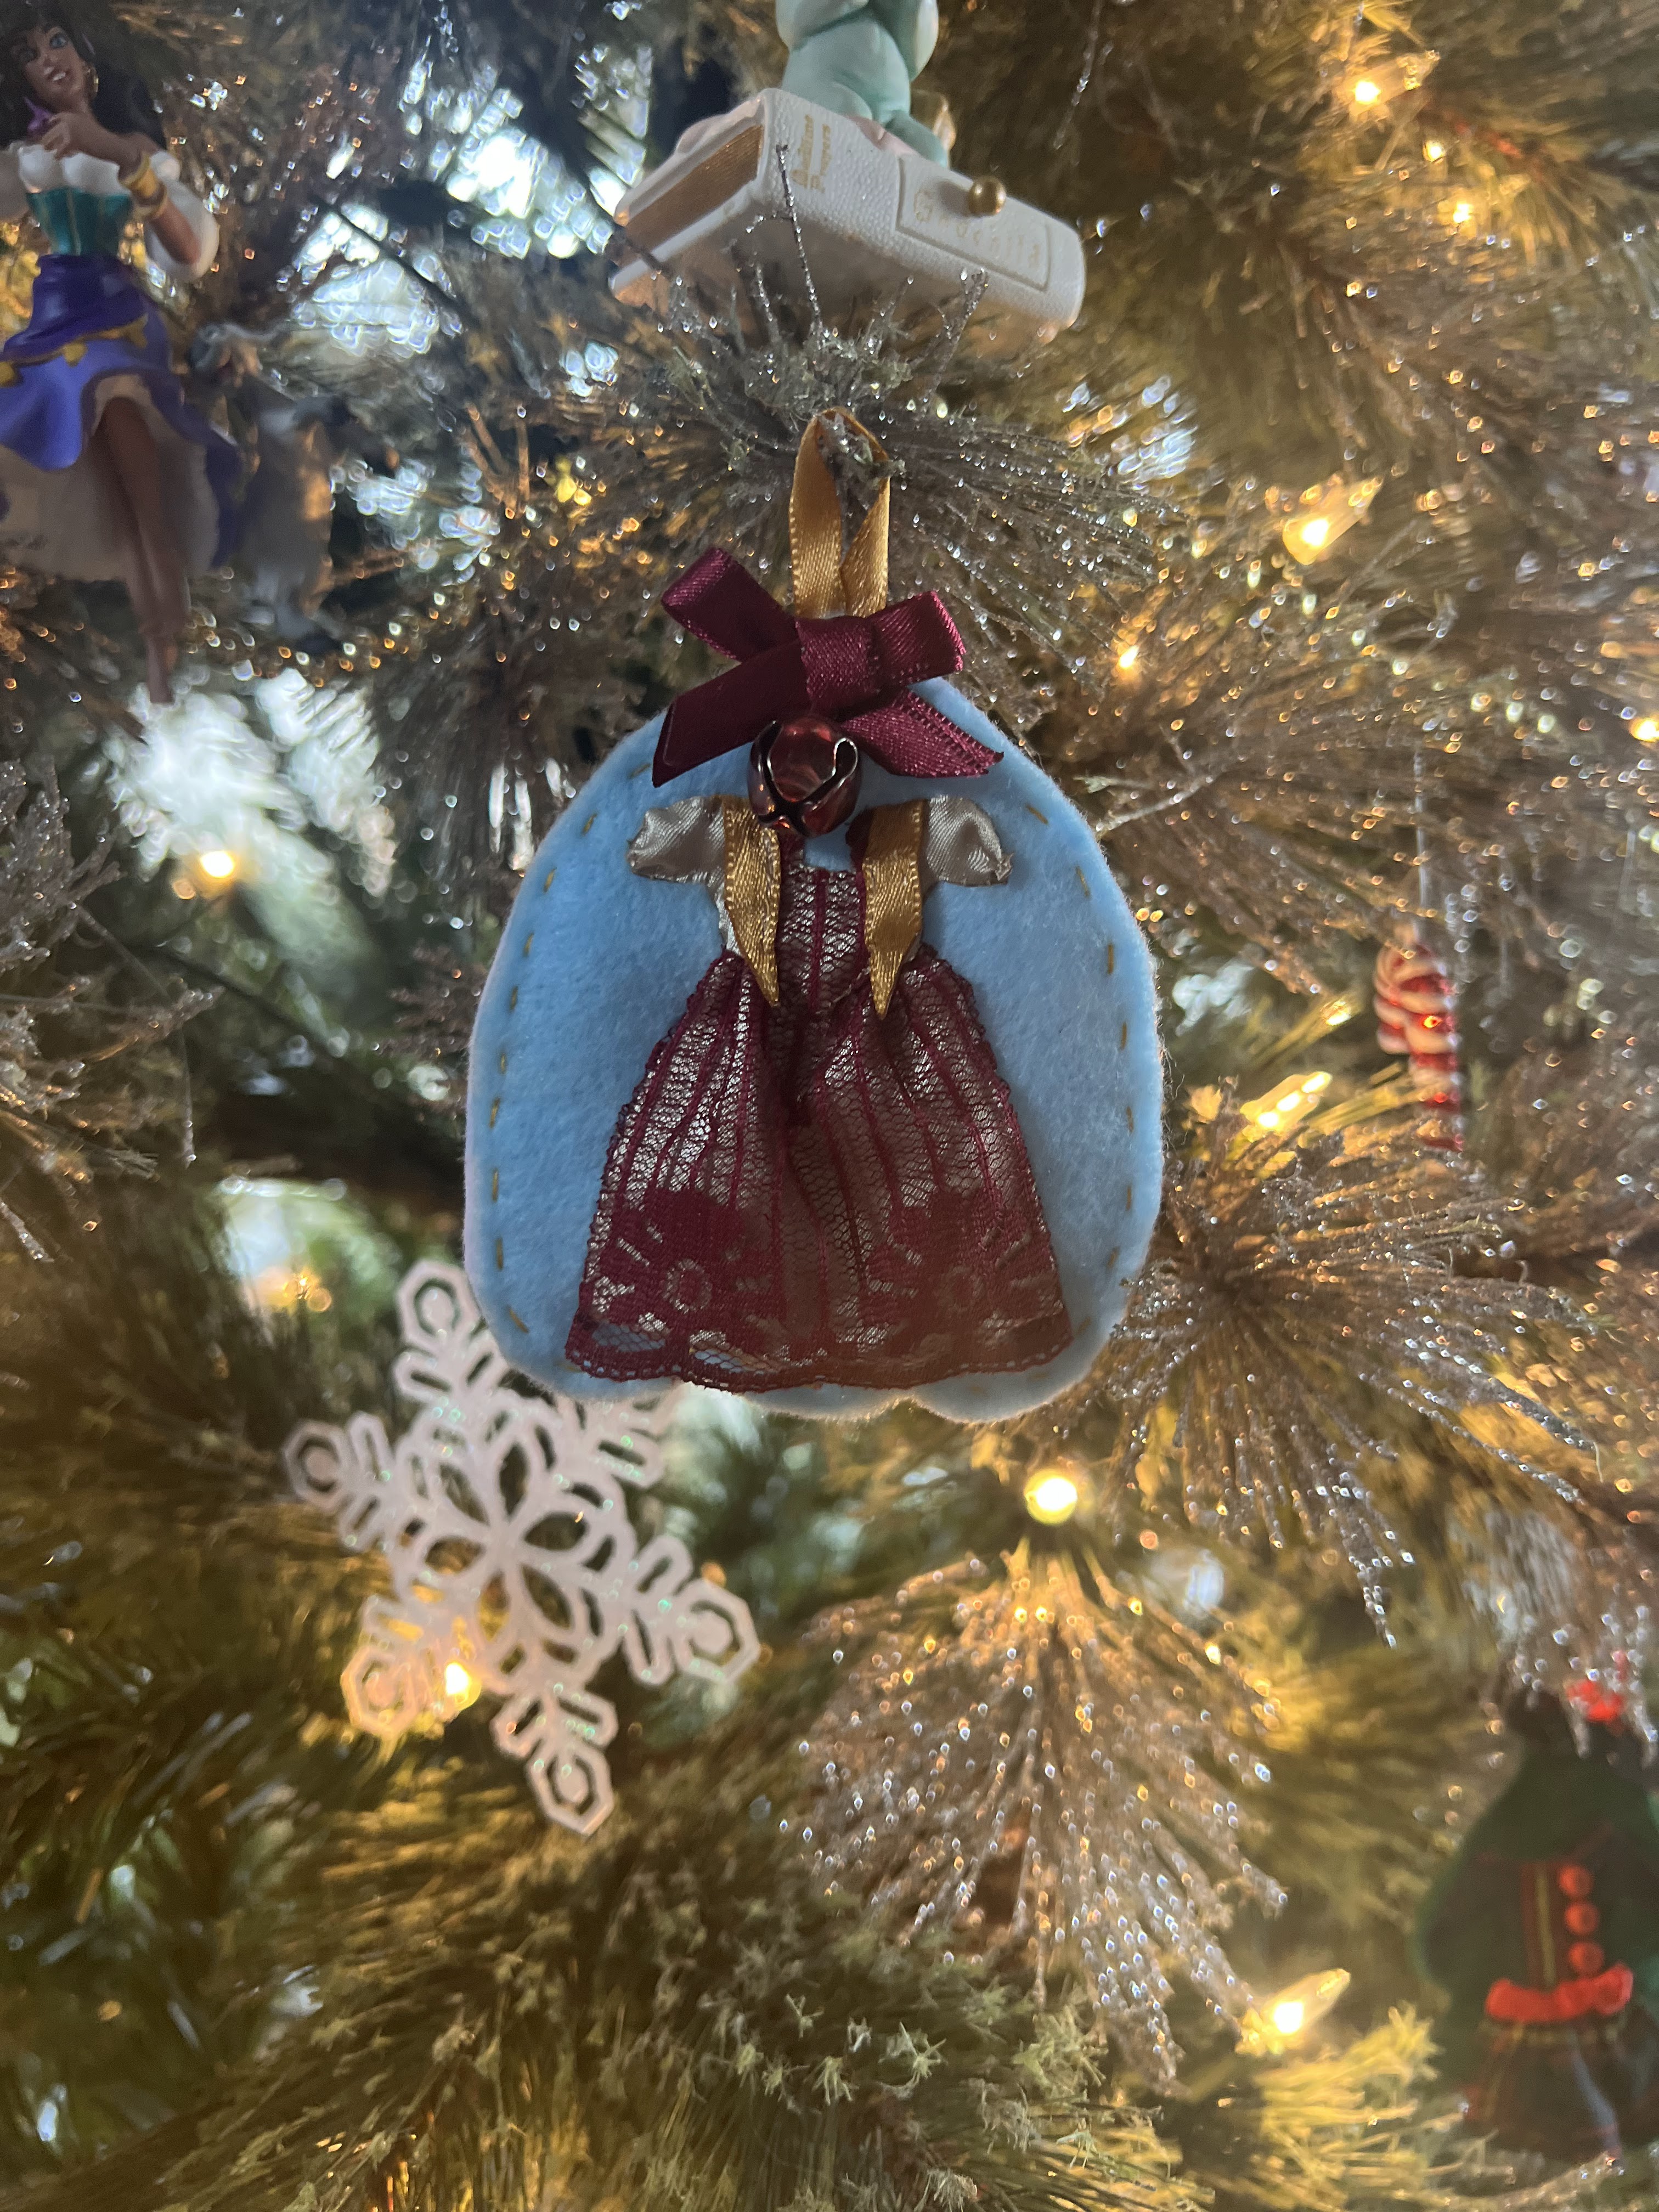
As with previous years, I continued the tradition and made an ornament to match the dress. Thankfully I found a cranberry lace trim at a thrift store that worked for the skirt of the ornament! With the lace border at the hem of the dress being so distinctive, I wasn't sure how I was going to replicate it in ornament size! 


My sister-in-law tells me my niece loved hanging all her dresses on the Christmas tree this year, so the ornaments are definitely a tradition I need to continue!


I also wanted to continue the tradition I started last year of making my niece's baby doll a mating Christmas Dress (I loved dressing up like my dolls as a kid!), however, I ran out of time to get the doll's dress done before Christmas. I had it cut out, I just couldn't fit in getting it sewn. (much like my own Christmas dress. . .) So, as of this morning, a week after Christmas, I finished the doll dress. (My first finished sewing project of the new year!) I'll give it to my niece as a belated Christmas gift next time I see her. Sadly it's too late for her and Dolly to match at the Christmas gatherings, but atleast she'll have it for the memories right?


Doll dress aside, I think it's safe to say I made my niece's Jingle Dress dreams come true this Christmas - and I'm not sure I'll be able to top this next Christmas!

Happy New Year!

Sunday, December 31, 2023

Claire McCardell Meets Minerva McGonagall

 It was a beautiful green plaid - I fell in love with it as soon as I saw it at the City Sewing Room - and there was a lot of it! My first thought was it would make a wonderful 1880's ensemble, but. . . it was stretchy. This woven plaid certainly had a high spandex content, which is not ideal for historical clothing. I almost left the plaid behind for that reason, but it was just too pretty! I decided to take about 4 yards home with me that day. It wasn't suitable for historical clothing, but surly I could figure out something more modern to make with it!


The green plaid reminded me of Professor McGonagall, so I decided I wanted to use the fabric for something inspired by McGonagall - inspired by her, but not costume-y. (I've already done an 1890's McGonagall outfit, so this could be more casual.) 

I decided a long skirt was a must, but did I want a shirt dress, or a wrap dress? Or something else entirely? I wasn't sure! I let the ideas linger in my mind for a few months while I worked on other projects. Finally, in November I decided I wanted the green plaid to be my Christmas dress, so I needed to nail down the design. I took to Pinterest and discovered this Claire McCardell dress saved to one of my boards.


It was perfect! Long skirt, unique wrap-style bodice, and, since it was a designer dress, it would work for my "Designin' December" entry, for the sewing challenge hosted by Linda of "Nice Dress, Thanks, I Made it!" This dress had everything!


I spent most of November keeping my eyes open for a good pattern to alter for my dress. I contemplated several - both in my stash and in the pattern books at Joann's. I needed a pattern with cut-on sleeves, no darts, and a high wrap front with some rouching. I knew I'd have to alter a pattern to get just what I wanted, but even so, finding a good pattern to start with was harder than I thought it would be!


Finally I picked Butterick 6318. It only featured one of the three elements I was looking for - cut on sleeves - but as it was a basic bodice pattern without any extra design details or fluff, it would make a good block to alter for the McCardell Design.


I started by tracing off the bodice in my size. For the bodice back I eliminated the center back zipper (my dress would close at the side like the original), and the waist darts. Since my fabric was stretchy due to the spandex content I knew I wouldn't need those back darts the way I would with a standard (non-stretchy) woven fabric.

The front bodice alterations were a little more involved. First I cut out a full bodice front pattern piece from brown paper, rather than the standard half to be cut on the fold.


Then I messed around with folding down to top edge of the pattern piece to decide on the angle I wanted the wrap neckline to have. The original McCardell dress had a very high neckline, but that looked uncomfortable to me. I wanted mine to be a bit lower. Finally, I picked an angle I thought looked good, and chopped off the extra paper.


Next came the messy part. I eliminated the front darts by rotating that fullness over to the side seam to make the pleats featured on the McCardell dress. Once that was done my pattern was ready! I just wanted to make a mock-up to double check everything. . .


Yeah. That mock-up didn't happen. In fact, the dress didn't happen for Christmas the way I'd planned. I was too busy sewing other people's Christmas dresses and Christmas gifts to make my own happen. (Good thing I've got a collection of Christmas dresses from previous years, I still had plenty of options to wear to the various Christmas gatherings - and it was fun to wear old makes again!)
So, here was are the week after Christmas. I decided I still wanted the dress. So yesterday I made it happen.
Since I didn't feel like dealing with a mock-up I just cut the dress out yesterday with some extra length added to the sleeves and bodice - as those are the areas I often find a touch short. I also added a cut-on facing to the  front bodice neckline, and decided to skip doing a lining.


I carefully cut out the bodice back so the two halves would meet in a chevron pattern.


 I attempted to do the same with the sleeve seam, but since I had to cut the front at a specific angle so the front neckline would be on the straight grain, the sleeve pattern matching was less successful.


I sewed up the bodice, then tried it on to double check the fit. It fit beautifully, and I was very glad I'd added the extra length!


I made the skirt - two rectangles gathered up with side seam pockets and a placket on the left hand side, and attached it to the bodice.


To maintain the stretchy-ness of the fabric I sewed the waist seam with a zig-zag stitch and bound the seam with some red plaid fold-over elastic from my stash. I thought the red would add some Christmas cheer to the inside of my dress!


To finish off the dress I added button holes to both the under and overlap of the bodice, and the skirt placket. On the underlap side I added a piece of twill tape to the side seam to sew buttons onto. I used some black plastic buttons from my stash for this.


On the overlap side I used some beautiful black glass shank buttons for the bodice closure, and some standard plastic buttons for the skirt closures. The buttons on the skirt placket are completely hidden inside the pocket when the dress is worn, so those didn't need to be fancy.


The original Claire McCardell dress closed with hooks and eyes, rather than buttons, but I didn't feel like sewing on a bunch of hooks and eyes last night, so buttons it was!


Besides, there's a another McCardell dress of a similar design (just shorter and of a less expensive fabric than my inspiration dress) that does close with buttons down the left side - so I felt completely justified in my closure choice!


I sewed on the buttons sitting by the fire last night and my dress was done! I'd begun at 10 am with cutting the dress out, and it was finished by 9 pm, even with several breaks throughout the day to eat, do house work, visit with a neighbor, and cook dinner!


Probably my quickest and easiest Designin' December entry yet! There are a couple little things I wish I'd done differently, but for the most part I love the dress and am very pleased with my day's work!


I made my skirt from two panels of 44" wide fabric, and I wish I'd done 3. The extra fullness would have been luxurious! But I didn't have enough fabric for that - I really should have snagged all of this fabric when I found it at the City Sewing Room, rather than just taking half. Oh well, two panels still gives a comfortably full skirt.


My second regret is the bodice length. Remember how I said the bodice was the perfect length when I tried it on prior to attaching the skirt?


Well it was. . . but the weight of the full skirt certainly stretched out that bias cut bodice so it's a touch too long now. I should not have added that extra length. It would have been fine without it. Oh well, throw on a belt or sash and its an easy issue to hide!


All in all, I love this dress! 

It's incredibly comfortable and I intend to wear it lots this winter!


I've even got one more family Christmas gathering coming up that I can wear it too!


So I can still call it my Christmas dress, right?


Merry Christmas and a Happy New Year to you! I hope you had a wonderful celebration of our Savior's birth with your family and friends!