Back in 2017, when I went in the World Race, I picked up several embroidered net lace trims with the intention of making 18th century lace engageantes, also known as sleeve ruffles.
5 years later and one of the lengths of net lace has been used to trim my wedding dress and my 1830’s evening gown. However, I still had lace saved back for those sleeve ruffles.
And finishing my Golden Rose Pet en Lair seemed like the perfect opportunity to pull out the rose embroidered lace and make my engageantes!

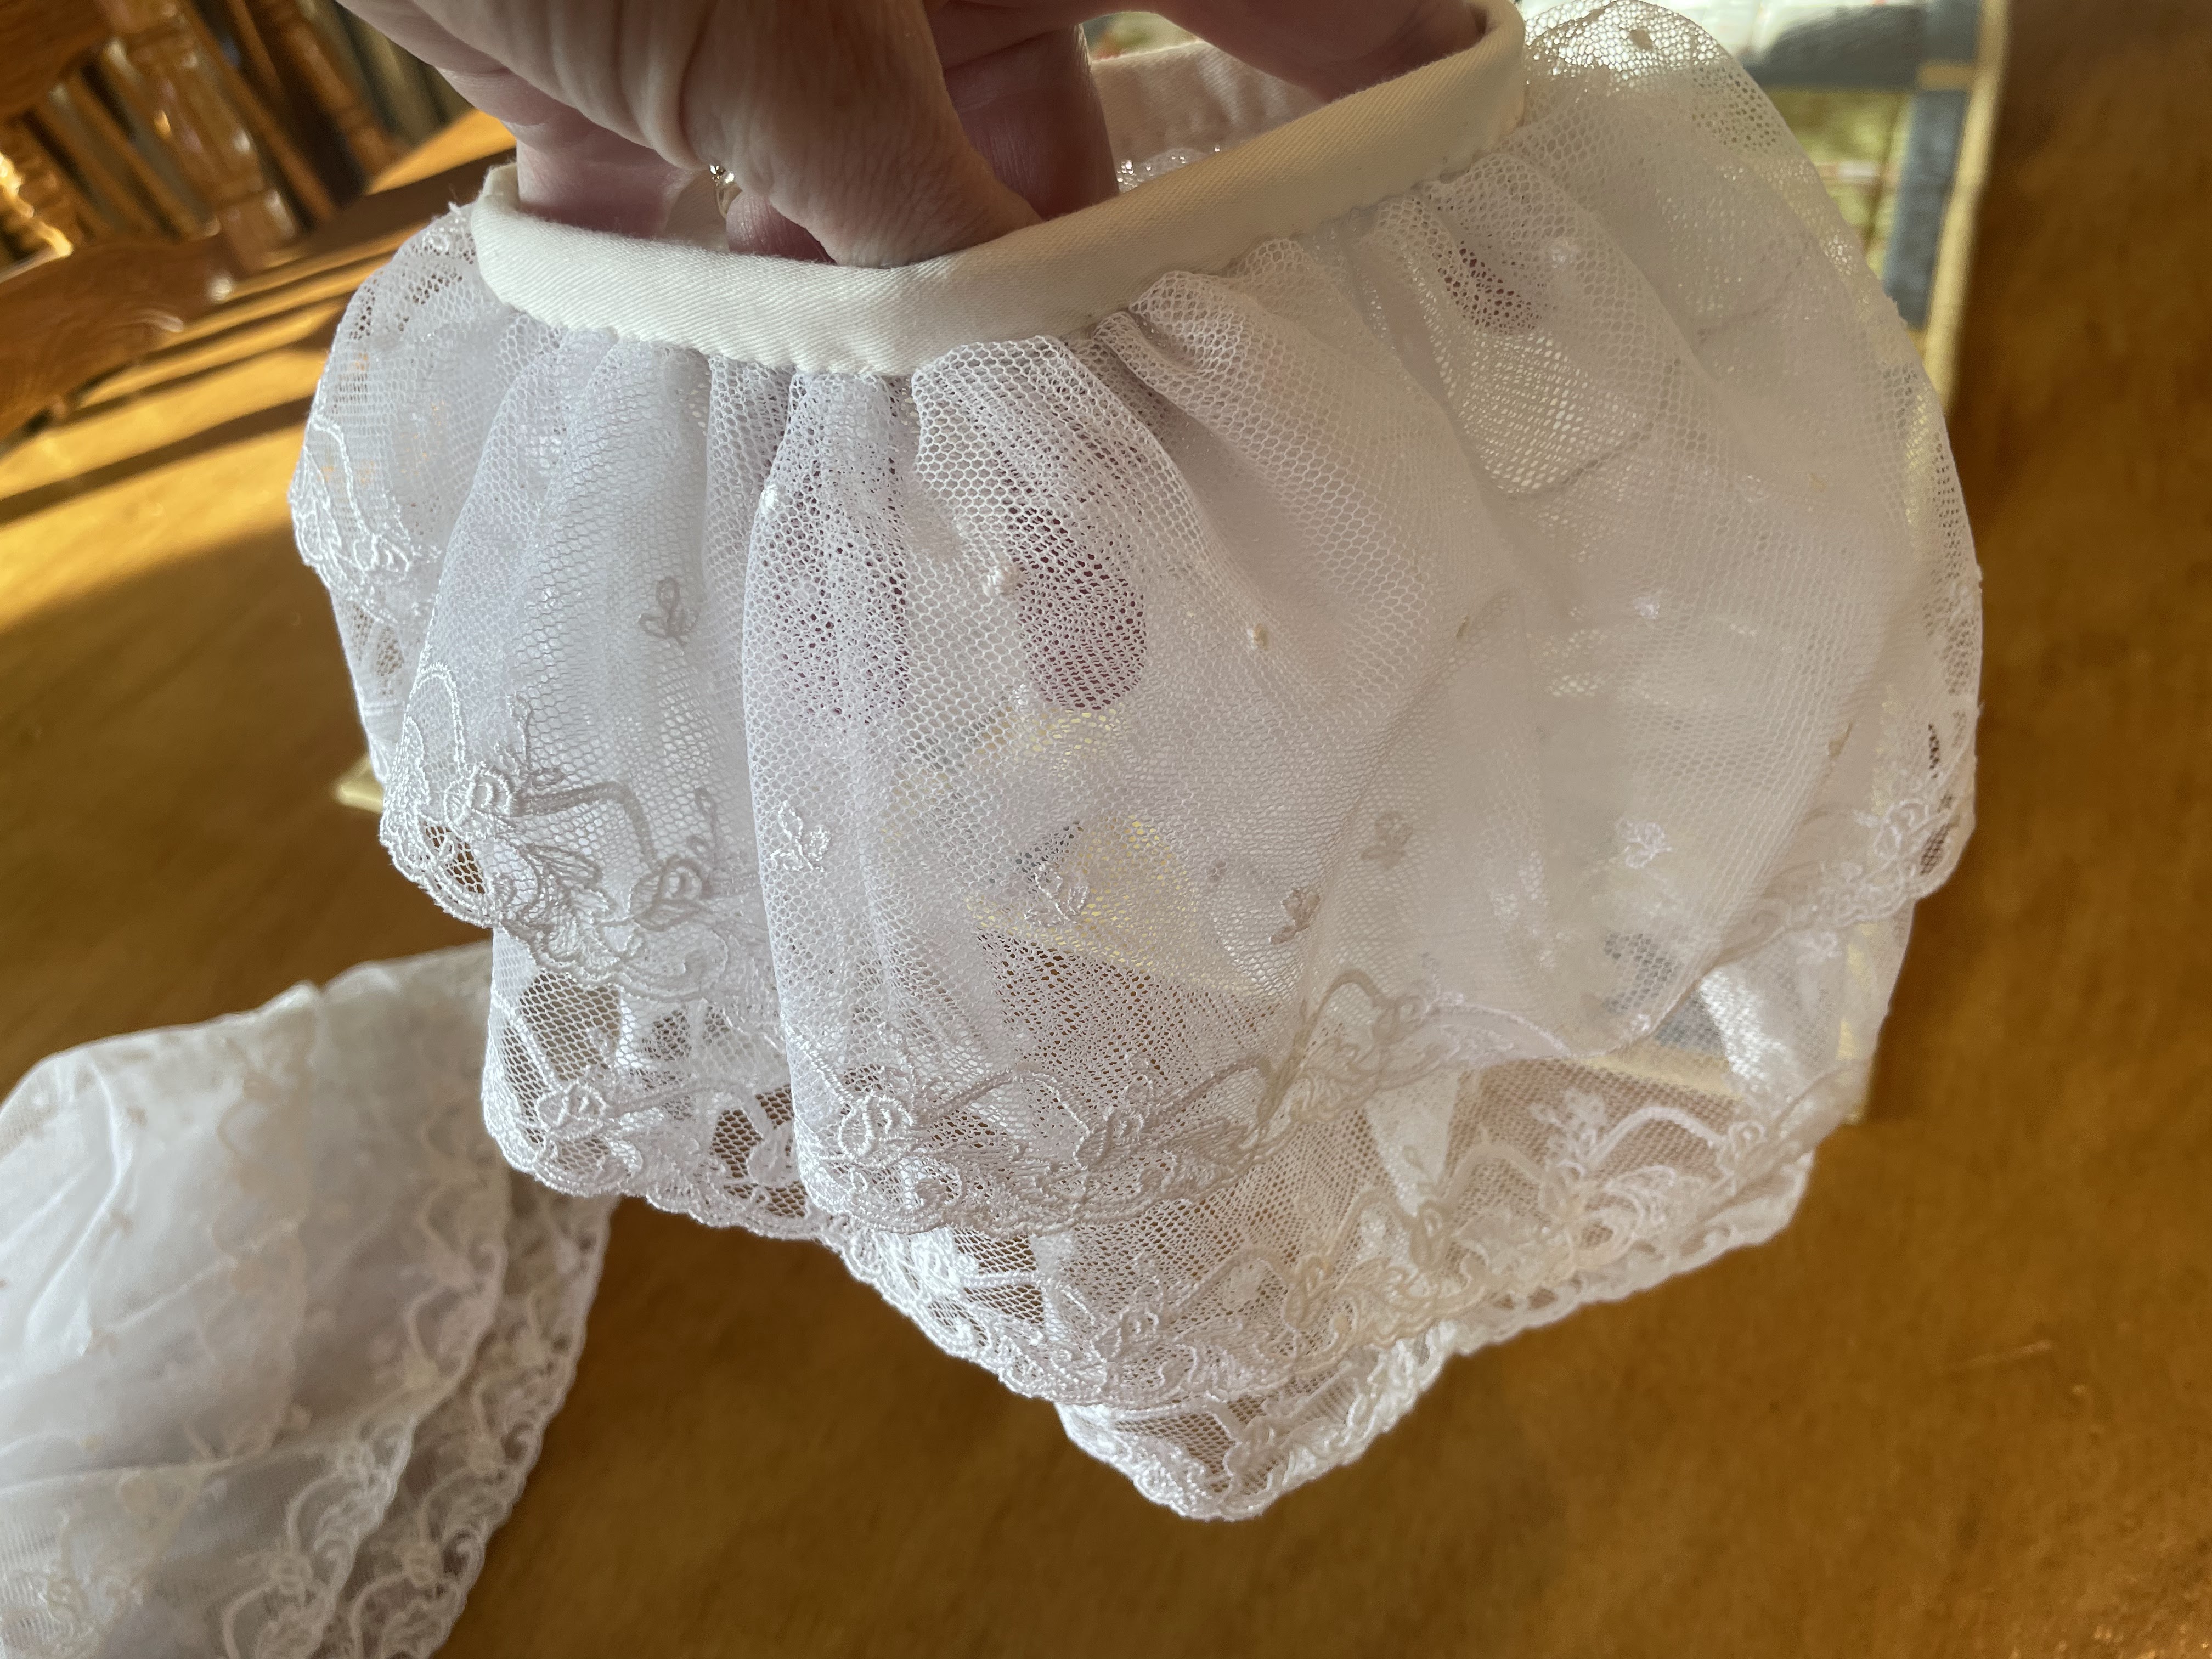
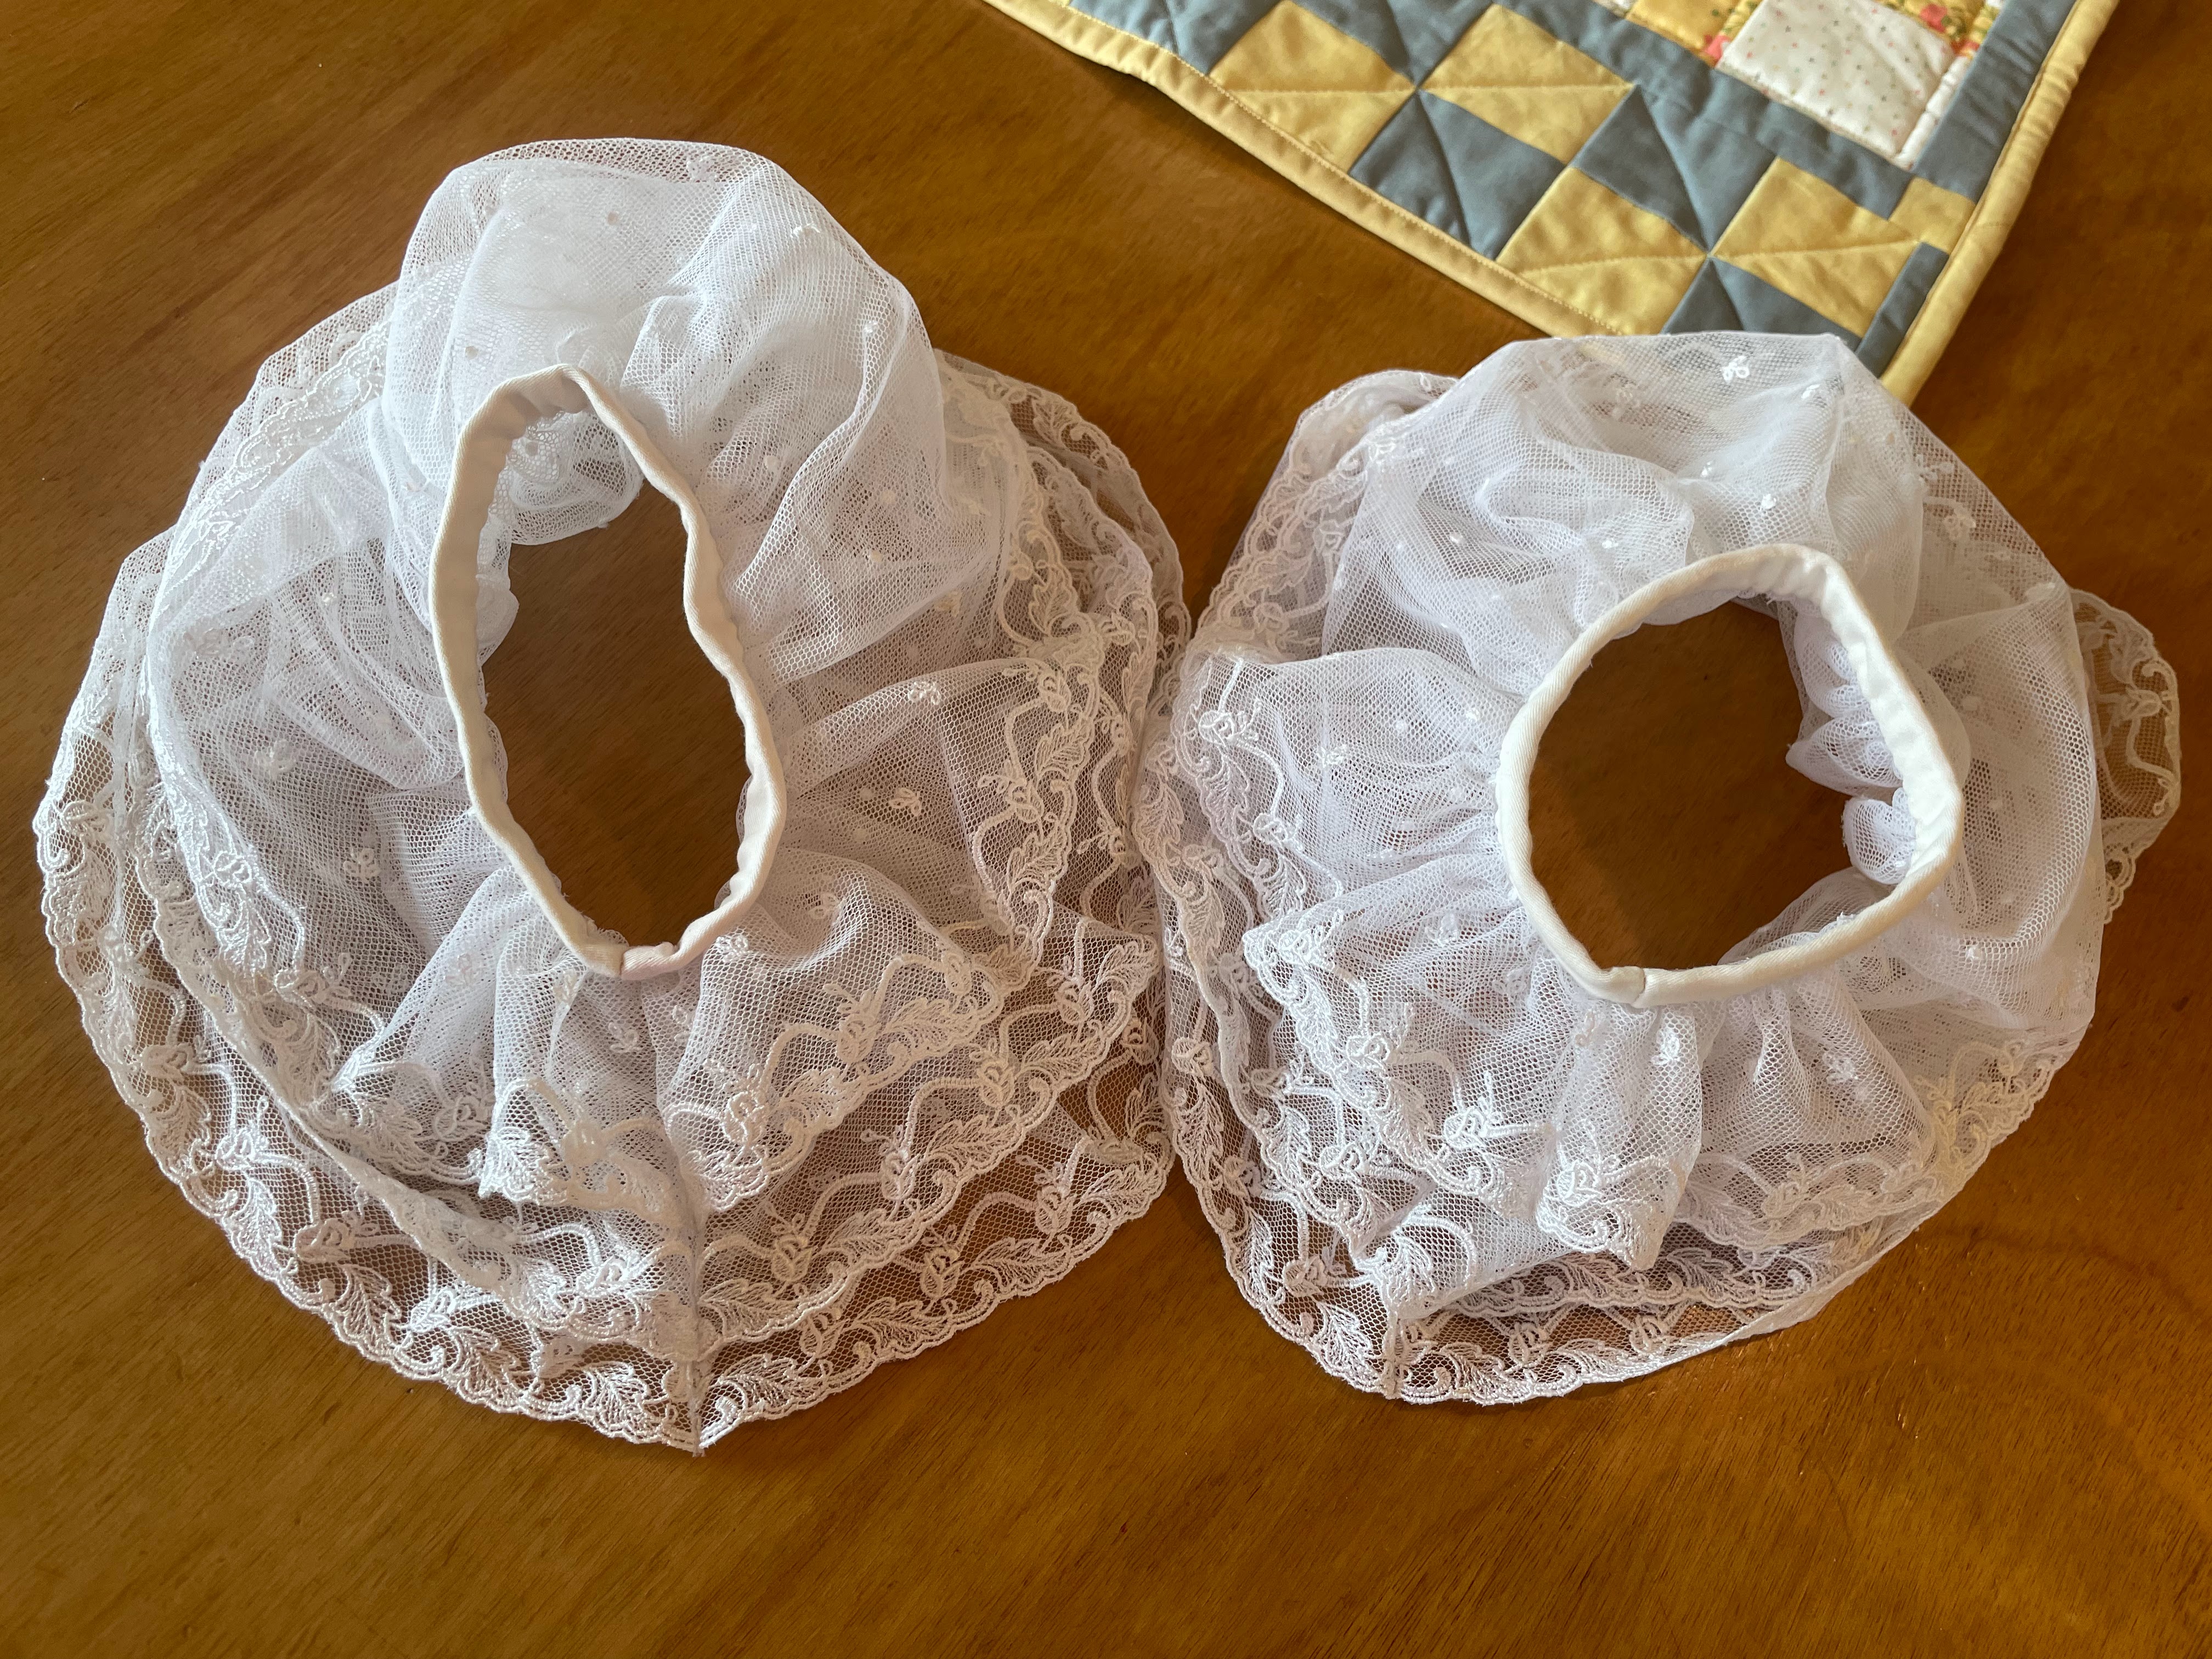
I wanted very floofy, triple flounced, engageantes. To get the look I was going for, the three flounces needed to be three different widths, narrower on top, slightly wider in the middle, and quite wide for the bottom layer of lace. As my lace was, obviously, only one width wide, and not as wide as I wanted my bottom layer of lace to be at that, I was going to have to get a bit creative to make this work.

I began by cutting 6 lengths of lace, 3 per engageante, each just under a yard long. I wanted my sleeve ruffles to be very floofy when gathered down.
I cut my narrowest ruffle into the correct shape - narrower at the ends where it would be sewn together, and wider in the center. That center section was the full width of the lace. (The Dreamstress has a blog post all about the shape of engageantes and making them work with modern materials if you're interested.)
Next I lay this length of lace on top of the pieces I had cut for the middle ruffle. I had the embroidered edge of the middle ruffle piece extend about an inch longer than that of the top ruffle. I cut the middle ruffle into the correct shape using the top ruffle as my template - narrower at the ends and wider in the center. There was only one issue once I got it cut to the right shape, the center of the ruffle was about an inch too narrow. To fix this I took the netting I’d trimmed off the ends and flipped it over. It could be sewn onto the top of the center to make that ruffle the correct width. Finally, I took the widest ruffle and repeated the process, cutting it to be about an inch wider than the middle ruffle. To get the center of that ruffle to be the correct length I took the netting I’d cut off the narrow ends of the narrowest ruffle, and flipped it over to be sewn to the top of the widest ruffle.

The middle and bottom ruffles got pieces together by hand with a whip stitch.


Once the ruffles were all pieced together, they were each sewn into loops.

Then gathered up.

And sewn onto strips of cotton twill.

I had the floofy lace engageantes of my dreams!

Unfortunately I didn’t get them done in time for my pet en lair photo shoot, but they’re ready for my next 1750-1770’s outing!

As these didn’t get finished until January, they are my first completed submission for Historical Sew Monthly 2023!

What the item is: Lace Engageantes
The Challenge: #12 - Paired to Perfection - they’re a pair of sleeve ruffles!
Material: 6 yards of embroidered net lace and scraps of cotton twill
Pattern: none
Year: 1750’s-1770’s
Notions: thread
How historically accurate is it? The look is right, embroidered net engageantes were a thing in the era, however, mine are made from modern synthetic net with machine embroidery, at the time it would be silk net and hand embroidery. Also, my engageantes are embroidered along the straight edge of the net, with the upper, curved, edge being gathered into my strip of twill. In the 18th century the curved edge would have been embroidered and the straight edge gathered. As I was working with pre-embroidered net, this was not possible for me.
On the upside, they are all hand sewn! So we’ll give this project 60%.
Hours to complete: I’m not sure, several afternoon naps, so maybe 10ish hours.
First worn: not yet!
Total cost: I bought the embroidered net lace in Malaysia several years ago, I can’t remember what I spent on it, but it was pretty cheap. I definitely spent less than $10, maybe even less than $5. The thread and cotton twill were stash, left over from other projects.

No comments:
Post a Comment