
That said, a lightweight jacket of some sort is still generally appreciated. So, in honor of the Winter Wear Design "Layers" blog tour, I made myself just such a jacket - lightweight and springy. Perfect for layering over the sundresses which have languished in my closet all winter, just waiting for warmer weather to return. (Also in honor of the blog tour, all WWD layering patterns are 25% off this week with the code LayersBlogTour)

I've admired the Fashionista Jean Jacket, by Winter Wear Designs, ever since the girl's version of the pattern was released. It was the curved neck band, rather than a collar, that specifically drew me to this pattern. It's the same shape as the neckline on the denim swing coat I made myself a few years ago, which I love. So, when it came time to pick my pattern for this blog tour, there was no doubt in my mind what I would make, and Suzanne graciously sent me the pattern.

Picking the pattern was the easy part of this project, and picking the fabric was the hard part. Actually making the jacket? That was somewhere in between.

Originally I'd thought I'd make the jacket from plain ol' normal denim. Then I thought I might make it from a lightweight wool. Then I admired a pale pink denim jacket worn by a lady in the checkout line at Walmart, and decided I must make myself either a pale pink or pale lavender jacket. Eventually, after all that, I found periwinkle colored denim at a Mennonite fabric store and decided it was just the thing for my fashionista jacket. So I bought three yards, used two to make the jacket, and have one yard left over to turn into a pair of shorts for myself this summer.

I cut out the jacket in my standard size for WWD patterns, widening the shoulders per usual and cutting the waist one size smaller than the bust and hips.


When it came to constructing the jacket, I glanced at the instructions to figure out the suggested order on construction, then did my own thing.

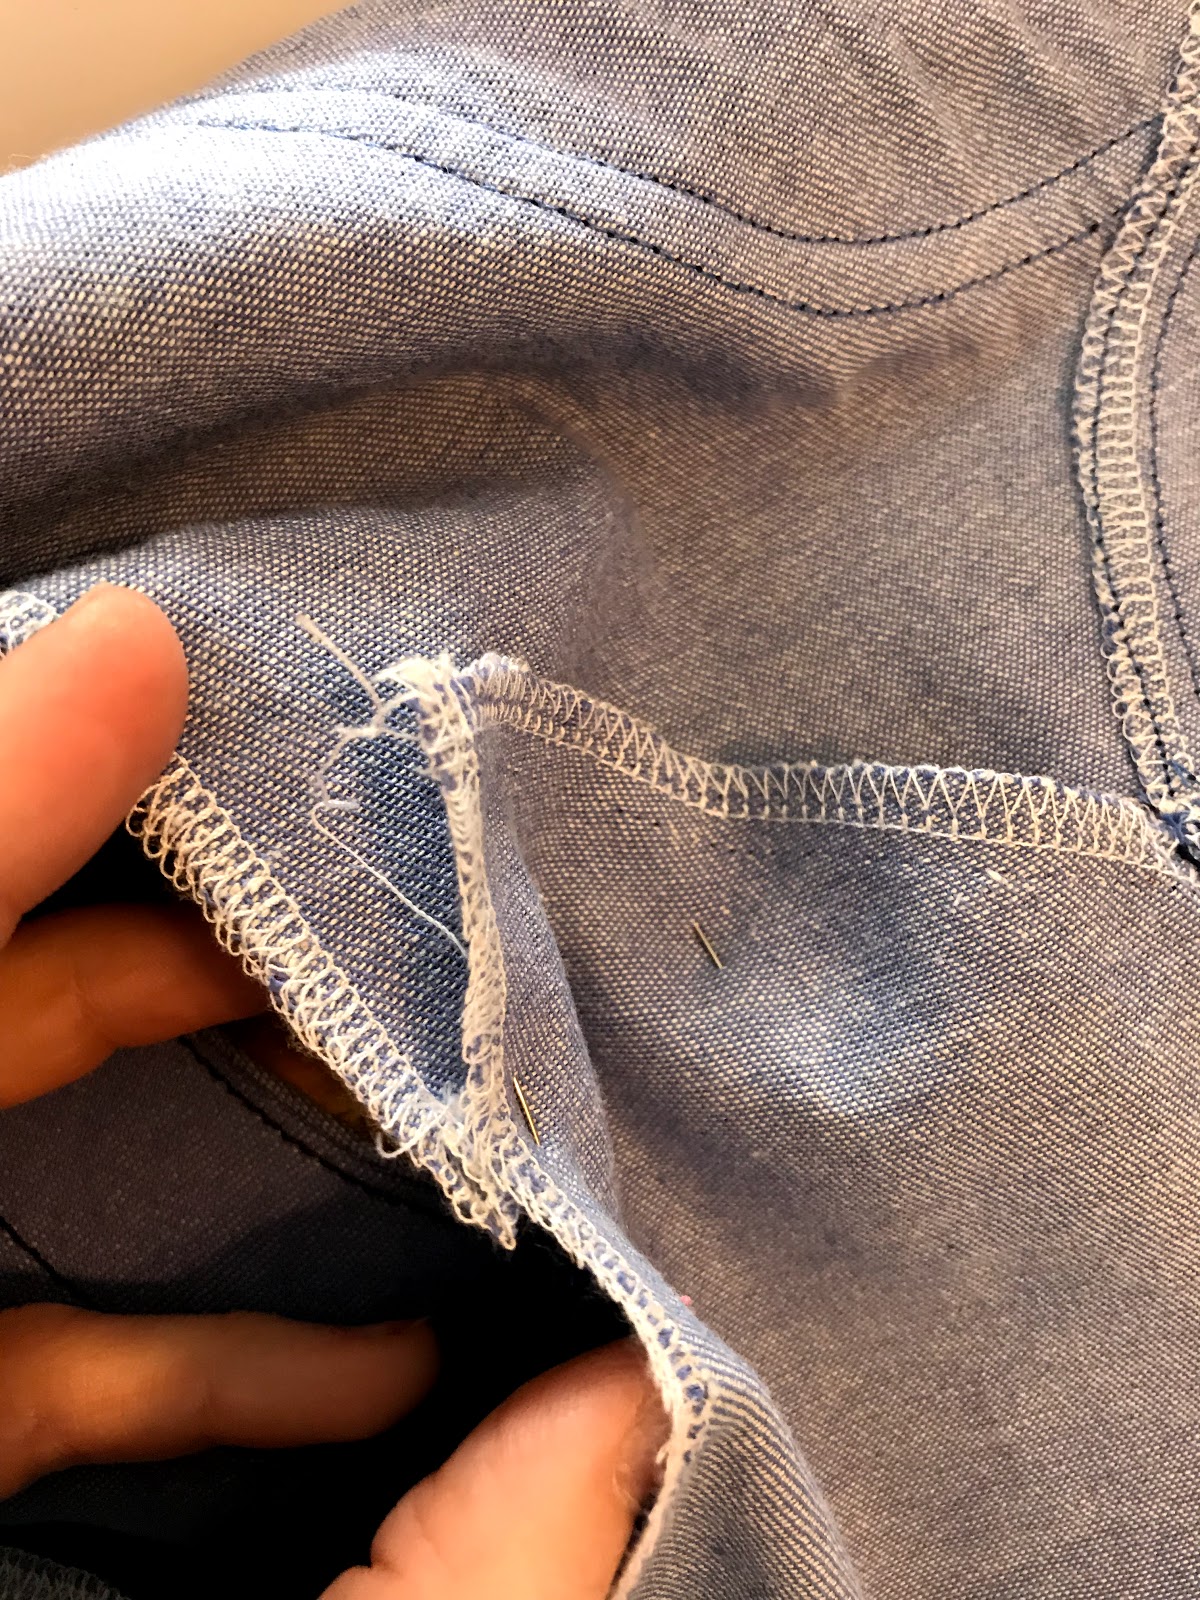
I attached the front yoke to the front bodice pieces using a lapped seam, a vintage sewing technique for sewing pointed, angled, or otherwise shaped seams.

To make a lapped seam, press the seam allowance of the upper piece under all along the seam line, as if you were preparing to hem it. Then lay this piece over the lower piece, line up the seam lines, pin, and topstitch in place.

As long as the seam allowance was pressed under nicely, the resulting seam should have nice sharp, pretty, angles, which can be difficult to achieve with a standardly sewn seam.

After sewing the lapped seams, I sewed together the front and back of the jacket at the shoulders and side seams, attached the neckband, button placket, and hemband, and finally tried the jacket on, prior to attaching the sleeves. I discovered there was excess fabric above my bust, at the armhole, and I didn't like it. (This was caused by the fact I really should do a full bust adjustment, but generally don't) So, I ripped out half of my lapped seam.

I messed with the overlap until I was happy with how the armholes fit, then re-stitched my lapped seams. This time I had a 1" overlap at the armhole, which tapered back to the standard 3/8" in the middle of the yoke.
Once the armholes were fixed, I set the sleeves and finished the jacket by sewing buttonholes and setting jeans buttons on the cuffs and all up the front of the jacket.

My Fashionista Jean Jacket was done, and just the springy garment I'd hoped it would be!

This jacket features not just one, but two sets of inseam pockets!

One set, highlighted by welt-like pocket flaps, in the center front seams.

And a second, larger, set of pockets hidden in the side seams!

I anticipate all four pockets being very useful!

And the jacket itself? Yeah, it's gonna be useful too, all spring long!
*A Special Thanks to my Friend Bretta for taking these pictures for me
*I received this pattern free of charge in exchange for writing this blog post.

Don't miss out on any of the stops on the tour!
3/25
Patricia of Sew Far North
3/26
Suzanne of Winter Wear Designs
3/27
Alyssa of The Sewing Goatherd
3/28
Kristen Guest Posting at WWD
Kristen Guest Posting at WWD
Laurie of The Bear and the Pea Atelier
Florence Guest Posting at WWD
3/29
Livia of Liviality
Aurelie of Maglice and So
Lisa of Maybe She Made It
Aren't we all happy for Spring? I love how fresh everything is. And your jacket falls right in there too. Four pockets is AWESOME!! I am SOOOOO adding that feature to the next jacket I make!
ReplyDeleteSpring is the best! I was super excited when I started cutting out the jacket and realized there were pattern pieces for all the pockets!
DeleteIt looks lovely on you. You sew divinely!
ReplyDelete