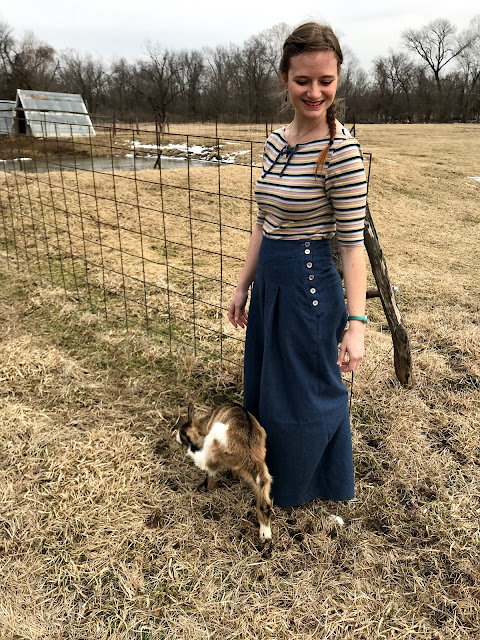
As it is still very much winter here, (We got snow again last weekend, and it was so cold at the beginning of the week that we had to close up the baby goats in a heated shed.) I decided to make these button-up Eastbournes out of wool, or more specifically, a wool blend.
I found this piece of blue wool fabric at a local antique mall/flea market type of place last fall. It's not as heavy as a coat-weight wool, but slightly heavier than most skirt-weight wools. I'd intended to turn the 2 yard length into an 18th century petticoat, but then I decided to do a burn test to make sure this fabric was indeed 100% wool - thus an accurate material choice for the 18th century. Well, the burn test revealed the fabric to be a wool/synthetic blend. Not accurate for an 18th century garment, but perfectly acceptable for a more modern garment, such as wide legged pleated pants.
So, how did I make the Eastbourne trousers button up the left side rather than zip up the back?
By altering the pockets. And adding a placket.
The pattern includes (wonderfully large) nearly invisible, hidden, side seam pockets. Now it is possible to put in a side seam zipper with this type of pockets (possible, but not particularly easy), but they are not really compatible with a side seam button placket. I most certainly did not want to lose the pockets to achieve the button placket, so instead I re-shaped the pocket opening.
I changed the pockets to have a visible slant opening, rather than a hidden one, which gave me room to install a button placket on the left side.
I just folded back the top edge of the front side seam at an angle from the upper edge of the pattern to the little circle on the pattern piece marking the bottom of the pocket opening. (You could also cut this angle, but I opted to fold it back so I can re-use this printout of the pattern in the future if I want to make these trousers again without the button placket.) I also widened the top of the inseam pocket pattern piece so it would be able to support slant opening pockets.
With the pocket piece layered behind the newly altered front leg piece, the side seam looks complete, matching the shape of the original front side seam before it was altered by the pocket opening. Thus this little pocket opening alteration will not affect the fit of the final garment at all, just the look.
Once I had the pocket situation figured out, I sewed up the pants like normal, making two major changes. First, just sewed up the center back seam rather than putting a zipper in it.
Second, I left the left side seam of the pants completely open and unsewn (with the pocket sewn to the front leg piece) until after I attached the waistband. Likewise, I sewed up the center back seam of the waistband but left the left side of it open.
After attaching the waistband, I then made the button placket.
I sewed an underlap onto the top 10" of the back leg piece and a matching facing onto the front leg piece. Then the remainder of the left side seam got sewn up like normal. The waistband/yoke facing was then sewn in place, and, finally, I made the button holes in my placket and sewed six metal buttons onto the underlap.
Then came the real test, I tried the pants on, buttoned up my placket, and. . .
My button-up Eastbourne Trousers fit beautifully!!
 |
| "Must reach that braid." |
They'd turned out just how I'd hoped!
 |
| "Got it!" |
Wide-legged, swishy, warm, comfortable, and featuring a pretty side button placket!
Due to the changes made to the pattern during testing, this pair of Eastbourne Trousers, made from the final pattern, fits me even better than my first pair do!
And, on another note, I managed to get these made, and photographed, and blogged, all within one week. That's something that hasn't happened with any project in a while!
I've also worn these pants twice since finishing them, so I predict they will be a much appreciated wardrobe addition!
They also appear to be baby goat approved, and who could complain about that?
*Making a special appearance in this blog post is Aurora, one of my 3 bottle babies!
*I received the Eastbourne Trousers pattern free of charge in exchange for testing it, but all thoughts and opinions expressed in this blog post are my own.


No comments:
Post a Comment