Wednesday, September 21, 2016

A Hat to Complete the 1890's Outfit

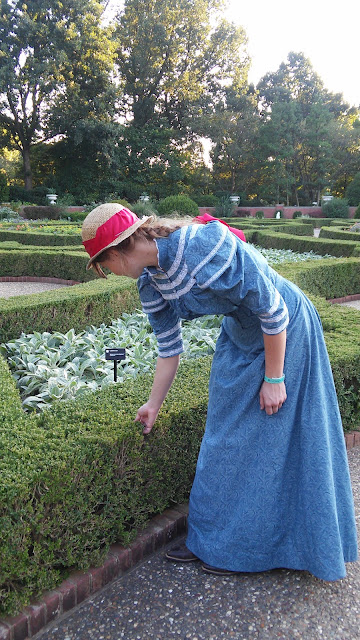
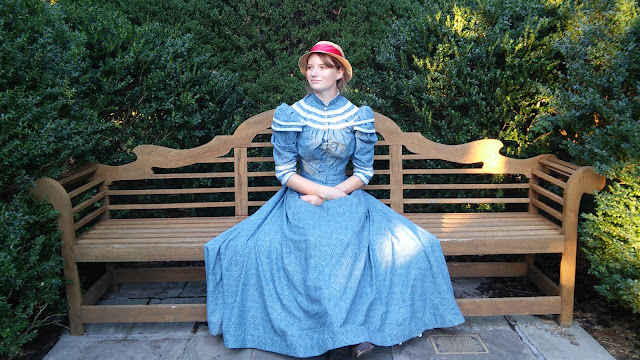
I was thrilled to be invited to help out in the Maplewood house at the Heritage Festival again this year. A chance to see items, including some clothing, up close from the late 19th century and to learn more about local history while educating others? Sign me up! This home of the Lenore and Nifong Families was built in 1877, added onto in 1891, and lived in until 1959. Thus, my blue paisley 1890's dress (after some minor bodice alterations)  was the natural choice of attire for this volunteer assignment last weekend.


However, my 1890's wardrobe was missing one vital piece, a proper hat. The Sophie hat I made using hot glue and model magic to wear with my dress to the Japanese Festival was far from historically accurate. Something new was needed for the Heritage Festival. 

Young Ladies' Hat October 1896

This month's Historical Sew Monthly challenge is Historicism: make a historical garment inspired by a previous era. After some research I decided an 1890's straw hat inspired by the 18th century bergere hats was just what I needed. So, after saving a bunch of inspiration images to my 1890's Pinterest board I set to hat making.


I started with this straw hat I picked up a Goodwill a while back. I yanked off all the embellishments, soaked it in water so I could reshape it, and trimmed down the brim a couple inches. Then I decided I wanted to dye it a dark brown. I used Rit dye for synthetics (even though straw is natural, I wasn't sure how it would take dye), and hoped for the best


So into a tub of dye sitting in the bathtub the hat went for a night. I weighed it down with rocks so it would stay fully submerged.


The next morning I pulled the hat out, rinsed it off, and this is what I had.


Not quite as dark as I wanted, but it would do. Time for the trimming to begin! I picked up some feathers at Hobby Lobby and used some fake flowers and a strip of polyester tissue taffeta from my stash.


I played around with my trims until I got the look I was going for then stitched everything in place by hand. No hot glue this time!

 The finished product worked splendidly to complete my outfit! 


I showed visitors the guest bedroom. I explained about the changes the room had undergone over time and a little about the family who had lived in the house. I also told people about some notable items in the room. The green butterfly quilt on the bed in this picture actually went to the St. Louis World's Fair in 1904, and it won!


I love this pattern! Now, if only I quilted. . .


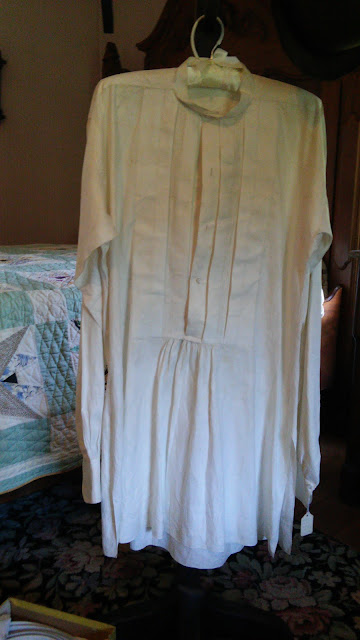
This shirt was Mr. Lenore's wedding shirt in 1864. Between visitors I examined it as much as possible without touching.


All handsewn with the tiniest stitches and hems imaginable. Amazing attention to detail. I would love to have this kind of sewing ability. Something to aspire to.

The hem of the drawers
 There was also a wardrobe in the room that held a chemise and drawers from the last quarter of the 19th century. They were sewn with a mix of hand and machine sewing and absolutely amazing. These undergarments of yesteryear were better made than any clothing today. It was a treat to get to volunteer in the house and see these items.


I received many compliments on my dress but after seeing the workmanship of the actual historical clothing, I felt a little inadequate. Good thing sewing is something I can continue to improve at! Though I'm not sure it is an art I can ever completely master, but atleast I can try.

Now for the less impressive details of my new hat.

What the item is: An 1890's Bergere hat, inspired by the Bergere hats from the previous century

The Challenge: #9, Historicism

Fabric/Materials: Straw Hat, Feathers, Fake Flowers, Polyester Taffeta

Pattern: None

Year: 1896-1899

Notions: Thread

How historically accurate is it? The look is right, but that's about it. The materials for the most part aren't.(with the exception of the straw and feathers.) So, maybe 40%

Hours to complete: About 3 hours, unless you count the amount of time the hat was in the dye. Then it would be 16.

First worn: 9/17/16

Total cost: The hat was $4. The feathers were $5. The dye was $5. The fabric and flowers were leftover from another project, basicly free. Thus, about $14.


It was a privilege to volunteer in the house again this year, and it was so much fun to have a dress from the correct era this time! Now, I just need to find a few more excuses to wear my historical dresses before I leave on the World Race in January! This time of year that shouldn't be too hard.


Monday, September 19, 2016

The Gryffindor Dress

Every Summer for the past 4 years my little sister has gone to camp. Every year camp has a different theme. Every year at the end of camp my parents get my sister a camp t-shirt. The first year she picked out the generic Camp Hickory Hill shirt, rather than that year's themed shirt. Every year since she's gotten the themed shirt, but I always thought she ought to also have the first year's themed shirt as well, to complete her collection.

This year when we picked my sister up from camp I noticed that they still had a few themed shirts, in larger sizes, left from her first year. While my sister was busy saying good-bye to friends I snuck over to the T-shirt table and bought one. Yes, it was several sizes too big for my sister, but I had a plan.


I was going to turn this shirt into a dress! So, once I got home I started brainstorming ideas. I would need more fabric. The T-shirt was large, but not large enough for an entire dress. The theme in 2013 had been Harry Potter. In my stash of T-shirts for rugs I had both a red and a yellow T-shirt. Thus, a Gryffindor House dress this would be. Gryffindor is the Hogwarts house Harry Potter is in. Gryffindor's colors are, you guessed it, red and yellow. I pulled out a simple dropped waist dress pattern, Simplicity 1174, from my stash and got to work.


First I removed the sleeves from the shirt. These became the new dress sleeves.


Next I cut down the sides of the shirt, laid it out flat, then folded in in half lengthwise. I laid the front bodice piece on the fold of the front of the shirt and the back on the fold of the back. I overlapped the shoulders of the pattern pieces at the shoulders of the shirt, so that I could keep the original shoulder seams and neck binding, then cut everything as one piece. All I had to do then was set the new sleeves and sew up the new side seams.
The red and yellow shirts I cut into strips to make the skirt out of.


Each shirt got cut into 4 strips, two wide and two narrow. The matching strips were sewn together end to end. Next I sewed the long strips into a stripe pattern. This made large rectangle, which I turned into a loop by sewing the short ends together. I bound the bottom with a leftover strip of fabric from the original shirt then gathered the top edge and sewed it to the bodice.


With the help of my serger this dress didn't take long to make at all. Once it was finished I wrapped it up and packed it away to give to my sister for her birthday.


She was incredibly surprised when she unwrapped it and immediately ran to put it on!


This dress has quickly become a favorite, I do believe, as she has worn it at least once a week, every week, since I gave it to her a month ago.


After all, it's just like wearing a T-shirt, only in dress form.


Now, my sister's collection of camp T-shirts is complete! 

At least it is until next year.


Tuesday, September 13, 2016

The Japanese Festival 2016

The Japanese Festival. This year it was different, still amazingly fun, but different.
The night before we didn't stay up past midnight finishing costumes, but Erentry, my little sister, and I had costumes all the same. (Tori decided to forgo dressing up the year.)

Myself as Sophie from Howl's Moving Castle, My sister as Totoro from My Neighbour Totoro, Erentry as Kiki from Kiki's Delivery Service.


How did we manage to finish these fabulous costumes without pulling an all nighter? We got smart this year. Once a week, every week, Erentry and I got together to sew. She got most of her dress done this way. She worked on her accessories in her spare time.


The morning of the Japanese Festival she attached the cat, Gigi, to the shoulder of her dress with magnets and her costume was good to go! Being the excellent friend that she is, Erentry even finished the ears for my little sister's Totoro costume before we left that morning.

Thanks to these weekly sewing get togethers I got my hat finished over a week in advance.


It started out as a straw hat I wore for the Anne of Green Gables play I was a part of in high school.


I de-trimmed it, soaked it in water to reshape it, and fixed any holes I found with a zig-zag stitch.


Then, armed with a hot glue gun, I re-trimmed it with red ribbon and "berries" made out of Model Magic.

Hat done over a week in advance, dress done before midnight the night before, there was only one thing left to throw together the morning of the festival.


 I needed something attach my water bottle and parasol to. So, I quickly sewed up a belt out of my dress fabric. It did it's job well.


We were off to the Japanese Festival, much less sleep deprived than normal! We had a smaller group this year. my family came for the afternoon, but neither Tori's nor Erentry's family joined us like they usually do. It was strange to have such a small group, but we still had fun. 

We got to see Japanese storytelling, a fancy drum show, and Bon Odori dancing.

The Bon Odori Dancers. This is always a fun thing to see, because after watching a few dances the audience is invited to join in!
Since Erentry's mom, our unofficial photographer, wasn't with us this year Erentry took over as Camera person.


After the activities we wandered around the gardens for a while then ended the day by watching paper lanterns get released onto the lake. (absolutely beautiful, but very hard to get good pictures of.)

So that was it, our 7th Japanese Festival. Different than past years but no less enjoyable.


Friday, September 9, 2016

The World Race

I'm doing it. I'm finally doing something.
For the past 5 years I've known God wanted me to do missions work. What, and where, I haven't been sure. I've considered going to Guatemala, but I haven't. I've done a couple short trips, but I knew I was supposed to do more than just leave home for a week or two. But what was it that I was supposed to do? Even after 2 years of lots of prayer, I didn't know.

Hanging out with elementary school kids in El Salvador this summer 
Still praying and seeking God's will, this summer I heard about something called the World Race. That was it! This is what I'm supposed to do right now. Not forever, but now.

Bubbles were a hit with the kids in Guatemala last Summer
The World Race is an 11 month mission trip with an organization called Adventures in Missions. I, and the 54 other members of my squad, will be going to 11 different countries, on 4 different continents, in that time.

The ladies I got to sew with in Guatemala
I am thrilled to get to do this! The day I got the phone call saying I was accepted to go on the trip I was stuck between laughing, crying, and wanting to shout for joy the rest of the afternoon!

Doing a program at a school in El Salvador
This trip is the beginning for me. I'm praying that through this trip, spending a month, rather than just a week, in each country, and nearly a year on the mission field, God will give me some more direction on what he wants me to do long term.

The sweet baby I got to hold for an afternoon in Guatemala
I leave in January. Please pray for me as I prepare for my trip. I know this is what I'm supposed to be doing, and I am beyond happy to have this opportunity. In order to go though, I do need to raise quite a bit of money, $16,617, to be exact. If you feel led, you can contribute to my trip through my world race blog, alyssawesselmann.theworldrace.org. If you can't donate, no worries, I understand, but I would still love for you to check out my World Race blog to see what I'm up to and read more about how I heard about it and why I've chosen to do it. 

I look forward to sharing more about this trip as I prepare for it, and of course sew my wardrobe to bring along!

Wednesday, September 7, 2016

1890's Blue Paisley - Done!

This spring it entered my mind that it might be fun to make an 1890's dress. Something from the era of Anne of Green Gables and Tales of Avonlea. I'd recently read Chronicles of Avonlea, by L.M. Montgomery and fell in love with all things Avonlea all over again. Would I ever make an 1890's dress though? I didn't know. There are so many different eras I'd love to make clothing from. The idea was in my mind though, so when I found an excuse to make an 1890's dress I jumped on it!


One month. That's how much time I had to sew this 1890's dress once I decided I was going to make it. That's the least about of time I've ever had from the idea conception to the completion of a historical dress.


This first challenge of this dress was finding the fabric. It needed to be blue and I wanted it to be patterned. Shouldn't be too hard finding a historically accurate blue patterned fabric, right? Wrong. Finally I settled on a 90 inch wide blue paisley lightweight quilting cotton. I decided it would work well to replicate this 1890's cotton summer dress.

image source

 Now, the fabric probably ought to be a bit lighter weight and more sheer, but I think it works pretty well. Unfortunately, Joann's had less than two yards in stock. Thanks to the extra wide width this was just enough to make my skirt.


Thus, the second week after I decided to make the dress I had the skirt done, using the pattern I made based on one in Janet Arnold's Patterns of Fashion II.  


I put two pockets in the skirt, in the seams on either side of the center front panel. The plan was to put both pockets at the top of the skirt, just below the waistband. Well, that worked great with one pocket, but the second pocket just wouldn't lie smooth there, so it got moved down to about knee level, supported by a cord attached to the waistband. Thus, I got my two pockets in the skirt.


The hem of the skirt is faced in 3 inch wide strips of bias cut cotton buckram.


In the 1890's skirt hems had horsehair braid for extra body. Today you can get nylon "horsehair braid", but I didn't have any in my stash and didn't want to spend more money than I had to. So, after a little research, I pulled out some buckram leftover from making a bonnet and used that. I had just enough to face the entire hem.

This is a very full skirt. 


The skirt went together easily enough, then it was time for the bodice. I still needed fabric and a pattern. The fabric was easy enough. I had a friend going to a nearby town with a Joann's, so she very kindly picked up another yard of the fabric for me. Then came the pattern. That took a bit more work.  I adapted two different 1980's patterns from my stash for this.  I found the puffiest sleeve pattern I could, then cut and spread to add even more puff.


Then for the main bodice I found a shirt pattern with a yoke that buttoned up the front.

I angled the shoulder seams to the back, changed the darts (To get these just right I made a dartless mock-up, tried it on over my corset, then pinned the darts in place.), and made a couple small adjustments to the yoke. After 2 mockups I had my lining pattern.


For the outer gathered bodice I used my lining pattern and added some extra width to be gathered into the yoke and waistband. Unfortunately, I didn't think to make the bodice mock-up with the waistband. So, the finished bodice wound up a little too long. This caused some unattractive folding in the bust area. I'll be fixing that before I wear this dress again.


The bodice is flat lined and boned for extra structure. I should have also flat lined the sleeves for extra body, but I didn't, so I may go back and re-do those later.


Trimming the bodice was the fun part. Typically historically accurate lace is an expensive nightmare to find, but not this time!  My friend's mom picked up this fabulous cotton lace at a yard sale and gave it to me.


There was just barely enough of the narrow lace for the sleeve cap ruffles, but I have lots more of the wider stuff on the yoke, so that will make appearances on future projects.


The bodice fastens with hooks and eyes, but I added three vintage porcelain buttons at the yoke for decoration. 


I wore the dress over the 1890's petticoat I made to go with it, my gold corset from last year and a combination (chamise and drawers in one) I made the night before the event. I'll have to do a blog post on the combination later. It was perfect for going under my corset and not adding extra bulk!


I felt so elegant in this dress, with all the lace and the slight train, and I got lots of compliments on it, even from people who had no idea who I was dressed as!

I'm hoping to find a few more excuses this fall to wear this dress. It's nice to have a historical dress that's easy to get into that doesn't require a massive amount of petticoats (though I really should have at least one more petticoat to wear with it, I just ran out of time to get a second sewn).


Even though it was finished a couple days after the deadline, I'm using this as an entry for the 8th HSM challenge of the year, Pattern.

What the item is: A summer dress

The Challenge: #8, Pattern

Fabric/Materials: Quilting cotton, duck canvas for interfacing, a cotton sheet for flat lining.

Pattern: A few cobbled together and hacked, so mostly my own.

Year: Late 1890's

Notions: Thread, cotton lace, porcelain buttons, hooks and eyes 

How historically accurate is it? It's all machine sewn with hand finishing, which is appropriate for the era. The fiber content of the materials is good, other than the thread, though I'm not sure the paisley pattern is perfect. The pattern is good to the best of my knowledge, but probably not perfect. (lots of work there to make it as historically accurate as possible). So I'm going to give it an 80%.

Hours to complete: I didn't keep track.

First worn: 9/4/16

Total cost: Less than $30


So, there's that. Now what shall I make next?