Sunday, June 28, 2015

The Sister-less Week

A few years ago my little sister went to summer camp for the first time ever. I missed her horribly. She came home to 5 new dresses.
Now this has more or less become a tradition. She goes to camp. I sew her dresses. (although maybe not quite as many as I did that first year)
As she has gotten older it's become harder and harder to come up with dresses to make for her (there are great dress patterns and designs out there for little girls, but not so many for tweens) , but still lots of fun. Here's what she came home to this year.


Several weeks ago I found this eyelet circular table cloth at a thrift shop.


I liked the fabric, so I got it, but I had no clue what I could make out of it. That is until I came across this dress on pinterest.


The table cloth would make a great skirt for an overall dress! So I picked up a pair of overalls off a clearance rack and got to work.

 First I cut the legs off the overalls, then sewed on the skirt. I found just enough green cotton in my stash to line the skirt with.


I sewed some eyelet trim from my stash along the hem of the lining. This peeks out from under the eyelet skirt to give it a fun ruffly look. Then, just because I knew my sister would enjoy it I used a couple fancy sewing machine stitches along the hem as well.

I replaced the shoulder strap buttons with these really cool looking buttons I found at Hobby Lobby.


I added some elastic to the back waistband, as the overalls were a bit too big, then ta-da!


The perfect dress for a girly farm girl!


I decided to base the next dress off  this pattern from the 60's that I came across on pinterest. 


I thought it was a pretty cool design. Then I found these cotton prints in a box of fabric someone had given to me.

I decided they would be perfect for this design. So I altered the bodice of Simplicity 1434, and pieced together the leftover fabric for the skirt.


I love the fun summer dress that resulted!

Those were the only two dresses I actually got done the week my sister was gone, but I had one more planned. I didn't get it done while she was at camp, but I did get it finished the weekend she returned! You'll hear about that one later, for now I'm gonna enjoy having my sister home!




Wednesday, June 24, 2015

Guatemala - what we did

I've been home from Guatemala for over a week now, and still about all I can say about the trip is it was AWESOME! And here's why.

This trip was primarily a dental trip. We had a dental team with us, they set up at a clinic and pulled teeth. Meanwhile there were lots of children outside the clinic waiting while their parents had teeth pulled.


Those of us who don't pull teeth did different activities with the kids. We brought out paper and markers and discovered a few very talented artists.


This little girl, Ashley, drew pictures of a few of us.


Bubbles were another favorite activity. 


This little boy, Sebastian, was so much fun! I played with him for a couple hours, with the bubbles, balloons, and on the jungle gym. At one point he asked me where I lived, so I told him America. He then informed me Gringos lived in America. So, I told him I was a Gringo . He still seemed to like me though, and had to give me multiple hugs before he left.
 His mom was also awesome. I was having a hard time explaining an activity to the kids, as I speak very, very, little spanish. She didn't speak any english, but was able to figure out what I was trying to tell the kids (through a combination of broken spanish and hand gestures), and explained the activity to them for me. I was so thankful for the help!

In addition to playing with the kids who came for the dental clinic, we also got to help with some of ASELSI's regular programs.


They have a school for special needs kids, as the public schools won't take any kids with disabilities. We got to do a Bible lesson and craft with these kids two of the mornings that we were there.

One of my favorite programs at ASELSI is the milk program. The milk program was started to combat the astronomically high infant mortality and malnutrition rates in rural Guatemala. Once a month mothers bring their  babies to ASELSI where the babies are weighed and the mother is given enough powdered milk to feed the baby for another month. The day of the milk program, I got to do a craft with these mothers. 


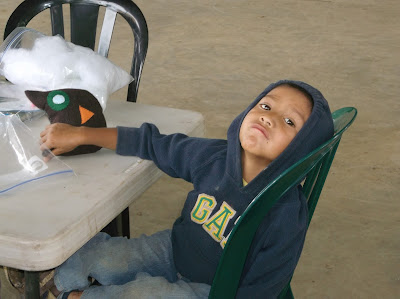
We made stuffed owl toys for the babies. It was so much fun! I explained how to make the owls, and then I just got to sit down and sew with them. 


Definitely one of the highlights of my week! 


The babies who were in the milk program were pretty adorable too.

The last day we were at ASELSI we got to do hospital visits. We visited a public hospital, where the medical care is free, but the standard of care is very low. We brought bags of toiletries to give the patients (as the hospital provides none), and prayed with them.  The group I was with got to visit the moms with new babies.


These babies were so tiny and sweet! The average birth weight is between 5 and 6 pounds, so a bit smaller than the average American newborn. My favorite part of the hospital visit? I got to hold one of the newborns!
There was also a heart breaking aspect of the visit. There were eight new mothers per room. In one room we visited 7 of the moms had their babies with them. The eighth mother? Her baby had been born with major deformities, and he didn't make it. This poor woman, imagine, just having lost your baby, yet having to share a room with all these new babies and moms. My heart was broken for her. 

I am so thankful that I got to go on this trip. It was an awesome experience! Hopefully within the next year or so I will get to return to Guatemala. I plan to work with ASELSI to start a goat program, which will almost be an extension of the milk program. I am excited! Now I must get on with doing more research and planning so that this dream can become a reality. I'll keep you updated!


Friday, June 5, 2015

To Guatemala I Go!!

This past week has been really busy! I've sewn. I've done lots of goat stuff. I sold 9 goats. I sorted through my clothes. I clipped Sombrita for a show. I did research for a possible goat ministry. I've done lots of praying. And after months of preparation,

Tomorrow I fly to Guatemala! I'm all packed and ready to go! I have a suitcase full of my clothes and a huge suitcase full of things for our ministry while we're there.
To say I'm excited would be an understatement. I am thrilled to get to go on this trip. I have seen God's hand in so many things as we have prepared for this trip, and I'm sure we will continue to see him work while we're there.

While I'm in Guatemala this week I would really appreciate your prayers.

Prayers for safe travel. We fly first to Dallas, and from there to Guatemala city. After that it's a 3 hour drive to where we will spend the week.

Prayers that we will have no problems while going through customs. As this is primarily a dental mission trip we are bringing lots of dental supplies. Often there are difficulties in getting medical supplies through customs in Guatemala. Pray that the customs officials have favor on us.

Prayers for the people we are working with. That we can show them who God is. That they will sense his love for them and come to know him as their savior.

And finally, prayers for me personally. I'm considering moving to Guatemala for a year or so at some point in the future. The plan is that I would help these missionaries, that we will be working with this week, start a goat program. On Wednesday I will have a meeting with those who would be involved in this goat program. We will discuss the idea of a goat program in general, and the possibility of me coming to start it, Please pray that God's will be done in this meeting. I'm both nervous and excited about this meeting.

I have no idea what all might happen this week, but God knows, and can't wait to see!


Thursday, June 4, 2015

Long and Lovely Plaid Dress

What to do when a summer dress with sleeves is needed and you don't have one? Make such a dress of course!
I saw this pink and gray plaid at Walmart and it just called out to me. "Turn me into a dress! Or at least a shirt!" So I brought home 3 yards and got to thinking up a design for it.


All I knew was that I wanted elbow-length sleeves with a ruffle at the bottom. First I considered making a knee-length wrap dress. Then I decided that wasn't what I wanted. Next I sketched out a dress with buttons down the front. That wasn't quite what I wanted either. Finally I decided to use the two patterns pictured above. I combined and majorly altered them. 
   

The result was a very comfortable, dropped-waist, ankle-length dress. With a square neckline and pockets (of coarse).


Now my favorite part of this dress is the gray lace at the waist and on the sleeves.


I found this lace in my stash and decided it would be just perfect on this dress. First I put it on the sleeves.


After that, this was the lace I had left.


I really liked the wider lace and thought it would look great at the waistband of my dress. Sadly there wasn't near enough of it, but at least I still had plenty of the narrow lace. So I decided to make the narrow lace look like the wide lace.


I used a zig-zag stitch to sew the points together. Once the lace was all pieced together I had enough for the waistband! (with 3 inches to spare)


Then my summer dress with sleeves was done! Now it's packed in my suitcase so I can wear it in Guatemala next week. Now, back to preparing for the trip I go!


Tuesday, June 2, 2015

A Very Practical Sunbonnet

Over the weekend I made a sunbonnet. Why? Because it's practical. For the 19th century at least.


To improve my historical sewing, and hopefully get more historical projects completed, I decided to participate in Historical Sew Monthly (HSM). The way HSM works is every month a new challenge is issued. Participants then make an item from their chosen time period that fits the challenge. (To read more about it you can click on this HSM link on my sidebar.) May's challenge was to make something practical.

After considering several different possible projects I chose the make a sunbonnet like this one from 1850 at the Met museum.


A sunbonnet is a very practical garment as it keeps a lady's face and neck from being sunburned, and keeps the sun out of the eyes.  

Once I figured out what I wanted to make I ran into a problem. I had no clue where to start. I had no patterns that even slightly resembled this bonnet. So I asked on the HSM facebook page if anyone could help me. I got lots of very helpful responses! Now I could make the bonnet.

The original bonnet is made of linen, but I had a tan calico already in my stash that I thought would make a great sunbonnet, so I chose to use that. 

First, I made a pattern for the bonnet. It is based off a picture of an actual mid-1800s bonnet pattern that one of the fb group members sent me.


I made a pattern for the bonnet itself and for the brim lining. The ruffles and ties were just strips of fabric. No pattern required for those!

The main part of the bonnet was easily sewn together. I then tried it on to make sure the shape was right. It was!


Next I sewed on the ruffle, facing, and brim lining.


Then it was time to insert the slats. This type of sunbonnet is also called a slat bonnet because the brim is supported by pieces of cardboard or wood, called slats. I decided I wanted wooden slats in my bonnet, rather than cardboard. I didn't want to run the risk of a soggy mess if the bonnet were to get wet! So I chose to use popsicle sticks for the slats.


I decided to alternate wide and narrow slats for a look similar to the original bonnet brim. I used my zipper foot to sew the slats in between the brim and brim lining.


This way the slats are held tightly in place so they won't fall out. Once the slats were in all that was left to do was to sew on the ties by hand. 


One on either side on the inside of the bonnet to be tied under the chin, and two sets on the back to give the bonnet the right shape.


I'm proud of how this bonnet came out! This is one of the first things I've made without a commercial pattern to start from, so in that way it was definitely a challenge. Now that I've seen I can make something simple without a pattern I may have to try making something a bit more difficult from scratch. Hmm, maybe for June's challenge.


The Challenge: Practicality
Fabric: 1 & 1/2 yards  tan cotton calico
Pattern: Self-drafted, based off original
Year: 1850
Notions: all-purpose thread and craft sticks 
How historically accurate is it? 6/10. It's almost all machine sewn, so that's not historically accurate, but my pattern was accurate, the shape is accurate, and the wooden slats are accurate. (though they would have been hand-made) 
Hours to complete: I didn't really time it but probably about 4
First worn: Not yet really, just for the picture in this post.
Total cost: about $10