Saturday, May 21, 2022

A Ruffley Blue Linen Coquelicot Pinafore

 I received a fun email back in March. A year ago I tested the Wildflower Designs' Coquelicot Skirt pattern, and now the Designer, Melanie, was expanding the pattern and asked if I'd like to test the expansion.

YES!!!!

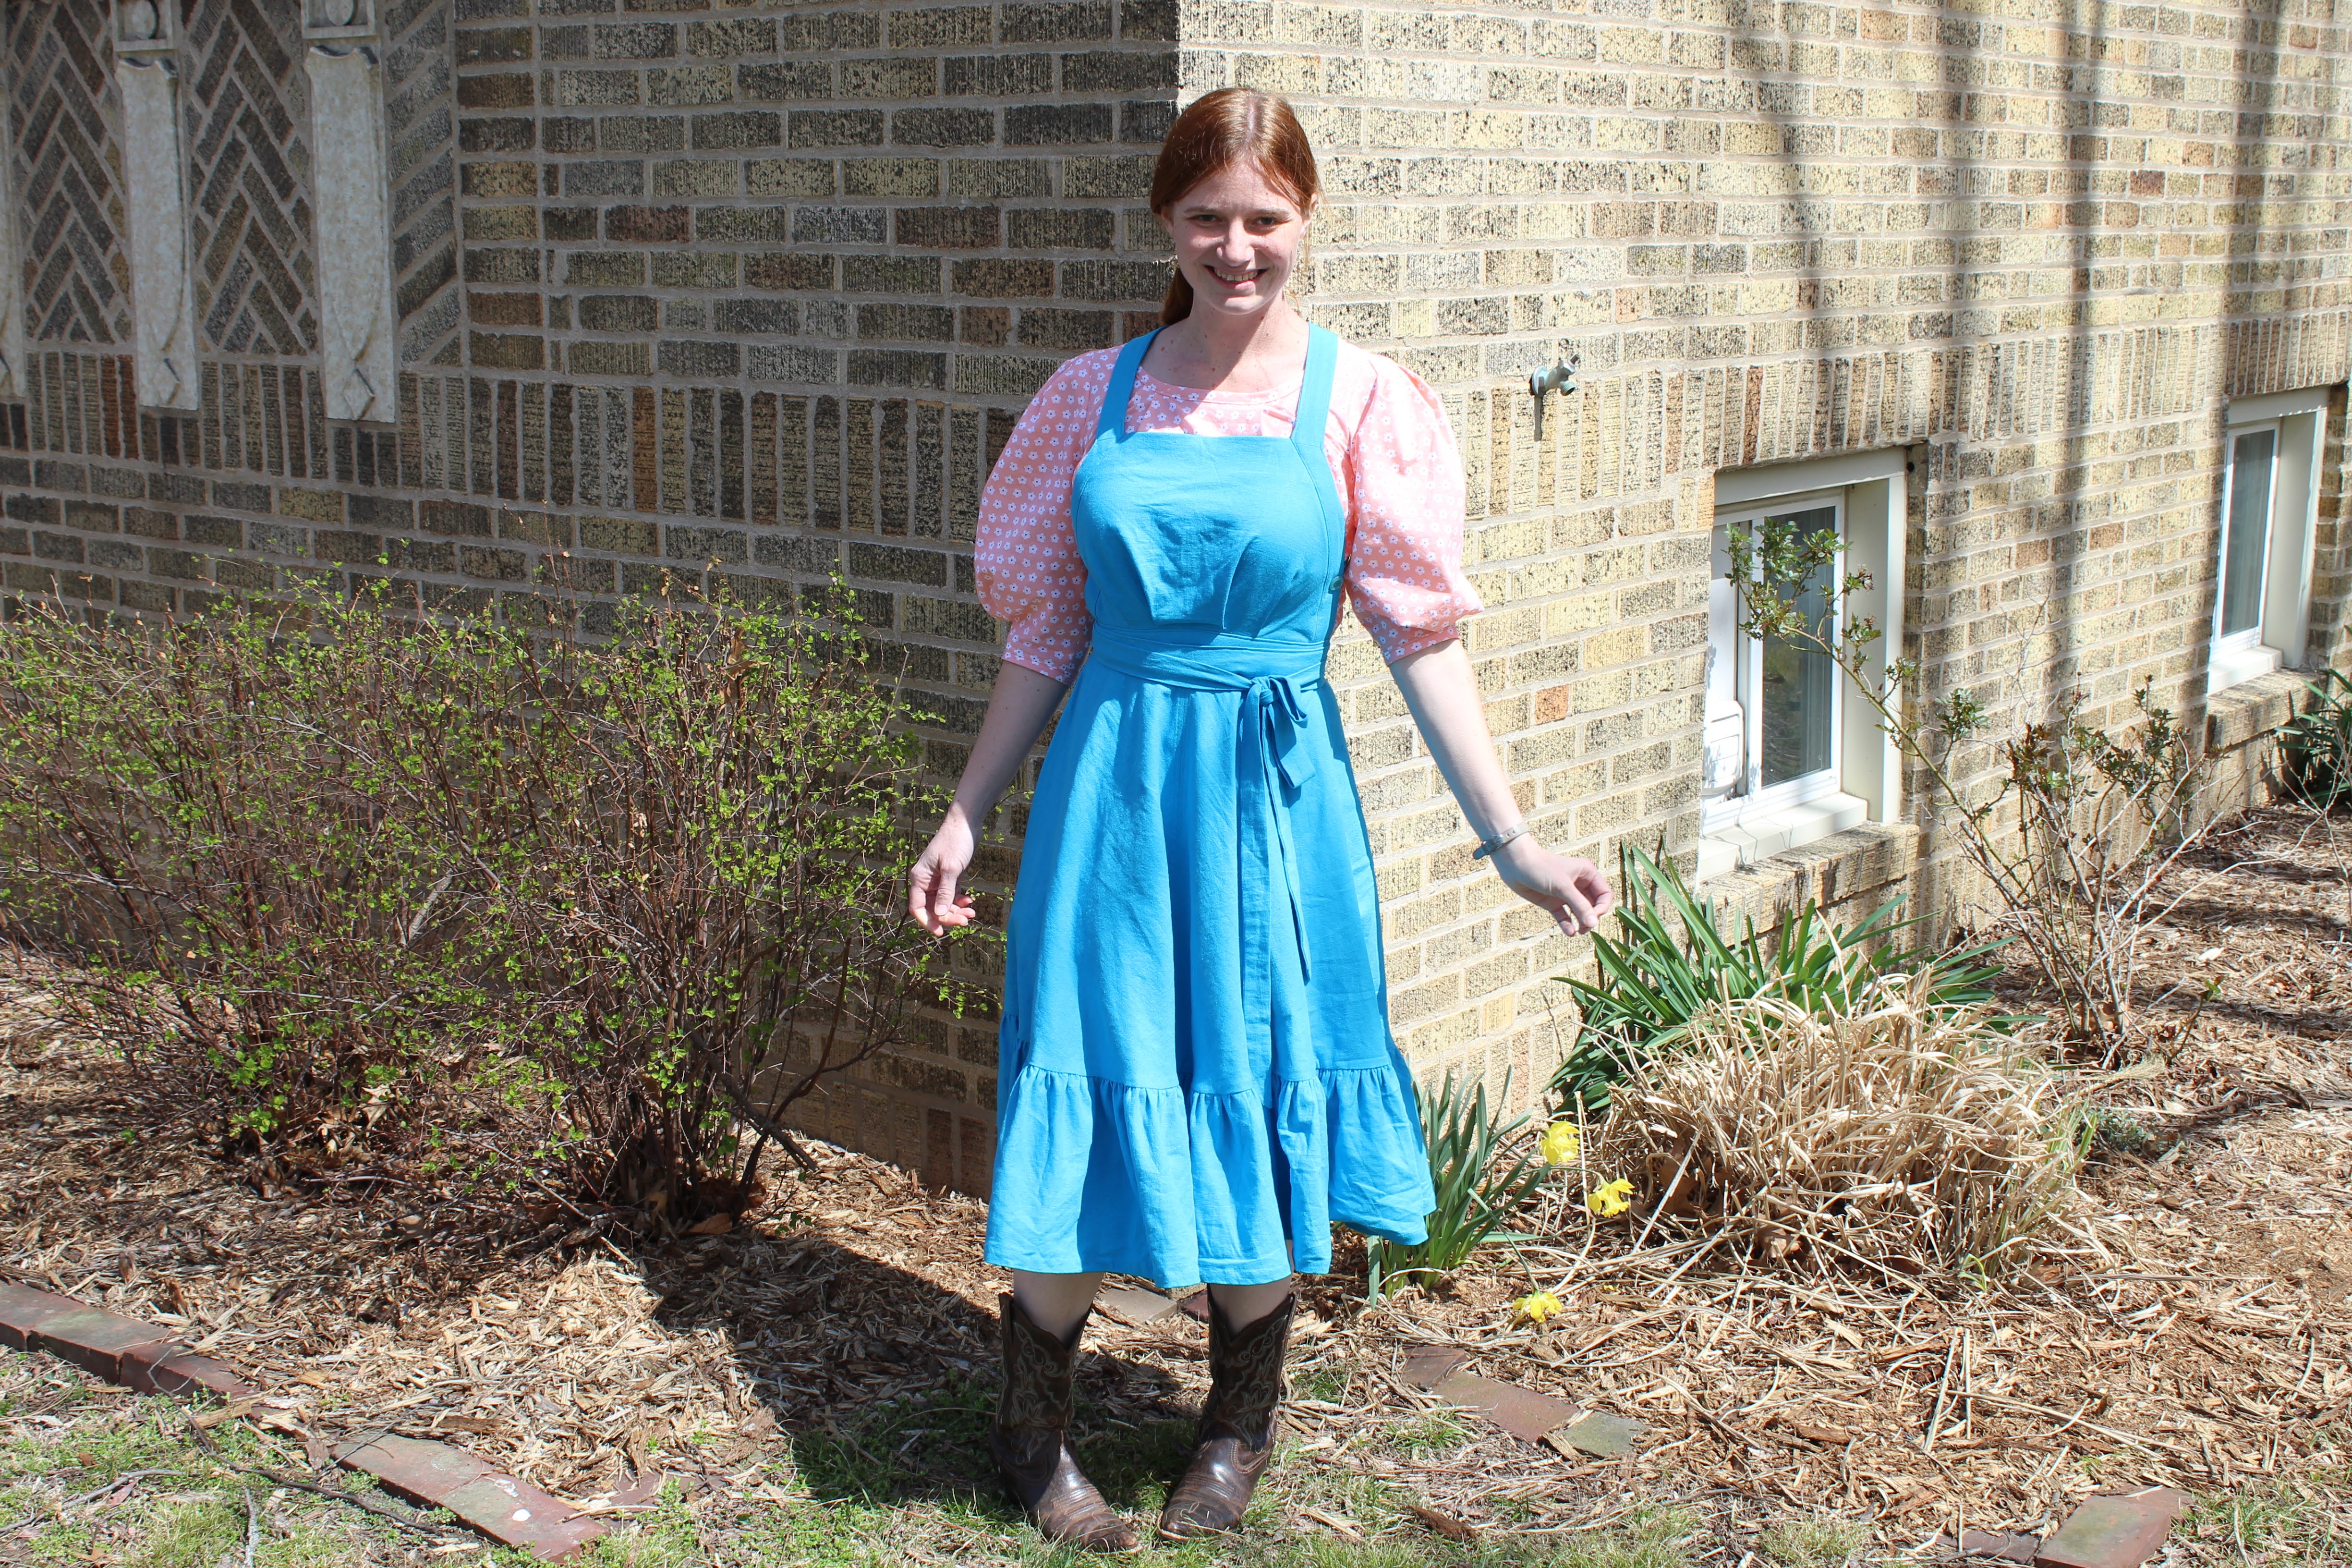
Coming was the addition of a bib so the skirt could be turned into a pinafore or an apron. 


Ever since making my Little Women inspired pinafore dress last fall, I've been on the pinafore train and dreaming up new ones to add to my wardrobe. Using a skirt pattern I already had and knew I liked as the base for a new pinafore? Perfect!


I quickly sent off a reply to Melanie saying I'd love to test the new pinafore options and preceded to go pick the perfect material from my fabric stash.


I found a bright blue linen blend in a bin of fabric I was given a couple years ago. It was just the thing!


I decided to make the view A skirt with the ruffle hem hack from the Wildflower designs blog.


To keep the garment as versatile as possible the new bib is actually made to be entirely detachable from the skirt. 


The bib and skirt are made separately, then buttoned together inside the front waistband.


When the garment is worn you can't at all tell that the bib is a separate piece!


I appreciate having the option to wear just the skirt on it's own if I'd like to, but even more than that. . .


The total separation means I can use just the bib pattern with my fabric scraps to make just about any skirt in my wardrobe into a pinafore! All I'll have to do is add buttons to the inside of my skirt waistbands for this to work! How cool is that??


Ok, so I don't think I'm actually going to turn every single skirt I've ever made into a pinafore, but it is a fun option to have!


The bib features straps that criss-cross in the back and button to the sides of the bibs under the arms.


The bib is fitted with tucks at the waistline, but these could easily be changed to gathers or darts if you want a slightly different look.


Personally, I like the look of the tucks! And I really like the square neckline!


I've enjoyed wearing my new pinafore all spring.


My husband calls in my "Dorothy Dress" and comments on how cute it is every time I wear it.


If you're interested in giving this pattern a whirl it can be found here on the Wildflower Designs website.


Thank you Melanie for inviting me to test this pattern!


Saturday, May 7, 2022

My Sister's Sewn and Crocheted Lacy Prom Dress

 And She's off to Prom!!


My sister came up with the idea for this spring's formal gown months ago. In the past 2ish years she has become a very talented crochet-er (crochet artist? crochet-ist?). She decided she wanted to crochet part of her formal gown and came to me with her design and ideas for the rest of the dress. 


The plan was a drop waist/trumpet style sleeveless gown with a full gathered skirt and she would crochet an overlay for the bodice and sleeves.


She went "shopping" in my fabric stash and picked out a gorgeous emerald green taffeta for the dress. I found this fabric at a thrift store several years ago and fell in love with the color. I was excited to make something worthy of this fabric! (This is the same fabric I used for my brothers' vests for my wedding last summer)


Fabric picked, I went to my pattern stash to find a pattern that would work for what my sister had described.


Vogue 8948 fit the bill! I decided to use view A, skip the notch at the neckline, and cut it off  straight across where the skirt started on views D, E, and F.


The bodice is flat lined with Joann's poly/cotton voile. Not a fabric I particular like (100% cotton voile is way nicer and easier to work with!), but it gave the bodice a bit more structure with almost no additional weight or bulk so it served the purpose I needed. 


The entire dress is then lined with some polyester lining from my stash and fastens up the back with an invisible zipper.


I don't generally like to use invisible zippers as, in my experience, they like to get stuck at waist seams and break. Thus, I almost always end up having to replace them after the first couple wears. However, since this dress didn't have a waist seam the zipper would have to go past I thought it would be safe, and so far so good!


After the dance last night my sister requested that next time I make her a formal gown I line it with cotton instead. Polyester is just too sweaty.


She has a point.


To give the skirt the poof my sister wanted, I attached 2 ruffles of stiff tulle to the skirt lining.


They gave the dress just the right shape!


The final piece of the dress was the lace at the hem.


My sister picked a silver and white ribbon yarn to crochet her bodice overlay out of so I suggested adding some silver lace to the hem of the dress to tie the whole look together. My sister agreed, and thankfully Joann's had just the right lace in stock in their "cosplay" collection. (Because of course I didn't think of adding lace to the hem until it was too late to order anything.)


And once that was sewn on my part of the dress was done!


My sister crocheted her bodice overlay and sleeves.


She and my mom made a sparkly silver belt to complete the ensemble.


A flower crown was added.


A matching reticule was crocheted.


Hair and make-up were done.


And she was ready to go!


My dad escorted her to the homeschool prom, known as Elegant Evening, wearing the matching tie she crocheted for him.


And they had a fun time dancing English Country Dances (like the kind seen in a Jane Austen movie) all night!


I'm thrilled with how this year's gown turned out!


It was so much fun to collaborate with my sister on a dress of her design!


And now we've got all sorts of ideas for future fancy dresses featuring crocheted pieces!