Now, theoretically, my mom could have just ordered this dress and been done, but where would the fun have been in that? I'd already offered to make my mom her mother of the groom dress, so my mom sent this picture to me and asked if I'd be willing to recreate it for her. Of course, I immediately said yes. Just buying the dress would have been fine, but my mom and I were confident that we could make it even better by working together and making it ourselves.

As we began planning the mother of the groom dress and discussing specifics such as fabric type and color, I recalled the Designin' December challenge hosted every year by Linda of "Nice Dress, Thanks, I Made It" and decided my mom's dress would be just the thing for my challenge entry this year. The Designin' December tagline is "Why buy it when you can make it yourself - better and for less money?" This concept absolutely applies to my mom's dress. We made it for over $100 less than we could have bought it, and we made it better by using better fabric than the store-bought dress had and personalizing little details such as color and hem length to better suit my mom.
Yes, we copied a ready to wear dress from a department store rather than a designer dress off the runway, but according to this description of the challenge from the host, copies of garments found in stores are also allowed: "We have all seen something we LOVE, either in the stores, online or on the runways, but don’t actually want to buy for some reason. So I propose that we sew that garment that we see/want. Now if you are lucky and you already have an exact pattern – either an indie pattern, your own self-drafted pattern, or a “Big 4” pattern, that you can use – then go for it! If you have to alter a pattern that you already have, or draft your own pattern, you can do that too. Whatever works for you. Let’s make what we see and want! (Remember Vintage Designer fashion is allowed too!) Good luck in your search! 😁👍"

Once the design was picked and it was decided I would absolutely make the dress the search was on for the perfect fabric and pattern. My mom's first request was for the dress to be made of silk rather than polyester. I was totally on board with this idea and recommended a light weight silk taffeta. After an evening looking at all sorts of pretty fabric possibilities my mom found a beautiful green silk taffeta on Etsy and ordered 7 yards. This turned out to be about 2 yards more fabric than we needed, but we really wanted to make sure we'd have enough!

Fabric decided on and ordered, it was time to find a pattern to use as the base for this project. (I'm quite capable when it comes to altering existing patterns to get what I want, but not particularly confident in my ability to draft patterns from scratch.) After searching for a pattern featuring a portrait collar, like that on the dress we were copying, we found Butterick 6022, an out-of-print Retro Butterick pattern from several years ago. Even though the bodice didn't cross over like the original dress it had the right basic fitted shape and the collar looked excellent to me. I was sure I'd be able to alter this pattern to be just what we needed. Thus, we found the pattern for a reasonable price on Etsy, ordered it, and sat back to wait for it to arrive from Canada.

Two weeks later, the pattern arrived in the mail and it was go time! I began by tracing off my mom's size. Usually I just cut right into my pattern tissue, but since this was an out of print pattern and I would need to make quite a few alterations, I decided it would be best to preserve the original pattern and just trace what I needed.

I shortened the bodice so it would end at the natural waist rather than the high hip, extended the front of the bodice so it would be a cross over bodice rather than having a center front seam, and lengthened the collar to match the new cross over bodice pattern. Then I whipped up the first mock-up, and, well, it was a bit of a mess.

My mom tried on the mock-up and the neckline gaped, it was too wide across the shoulders (my mom does not have the same wide shoulders/broad back my siblings, father, and I have) and the bust darts were in the wrong place. So I pinned and marked, and then disassembled that first mock-up.

I made the necessary pattern alterations, then made a second mock-up. And this one actually fit!

A couple of minor adjustments and it was time to get started on the actual dress!
 |
| The blue pattern is what I originally traced off and altered. The green is the final pattern, altered to fit my mom. |

With everything cut out, sewing commenced. I went slower than usual with this project because I was worried about screwing something up.

I lined the bodice in a super soft robin's egg blue cotton voile and hand sewed in the side seam zipper.

The skirt is simply two widths of fabric pleated onto the the bodice. After some discussion we decided to skip the high-low hem of the inspiration dress. There are, of course, pockets hidden in the side seams of the skirt.

The final piece of the dress was the belt. The inspiration dress had a bejeweled sash, but we decided to skip the big bow in the back and do a fitted belt with a fancy clasp instead.

The belt is buckram covered in silk. We picked out a fancy gold clasp to match the jewelry my mom would be wearing to the wedding. Once that belt was done, the dress was done - the first of the wedding sewing to be completed!

I don't currently have access to most of the wedding pictures, but you'll have to believe me my mom looked stunning that day! Here she is with the bride and her mother:

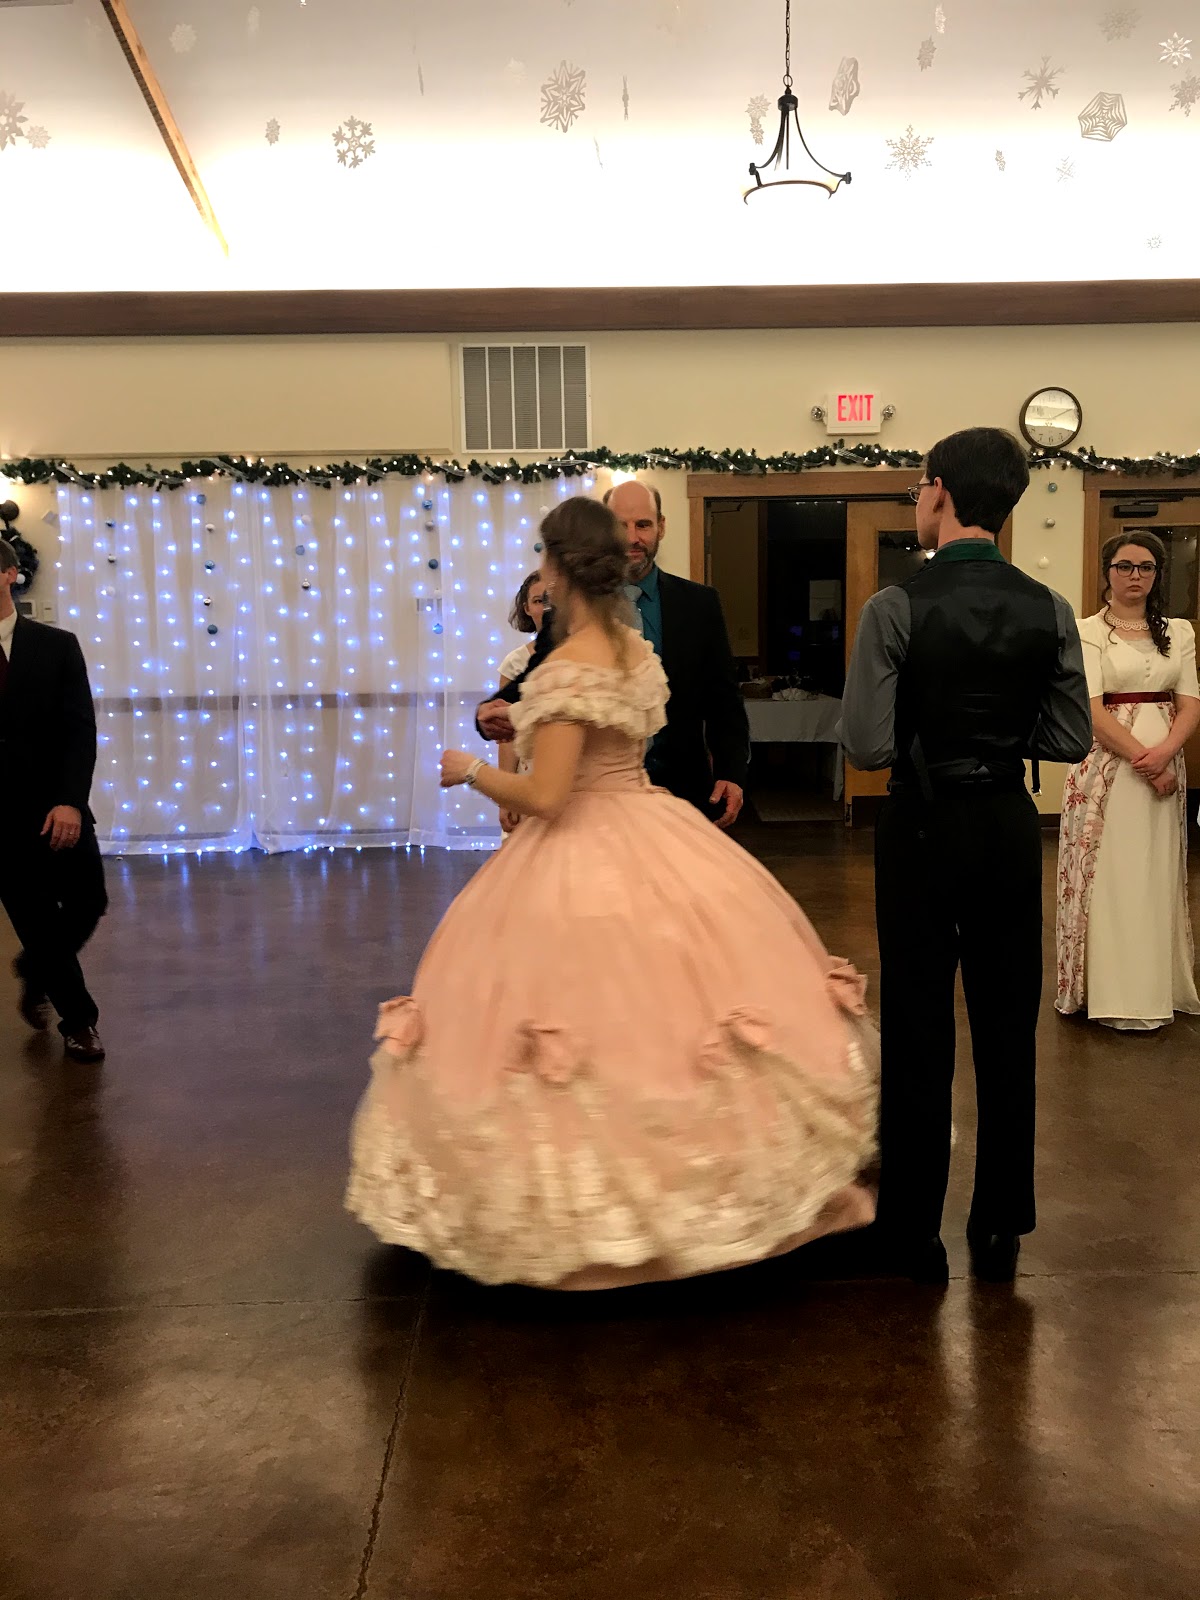
And here she is dancing with my brother at the reception:

A month later my mom wore the dress again to the Christmas Ball, where I was able to get a few pictures of the dress.

The finished dress is a bit different from the inspiration dress, but I think it suits my mom perfectly!

My mom's dress is more off the shoulder, a look I find very elegant.

A beaded sash vs. a belt with a fancy clasp.

The back of the dresses are where the differences are most obvious, but I personally much prefer the fitted back of my mom's dress to the back of the inspiration dress. This is one area where you can tell my mom's dress was made for her, not just something picked off the rack.

All said and done, there are zero regrets about making my mom's dress rather than her buying one. Are there little things I would adjust on the finished dress if I could? Of course, but that's just the nature of sewing!

Thank you to Linda of "Nice Dress, Thanks I Made it!" for hosting Designin' December yet again! This project definitely used skills I picked up by participating in this challenge the past two years. I really enjoy annual challenges like this!

*If you're interested my 2017 challenge entry can by found here and my 2018 entry can be found here.