Showing posts with label Tea Gown. Show all posts

Wednesday, July 11, 2018

The 1895 Minerva McGonagall Tea Gown - Finished!

Well, I did it. It's done! My 1895 tea gown, inspired by Professor McGonagall in Harry Potter, is completed and wearable!


In the late Victorian era, a tea gown was primarily an at home garment. It was what an upper class lady would wear while she was at home resting between visiting friends in the morning, and before dressing for dinner in the evening. Fancy loungewear, if you will.


In this context, the best place to photograph my tea gown would have been the parlor of a 120 year old house. Unfortunately, I did not have one of those readily available for my photographic needs. So, after considering my options, I decided a local replica 19th century schoolhouse would suffice for my photo shoot. After all, this gown was inspired by Professor McGonagall, a teacher at Hogwarts School of Witchcraft and Wizardry. Thus, lacking a 19th century mansion, I decided to do a Minerva McGonagall photoshoot, and the school house felt fitting. (English castle ruins were also in short supply.)


Photography location explained, let's get on to the good stuff! How does one actually wear a tea gown (that doubles as a Hogwarts teacher costume)? All one piece, my tea gown slips easily over my head. I wear it over my standard 1890's undergarment - a combination corset, corset cover, and 3 petticoats. Now, as tea gowns were loungewear, there is some debate whether or not they were worn with corsets. After all, it is easier to lounge without a corset on! Personally, I have decided to wear my corset under my tea gown as I like the 19th century silhouette it gives. However, I also made the tea gown easy to adjust if I ever chose to wear it without a corset.


The tea gown settles at my hips, like a skirt, then I pull on the sleeves.


Once the sleeves are on my arms, I fasten the twill tape waist stay around my waist.


Next, the bodice is fastened. As tea gowns are meant to be easily put on and taken off in the middle of the day, all my fastenings are on the front and I can easily do them up myself.


First, the bodice underlap is fastened in place with a hook and bar. Then the bodice overlap is fastened in place, also with a hook and bar.


And with that, the tea gown is securely on and all that's left to do is smooth the front "over dress" in place.


The front "overdress" hides the skirt placket and the side seam pockets, because every good dress has pockets!


Pockets, they are the perfect place for concealing things,


Such as wands. Every set of wizards robes must have a wand pocket after all!


And with that, I am Professor Minerva McGonagall, ready to teach young witches and wizards how to transfigure things!


Let's pretend for a moment, shall we, that the beautiful gardens surrounding the school house are the grounds of Hogwarts Castle?


Let's set off exploring, beautiful silken trains trailing behind.


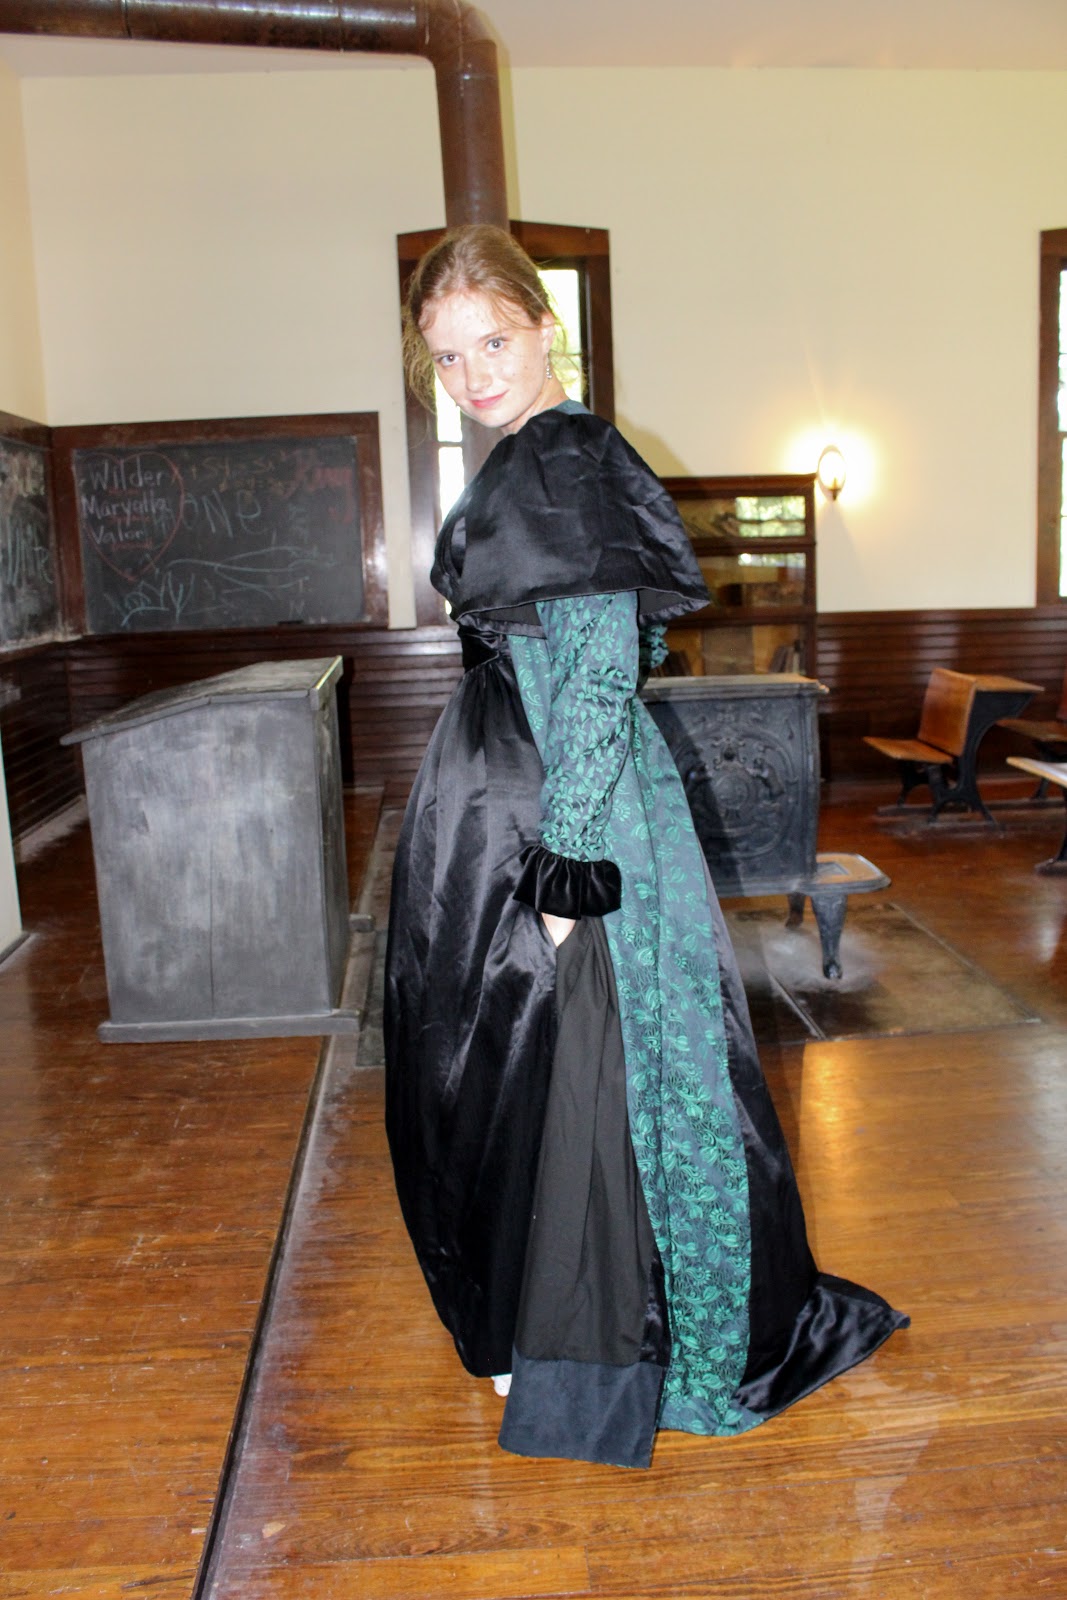
Honestly, the back of the tea gown my be my very favorite part of it.


Originally, I'd planned for the back to be all one fabric, no center back contrast, just like the original. However, I didn't have enough silk jacquard for that to work. So, I took a hint from this 1880's tea gown and made the train, flowing down from the waist, from black silk satin.


And I absolutely love the result! It definitely turned out better, or at least more interesting, than my original plan would have!


It's the layers and different texture that make this tea gown so much fun!


The green, and the black. . .


The streaked satin, and the jacquard. . .


The velvet ruffles. . .


The bodice pleating. . .


The front layers. . .


The sleeve dimensions. . . 


And the back train.


All together it makes one perfectly fun, fabulous, and magically inspired tea gown.


Perfect for wearing while instructing stone statues to defend Hogwarts;


Or relaxing in a garden like an 1890's lady of leisure.


I now have a beautiful gown that works for both activities!


What more could I ask for?


If you have not followed along with my 1890's tea gown making journey so far and want to catch up, check out the links bellow!

You can find out how I got the inspiration here.

Check out the tea gown I decided to copy here.

See how I made the pattern here.

Read the struggles I ran into mocking it up and cutting it out here.

And observe how it all came together here.


A huge thank-you to my friend Bretta for taking all the amazing pictures for me!


Now, what costume should I start on next??


Tuesday, June 26, 2018

Mocking Up and Cutting Out the 1890's Tea Gown

I made my apportioning rulers. I drafted the pattern. I sewed a mock-up. My long planned for 1890's, Professor McGonagall inspired, tea gown was going to become a reality!


Well, it would become a reality, after I perfected the pattern. It turns out measuring your own back length (nape of neck to small of back), all by yourself, does not produce very accurate results. Somehow, by doing this, I added over an inch to my back length. Then I used that too long measurement to make my back measure apportioning ruler. The result? My first mockup fit perfectly around, it was just much too long. It wrinkled horribly at the waistline and the skirt dragged on the floor.


The skirt length? That could be easily chopped and fixed. But the bodice length? That required some pattern alteration.


I pulled out my plastic pattern and folded an inch out of the bodice length, right above the waistline, on every single pattern piece. Then I made another mock-up.


Mock-up #2 fit better than mock-up #1, but it wasn't perfect. The center back length, from neck to waist, was just about right, but the side panels were still too long. So, I pulled out my plastic pattern again and folded another inch of length out of the side panels only.


That done, I made another mock-up, and it appeared that the third time was the charm!


No wrinkles this time!! The main tea gown pattern was good, and I could move on to perfecting the sleeves. Those took another 3 mock-ups. 


Eventually, I had a flounced sleeve puff thing that resembled the sleeves of my inspiration tea gown.


The very last thing I did to my pattern was make some minor alterations to the pleat arrangement on my under bodice pieces.


And with that, I could, at last, cut into my pretty silks and begin sewing my actual tea gown!


To give my tea gown the structure it needed, I flatlined the entire thing with black cotton broadcloth. The flat lining was the first thing I cut out, and it ate up an entire 8 yard bolt of black cotton!


After ironing and lint-rolling (black cotton is a magnet for wrinkles, lint, and pet hair!) each individual piece, I marked the "right side" of each one with a safety pin. (Both sides of the black cotton look and feel exactly the same.) I would be using my flat lining as the pattern to cut out my silk, so these safety pins would allow me to be extra sure I wouldn't cut out any pieces backwards. I didn't have enough of my green and black silk jacquard to make any cutting mistakes! 


When I bought the fabric in Malaysia, I didn't buy enough for a tea gown the first time I was in the fabric shop. I only bought 2 meters, and I had no specific plan for the fabric. Upon returning to my Airbnb with my purchase, I realized it was the perfect fabric for the tea gown I'd been dreaming of! I was going to have to go back to the fabric shop to get more! Well, it was a week before I managed to do that. When I returned to the shop, all that was left of my silk was a remnant that was a little more than a meter. So, I bought that and another silk jacquard remnant, that happened to be the same colorway, but a different pattern. Thus, when it was finally time to cut out my tea gown, I was just hoping I would have enough fabric. Thankfully, I did!


The front pieces fit on my 2 meter length of fabric. With a bit of piecing, the back pieces were able to be cut from the smaller length of fabric. The under sleeves were cut from the coordinating jacquard.  And finally, the train, over sleeves, under bodice, and under skirt were cut from my black streaked satin.


I kept the back cotton securely pinned to my silk until I attached the two layers together permanently using my serger.


Yes, using a serger is not historically accurate, but I was willing to sacrifice accuracy in this department. Serging the edges not only had the advantage of attaching the flat lining to the main fabric easily, it also finished the edges of my very fray-prone silk, before that could become a problem. I have no regrets about using my serger on this project. In the end, it made my fabric easier to work with and had no effect on the over all look of my tea gown.


After nearly a year of dreaming, months of planning, three mock-ups, and some very careful cutting, I could finally construct my tea gown!