My sister's birthday happened to fall just a few weeks after I finished my ruffly, gingham, 1870's bustle dress. Since my mind was on bustle dresses I decided that was what my sister needed for her birthday!


Lots of fabric in a print that resembled 1880's prints I've seen. That would do! Now onto that pattern. . .

I did have several bustle dress patterns in my stash, but right around that time McCall's released a new natural form era (early 1880's, right between the fluffy bustles of the 1870's and huge bustles of the later 1880's) costume pattern, designed by Angela Clayton. It was pretty! I couldn't resist. . .
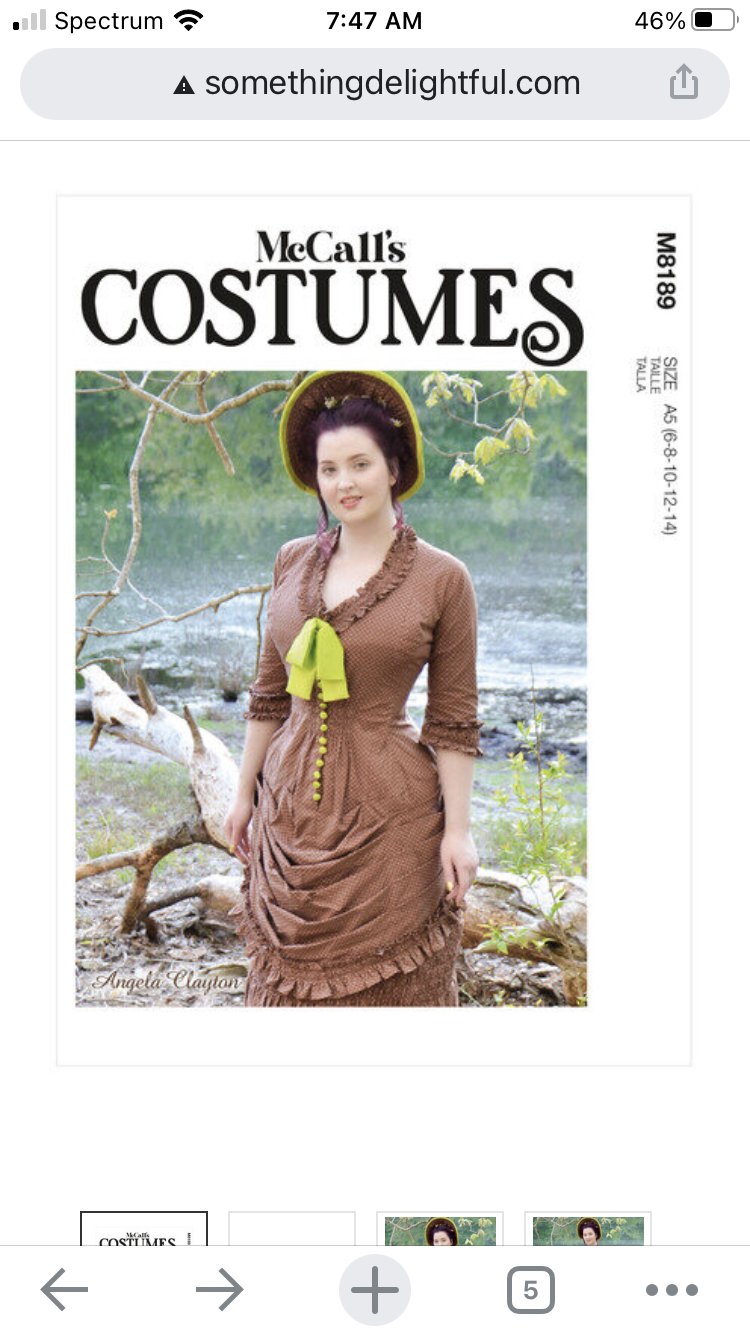
The patterns in my stash got pushed to the side. McCall's patterns went on sale and I snagged the bodice (8189) and skirt (8191) pattern and got started.
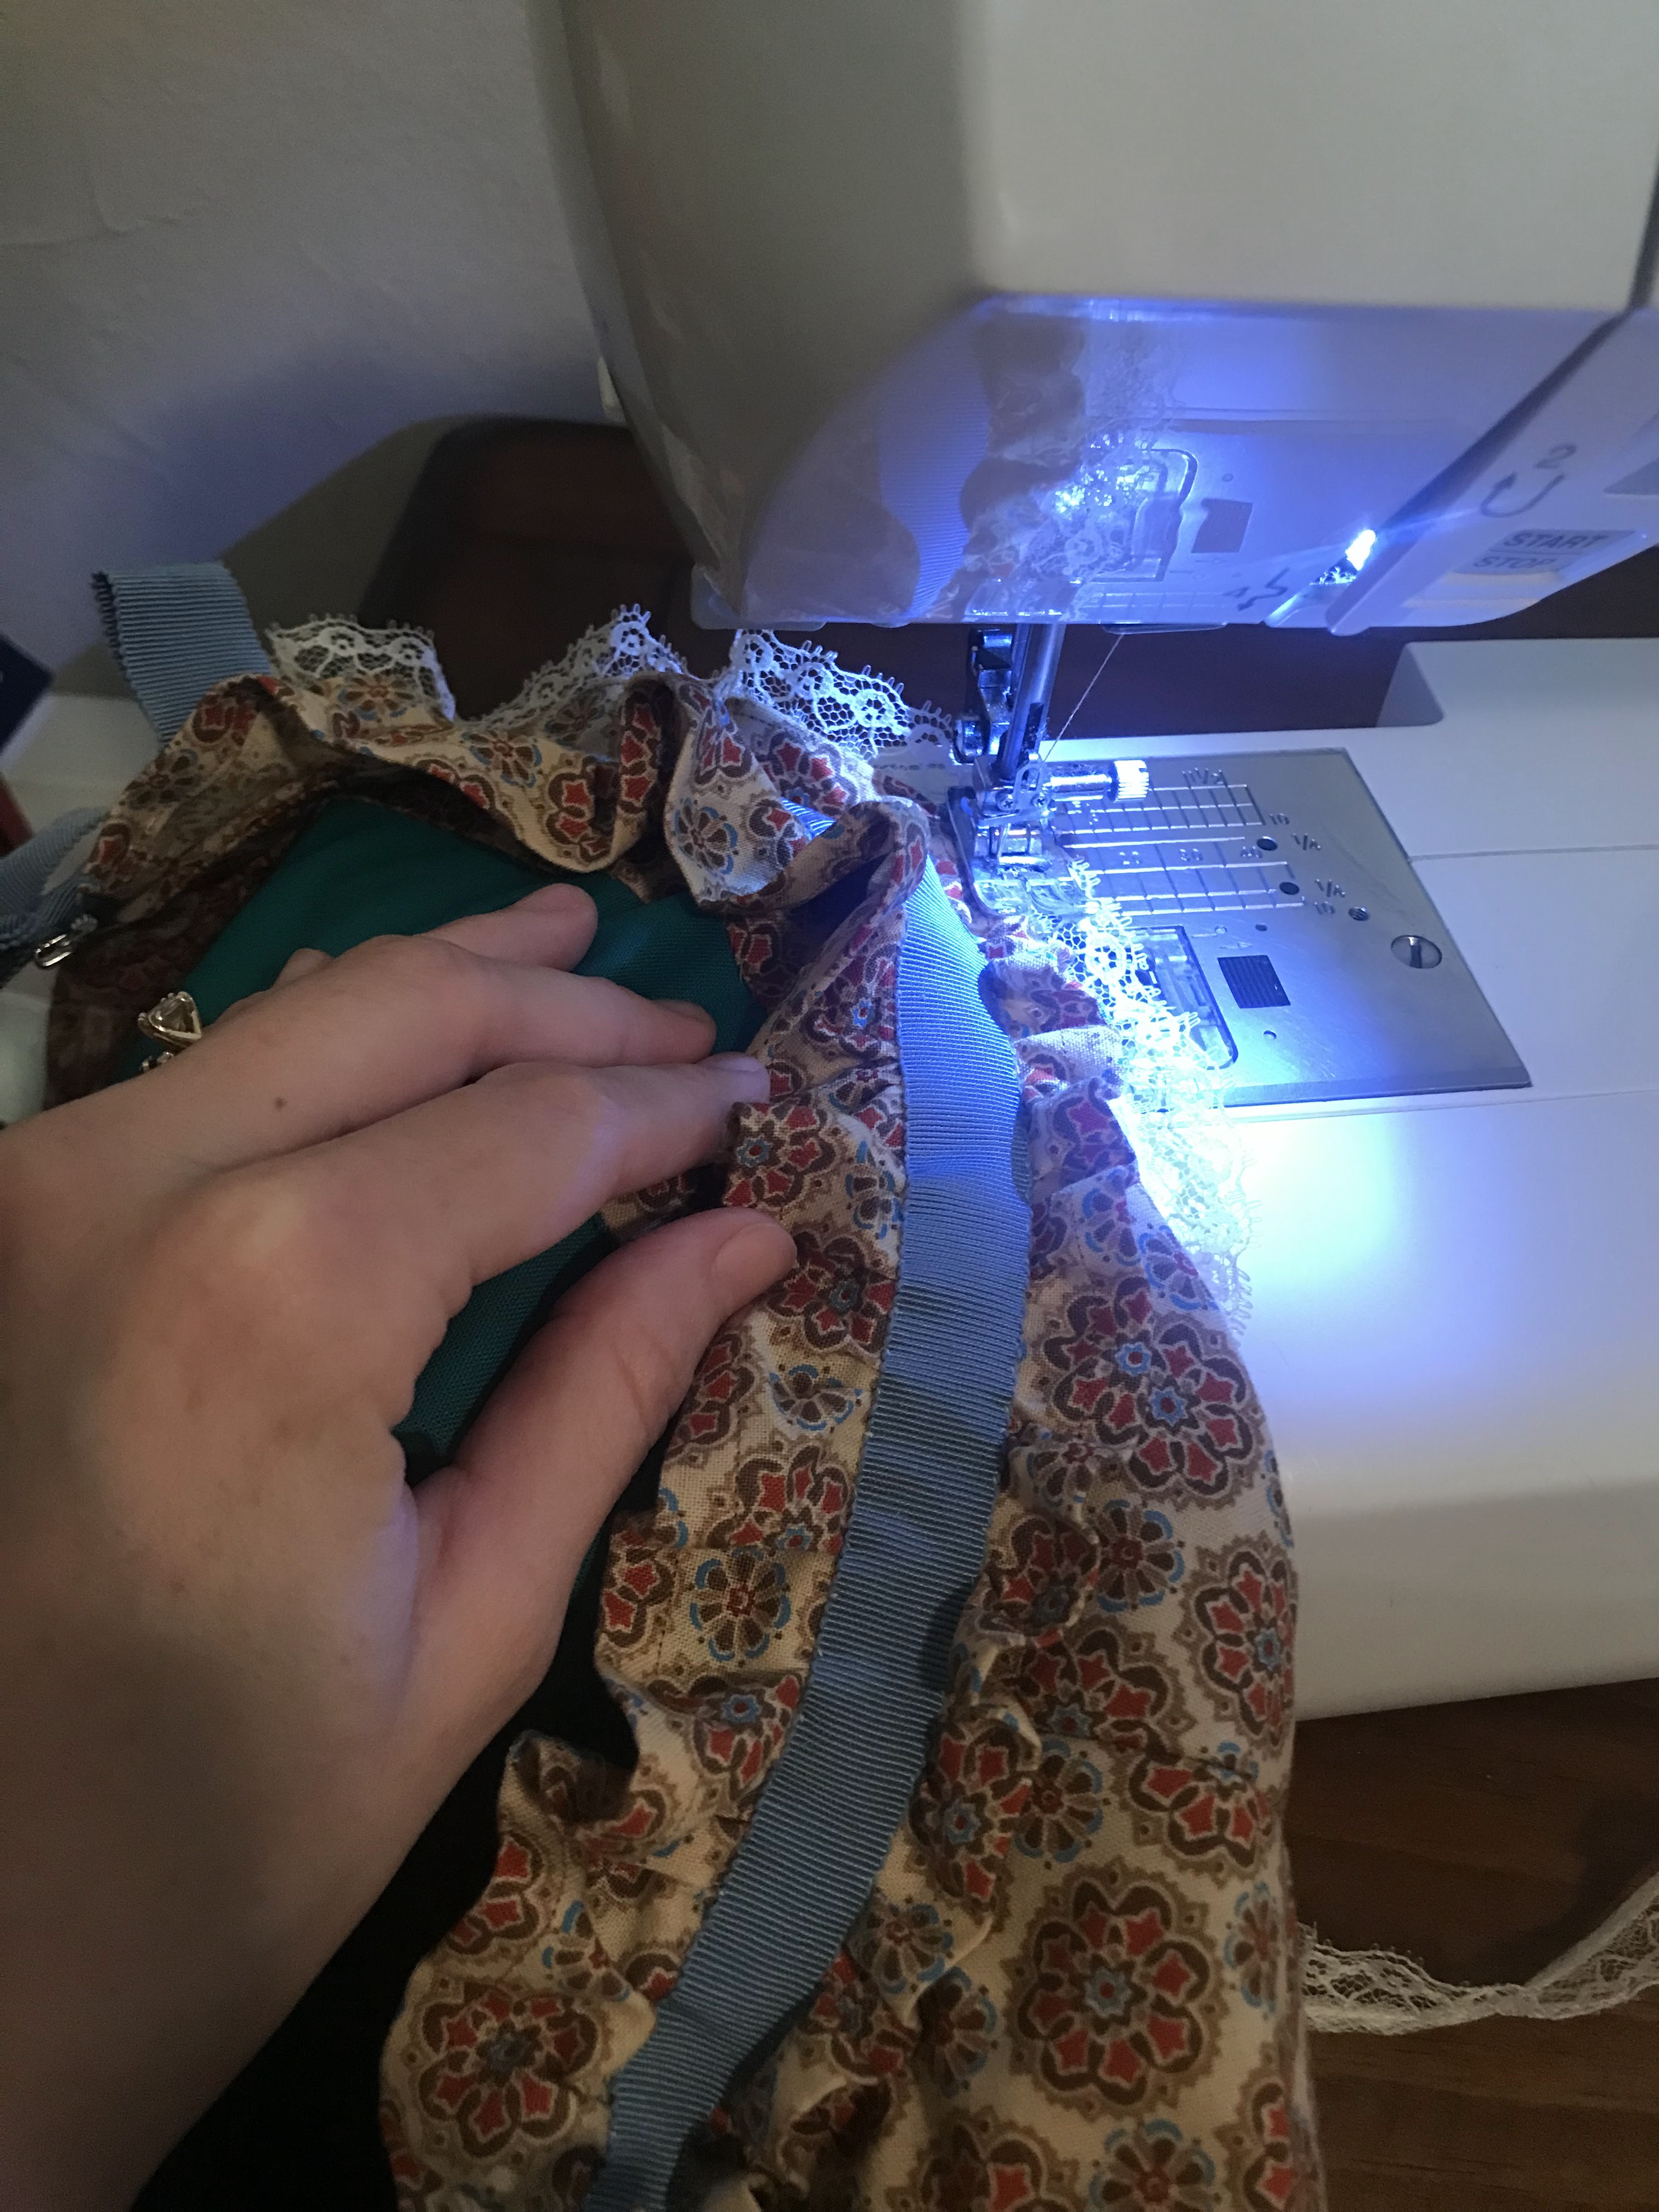
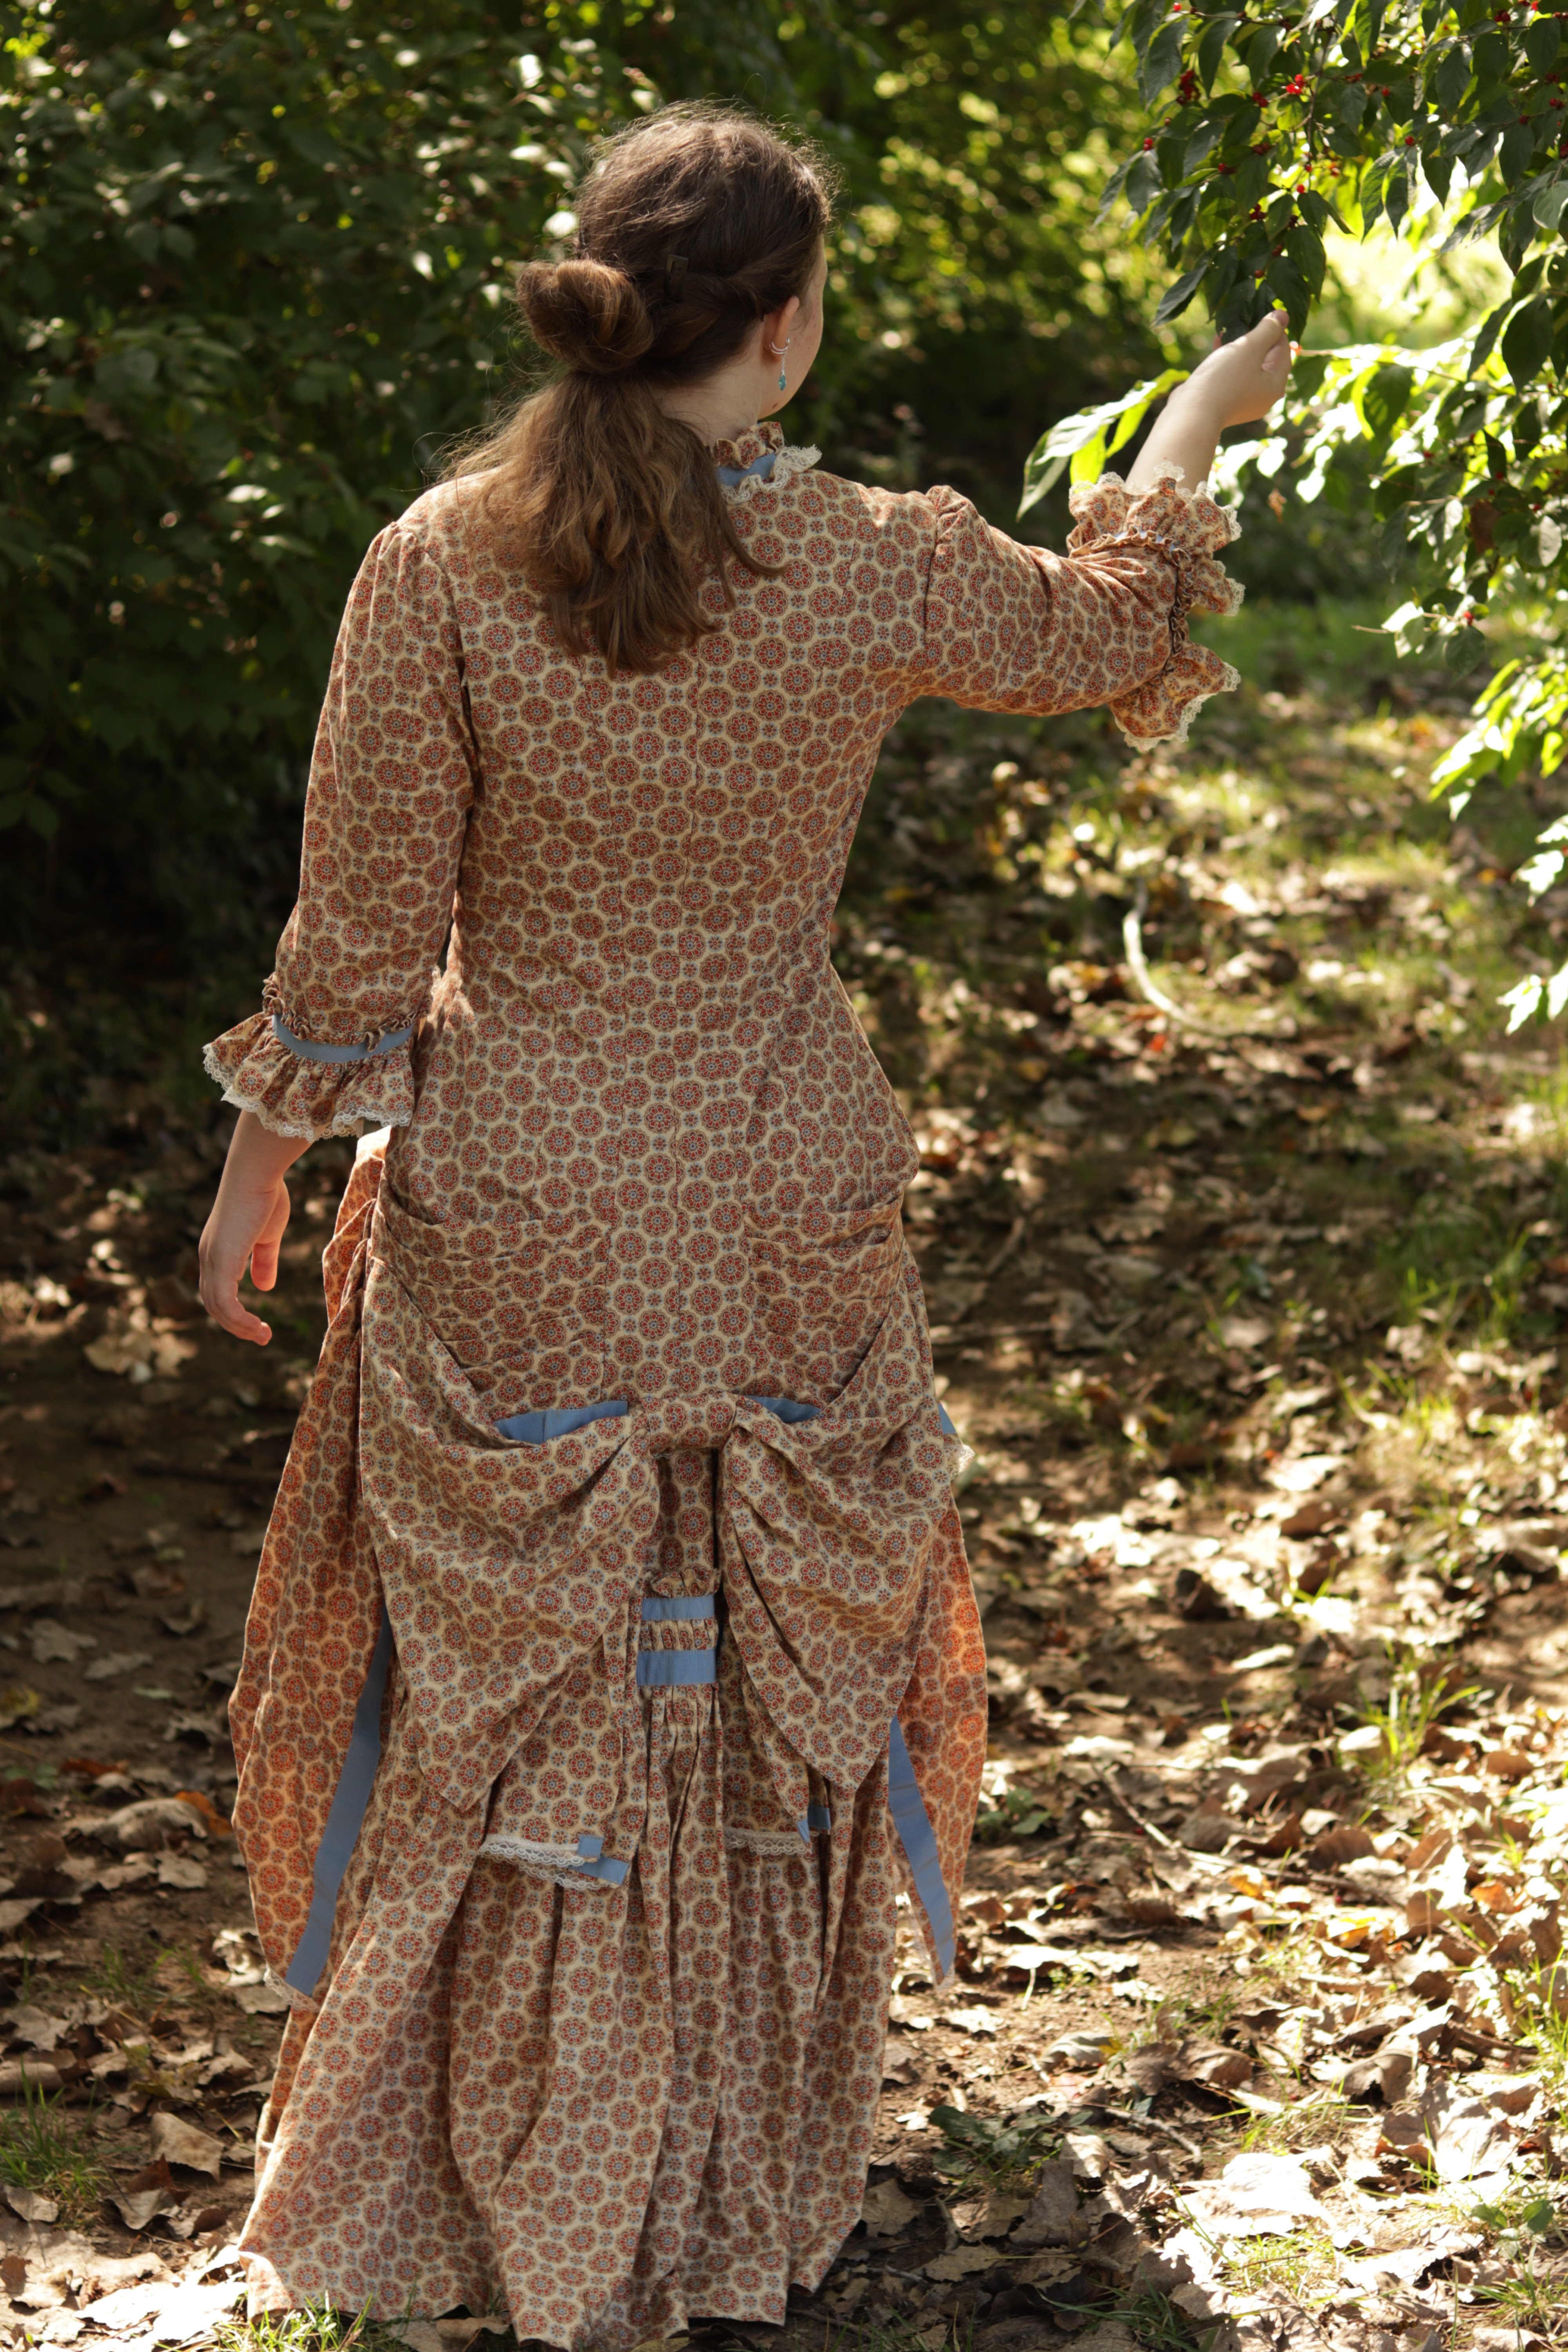
I loved the way the petersham ribbon worked to trim my bustle dress, so I searched Etsy and found a couple rolls of different widths of blue vintage petersham ribbon at a decent price and ordered those to trim this dress with.

I went through my lace stash and found some narrow ivory ruffled lace to complete the trimmings with.


I quickly deviated from the pattern.

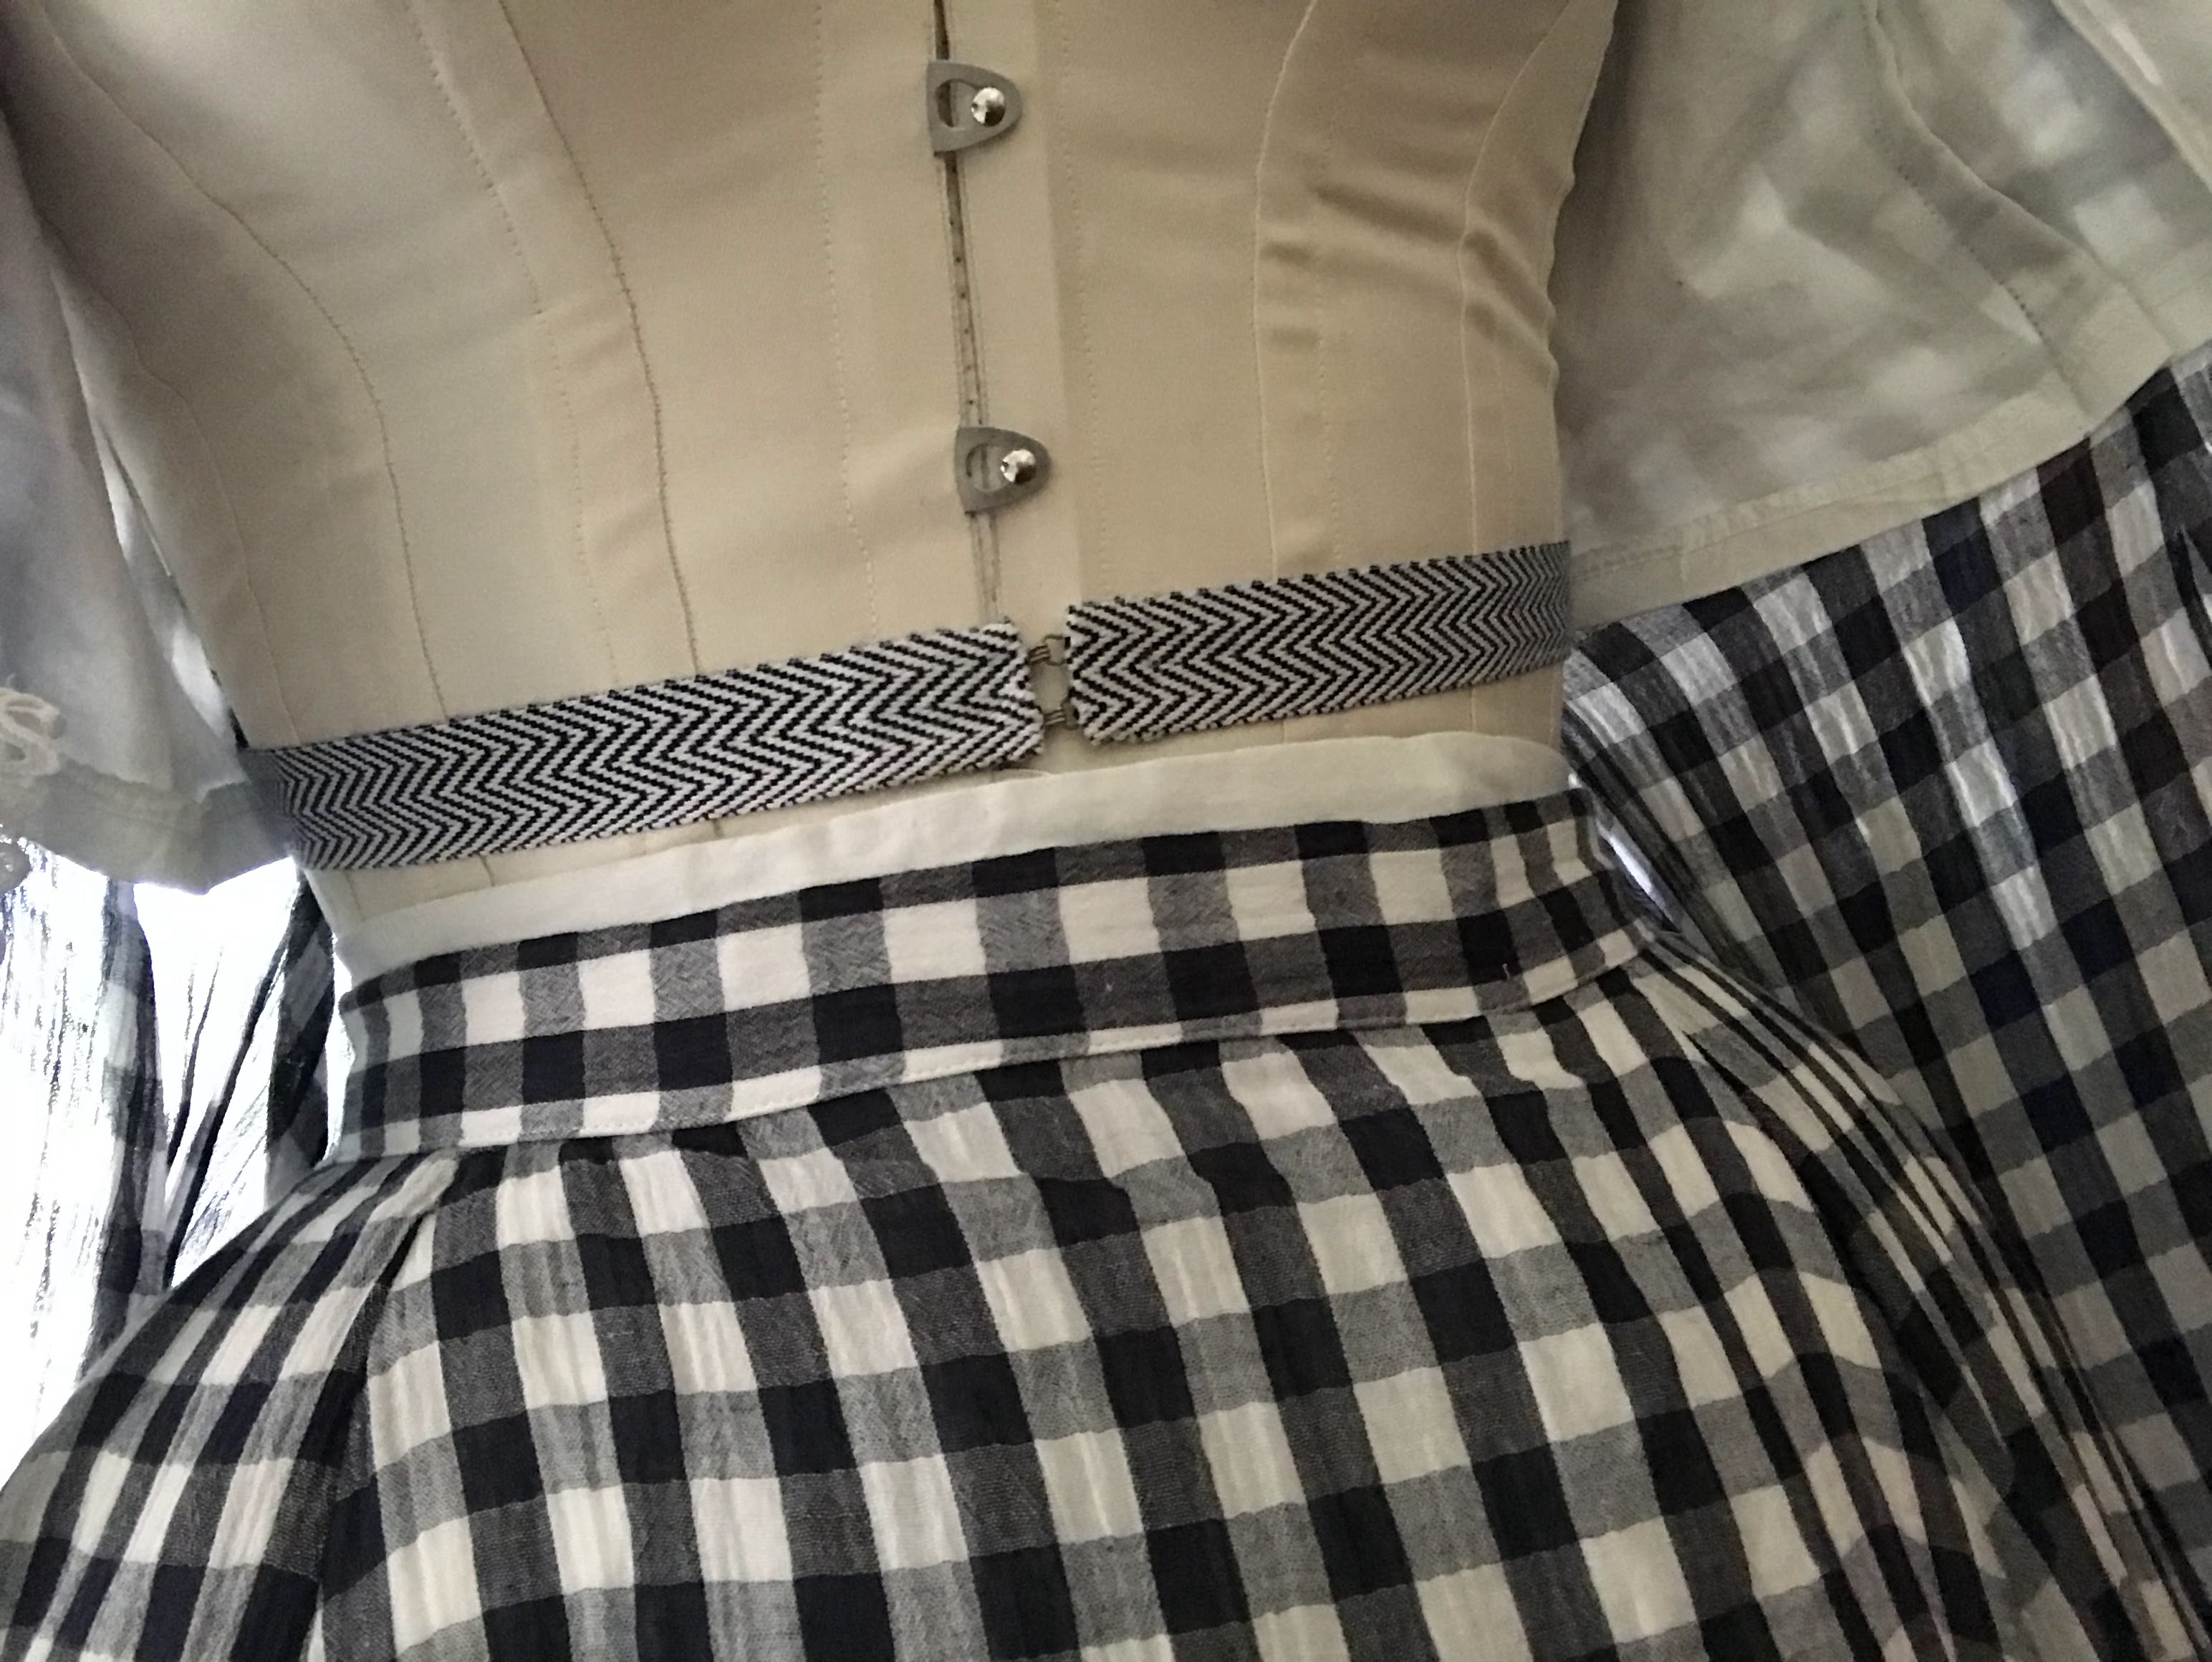
Rather than ruche the waist at the center front with machine sewing, I did it by hand. I thought that would look nicer, and I had time to do it, so why not?

Rather than sewing hooks and eyes down the front of the bodice to fasten it up with, and just adding buttons on top for decoration, I did functioning buttons and button holes down the front.

This project was the perfect opportunity to use up a set of metal buttons I found on clearance at Wal-Mart years ago.

The most noticeable change I made was to leave the bodice open below the buttons, rather than to sew it up the way the pattern recommended.

I found examples of similar natural form era bodices open over the skirt like this online. I liked to look of it, and I thought it would be way easier to put the bodice on this way.

As far as the skirt went, I changed that up a bit too. I did much less ruching than the pattern recommended so the bottom ruffle was nice and wide.

I'm very pleased with the changes I made and how the finished garment turned out.

When my sister unwrapped the dress on her birthday she was surprised - and absolutely thrilled!!

She ran to put it on immediately!!

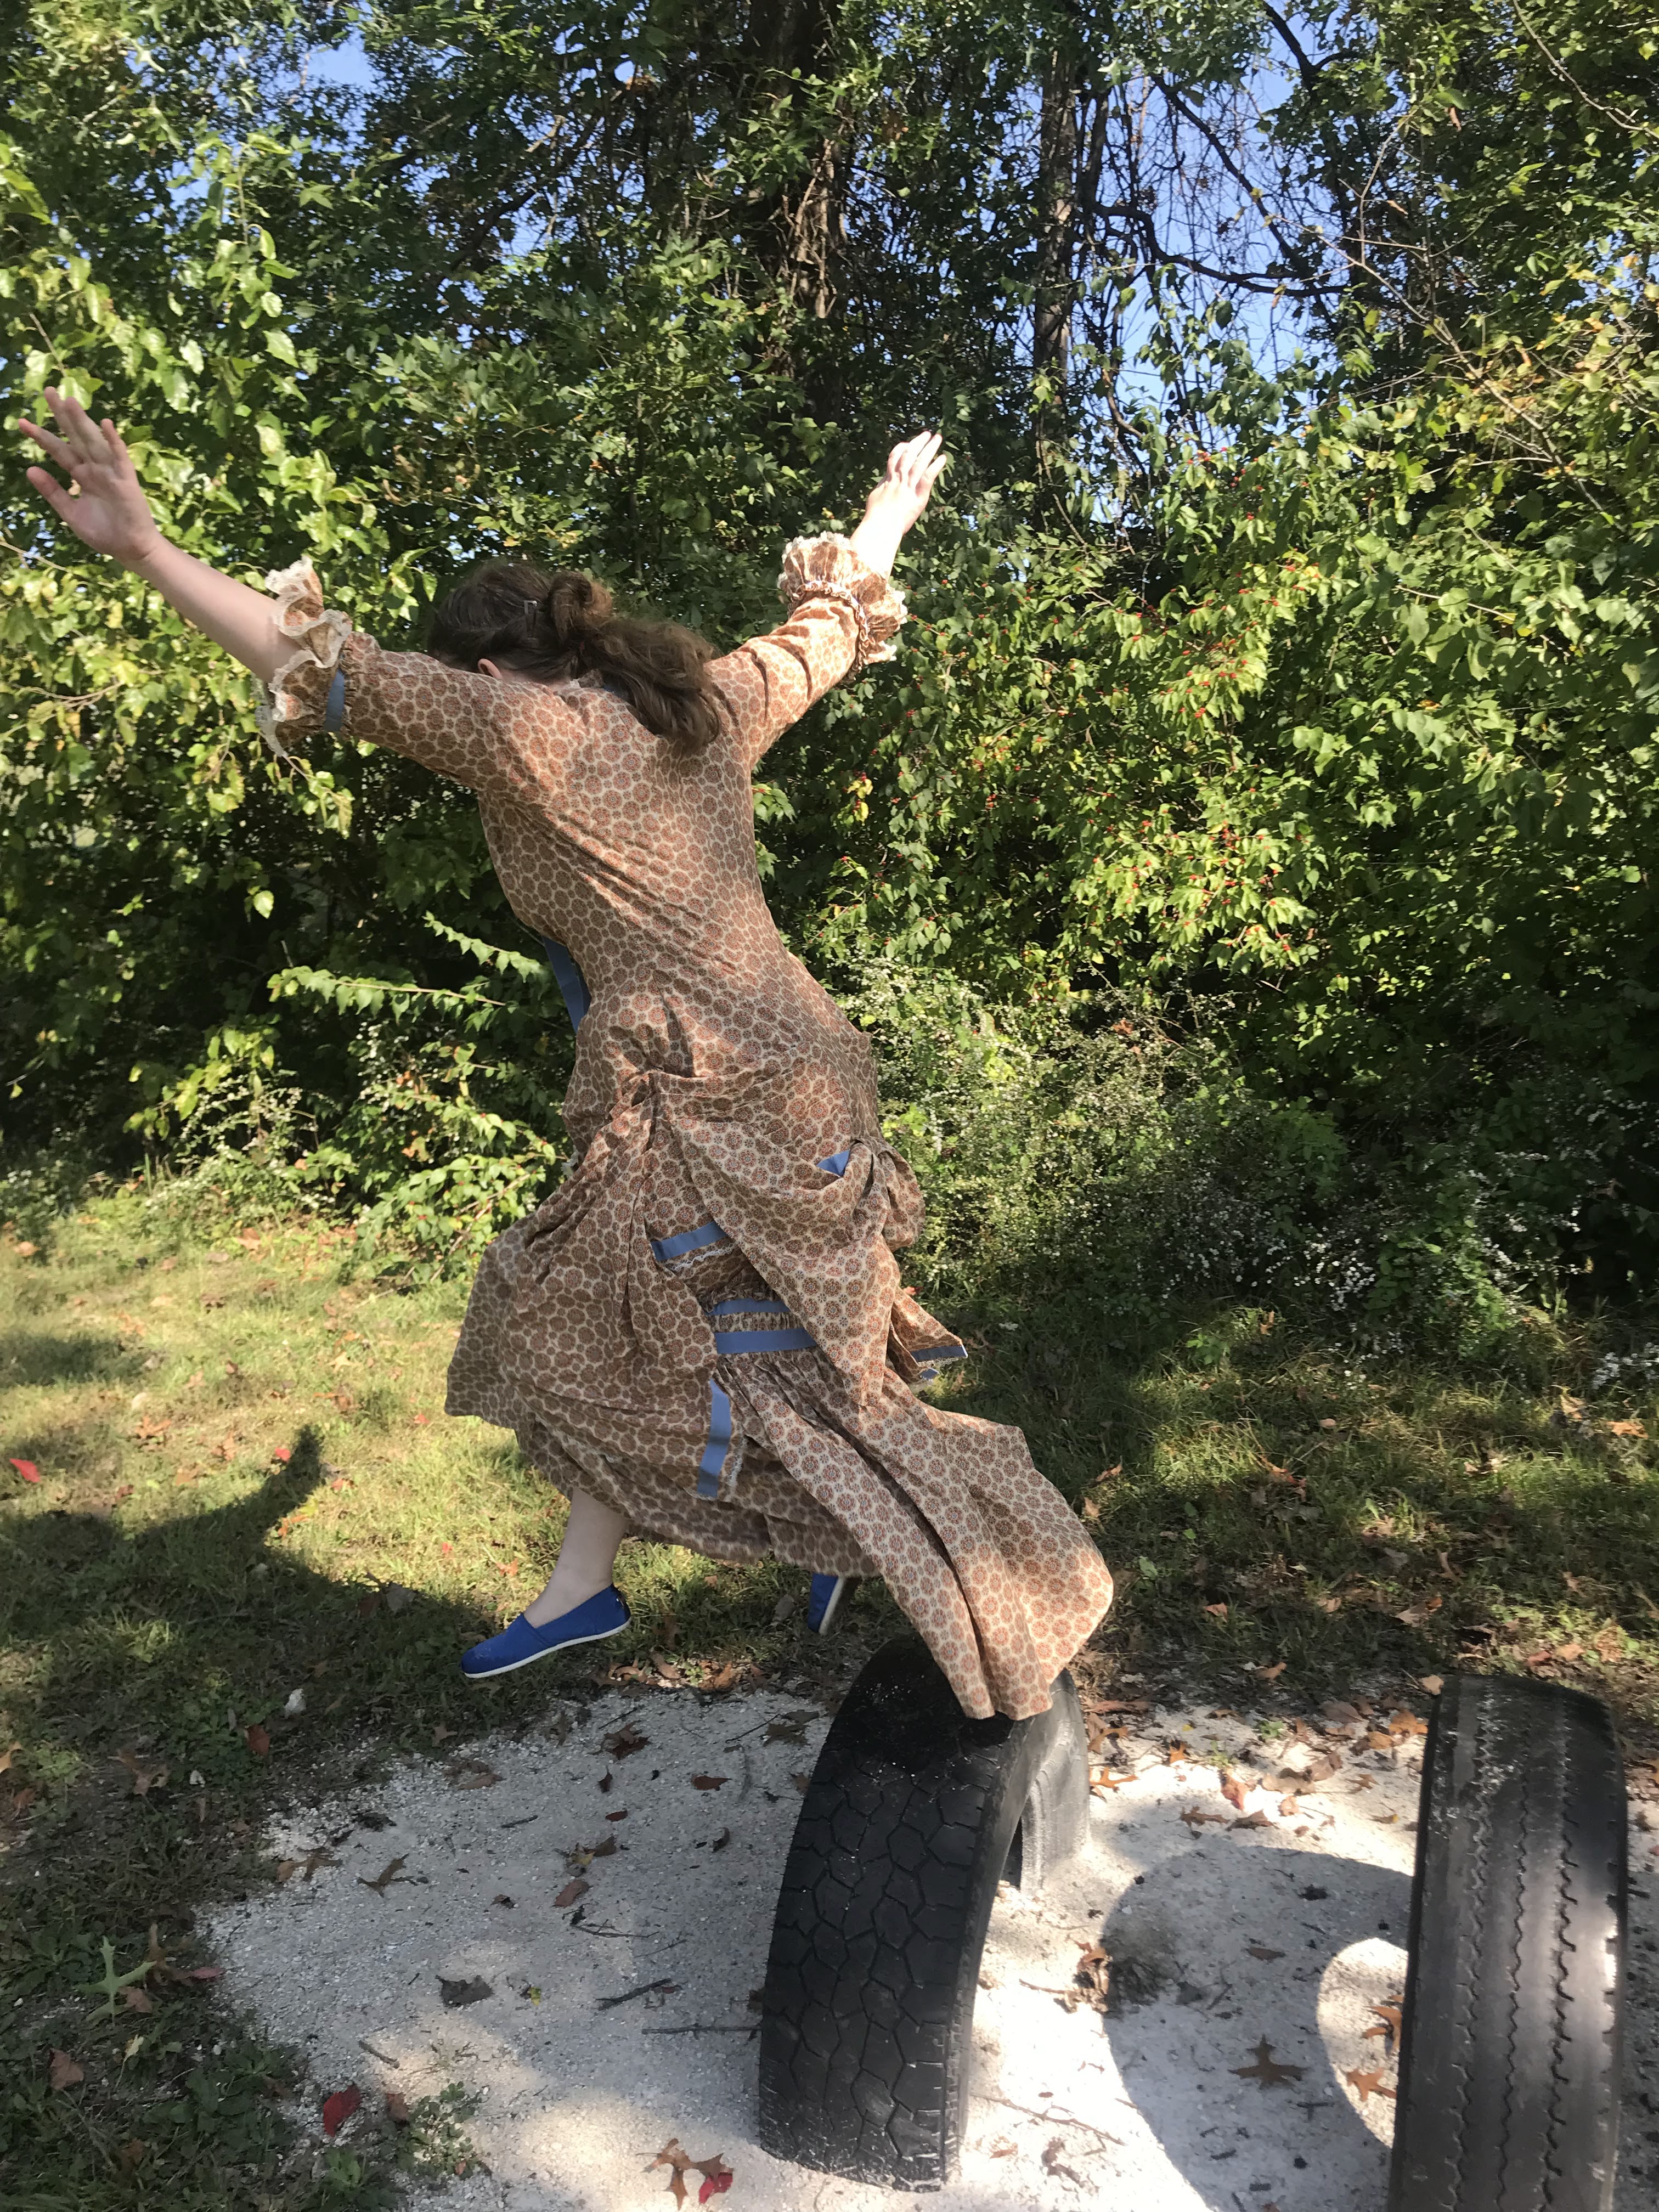
Ruffles, lace, ribbon, a large bow in the back.

What is there not to love??
`
My only complaint is this dress doesn't fit my sister as well as I'd like it too.
Since this was a gift, I couldn't do fittings on my sister while making the dress, and it shows.

I went off the pattern measurements - both the size chart and the finished garment measurements (few that there were), and the dress most certainly came out on the large side all around. My sister has wide shoulders, just like me. Usually I need to alter patterns to fit her through the shoulders, however I did not alter these shoulders at all, and they came out a touch too wide. Quite surprising.


Of course, I could always take my sister's dress in a bit, I just haven't bothered to do so. I've never enjoyed going back to alter something I've made, and no longer living in the same house, or even the same town, as my sister, makes things even more inconvenient.

There are worse things than a slightly too-big dress, but if it ever becomes important to my sister for the dress to fit better, I'll make it happen.

My sister has worn the dress as-is a handful of times.

We both find it absolutely delightful to now have bustle dresses we can wear together - even if they are from different decades! My dress would have been quite out of style by the time her dress would have been in fashion.

But who cares about that now!