Friday, November 30, 2018

1865 Pink and Lace Ball Gown - The Skirt

The skirt. The ball gown skirt. It's huge, and pleated, and poofy, and lacy, and pretty. And it's done!


The skirt is made up of three straight panels of 50" wide fabric, pleated into a waistband and finished at the bottom with a wide hem facing.


By 1865 skirts could be cut one of two ways - all straight panels all the way around (Each panel is the same width at the top and bottom.), or with gored panels (Cut wider at the bottom and narrower at the top for less bulk at the waistline and more volume at the hem.). 
The 1864 ball gown in Patterns of Fashion II by Janet Arnold, which I referenced for bodice construction details, has a gored skirt. However, I knew that did not necessarily mean the 1865 ball gown I was recreating also had a gored skirt. I decided to read through the museum database description of the dress yet again to see if the cut of the skirt was referenced at all.

I was in luck! The (translated from Swedish) description read "Skirt: Consisting of eight straight lengths, seams machine sewn". My dream ball gown's skirt was cut with straight panels, so my reproduction would be cut the same.

In the 1860's fabric widths were narrower than they are today, thus the reason the original dress' skirt was comprised of eight panels to get the necessary fullness. After looking at the skirt dimensions (also shared in the museum database's description), I determined, due to the width of the fabric I was using, my skirt only needed to be comprised of three straight cut panels.

So, after determining how long the skirt would need to be to go over the hoop skirt and reach the floor, I cut three panels of fabric, and seamed together the selvedges.


This gave me one big loop of fabric, which I then hemmed with an extra deep (probably deeper than it needed to be) hem facing of green and white polished cotton. (I actually have about 6 yards of this polished cotton, so you can expect to see it used for an awful lot of hem facings in the coming years.)


Once the fabric "loop" that would become my skirt was hemmed, it was time to adjust the skirt to the exact length it needed to be. To do this, I measured up from the hem and marked the correct length at the top of the skirt. (1860's skirt length was adjusted from the waist, not the hem.) 44" in the front, and slightly longer in the back.


Once the length was marked all the way around, I folded the excess fabric at the top down to the inside of the skirt and pressed that top fold in place.


Then I threw the gigantic loop of fabric on my dress form, over the hoop skirt. (I stuck my dress form on top of the dining room table at this point to (hopefully) keep the skirt free of dog hair, which quickly accumulates on the floor despite regular sweeping.) It was time to begin pleating.


Yet again, I examined the pictures of the original dress to figure out the exact pleat arrangement. Then I did my best to replicate it. There are 8 box pleats in total around the top of the skirt. At the center front these are single pleats. All the other pleats are double pleats.


Once the skirt was pleated, I whip stitched it onto the waistband.


The black cat (Susie Q) "helped" by laying on top of the skirt in my lap the whole time.


Once the skirt was attached to the waistband, my sister tried it on over the corset and hoop skirt just to make sure it fit properly. It did! (Since the finished dress will more or less be shared by my sister and I, half the fittings during construction were done on her, and half on me. I am pleased to say the finished dress fits us both - just as intended!!)

Now it was time to add the crowning glory of the whole dress - the lace swags - to the skirt!


 Back onto the dress form on the table the skirt went, and out came the lace.


First, I trimmed the excess netting off the scalloped border of the lace.


Then I folded the lace in half lengthwise, lining up the borders, figured out how deep I wanted the lace to be, and cut the folded edge off. This gave me two strips of lace with a border on one edge.


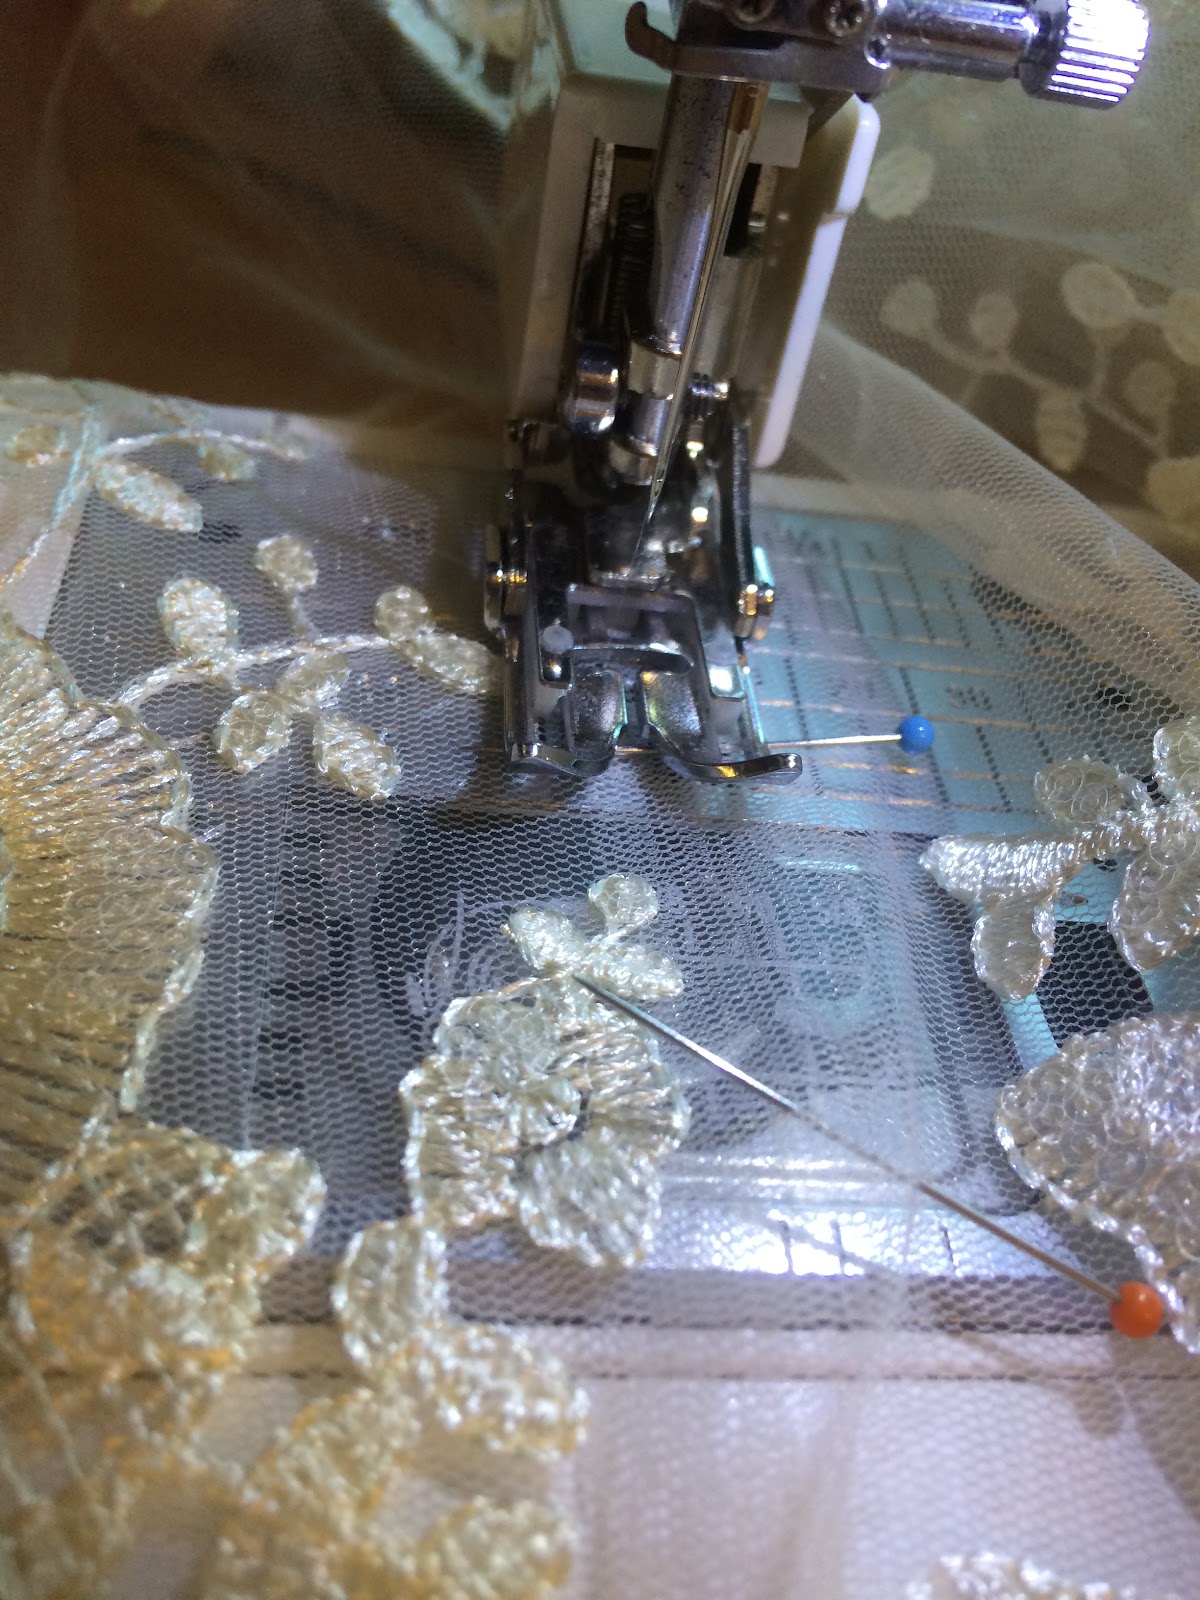
I overlapped the ends of the strips of lace, lined up the motiefs, and top stitched the ends together using clear/invisible thread on the sewing machine. 

Yes, clear plastic thread is in no way, shape, or form, historically accurate, but neither is sequined lace. With this dress I'm aiming more for "correct overall look and construction", not "perfectly historically accurate materials". Perfectly historically accurate materials were way out of my price range for this project.

Once the ends were sewn together, I had a 6 yard "loop" of lace (made from 3 yards of double-bordered lace), ready to attach to the skirt. 


I marked the "quarter points" of the lace, and pinned those to the "quarter points" of the skirt, inbetween the box pleats, about 20" up from the hem.


Then I went around and pinned the "eighth points" of the lace to the "eighth points" of the skirt - between the remaining box pleats.


Finally, I tacked all the points with a few small stitches, and I was ready to make the last part of the skirt - the bows!


For the bows, I cut eight 20" long, 6" wide strips of moire. Then I did little hand-rolled hems at the top and bottom of each strip. Next, I fringed the ends by pulling out about a centimeter's worth of weft threads. 


The hemming and fringing was tedious and took a while.


Once that was done, I folded each strip into a bow shape and tightly wrapped a 1" wide strip of moire around the middle of the "bow".


Finally, I sewed the bows onto the skirt where the lace was tacked in place, and the skirt was done. 


Not only was the skirt done, the whole dress was done!


This pink and lace ball gown, that I'd been dreaming of making for years, was finally, actually, amazingly, done!!


All done, and ready for my sister to wear on stage as Mrs. Fezziwig in A Christmas Carol next weekend!


Monday, November 26, 2018

1865 Pink and Lace Ballgown - The Bertha

The Bertha. The frilly, poofy, thing that trims the neckline of the 1865 ball gown I'm re-creating. It was definitely the piece of this gown I spent the most time attempting to figure out how to make.


XXII: In: A.03. The dress of Wilhelmina von Hallwyl the E. Boutibonne in Interlaken, Switzerland. 

Once the bodice itself was done, I spent an awful lot of time staring at this picture trying to see exactly how the bertha may have been constructed. 

At a glance it's easy to see the the bertha is made from a layer (or maybe two?) of netting, gathered and attached to a solid foundation of some sort. The gathered net is contained by strips of moire. The bertha is finished with a ruffle of lace at the bottom.

So, that stuff was easy enough to see, but I still had questions. Was it a permanent, attached bertha, or a detachable bertha? If permanent, was the netting gathered and sewn directly to  the bodice, or to some other sort of foundation? If detachable, the net was clearly attached to a foundation, but how was it attached to the bodice? How did it close, at the center back like the bodice itself, or at a shoulder? 

After asking some questions in The Historical Sew Monthly Facebook group, I decided a detachable bertha was the most plausible and practical option. Thus, I began by making a pattern for the foundation the net would be attached to.


I did this by tracing the neckline of the gown to figure out the correct shape and length of the top edge, then free-hand drawing the bottom edge.

I then cut the foundation from a layer of moire and a layer of ivory cotton sateen (the same stuff I used to line the sleeves.) I sewed one shoulder seam of each, as I'd decided the bertha would close on the left shoulder, then sewed the two layers together - right sides together, then turned right side out. The bertha foundation was then pressed and ready for me to apply the poofy netting.


I cut the netting out twice as deep, but the same length, as the foundation. I pinned and sewed it in place, and was less than impressed. There was just not enough volume to the netting as it was. So, I cut out another later of netting, almost twice the size, all the way around, as the first.


By this point I was running short on netting, so the back netting had to be pieced together, rather than cut as one solid piece. When it's all gathered up the seams can't be seen!


I gathered that layer of netting down and applied it on top of the first layer on the foundation. I saw no point in removing to first layer of netting I'd already sewn on. Two layers of netting would just add to the frothiness of the bertha!


Once the netting was sewn in place I cut bias strips from scraps of moire, sewed them into tubes, and turned them right side out. I laid these short tubes of bias on top of the netting all along the bertha at regular intervals. Then I secured them in place with bias tape sewn along the top and bottom edges of the bertha. The netting extended past the bias tape so the bertha would be edged in little frills of netting, just as the original appeared to be.

Finally, all that was left to add was the lace ruffle to the bottom edge, and the closures on the left shoulder.


I sewed the lace onto the bottom edge of the bertha by hand, gathering it as a went along. First, I would sew a few small running stitches just in the lace.


Then I would pull those stitched up tight to gather the lace.


Finally, I would take a back stitch through both the lace and the bertha foundation to secure the lace in place.


I started sewing the lace onto the back of the bertha, and worked my way around to the front. This whole process went surprisingly quick. Before long I was trying to figure out how and where to overlap the two ends of the lace so there would be no visible break in the lace ruffle when the dress was worn.

I decided that rather than overlapping the lace right on the shoulder where the bertha would close, it would be less conspicuous to overlap the lace off center in the back. So, once I'd sewn the lace all the way around to the left front shoulder, where the bertha would fasten when worn, I continued to sew and gather the lace onto a strip of bias tape several inches long.


After I'd sewn about three inches of lace onto the bias tape, I cut off the end on the lace, then folded the bias tape back over the top of the lace and sewed it down. The top edge of the lace was now sandwiched between two layers of bias tape.


The front end of the bertha looked like this:


This tail of lace would hook onto the underside of the bertha in the back to give the illusion of a seamless frill of lace all around the bertha.


I also sewed hooks and eyes onto the shoulder, where the bertha would fasten with the front slightly overlapping the back.


Finally, I attached the bertha to the bodice itself with large basting stitches. These stitches can easily be removed if I ever want to wear the dress without a bertha, or with a different bertha.

The bertha is basted to the bodice all along the front, and on the right side of the back. It is not sewn to the left side of the back at all, as that would make the bodice impossible to put on. So, this is what the bodice looks like laid flat:


Once the bodice is put on, first it is hooked up the center back:


Then the lace underlap is hooked in place:


And finally the two ends of the bertha are hooked together at the shoulder:


It actually takes very little time to get in and out of this bodice as the closures are very easy to work!


Once the bertha was basted on, the bodice was done and wearable!


Just in time for the October Historical Sew Monthly challenge: Fabric Manipulation. 


If making this bertha did not require some fabric manipulating, I don't know what does!


HSM Facts:

1865 Ball Gown Bodice

The Challenge: Fabric Manipulation

Which kind of fabric manipulation did you use: I ruched the netting for the bertha.

Material: Either a cotton or a rayon moire (not sure of the exact fiber content here), nylon netting, cotton sheet for interlining, and cotton/nylon blend net lace.

Pattern: I used Simplicity 2881 as my base pattern because the pattern shapes almost exactly matched those of the 1860's ball gown bodice in Janet Arnold's Patterns of Fashion 2. I drafted my own pattern for the bertha.

Year: 1865

Notions: Large zip ties for boning, cotton ribbon for boning casing, all purpose
 thread for machine sewing, vintage cotton thread for hand sewing, hooks and eyes for closure, rayon ribbon for neckline drawstring, cotton crochet yarn for piping.

How historically accurate is it? The materials do not have the correct fiber content at all, but they have the right look. The pattern and construction methods are accurate according to my research, and the bodice would be recognizable in its era, so 70% or so.

Hours to complete: Honestly I don't know. I completed this bodice in about 10 days and I would guess I worked on it an average of 2 hours a day, so 20ish hours. The bodice itself was fairly easy to construct, but the bertha was time consuming and required a bit of experimentation.

First worn: For pictures 10/31/18

Total cost: I got the moire for $1.50 per yard, and used under a yard for the bodice
I paid $4 for 1 yard of nylon net, and used all of it for the sleeves and bertha
The lace was $3 a yard and I used about 3 yards to trim the bertha, so that would be $9 total
All the notions were in stash, but I probably spent about $3 on what was actually used for this
So the total cost would be around $20.50


Unfortunately, despite my best-laid plans, I did not get the skirt done by the end of October. No, that beast had to be sewn well into November. But that is a story to tell you in another blog post!