A month or so back my husband and I went on a trip. We visited family, did some hiking, went to some wineries, and I even managed to do some fabric shopping. It was a fun, relaxing, trip. It also involved a lot of time in the car.
No complaints there, I do enjoy road trips! However, I also enjoy getting stuff done, so I came prepared with a little sewing project that I was pretty sure I could manage to complete in the week we would be gone.

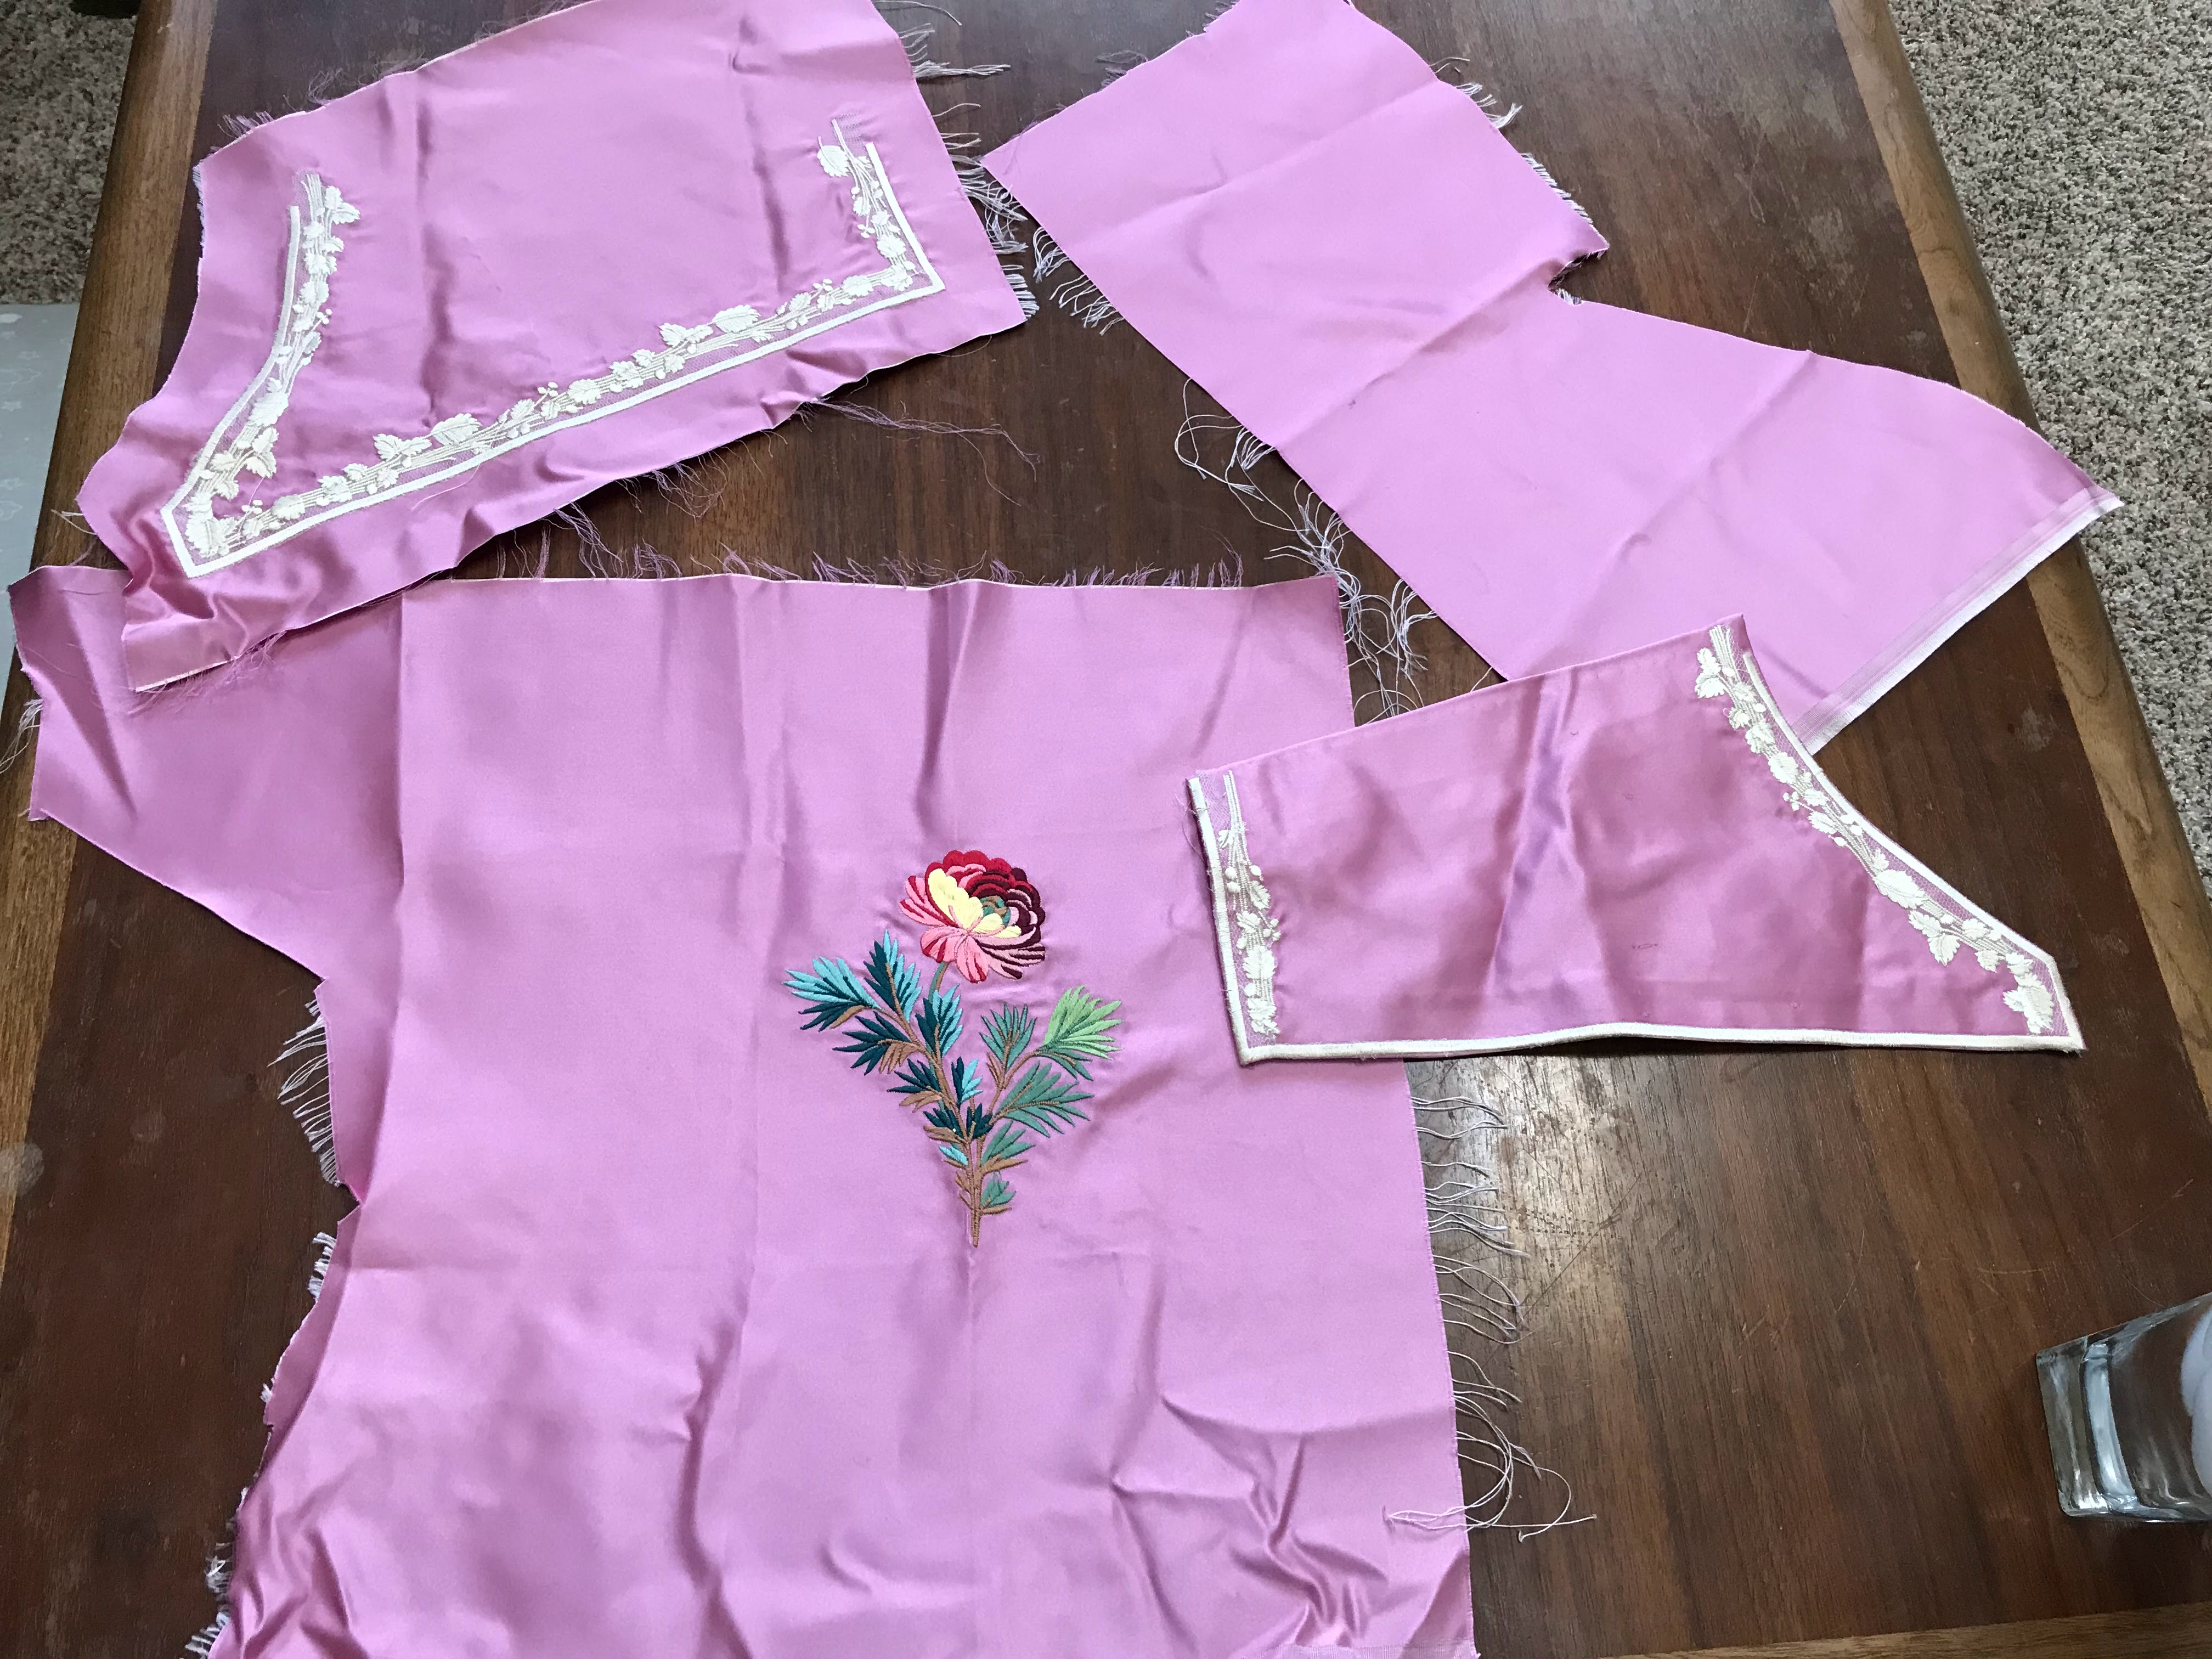
A little over 2 years ago, just weeks before the world shut down due to Covid, the Saint Louis Historical Sewing Society had a sewing day. At the end of it, Sewstine brought out some fabric lengths, fabric scraps, and embroidery samples she was ready to de-stash, and most of us went home with pretty pieces of fabric to turn into. . . something. Among other things I received some embroidery samples on pink double faced silk satin. (What a luxurious fabric!) Left overs from this 1780's gown.
As stunning as this fabric and the embroidery was, I didn't have a whole lot of it, so it took some brainstorming to come up with a plan to properly use it! At some point in the past year or so, inspired by all the pretty Regency (or Regency-inspired) costumes in EMMA. (2020) and Bridgerton I came up with the idea of turning these embroidered fabric scraps into a sleeveless spencer jacket.

Now I have plans and fabric to make myself a new Regency dress from around 1805-1810 so I wanted the new sleeveless spencer to be from around then to go with the new dress I will eventually get around to making. Thus I went to Pinterest and scoured all the fashion plates featuring sleeveless spencers from that date range that I could find. I particularly liked the 1807 sleeveless spencer featured above.
Once I felt like I had a decent idea of the shape my little jacket should have, I proceeded to cut into the beautiful double faced silk satin.

(Here's the gown I made from the pattern, the "Tunic with Points", and the 1790's open robe.)

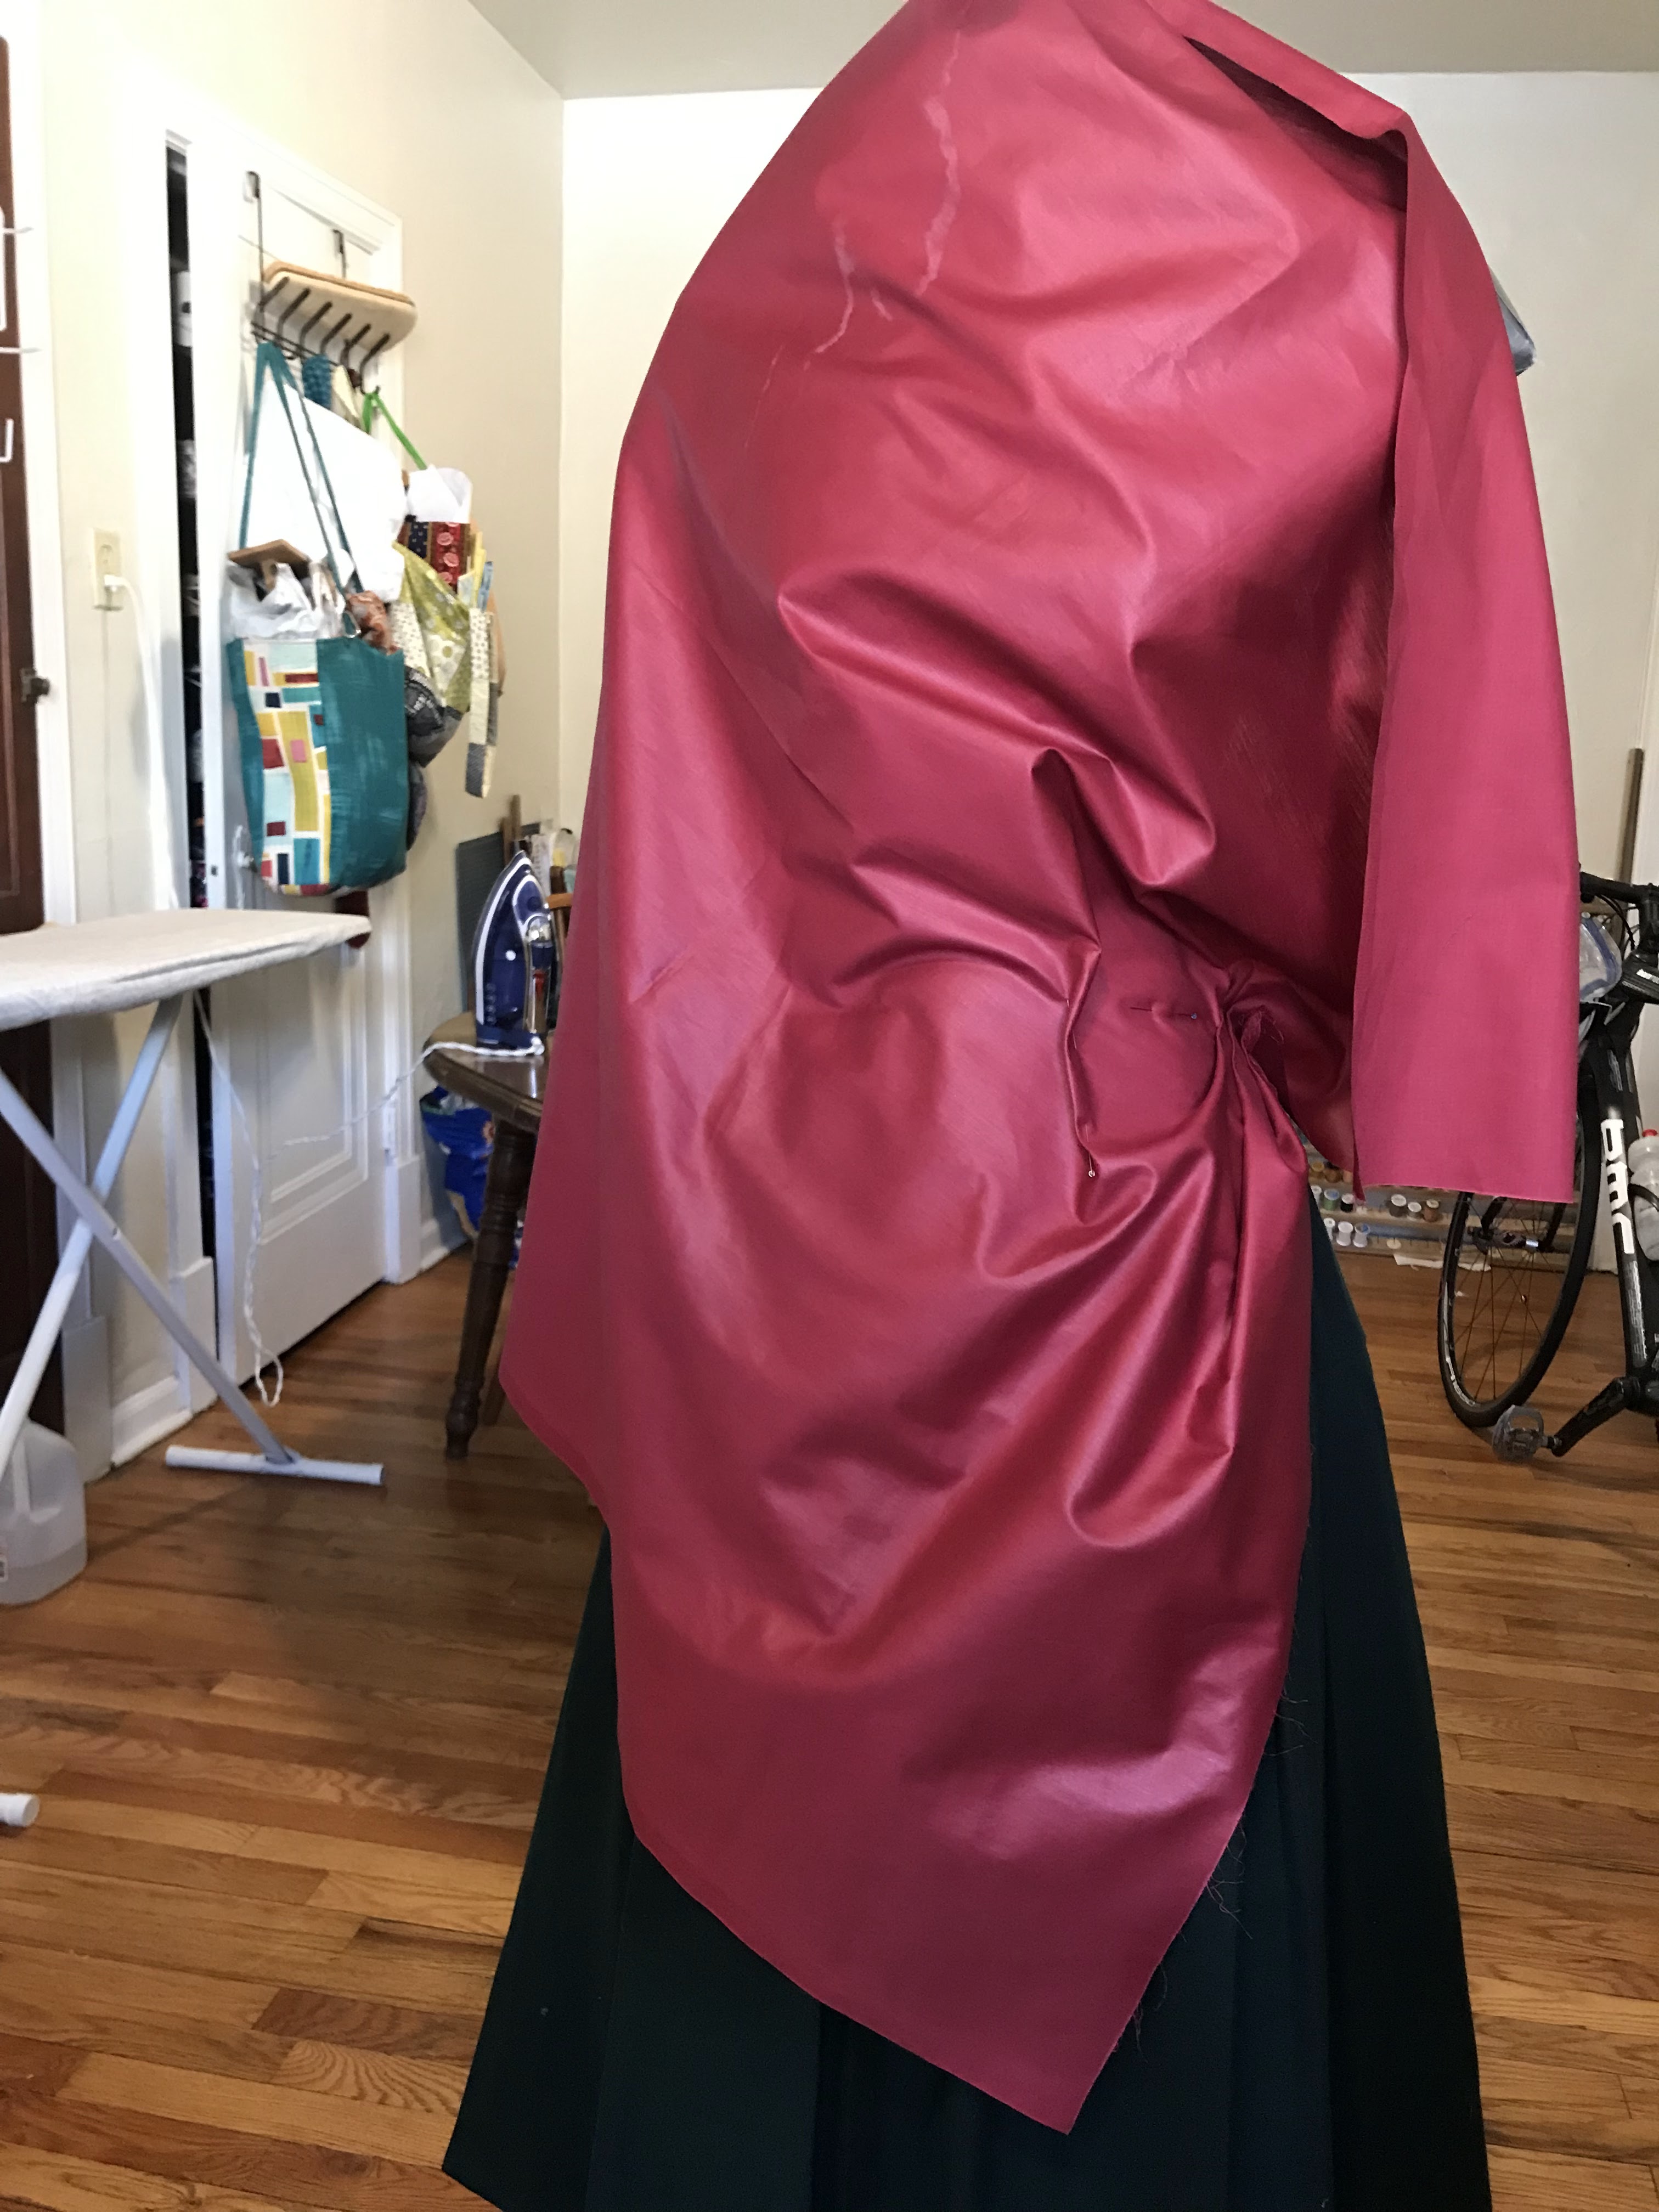
Next I cut out the fronts and shoulder straps from the remaining silk.


The first piece I cut out was the back, centered over the flower embroidery on the largest piece of silk.

Next I cut out the fronts and shoulder straps from the remaining silk.

Some considerable piecing was required.

But eventually. . .

The primary pieces of the spencer were cut out!
Now I just had to decided how I wanted to use other two embroidered pieces of silk I had. They were specifically shaped and embroidered for the center front of a 1780's gown, but surely I could make them work for something here!

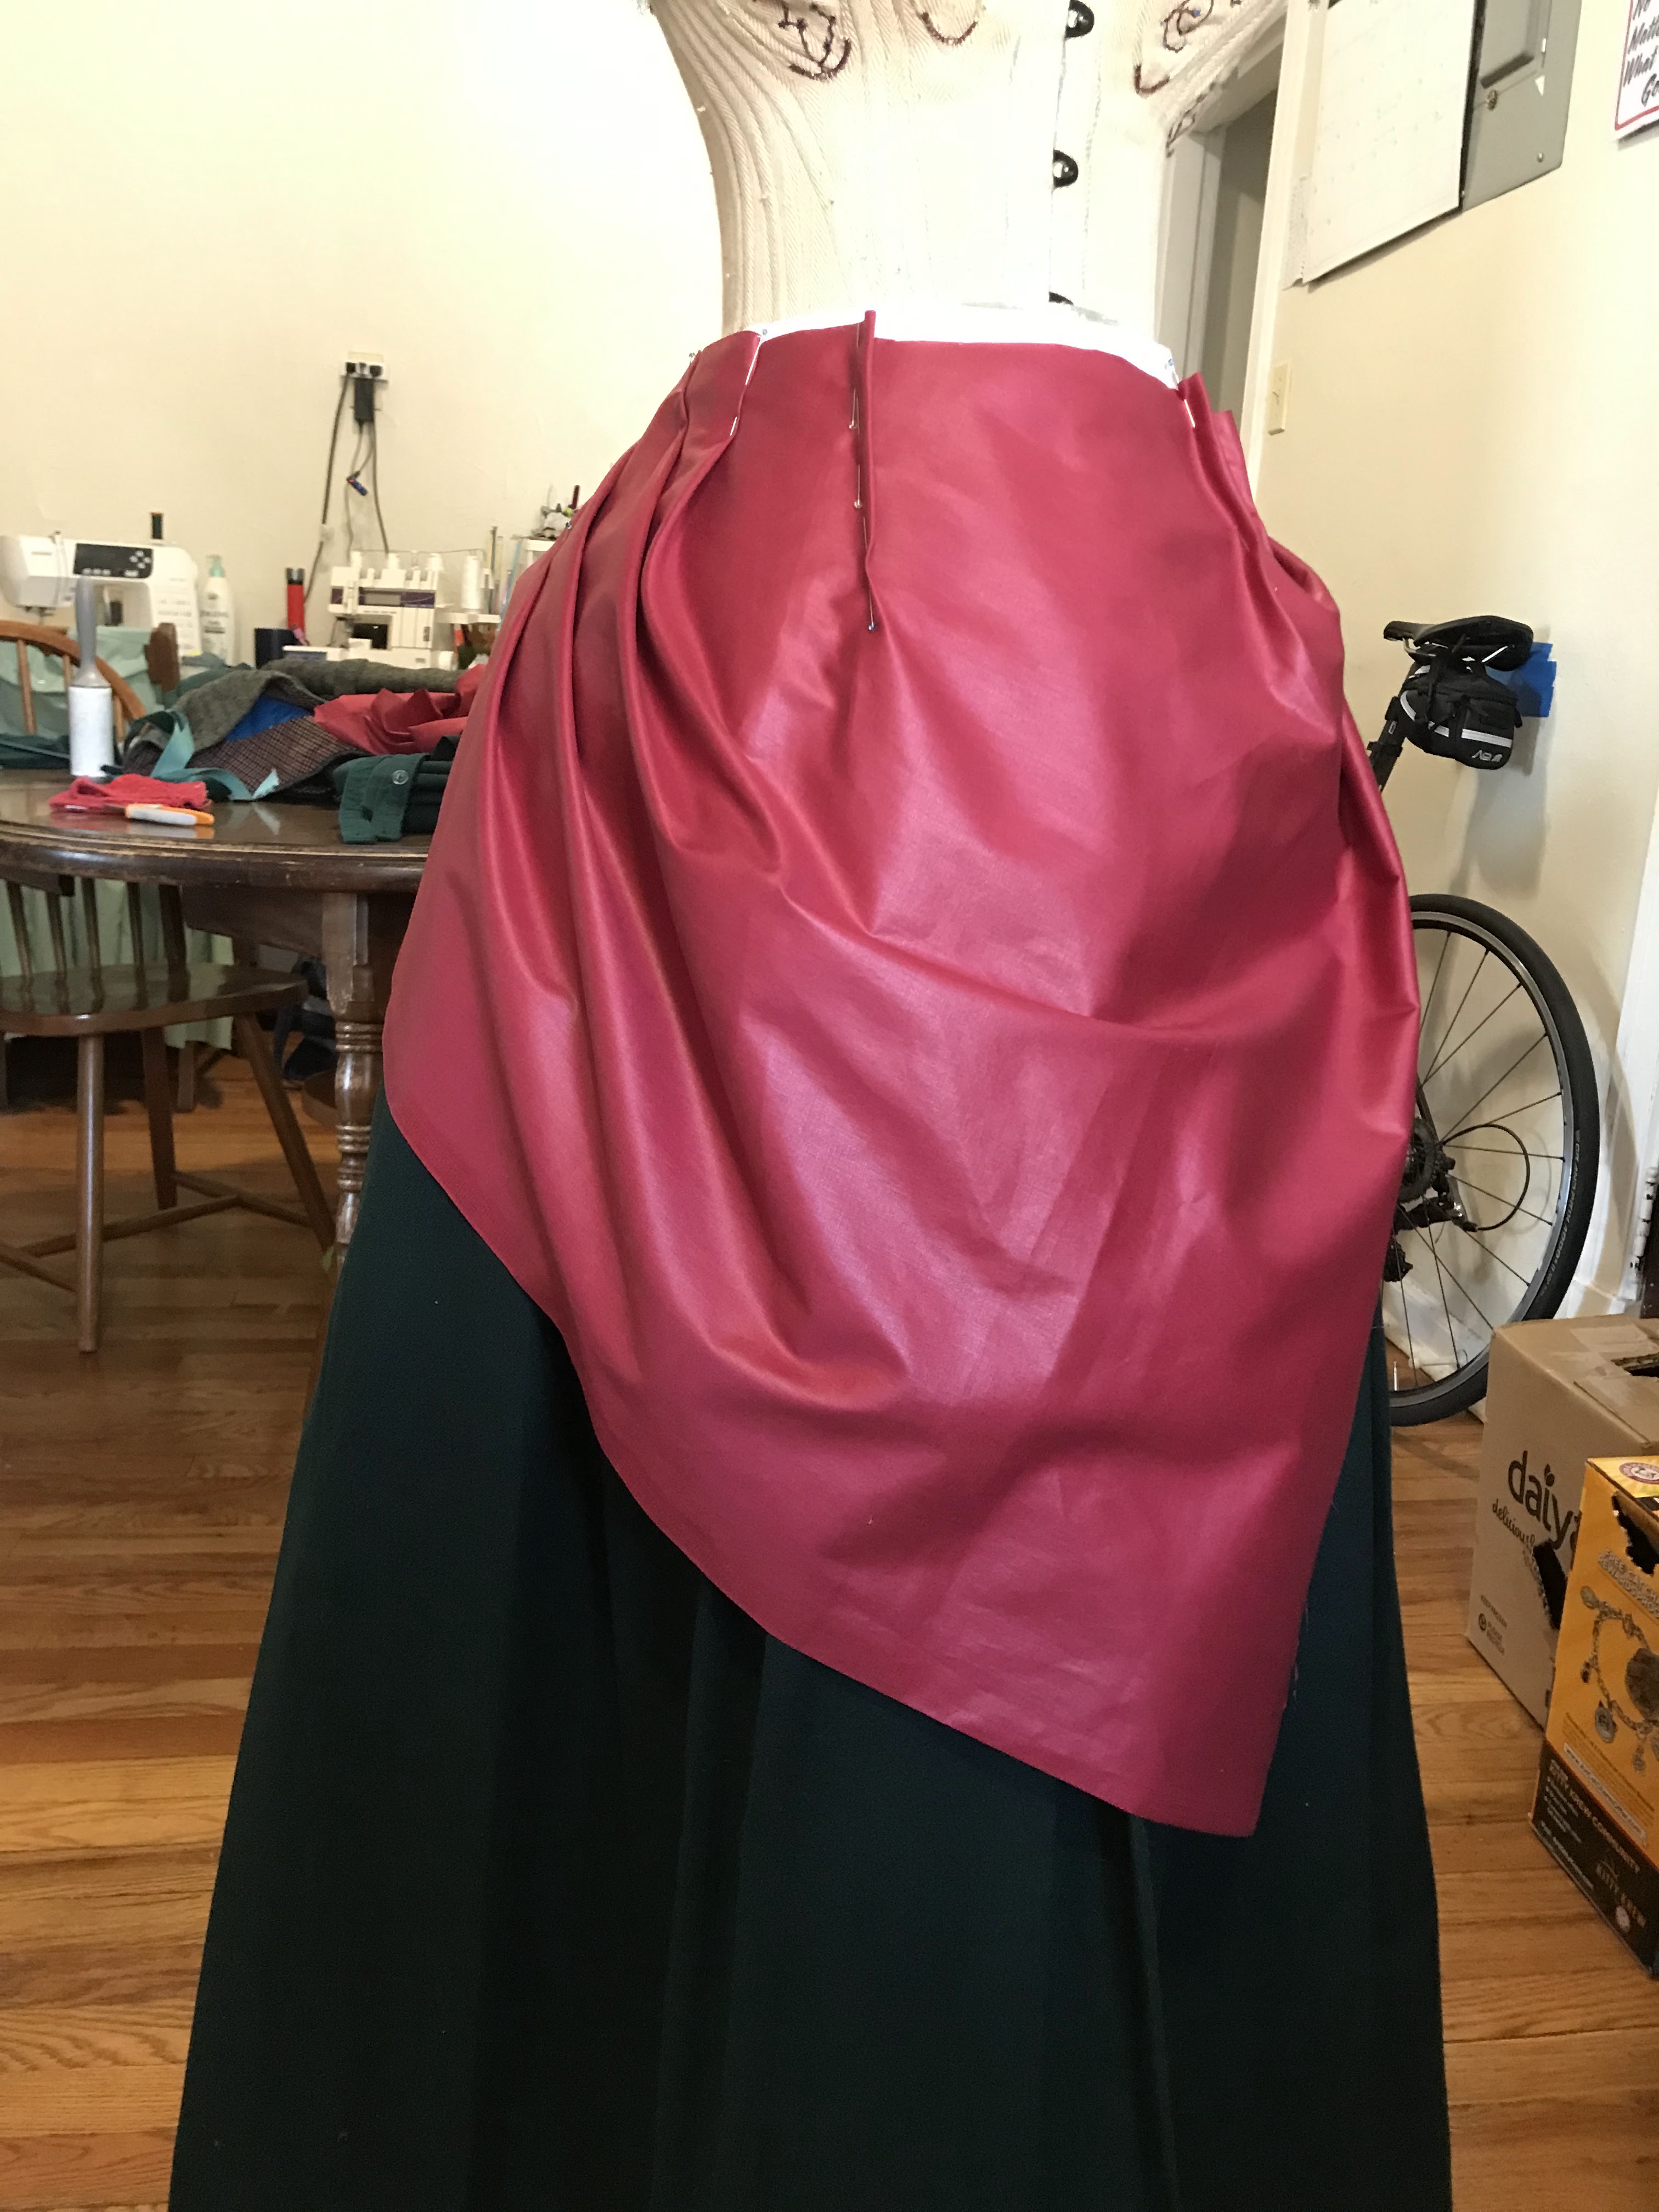
After a bit more brainstorming I decided to use the longest section of embroidery to make a peplum for the back of the jacket.

I cut apart the other sections of embroidery and ironed in the edges to basically make pieces of "ribbon". My plan was to turn these into a bow for the front of the jacket.

Once I was finally satisfied that I'd figured out how to use all the beautiful embroidery to the best of my ability, construction of this little spencer could begin!

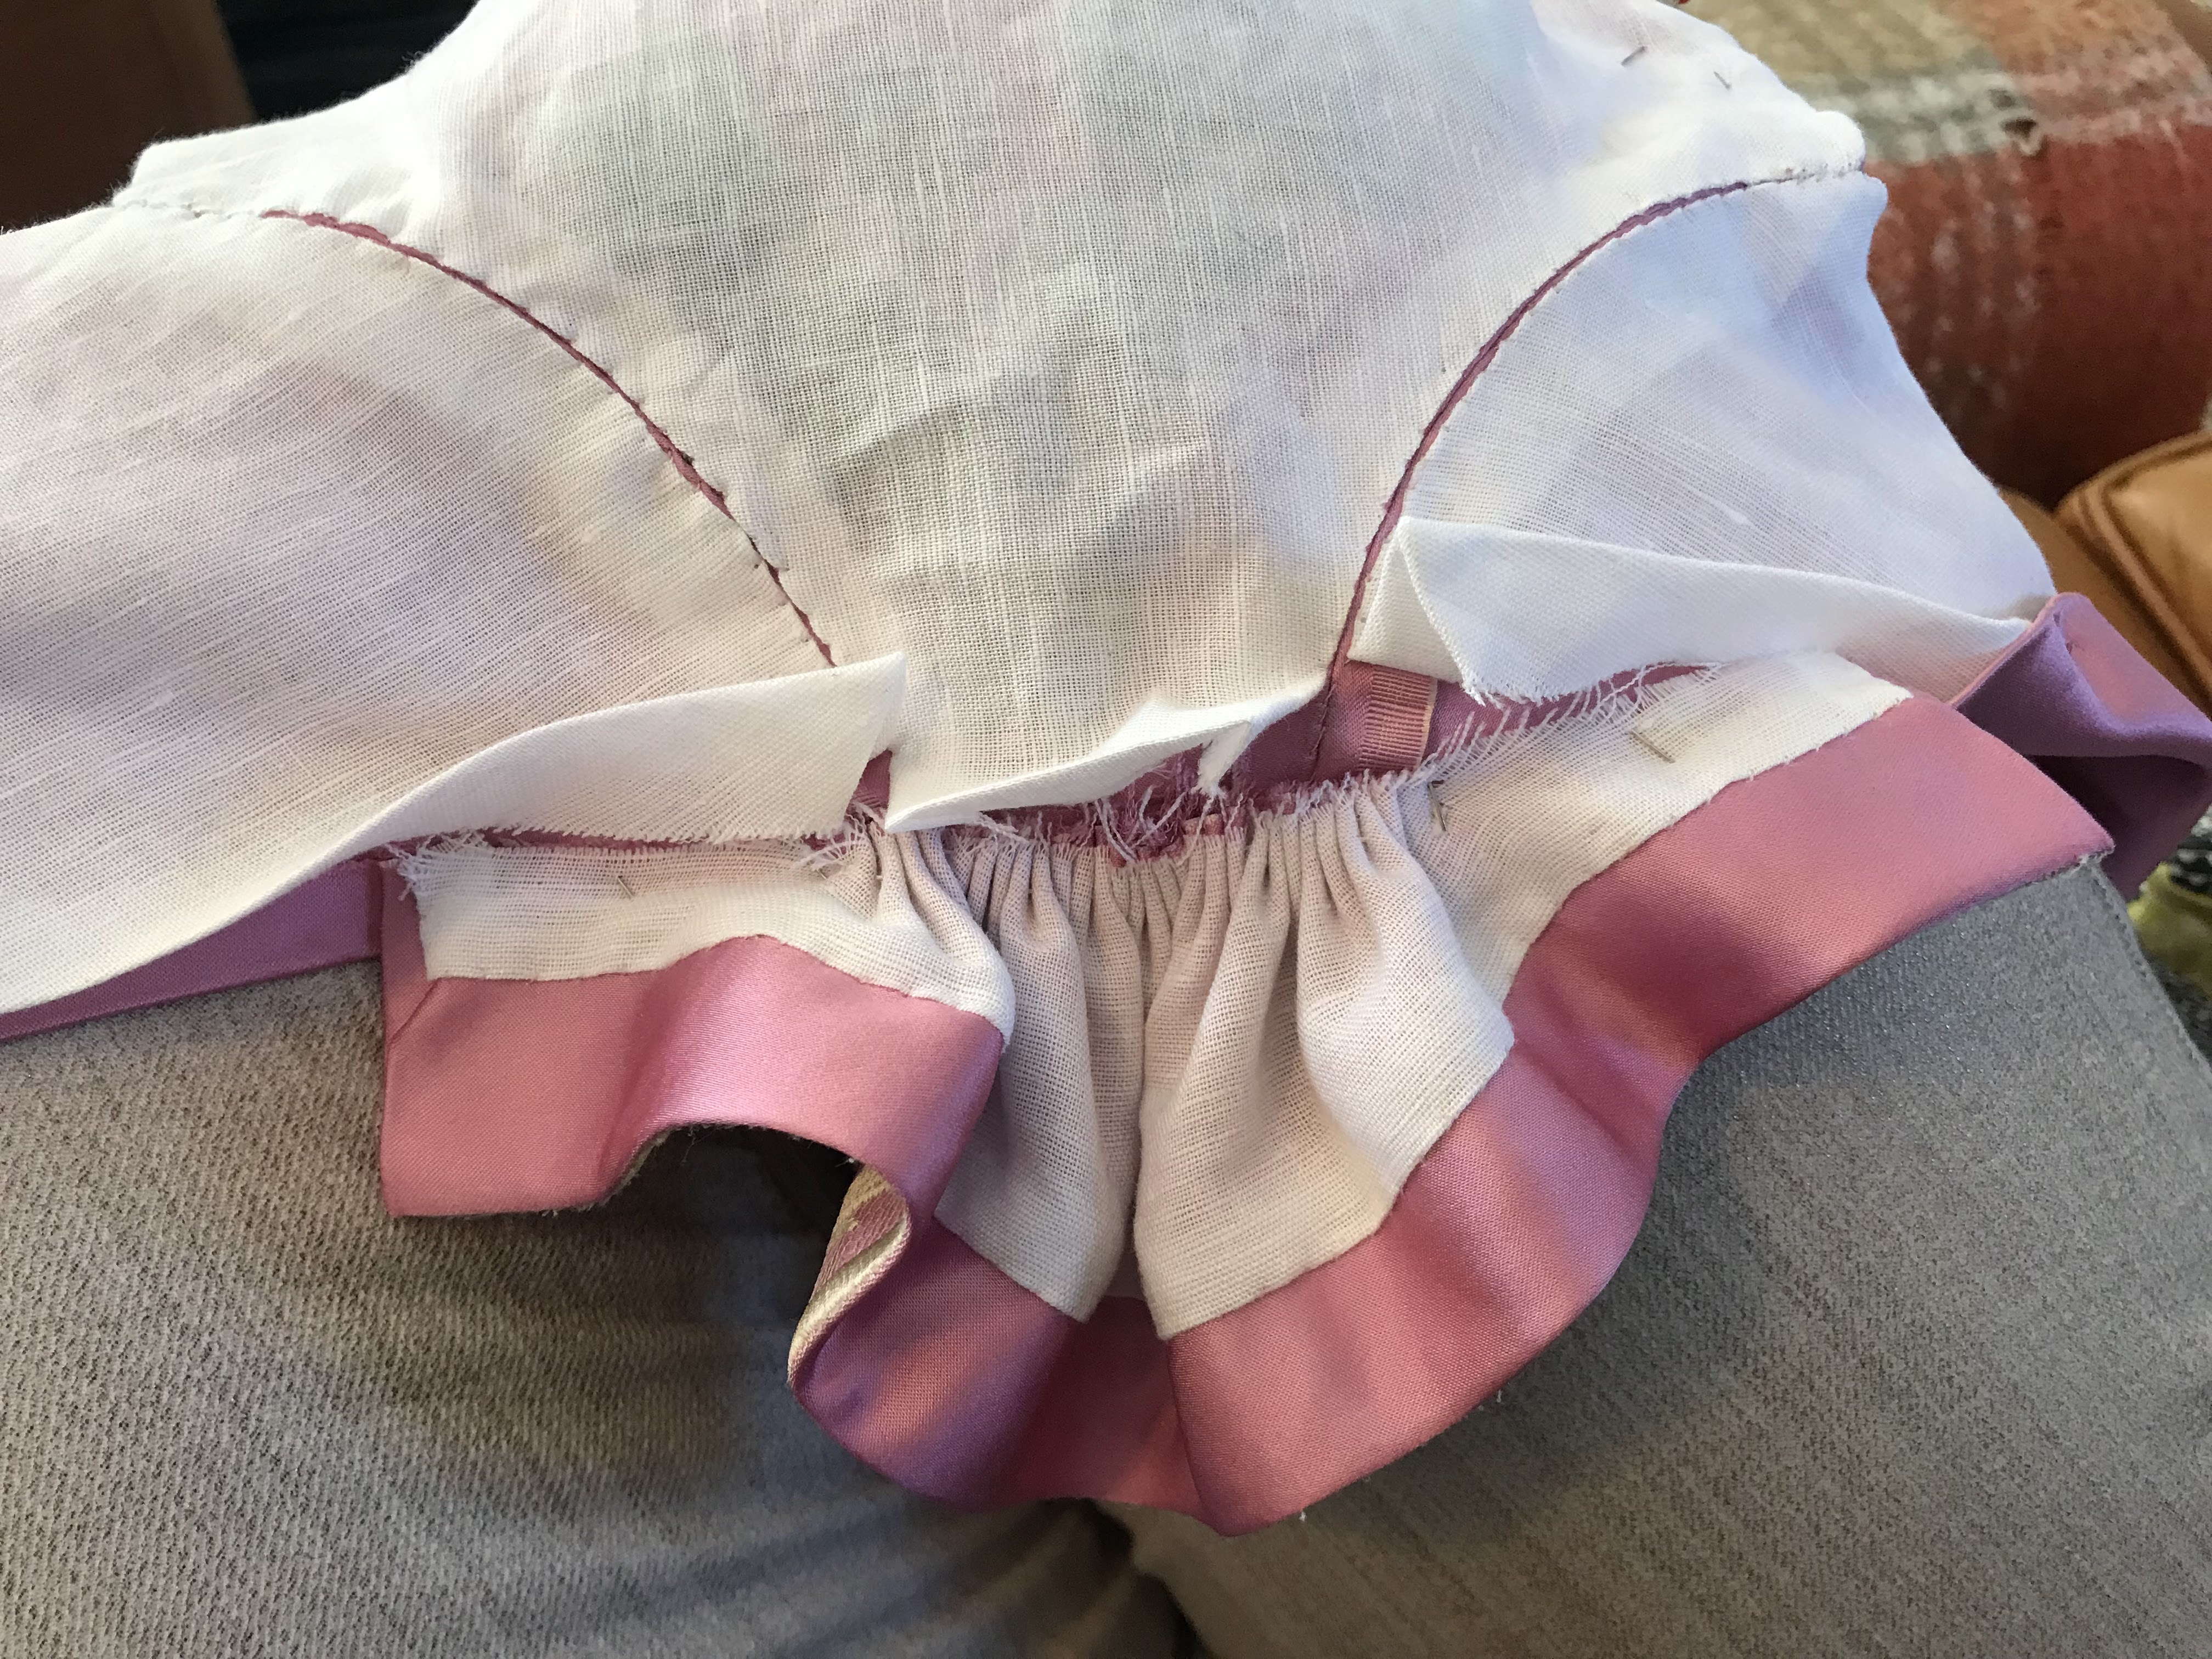
The night before we left on our trip I ironed in all the edges of each piece of the spencer and did the same with the lining pieces.

I then pinned each individual lining piece to it's corresponding silk piece wrong sides together with all the raw edges tucked inside.

Into my sewing bag everything went and out it came the next day once we were on the road! The sleeveless spence was assembled using the "English Stich" from The American Duchess Guide to 18th Century Dressmaking.
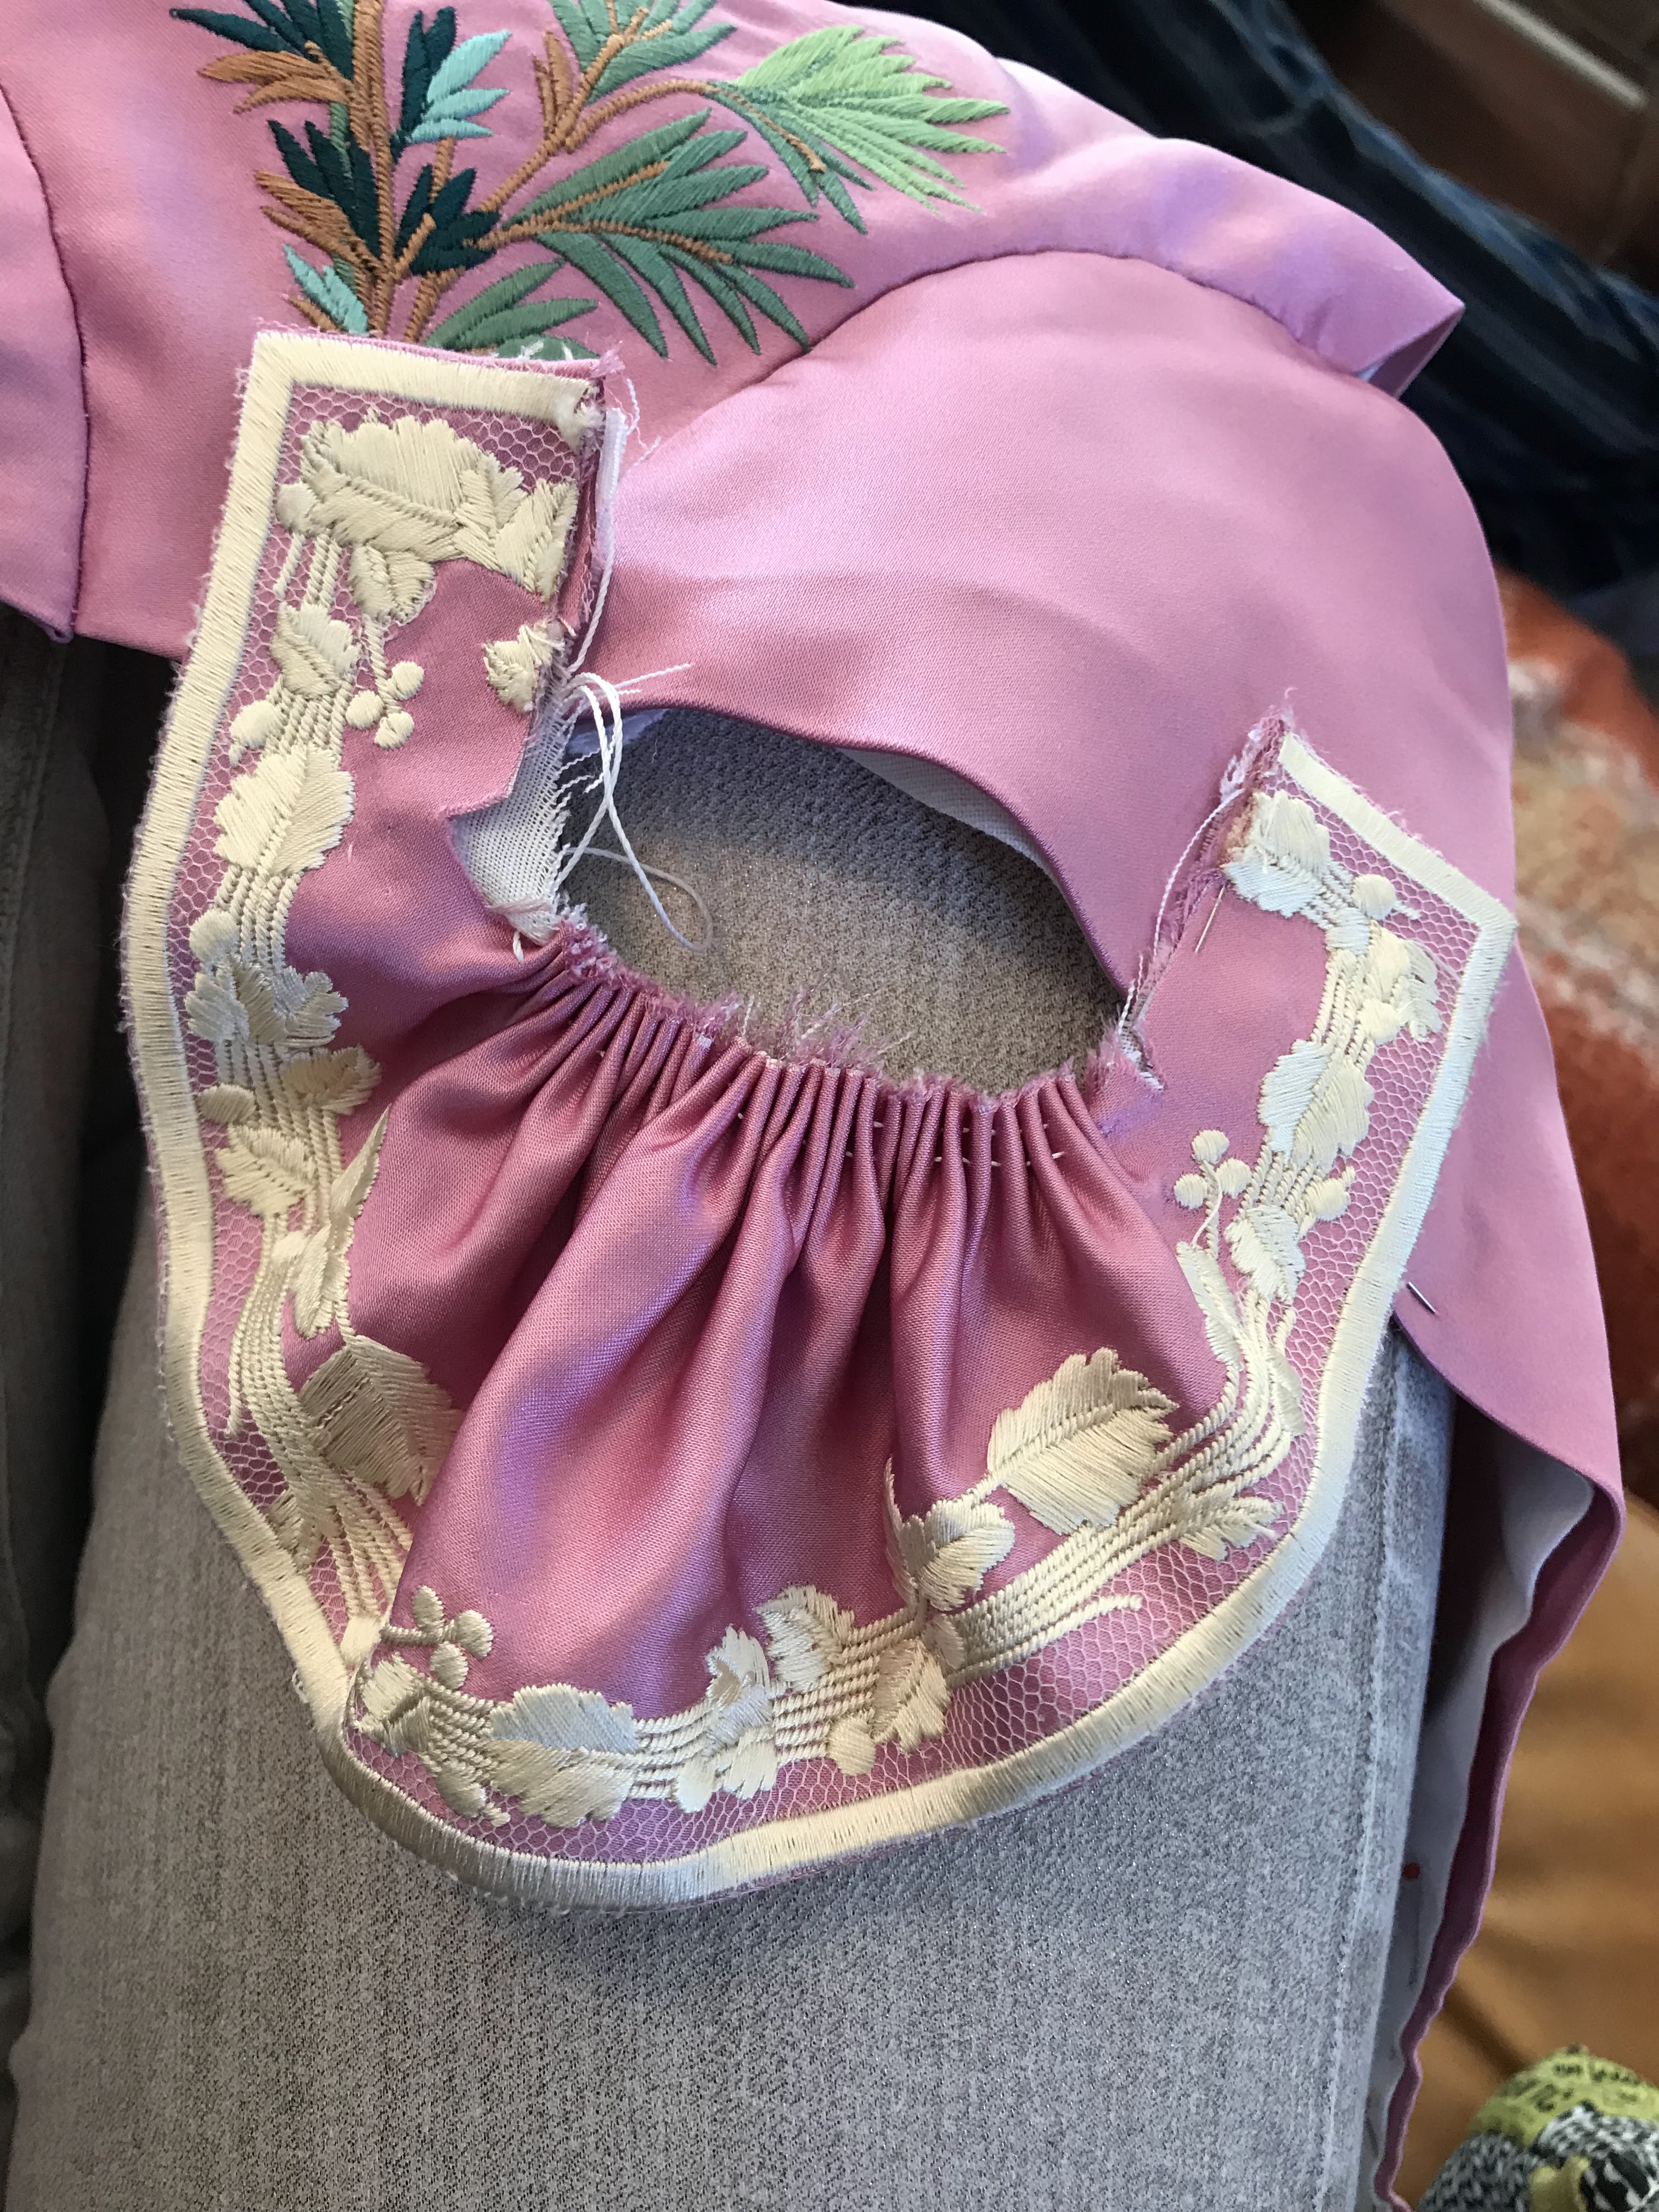
The peplum was gathered up.

With the upper raw edge tucked in-between the outer fabric and the lining.


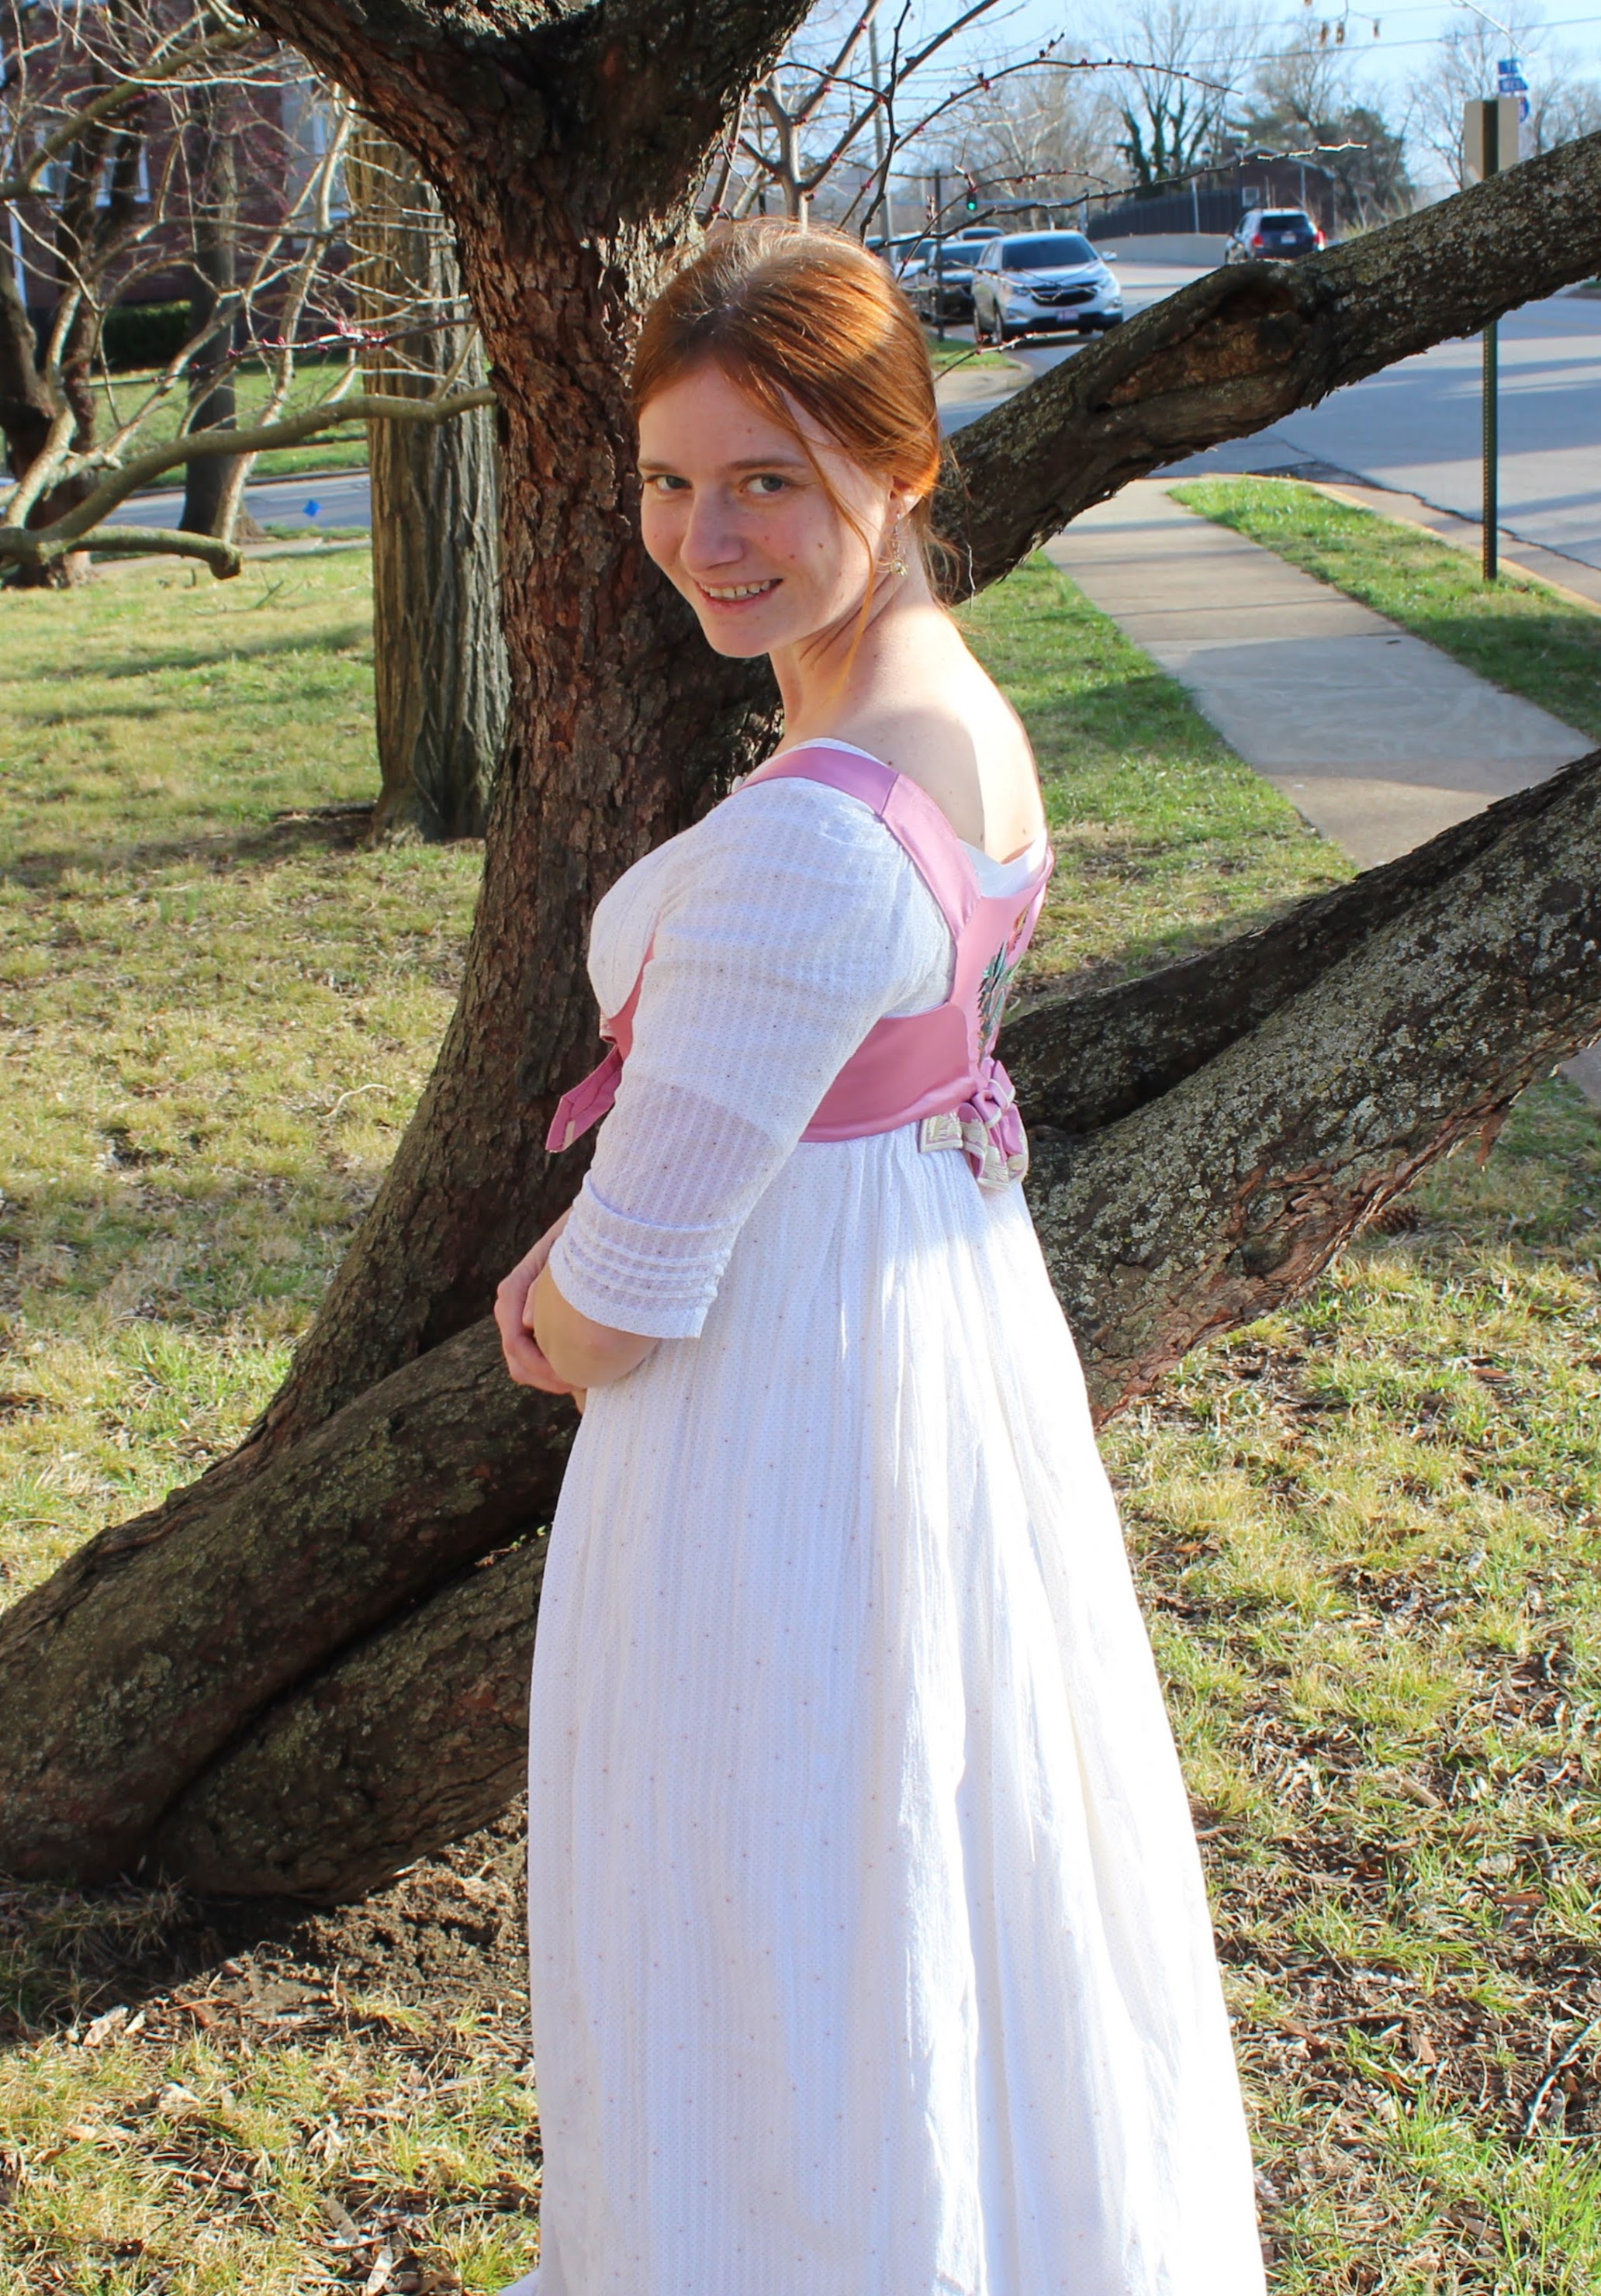
Once we got home I tried on the mostly finished jacket over my regency dress and under things and discovered the front edges didn't quite meet. Oops!

The little bow I made from the other embroidered pieces saved the day!

I sewed the bow onto the end of one front piece.

Hooks onto the other edge of the bow.

Eyes onto the other side of the jacket.

And it worked!

The jacket fastened!

My new embroidered sleeveless spencer fit!!

I had one final little piece of embroidered silk which I made into a little bow for the back of the jacket.

I'm satisfied I made good use of these gorgeous fabric scraps!

And once I got started it only took me a week to finish the project!

Since the EMMA. movie and Bridgerton put the idea of using this fabric to make a sleeveless spencer into my head, I'm using it as my entry for the 2022 Historical Sew Monthly "As Seen on Screen" challenge: Make something inspired by something you’ve seen on screen, whether it’s film, TV, or YouTube.
What the item is: A Sleeveless Spencer Jacket
How it fits the challenge: Watching EMMA. and Bridgerton gave me the idea of using the fabric scraps I had to make a Regency era garment.
How it fits the challenge: Watching EMMA. and Bridgerton gave me the idea of using the fabric scraps I had to make a Regency era garment.
Material: Double faced silk satin and linen for the lining.
Pattern: An altered and adapted version of the drop-front gown lining from Patterns of Fashion 1
Year: 1805-1810
Notions: Silk thread, hooks and eyes
How historically accurate is it? It has the right shape for the era, it's all constructed by hand, and made of natural fibers, so pretty decent! Maybe 80%
Hours to complete: I didn't really keep track, I finished it in a week while on vacation.
First worn: For pictures on March 27th, the day I finished it!
Total cost: The embroidered silk scraps were gifted to me and the linen, silk thread, and hooks and eyes were in my stash, left over from other projects, so nothing!