Showing posts with label 18th Century. Show all posts

Wednesday, April 24, 2024

Last Minute Alterations to Wear the Dragonfly Volante

 After two years of hanging in the closet, I decided my dragonfly volante needed an outing - and the Renaissance festival was the perfect excuse to give it one.


A week before I planned to head to the Ren fest I pulled the gown out of my closet, and made the last accessory it needed to be wearable - a stomacher.


From my stash I picked a scrap of green and gold shot silk taffeta (given to me by a friend) and some metallic gold trim. 


Using an early 18th century stomacher in Patterns of Fashion 1 as my reference for shape and a Simplicity pattern piece as a guide for size, I cut out a stomacher from two layers of linen canvas. (The same canvas I used to make my sister's stays last spring.)

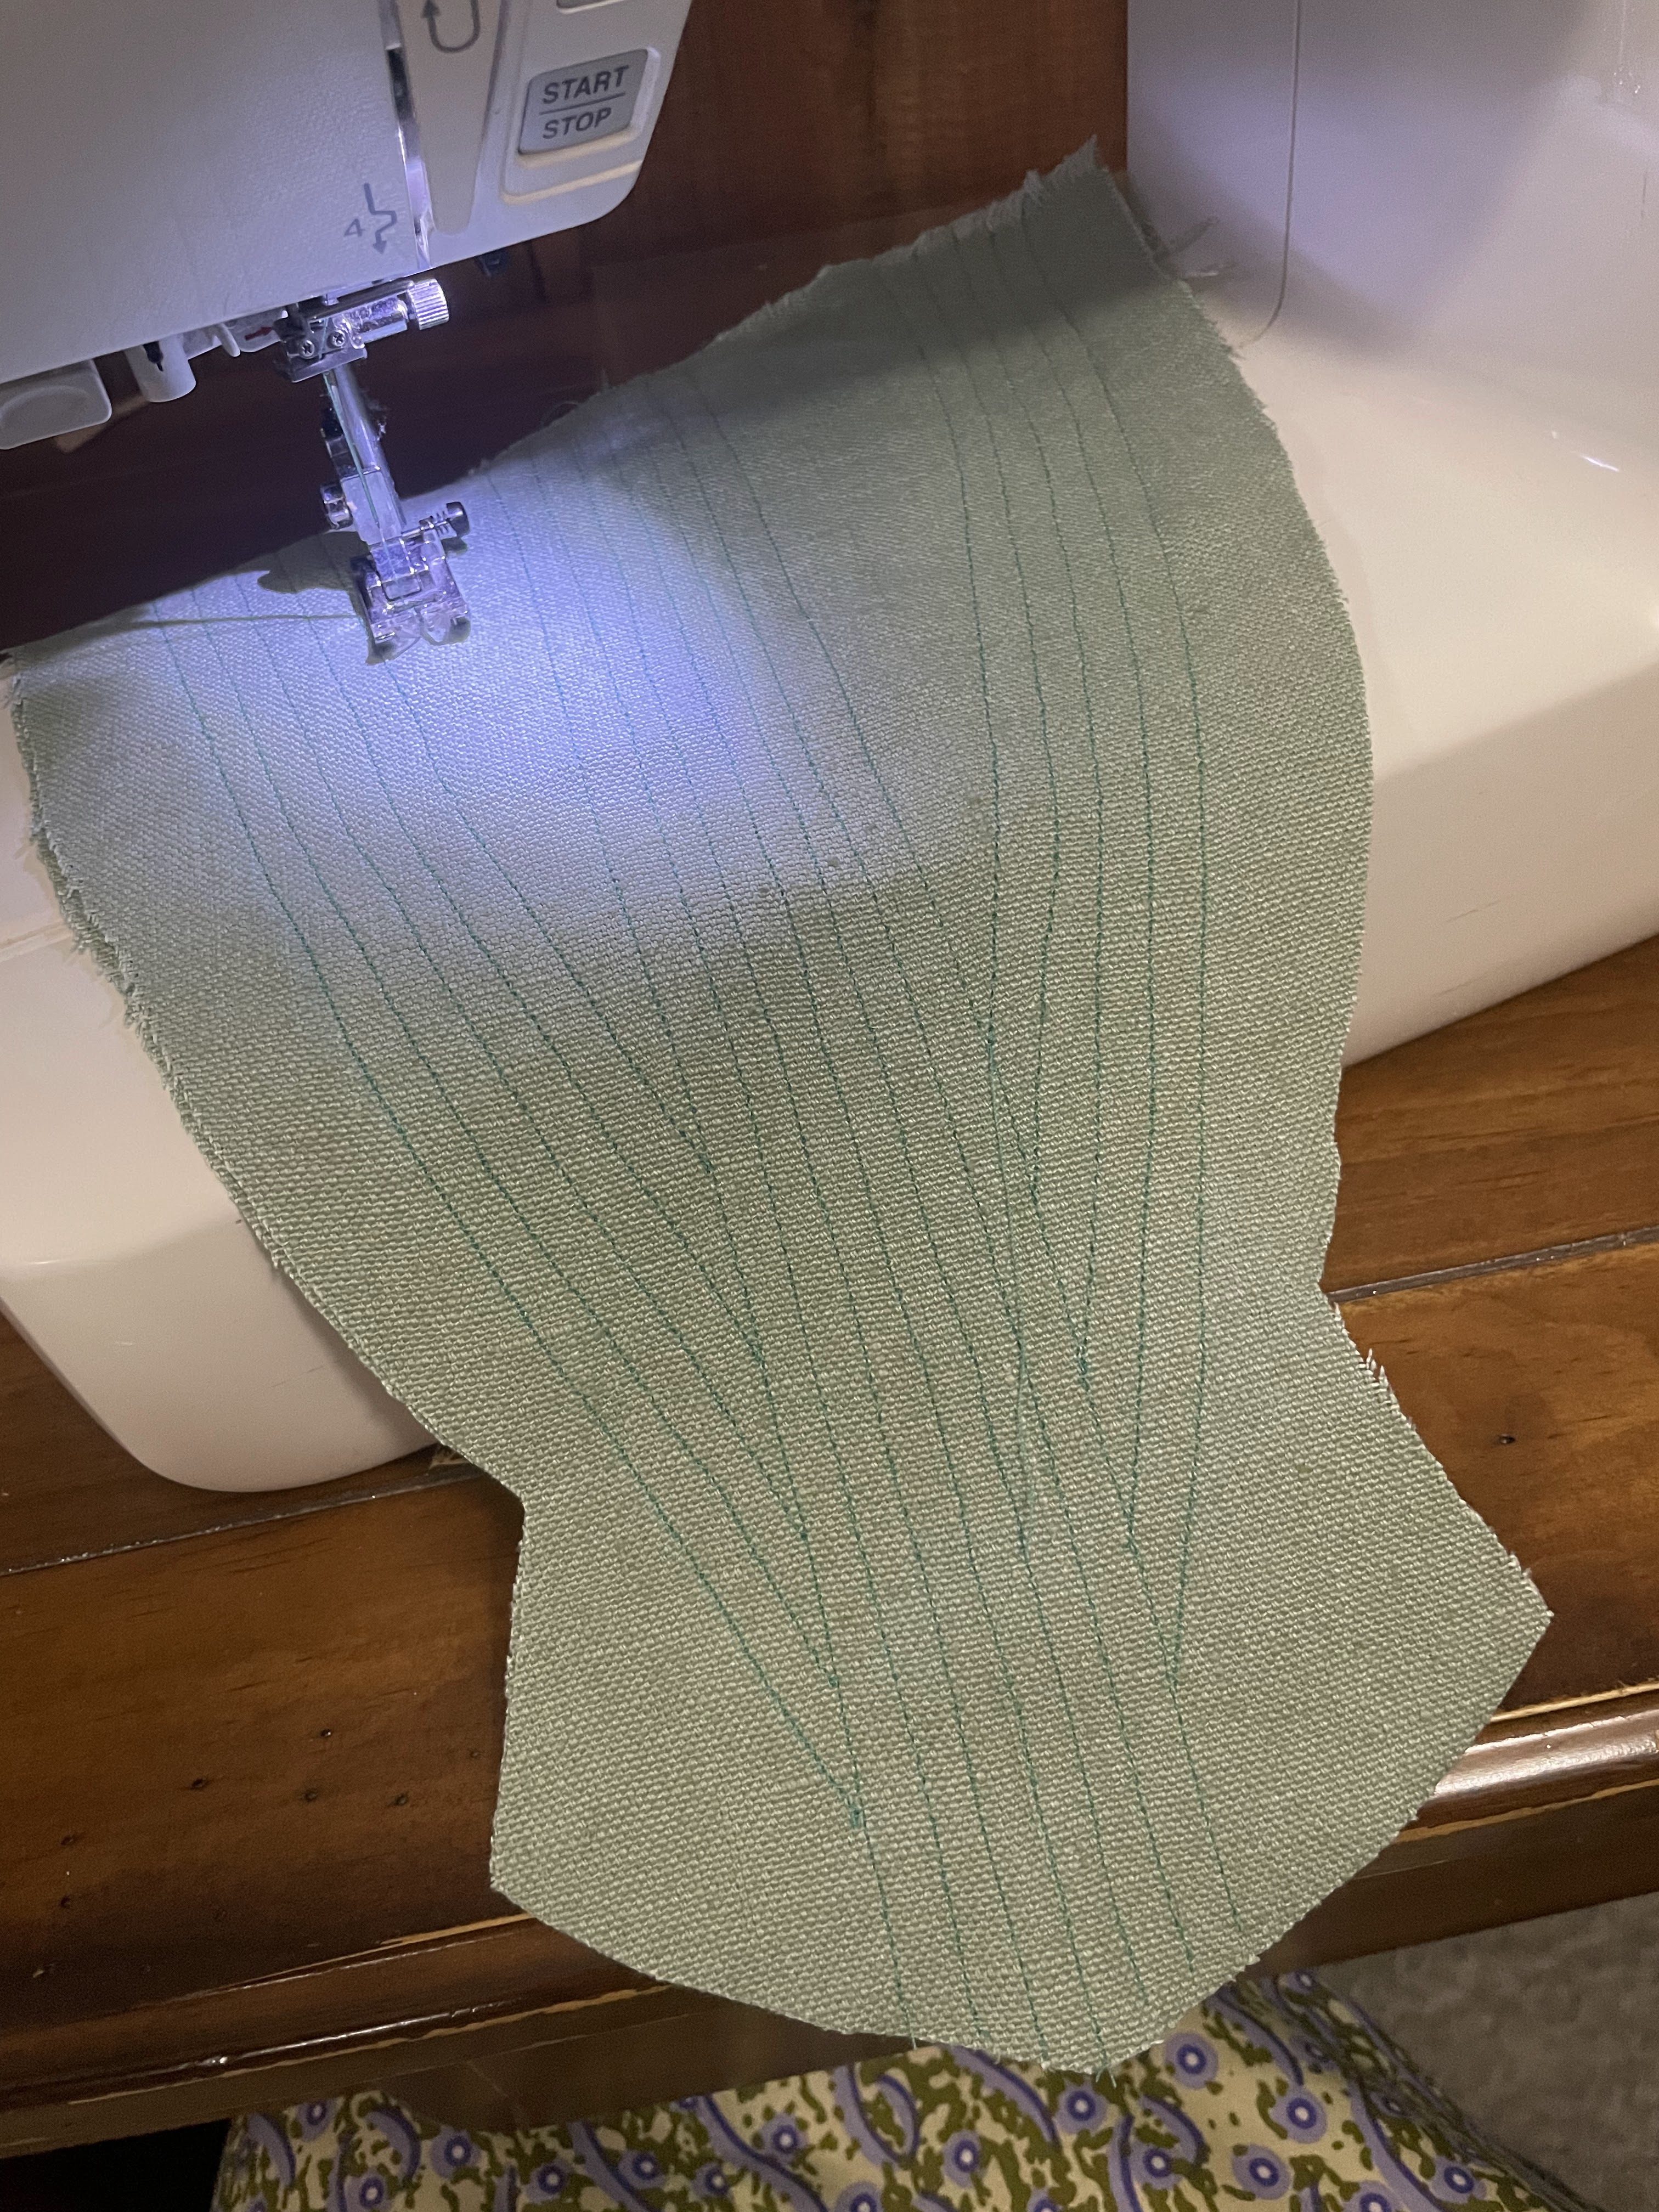
I sewed together the two layers of canvas and stitched boning channels.


The stomacher got boned with zip ties.


I decorated the outer silk layer of the stomacher with my metallic trim, then mounted it on the boned linen foundation.


And bound the whole thing with some petersham ribbon.


It was a quick and easy one evening project - and once it was done I figured I was all set to head to the Ren Fest at the end of the week - but then matters got complicated.


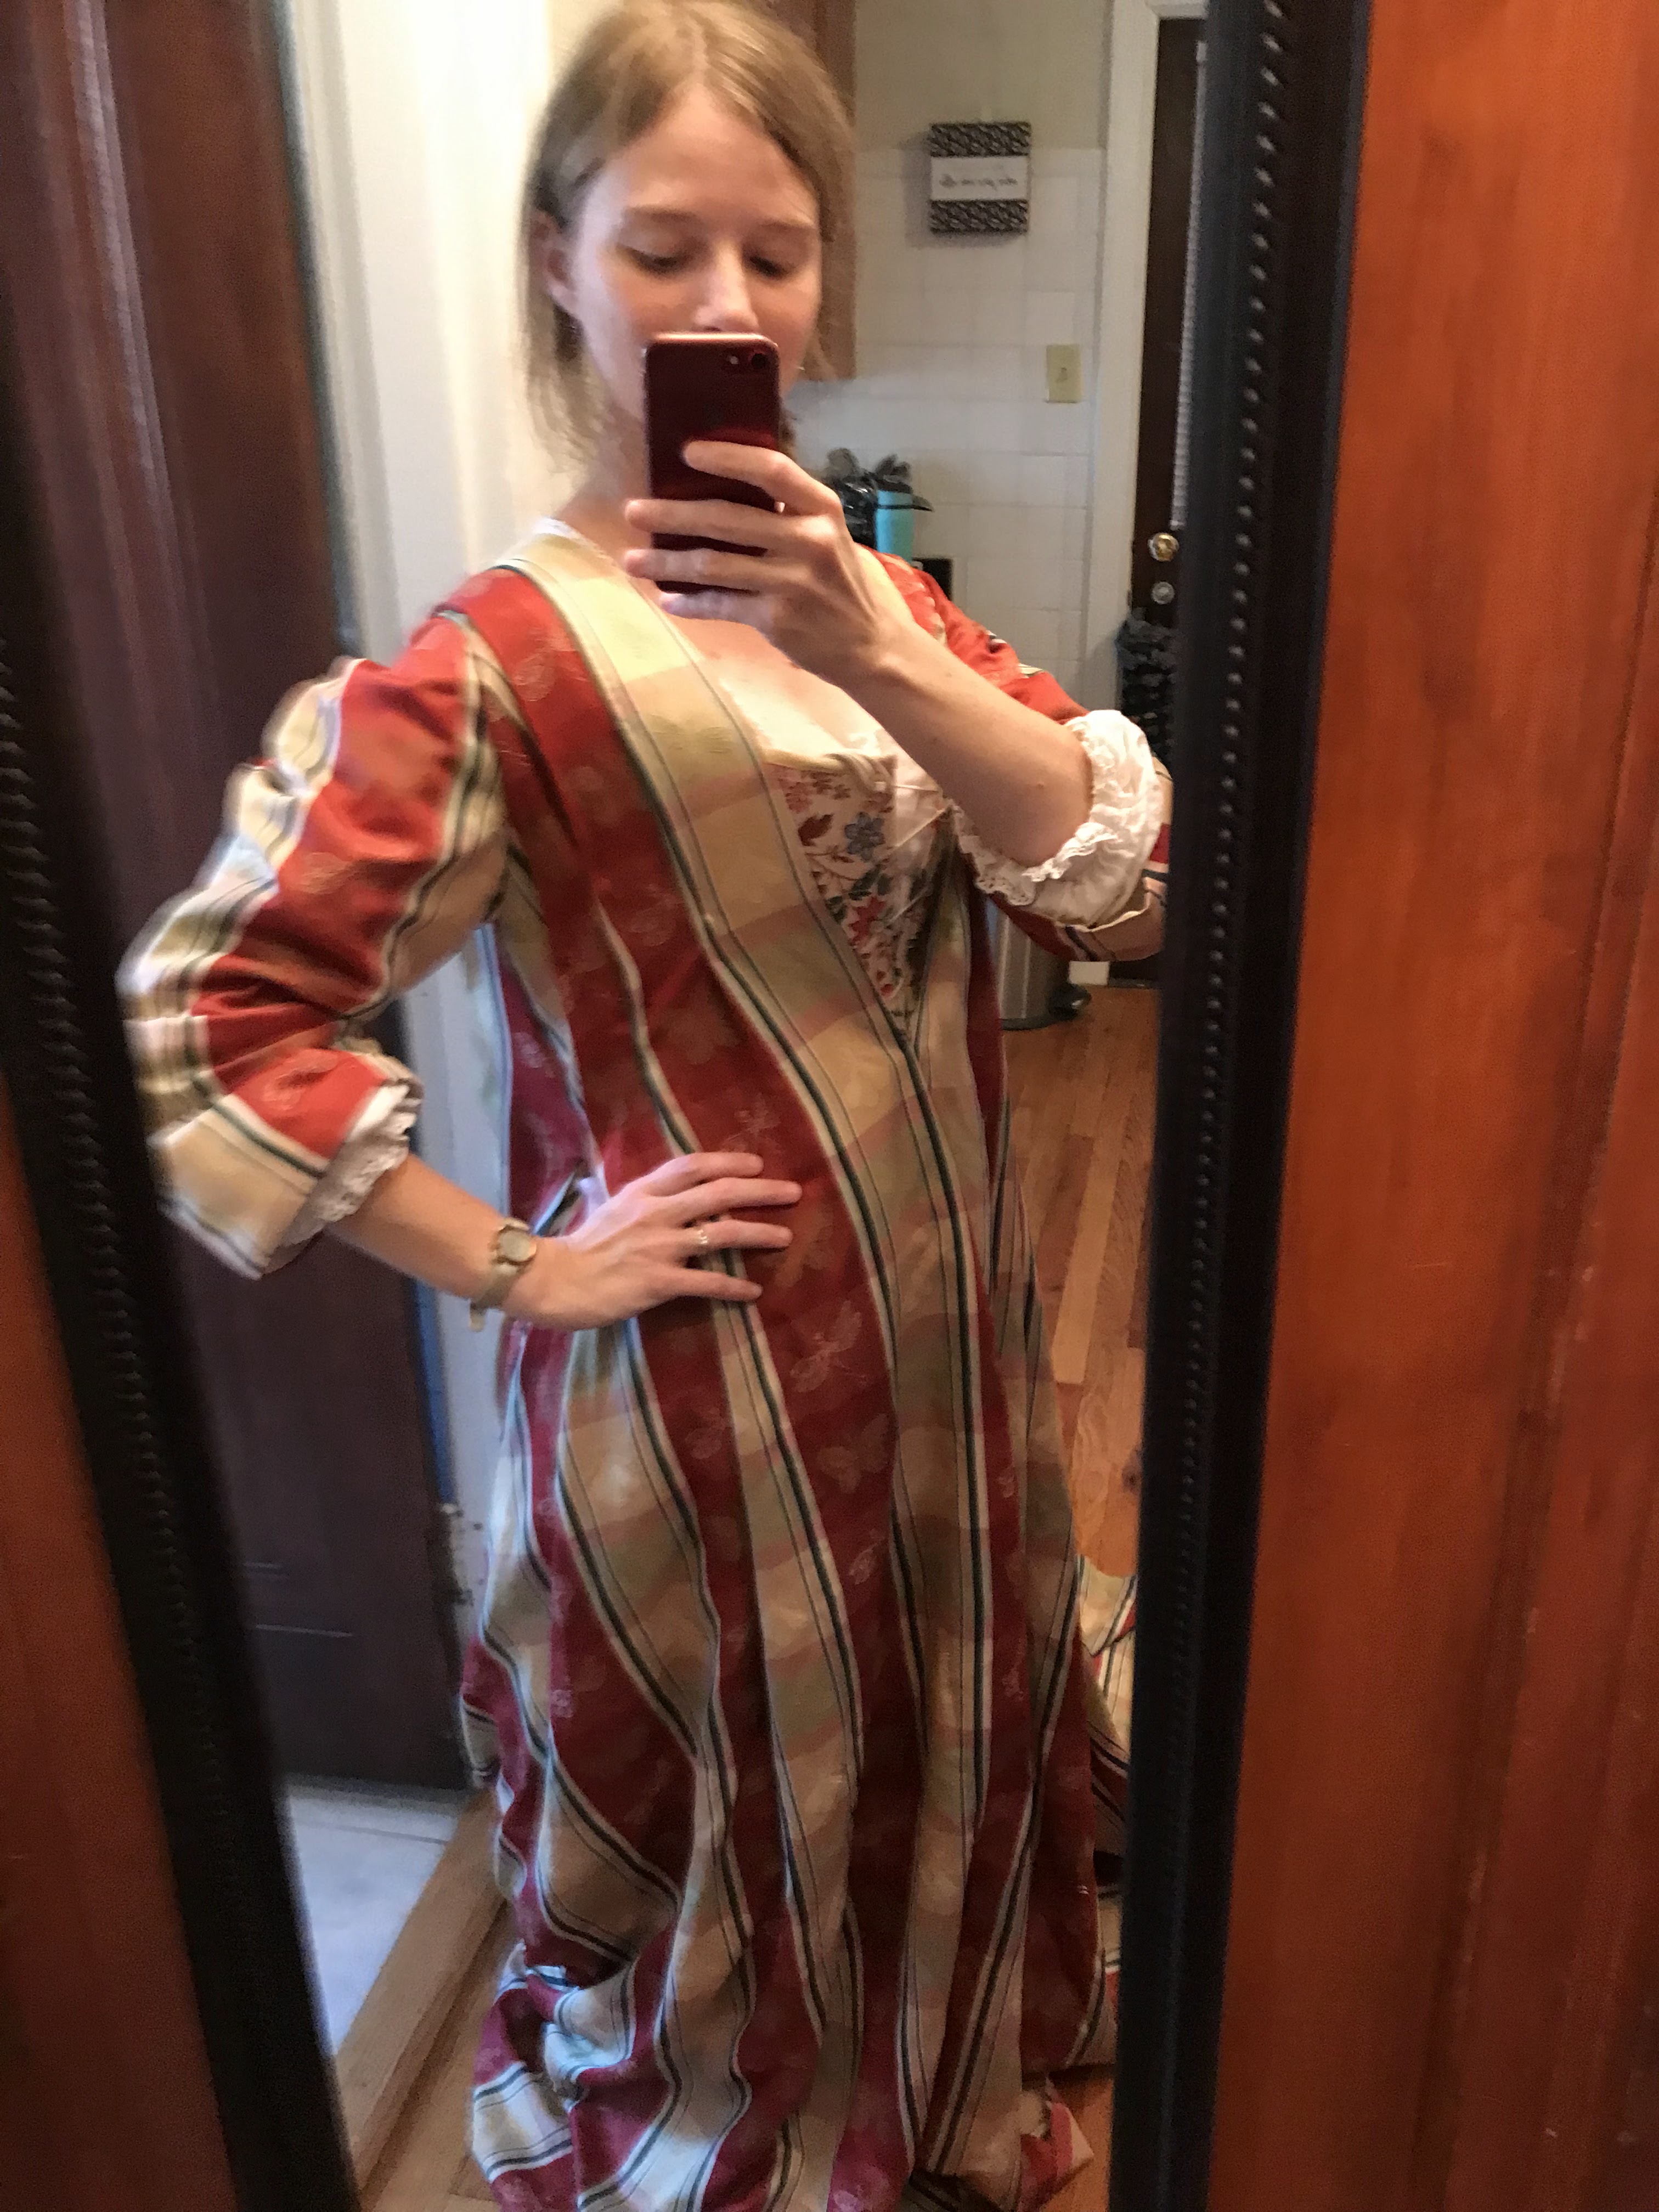
I tried on the gown - and oh my goodness. It was a shapeless sack.
Ok, so this style of gown is, more or less, a shapeless sack, BUT.
It should have had a bit more shape than it had.
I tried it on over my big hoop skirt. I tried it on over my small hoop skirt. I tried it on over my pocket hoops. Nothing looked right. It needed help.


I went to Pinterest and looked at all the pictures of Volantes I'd saved two years ago, and formulated a plan. My Volante needed a partial bodice lining to give it a bit more shape.


This partial lining wound up being super easy to add - just a pair of lacing strips with twill tape ties sewn into the back of the gown. Once the ties were all tied together they added just the amount of fit and shape this dress required!


There was now a clear distinction between bodice and skirt! But. . . the ties caused a different issue. The bodice was now just fitted enough when the ties were tied that the gown did not want to slip on easily over my shoulders. Uggg.


I fixed this problem by extending the front opening a good 6" or so and adding a couple hooks and eyes to keep it closed below the waistline.
Speaking of the waistline. . .


When I made the gown I made the waistline a little bit high - too high. So, while I was fixing the gown up to wear, I decided to lower the waistline a touch by extending the bodice pleats down several inches.


This was a pretty easy alteration to do and greatly improved the fit of the gown!


Bodice alterations done, I tried on the gown with my hoop skirts once more to choose which skirt supports I would wear that weekend. My small hoop skirt - the one I wore with my wedding dress - turned out to be the best choice. 


When I'd originally made the gown 2 years earlier I'd intended to wear it with my big hoop skirt (the one for the pink ball gown), and the skirt was cut and hemmed accordingly. 
Well, with the smaller hoops, the skirt was now too long. So, I spent the afternoon before I went to the Ren Fest hemming.


A new hem facing was sewn in!


And finally, two years after it was originally made, the Dragonfly Volante was completed and worn!!


In case you missed any Volante blog posts. . .

Here you can find the story of how it began

This post is all about the initial construction of the gown 

Here I share about the accessories I made to go with it

And here's my post all about my day at the Renaissance Festival where I wore it!

Wednesday, March 27, 2024

Bows and a Cap for the Dragonfly Volante

 Upon completing my Dragonfly Volante, I decided I ought to make a few little accessories to go with it, so it would be ready to wear when an occasion arose. A stomacher, sleeve ruffles, bows, and some sort of cap to go on my head.


That was my proposed list, and I got through half of it back in the fall of 2021. 

The stomacher? I cut that out, made a plan, and never actually made it. Two years later when I was ready to wear the gown I couldn't find the pieces I'd cut out, so I started again from scratch.

The sleeve ruffles? I had a vague plan for those, but never actually did anything with that plan. When I finally did wear the gown, I just wore a set of the sleeve ruffles I made to go with my Sacque Back Bird Gown (apparently I'm drawn to fabric featuring flying creatures) back in 2019. 

The bows? These I actually did make!


In my stash there was a length of mint green rayon satin ribbon. I divided it into 3 and turned it into fancy bows.


I laid out the ribbon in a sort of flat bow shape, with 2 sets of loops rather than one, so as to make a variation of a "4-loop bow".


Then I ran a row of gathering stitches straight down the center and gathered the ribbon up to make the cutest little floofy bows! One to trim each sleeve cuff with, and one for the cap.


The cap? Yes, that happened too!


I looked online at paintings of women in the 1720's and '30's wearing Robe Volantes to see what sort of headgear they were wearing. A mostly flat, mostly circular, little cap, trimmed with a ruffle, seemed to be the choice of the day.


To make my own I cut out a simi-circle and a long narrow strip from some lightweight linen, and roll-hemmed the edges of each.


The long strip got pleated, then folded in half length-wise and slightly whip-gathered.


This gave me a delightfully long, curly, floofy, linen ruffle.


I whip-stitched it around the curved edges of my simi-circle.


I made a little box pleat along the flat edge of the "circle" to help the cap cup my head slightly.


The pleat was covered with one of my green bows, and the cap was done!


Ready to wear with my gown, whenever I found an excuse to do so!


Wednesday, March 13, 2024

Making the Dragonfly Volante

 Historical Accuracy was already out the window for my Robe Volante thanks to my Spectacular fabric choice, so when it came to assembling the gown, I went straight to the sewing machine. No need to hand sew the whole thing!


Volantes could have a fitted bodice lining, with the loose outer layer draped over top. Or, the lining could be skipped entirely, giving you just a nice loose tent dress type garment. There are extant examples of both types. I chose the second option for my gown. A lining was one more thing to fuss with and fit - and I just wanted to make the pretty dress! Also, as I mentioned in my last post, I made this the summer I got married. At that time I was quite certain I would find myself pregnant very soon (too bad that plan didn't pan out. . .), so I figured a loose, almost completely unfitted, garment in my costume wardrobe would come in handy in the near future. If not all Volantes in the era had a fitted lining, I saw no reason to put a fitted lining in mine. 


Upon deciding to skip the lining, I forged ahead and sewed up the center front and back seams on the sewing machine, being sure to match the stripes n the fabric across seamlines. Where needed, I serged raw edges to prevent unraveling, but the center front and back were cut on the selvedge edges so this was unnecessary there.


Then I pleated the back. As I mentioned in my last post, early Volantes (1720's and 30's) could really have any arrangement of pleats and gathers in the back. My favorite arrangement of those I looked at was a set of 4 box pleats across the top, so that's what I did with mine. Four box pleats, each featuring butterflies and dragon flies in the center.


For the front panels, I sewed up the center front seam with a very large (several inches) seam allowance, and left the seam entirely open above the waist.


This gave me a V-shaped front opening perfect for showing off a stomacher on the finished gown.


The extra wide seam allowances were then folded back and stitched down on either side if the opening to form a facing. And yes, this part was handsewn. All the interior construction was done by machine, but anything that could be seen on the outside I tried to hand sew.

Once the center front seam and opening were addressed, I sewed up the side seams (leaving pocket slits open of course!), then pleated the front shoulder straps in a manner similar to the Volantes I'd seen online. I pinned the shoulders together then tried on the gown.


It resembled a shapeless tent, but that was kind of the goal, right? Things were coming along nicely! 


I proceeded to make the sleeves (by machine) and the pleated cuffs to go on them (also by machine, but with hand finishings.)


I hand sewed my shoulder straps in place. (really the best way to do any 18th century shoulder straps and sleeves.)


Then set the sleeves with a whole bunch of little pleats. Later 18th century sleeves are usually set with 2-3 larger pleats, but earlier sleeves could have lots of little pleats, and that sounded fun to me, so that's what I did. (Has it become obvious yet that this whole thing was a "that looks/sounds fun so I'm going to do it" type of project, rather than a heavily researched and planned project?)


As with the shoulder straps, the sleeves were hand sewn in place.


Thanks to their loose fit and all the little pleats, these sleeves were easier to set than later 18th century sleeves. (I now highly recommend the early 18th century, it's fun!)


Once the sleeves were on, I tried on the gown again and decided I really ought to make this shapeless tent a bit more shapely.


So I extended the front shoulder pleats, pinning them all the way down to the waist to make the bodice a bit more fitted.


I hand sewed those in place.


Then I bound the back neckline.


And put the whole thing on my dress form - it looked just about right now!


I trimmed up the hem to what I thought was about the right length, then finished it with a hem facing. 


The gown was done!


 To celebrate I embroidered my initials and the year into the back neckline - just for fun!

Now I just needed to figure out a stomacher, sleeve ruffles, and head gear to go with the gown, then I could find an excuse to wear it!


With this in mind, I put the gown away in my costume trunk - where it stayed for the next 2 years. . .

More on that, next time!