Wednesday, March 27, 2019

A Springy Fashionista Jacket

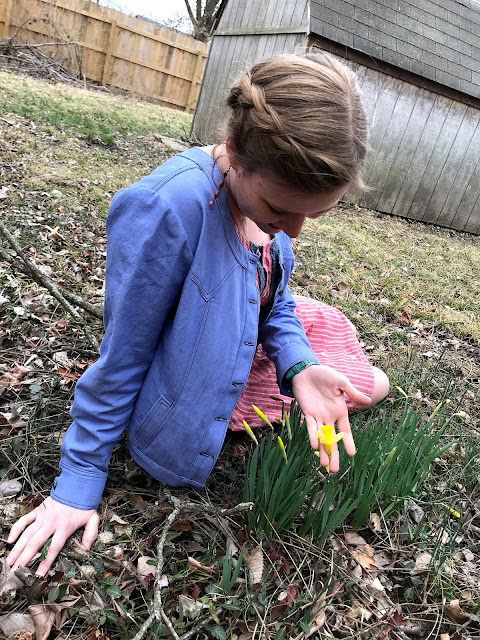
After snow, followed by more snow, followed by below zero temps, followed by, you guessed it, more snow, it seems winter is finally drawing to a close, and spring is finally happening! The temperatures are now above 40 degrees (Fahrenheit) most days! The grass is actually turning green! I found the first fully bloomed daffodil of the season in my best friend's backyard! And, I haven't worn my winter coat in over a week!


That said, a lightweight jacket of some sort is still generally appreciated. So, in honor of the Winter Wear Design "Layers" blog tour, I made myself just such a jacket - lightweight and springy. Perfect for layering over the sundresses which have languished in my closet all winter, just waiting for warmer weather to return. (Also in honor of the blog tour, all WWD layering patterns are 25% off this week with the code LayersBlogTour)


I've admired the Fashionista Jean Jacket, by Winter Wear Designs, ever since the girl's version of the pattern was released. It was the curved neck band, rather than a collar, that specifically drew me to this pattern. It's the same shape as the neckline on the denim swing coat I made myself a few years ago, which I love. So, when it came time to pick my pattern for this blog tour, there was no doubt in my mind what I would make, and Suzanne graciously sent me the pattern.

Picking the pattern was the easy part of this project, and picking the fabric was the hard part. Actually making the jacket? That was somewhere in between.


Originally I'd thought I'd make the jacket from plain ol' normal denim. Then I thought I might make it from a lightweight wool. Then I admired a pale pink denim jacket worn by a lady in the checkout line at Walmart, and decided I must make myself either a pale pink or pale lavender jacket. Eventually, after all that, I found periwinkle colored denim at a Mennonite fabric store and decided it was just the thing for my fashionista jacket. So I bought three yards, used two to make the jacket, and have one yard left over to turn into a pair of shorts for myself this summer.


I cut out the jacket in my standard size for WWD patterns, widening the shoulders per usual and cutting the waist one size smaller than the bust and hips.


The resulting garment is a bit more roomy than I expected. I may not have actually needed to add width to the shoulders of this pattern. However, my jacket is quite comfortable and perfect for layering! Just be advised, if you want a closer fitting jacket you may wish to cut one size smaller than usual. There is a finished garment measurement chart with the pattern instructions, which would be helpful in picking a size prior to making your jacket, but to be honest, I didn't really look at the instructions that closely.


When it came to constructing the jacket, I glanced at the instructions to figure out the suggested order on construction, then did my own thing.


I attached the front yoke to the front bodice pieces using a lapped seam, a vintage sewing technique for sewing pointed, angled, or otherwise shaped seams.


To make a lapped seam, press the seam allowance of the upper piece under all along the seam line, as if you were preparing to hem it. Then lay this piece over the lower piece, line up the seam lines, pin, and topstitch in place.


As long as the seam allowance was pressed under nicely, the resulting seam should have nice sharp, pretty, angles, which can be difficult to achieve with a standardly sewn seam.


After sewing the lapped seams, I sewed together the front and back of the jacket at the shoulders and side seams, attached the neckband, button placket, and hemband, and finally tried the jacket on, prior to attaching the sleeves. I discovered there was excess fabric above my bust, at the armhole, and I didn't like it. (This was caused by the fact I really should do a full bust adjustment, but generally don't) So, I ripped out half of my lapped seam.


I messed with the overlap until I was happy with how the armholes fit, then re-stitched my lapped seams. This time I had a 1" overlap at the armhole, which tapered back to the standard 3/8" in the middle of the yoke.


Once the armholes were fixed, I set the sleeves and finished the jacket by sewing buttonholes and setting jeans buttons on the cuffs and all up the front of the jacket.


My Fashionista Jean Jacket was done, and just the springy garment I'd hoped it would be!


This jacket features not just one, but two sets of inseam pockets!


One set, highlighted by welt-like pocket flaps, in the center front seams.


And a second, larger, set of pockets hidden in the side seams!


I anticipate all four pockets being very useful!


And the jacket itself? Yeah, it's gonna be useful too, all spring long!

*A Special Thanks to my Friend Bretta for taking these pictures for me

 *I received this pattern free of charge in exchange for writing this blog post.


Don't miss out on any of the stops on the tour!

3/25
Patricia of Sew Far North

3/26

3/27

3/28
Kristen Guest Posting at WWD
Florence Guest Posting at WWD

3/29
Livia of Liviality
Aurelie of Maglice and So

Thursday, March 21, 2019

Cardboard 18th Century Stays

I have just over a month to make an 18th century ensemble for myself. There's a Rococo picnic I want to attend happening at the end of April. At this moment, I have nothing quite acceptable to wear. My 18th century wardrobe currently consists of a shift, an under petticoat, a pair of shoes, and a white linen cap (not yet blogged). A few more layers are required for me to be a properly dressed Rococo lady. The stays I've been procrastinating on for well over a year? Yeah, those have got to happen. Now. And the gowns I've been dreaming of? It's time to make one reality.


For the stays I've decided to use Simplicity 8579 - one of the 18th century patterns Simplicity produced as a collaboration with American Duchess. I'll be altering it somewhat to lace up in the front as well as the back, since back-lacing only stays sound difficult to put on one's self without assistance. Stays with lacing up both the front and the back are a historically accurate option and would seem to be more user-friendly.


Picking the pattern was easy. Deciding to make the stays both front and back lacing was also easy. My procrastination has had nothing to do with either of these things, and everything to do with the next step of the project, possibly the most important part of the whole stay and corset making process - making the mock-up.


I do not enjoy making mock-ups whatsoever. Now, I do know their value, and I've never regretted making a mock-up (and have regretted not making a mock-up), but I just generally don't like making them. Thus, I've avoided making my mock-up stays, and thus my actual stays as long as possible. 


Due to my immediate need of an 18th century outfit, my time of mock-up avoidance was forced to an end last week. I made my mock-up. Out of cardboard.


18th century stays are often fully boned, thus more rigid than a Victorian corset. Making a fully boned mock-up sounded tortuous. (This is part of the reason I've avoided making a stays for so long.) However, a few months ago, I learned in one of the 18th century sewing groups I'm a part of on Facebook, that non-corrugated cardboard (like the stuff cereal boxes are made from) works well for making stay mock-ups. The stiffness apparently nicely simulates the structure of fully-boned stays. This concept made the stay mocking-up process seem a lot more approachable.


I just so happened to have two large sheets of this type of cardboard on hand. So last week I traced my pattern onto the cardboard, cut it out, taped it together, punched holes in the edges for lacing, and tried the cardboard stays on.


They actually looked like stays! And they fit pretty darned decent! And took way less time to make than a fabric mock-up would have! There were only a couple small fit changes I needed to make.


First I lowered the armscyes slightly so they wouldn't dig into my armpits.


Then I took a bit of width off the top of the center front edge for better bust support.


I laced myself back into the cardboard stays, and. . .


They fit!!


So now that the pesky mock-up stage is out of the way, I can cut out my actual stays, sew them up, then make this dress:


A sacque-back gown, which will be machine sewn, in a rather inaccurate fabric. But, I'll tell you all about that later. Right now I'd better get to sewing all the boning channels on my stays!

Thursday, March 14, 2019

This Raglan Pattern Needs Seam Allowance Added???

Well, I'm continuing on the raglan shirt theme, looking for the perfect basic raglan pattern for me,  but this shirt is a little bit different than the last raglan pattern I tried. This raglan pattern gave me the chance to try out a new skill while participating in the Breaking Ground blog tour, hosted by Melissa of Mahlica Designs.


The Breaking Ground tour is all about trying something new in your sewing - a new skill, a new type of garment, a new kind of fabric, or a new-to-you pattern designer. After a few days of pondering ideas fitting this theme, I finally landed on a plan. I'd make a pattern that came without seam allowances included - something I've never done before, from a new-to-me pattern designer. 


Back in December, I helped a German pattern designer, Sewera, edit her pattern instructions as she translated her entire line of patterns from German to English. In return, I received a few of her patterns to sew up for myself as I had time. My favorite pattern from her line was this one - the Feel Free Raglan. I wanted to make this shirt as soon as I saw the initial picture and proofread the instructions. Unfortunately, I didn't have time to make it just then.


Fast forward a couple months, and I still hadn't taken the time to make a Sewera pattern. Thus, I decided to use this blog tour all about trying new things as my excuse to sew the Feel Free Raglan!


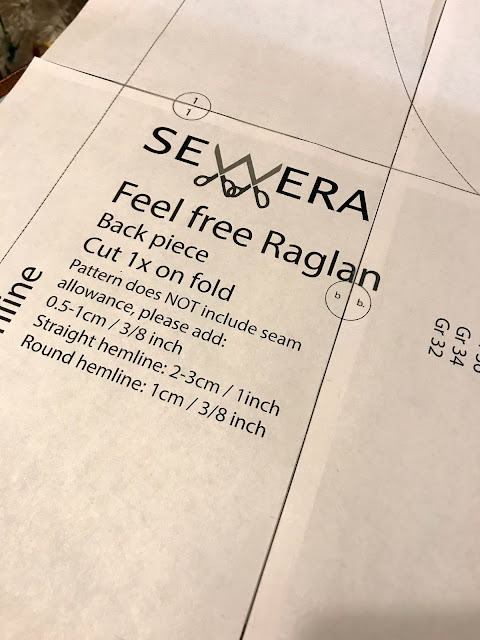
Now Sewera is a German brand, and it is very common for European pattern companies to not include seam allowance in their patterns. Sewera is no exception. When it comes time to cut out your project you have to make sure to add your own seam allowance prior to cutting your fabric, otherwise the finished garment will be too small. 


Adding seam allowance is something I've never before had to do with a commercial pattern, but I gave it my best shot.


I pulled out my hem gage and marked a 3/8" seam allowance all around each pattern piece before I cut my pattern pieces out of the paper they were printed on. Once that was done I cut out the pattern pieces along my freshly-drawn seam allowance lines and cut out my shirt like normal.


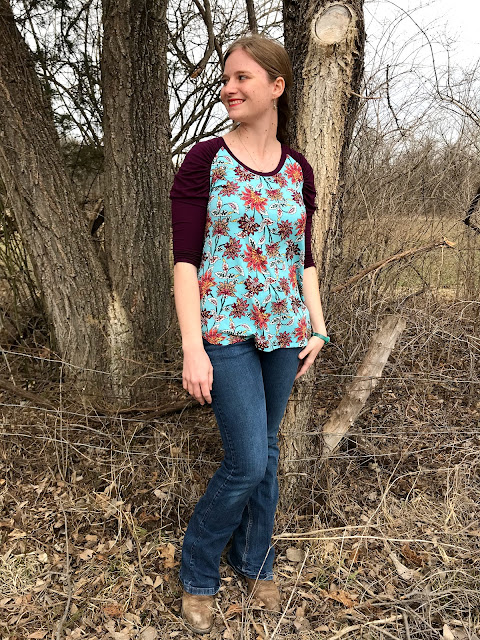
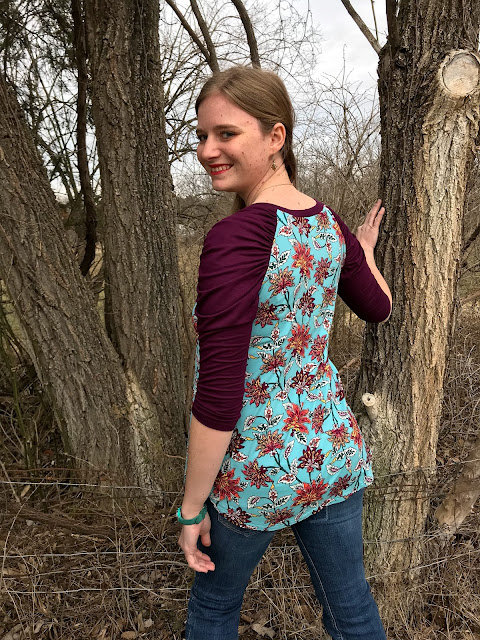
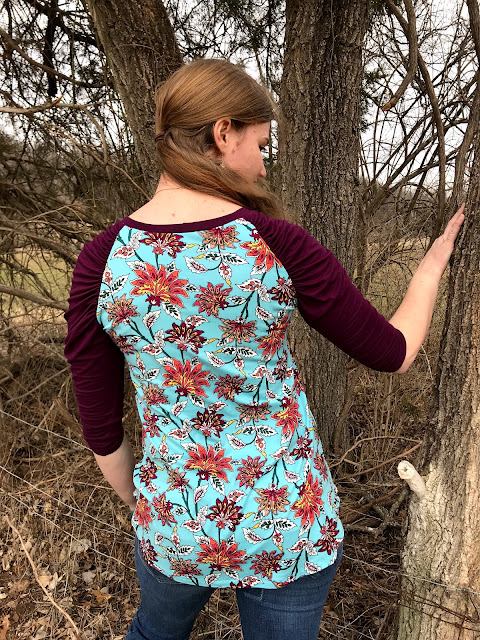
After a quick dig through my stash of knit fabrics I opted to make my shirt out of the fabrics left over from the Magnolia Dress I made myself last summer - a floral double brushed polyester and a dark purple rayon spandex. I figured the very soft drapey rayon jersey would be perfect for the gathered sleeves.


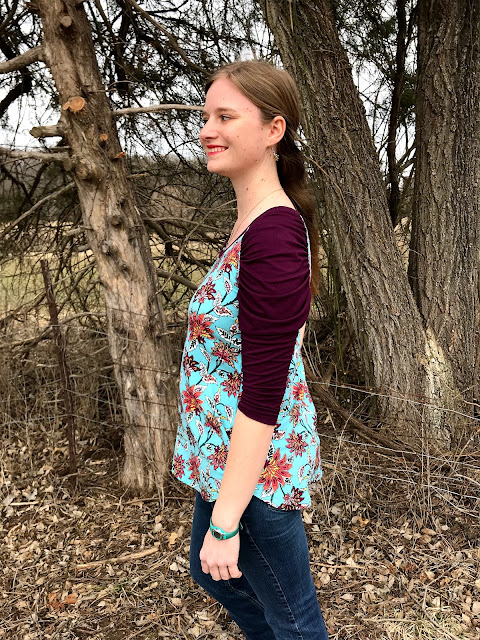
 I may have had the wrong idea there, however, as the rayon spandex is almost too drapey for these sleeves. They're looking a little droopy. A light weight cotton spandex jersey may have been a better choice for the sleeves since that blend has less drape and more structure to it.


Droopy sleeves and all, though, I do like my finished shirt. The floral is bright and cheerful, while the dark purple keeps it from being over the top cheerful and in your face on dreary winter days. 


It's wonderful to finally have this pattern off my "to try out eventually" list! The Breaking Ground blog tour was just the excuse I needed get it made!

*I received this pattern for free in exchange for instruction editing, but all thoughts and opinions are my own.


Thanks for checking out the Breaking Ground Blog Tour 2019. This year over 25 bloggers from around the world are joining with me to break new ground by trying a pattern designer that is new to them, try new techniques, new styles, or whatever way they want to push themselves. (Read on for Giveaway info)

The Full Tour includes all these creatives... we hope you'll visit us each day! 

Monday March 11 

Tuesday March 12
  
Wednesday March 13

Thursday March 14

Friday March 15 

Breaking News: our tour sponsor Phat Quarters is offering 2 patterns of choice from her pattern shop to one lucky winner.

Enter Here!

***
We'd love to see how you're Breaking Ground this month. Share with us what you're working on by using the hashtag #BreakingGround2019 across social media.

Friday, March 8, 2019

Button-up Wool Eastbourne Trousers

Shortly after testing the Eastbourne Trousers, by Scroop Patterns, back in January, I saw a picture of a similar pair of trousers come across my Instagram feed. Wide legged, pleated, flowey, and high waisted, just like the Eastbourne trousers, but with one noticeable difference - the trousers in the instagram picture closed up with a button placket in the left side seam rather than a center back zipper. I quickly decided I wanted a pair of pleated, wide legged, high waisted pants that did the same, so why not attempt to hack the Eastbourne Trousers pattern?


As it is still very much winter here, (We got snow again last weekend, and it was so cold at the beginning of the week that we had to close up the baby goats in a heated shed.) I decided to make these button-up Eastbournes out of wool, or more specifically, a wool blend.


I found this piece of blue wool fabric at a local antique mall/flea market type of place last fall. It's not as heavy as a coat-weight wool, but slightly heavier than most skirt-weight wools. I'd intended to turn the 2 yard length into an 18th century petticoat, but then I decided to do a burn test to make sure this fabric was indeed 100% wool - thus an accurate material choice for the 18th century. Well, the burn test revealed the fabric to be a wool/synthetic blend. Not accurate for an 18th century garment, but perfectly acceptable for a more modern garment, such as wide legged pleated pants.


So, how did I make the Eastbourne trousers button up the left side rather than zip up the back?


By altering the pockets. And adding a placket.


The pattern includes (wonderfully large) nearly invisible, hidden, side seam pockets. Now it is possible to put in a side seam zipper with this type of pockets (possible, but not particularly easy), but they are not really compatible with a side seam button placket. I most certainly did not want to lose the pockets to achieve the button placket, so instead I re-shaped the pocket opening.


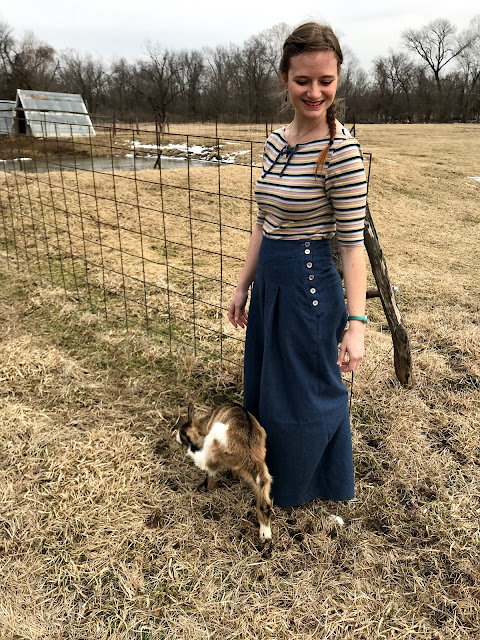
I changed the pockets to have a visible slant opening, rather than a hidden one, which gave me room to install a button placket on the left side.


I just folded back the top edge of the front side seam at an angle from the upper edge of the pattern to the little circle on the pattern piece marking the bottom of the pocket opening. (You could also cut this angle, but I opted to fold it back so I can re-use this printout of the pattern in the future if I want to make these trousers again without the button placket.) I also widened the top of the inseam pocket pattern piece so it would be able to support slant opening pockets.


With the pocket piece layered behind the newly altered front leg piece, the side seam looks complete, matching the shape of the original front side seam before it was altered by the pocket opening. Thus this little pocket opening alteration will not affect the fit of the final garment at all, just the look.


Once I had the pocket situation figured out, I sewed up the pants like normal, making two major changes. First, just sewed up the center back seam rather than putting a zipper in it.


Second, I left the left side seam of the pants completely open and unsewn (with the pocket sewn to the front leg piece) until after I attached the waistband. Likewise, I sewed up the center back seam of the waistband but left the left side of it open.


After attaching the waistband, I then made the button placket.


I sewed an underlap onto the top 10" of the back leg piece and a matching facing onto the front leg piece. Then the remainder of the left side seam got sewn up like normal. The waistband/yoke facing was then sewn in place, and, finally, I made the button holes in my placket and sewed six metal buttons onto the underlap.


Then came the real test, I tried the pants on, buttoned up my placket, and. . .


My button-up Eastbourne Trousers fit beautifully!!

"Must reach that braid."

They'd turned out just how I'd hoped!

"Got it!"
Wide-legged, swishy, warm, comfortable, and featuring a pretty side button placket!


Due to the changes made to the pattern during testing, this pair of Eastbourne Trousers, made from the final pattern, fits me even better than my first pair do!


And, on another note, I managed to get these made, and photographed, and blogged, all within one week. That's something that hasn't happened with any project in a while!


I've also worn these pants twice since finishing them, so I predict they will be a much appreciated wardrobe addition!


They also appear to be baby goat approved, and who could complain about that?


*Making a special appearance in this blog post is Aurora, one of my 3 bottle babies!

*I received the Eastbourne Trousers pattern free of charge in exchange for testing it, but all thoughts and opinions expressed in this blog post are my own.