
The Breaking Ground tour is all about trying something new in your sewing - a new skill, a new type of garment, a new kind of fabric, or a new-to-you pattern designer. After a few days of pondering ideas fitting this theme, I finally landed on a plan. I'd make a pattern that came without seam allowances included - something I've never done before, from a new-to-me pattern designer.
Back in December, I helped a German pattern designer, Sewera, edit her pattern instructions as she translated her entire line of patterns from German to English. In return, I received a few of her patterns to sew up for myself as I had time. My favorite pattern from her line was this one - the Feel Free Raglan. I wanted to make this shirt as soon as I saw the initial picture and proofread the instructions. Unfortunately, I didn't have time to make it just then.

Fast forward a couple months, and I still hadn't taken the time to make a Sewera pattern. Thus, I decided to use this blog tour all about trying new things as my excuse to sew the Feel Free Raglan!
Now Sewera is a German brand, and it is very common for European pattern companies to not include seam allowance in their patterns. Sewera is no exception. When it comes time to cut out your project you have to make sure to add your own seam allowance prior to cutting your fabric, otherwise the finished garment will be too small.
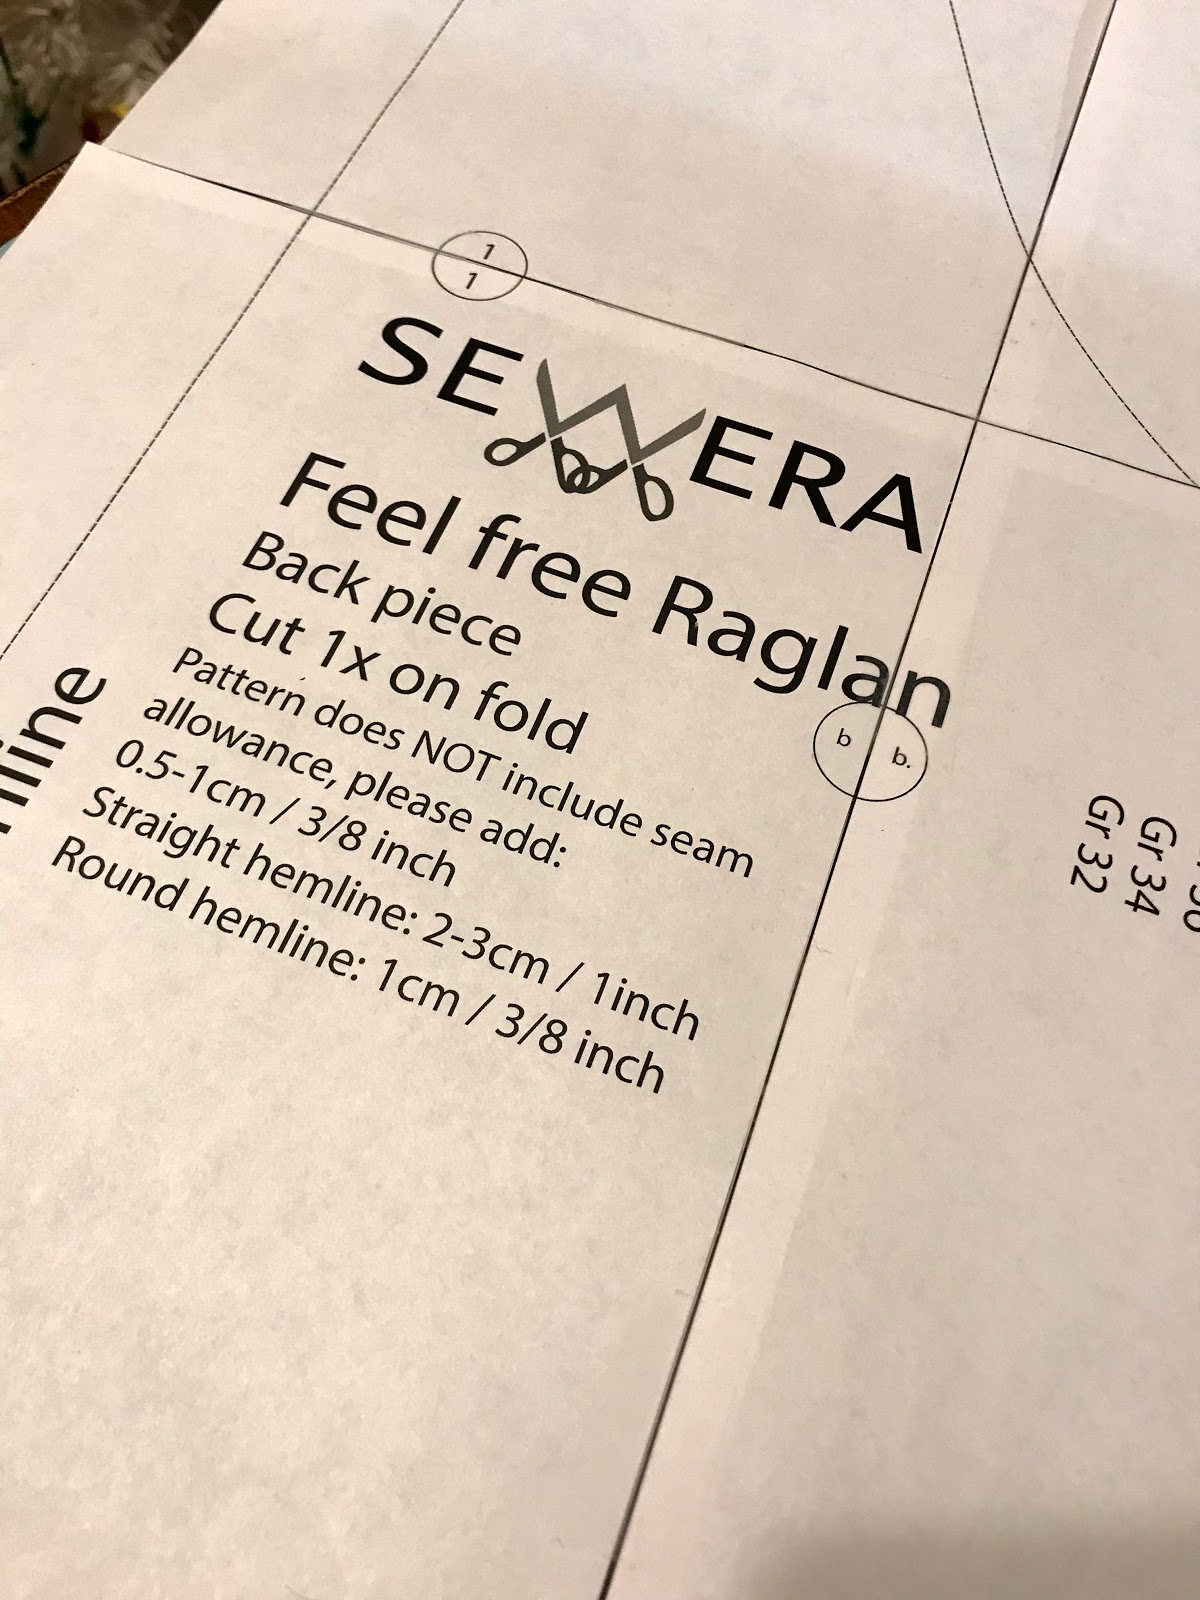
Adding seam allowance is something I've never before had to do with a commercial pattern, but I gave it my best shot.

I pulled out my hem gage and marked a 3/8" seam allowance all around each pattern piece before I cut my pattern pieces out of the paper they were printed on. Once that was done I cut out the pattern pieces along my freshly-drawn seam allowance lines and cut out my shirt like normal.
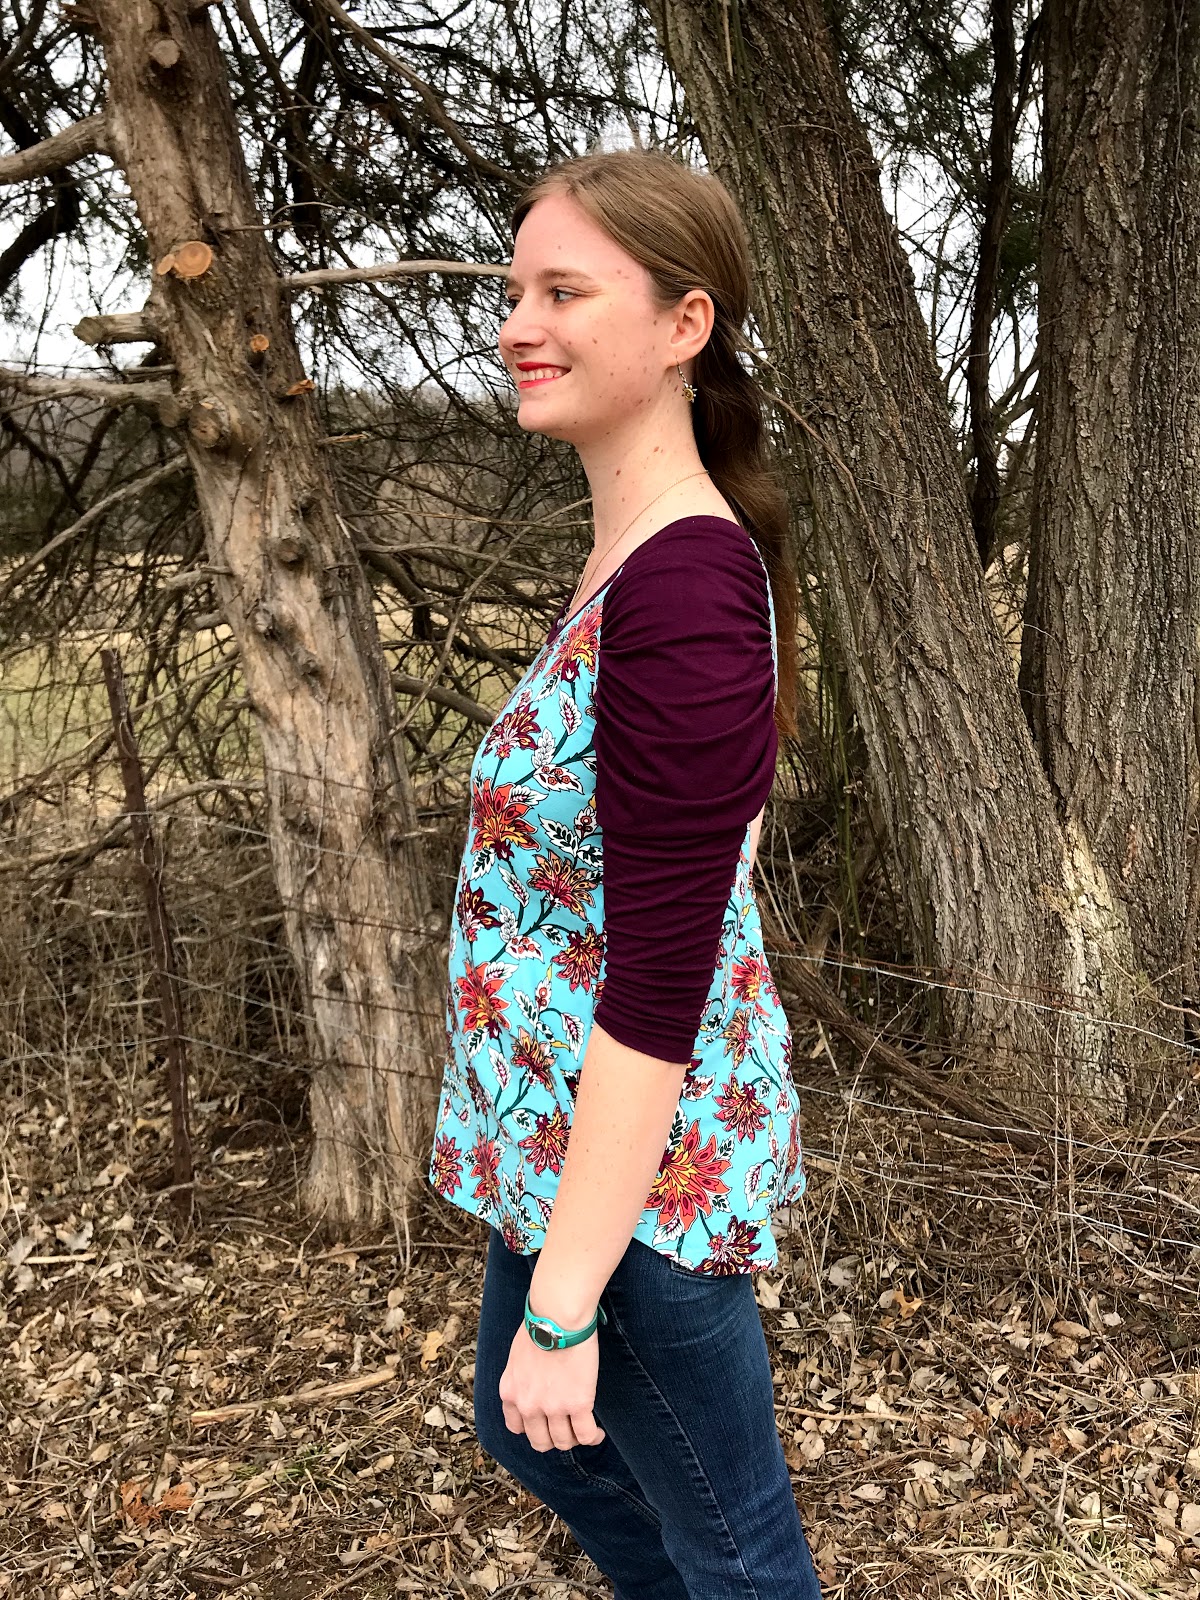
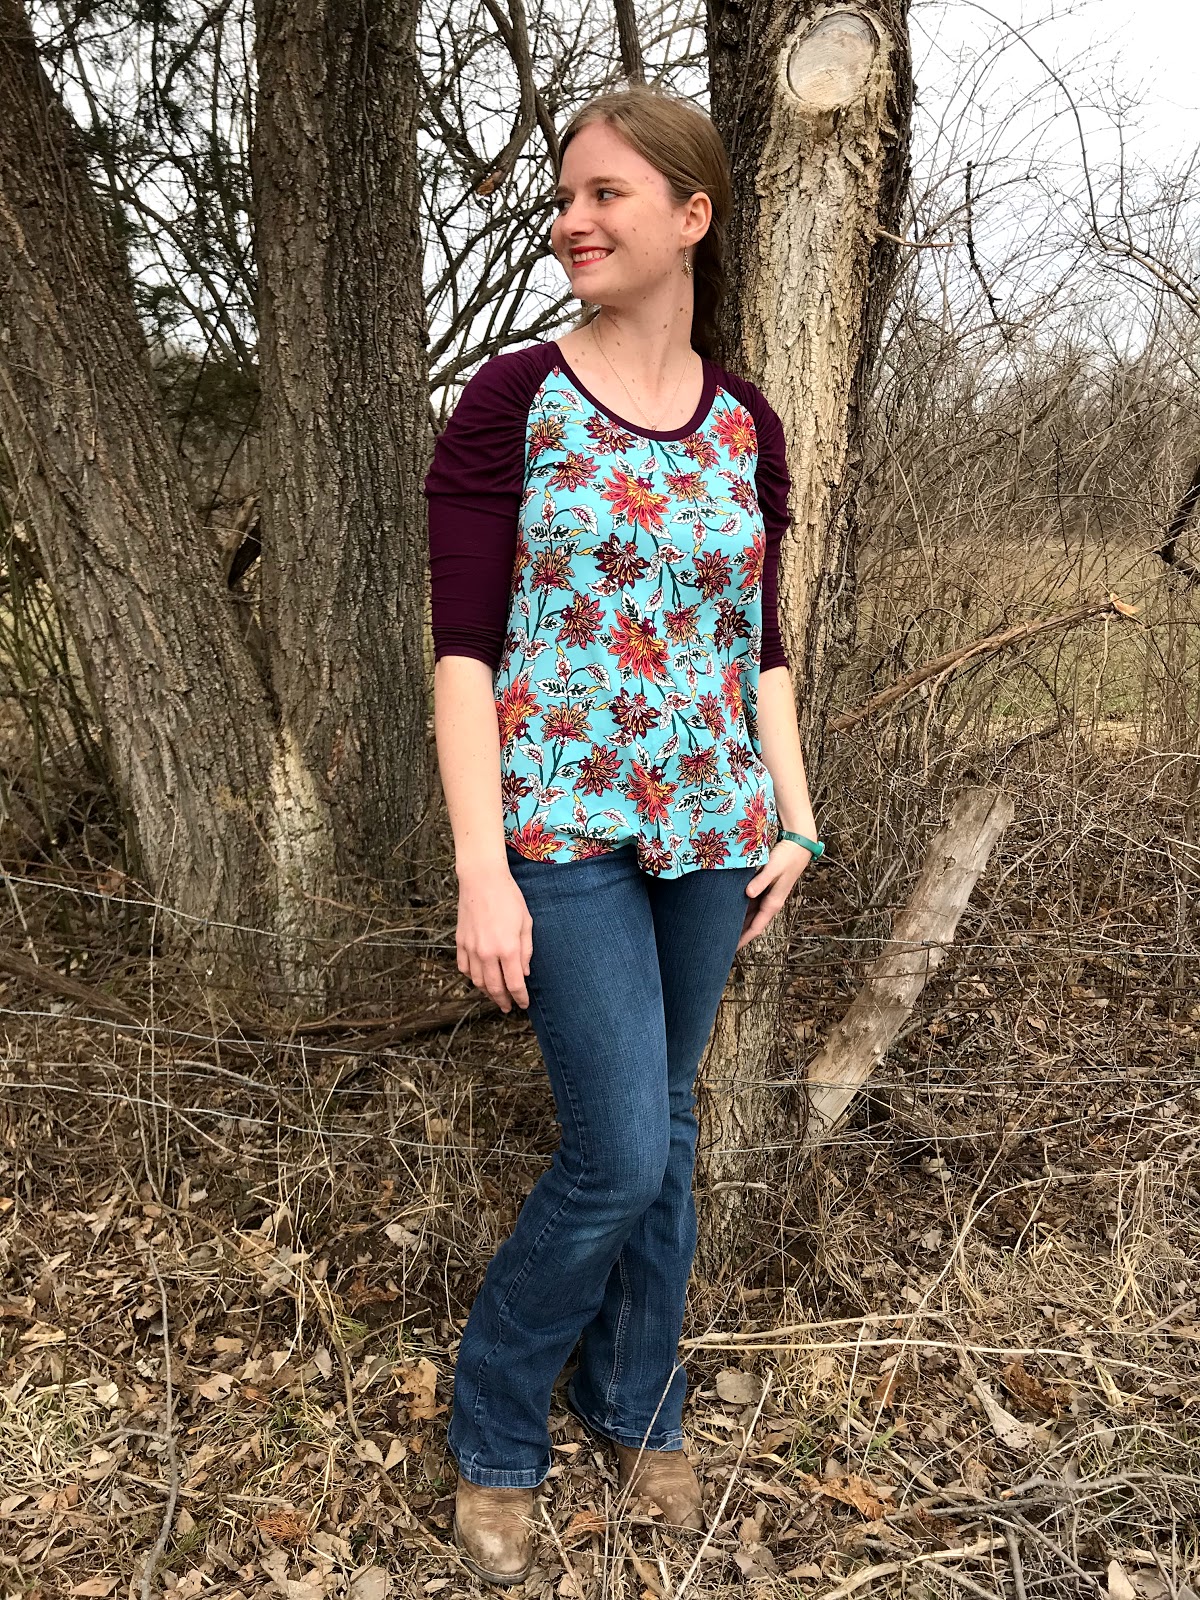
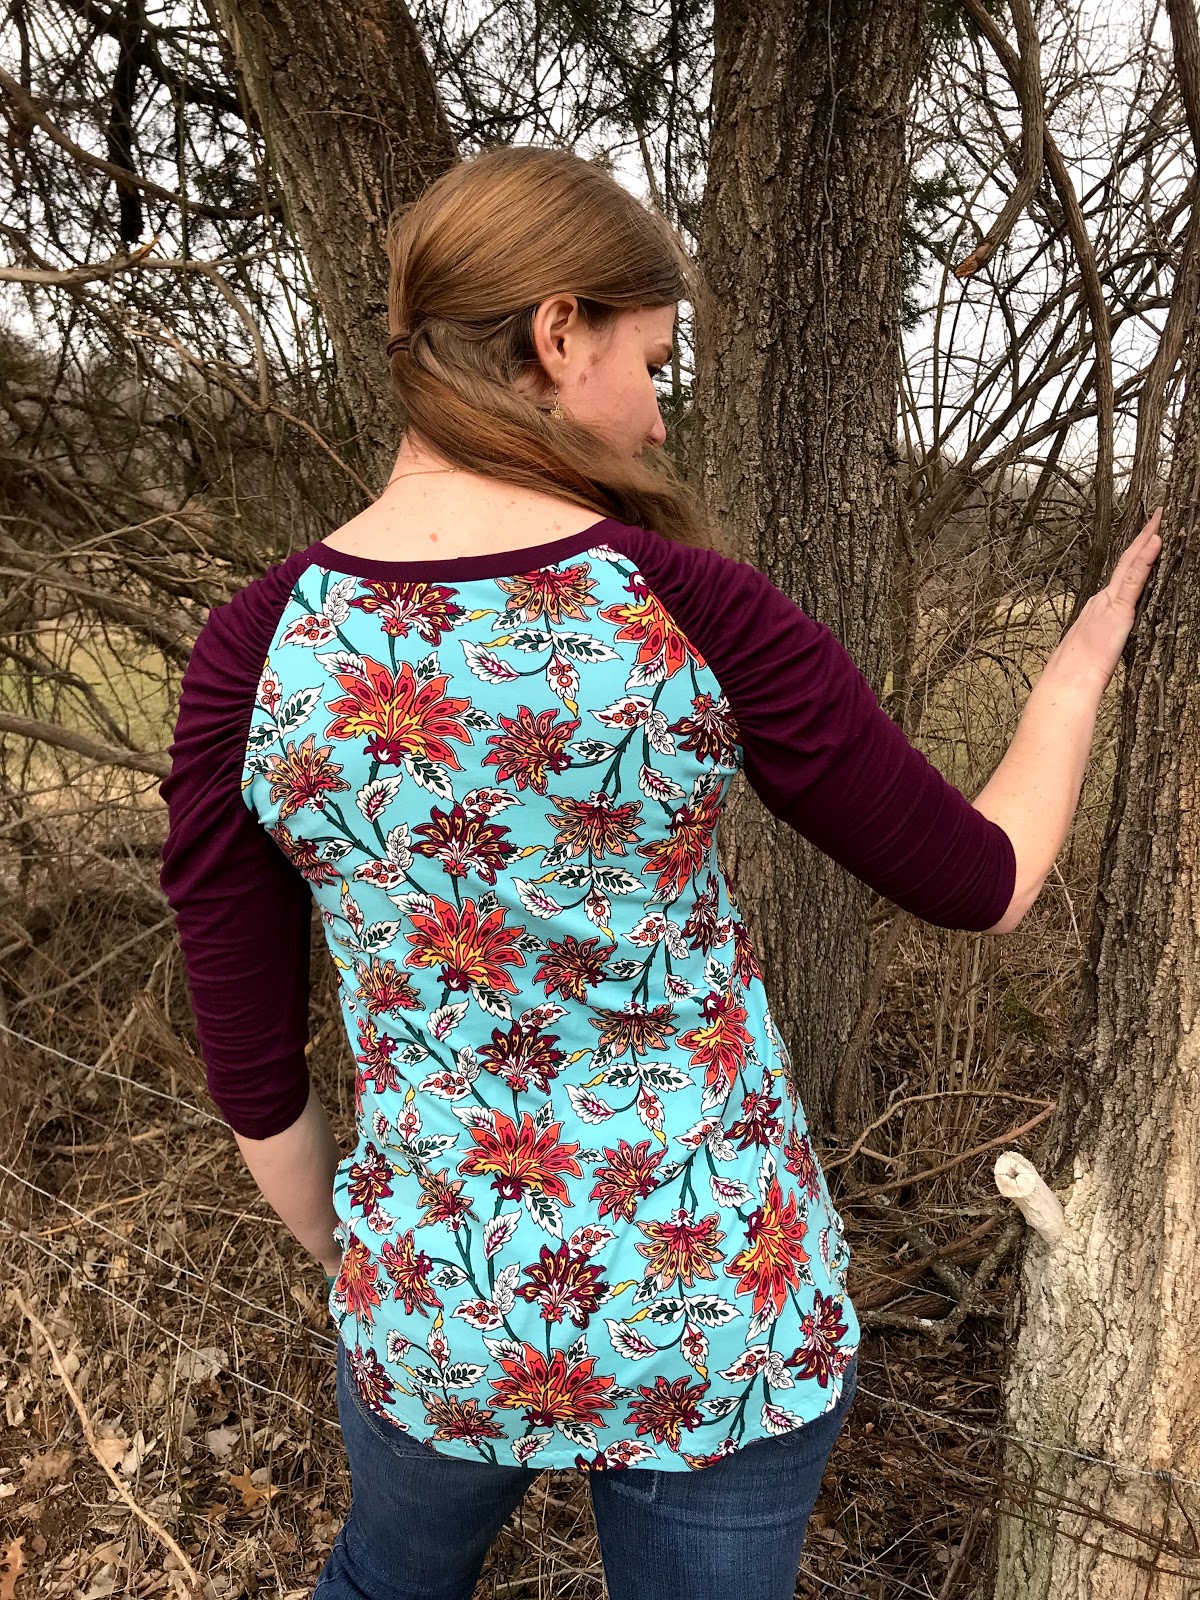
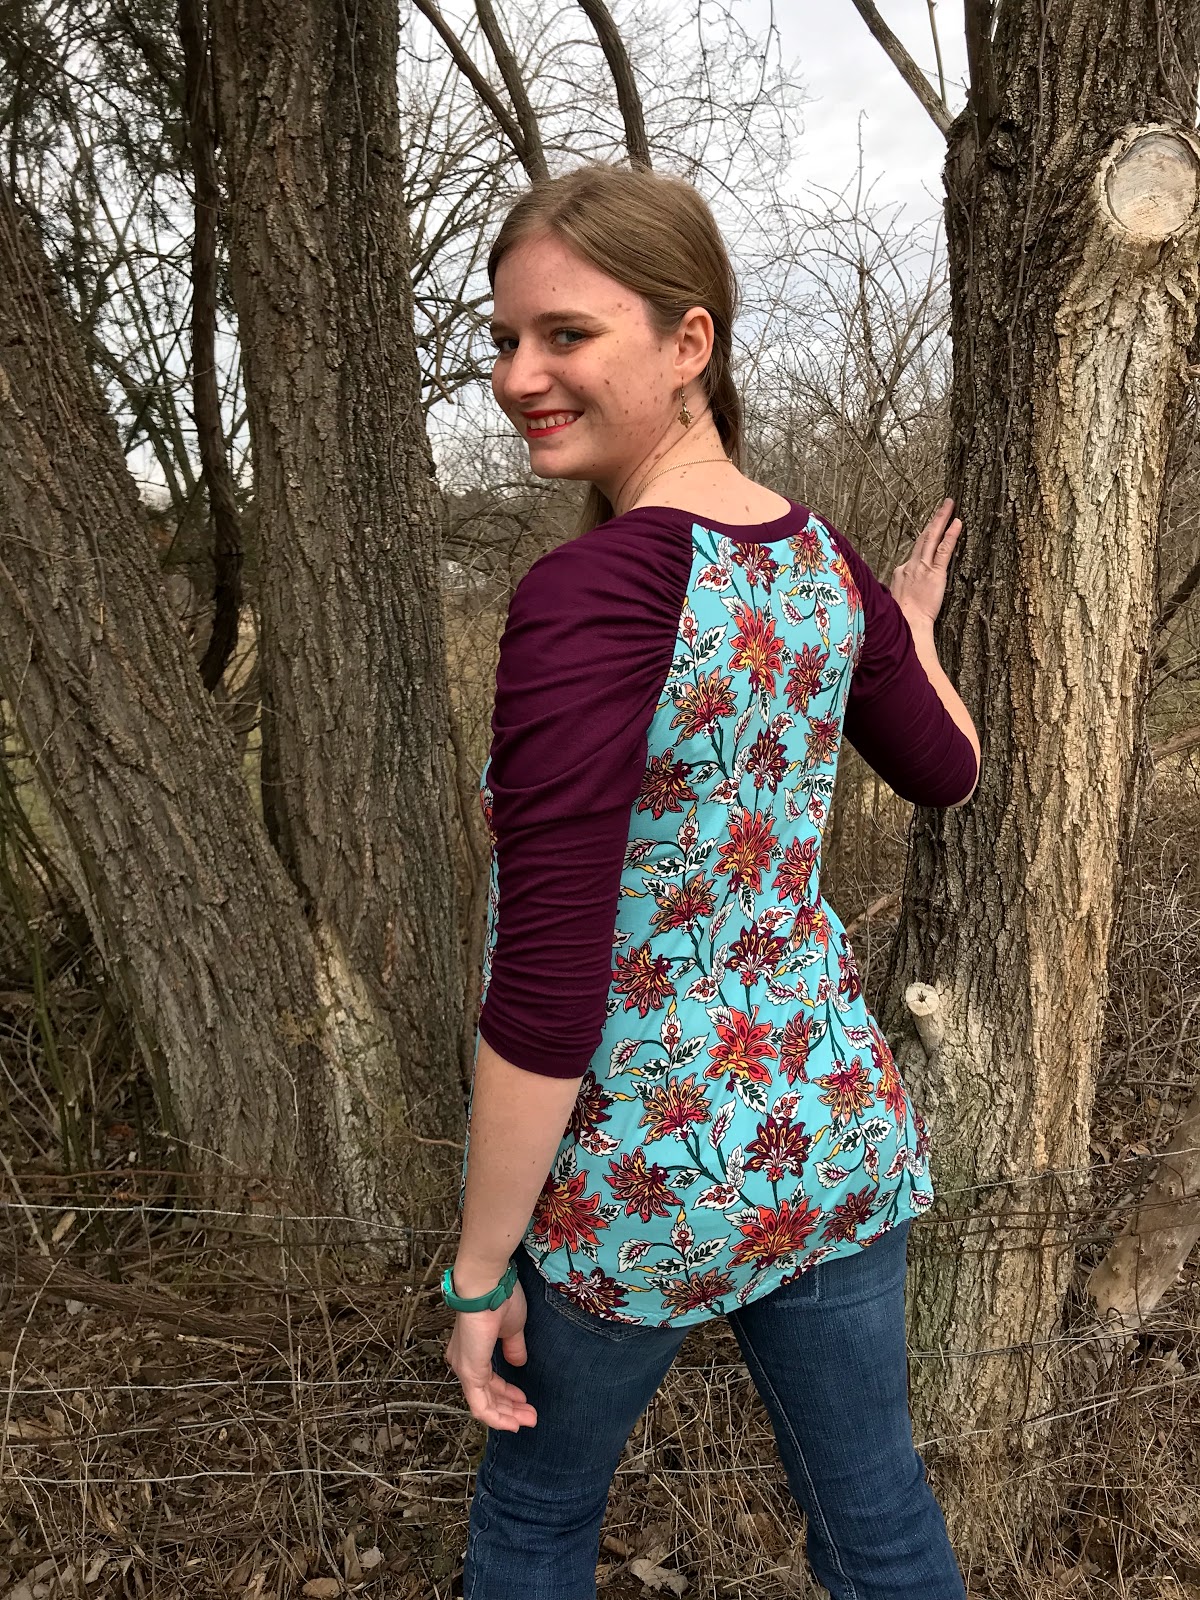
After a quick dig through my stash of knit fabrics I opted to make my shirt out of the fabrics left over from the Magnolia Dress I made myself last summer - a floral double brushed polyester and a dark purple rayon spandex. I figured the very soft drapey rayon jersey would be perfect for the gathered sleeves.


Droopy sleeves and all, though, I do like my finished shirt. The floral is bright and cheerful, while the dark purple keeps it from being over the top cheerful and in your face on dreary winter days.
It's wonderful to finally have this pattern off my "to try out eventually" list! The Breaking Ground blog tour was just the excuse I needed get it made!
*I received this pattern for free in exchange for instruction editing, but all thoughts and opinions are my own.

Thanks for checking out the Breaking Ground Blog Tour 2019. This year over 25 bloggers from around the world are joining with me to break new ground by trying a pattern designer that is new to them, try new techniques, new styles, or whatever way they want to push themselves. (Read on for Giveaway info)
The Full Tour includes all these creatives... we hope you'll visit us each day!
Monday March 11
Tuesday March 12
Wednesday March 13
Musings of A Seamstress, Very Blissful, Sew4Five, Just Sew Something, Hazelnut Handmade, Crafting Through Time, Tales From A Southern Mom
Thursday March 14
Make It Sew with the Bear and Pea Atelier, Ronda B Handmade, SequioaLynn Sews, Sewing with D, The Sewing Goatherd, OOYA Made, My Golden Thimble, Custom Made by Laura
Friday March 15
Sew Cute Couture by Kathy, Sewing Novice, Ronda B Handmade, Momma Bear Sews, MeMade, My Golden Thimble, Lulu & Celeste
Breaking News: our tour sponsor Phat Quarters is offering 2 patterns of choice from her pattern shop to one lucky winner.
Enter Here!
***
We'd love to see how you're Breaking Ground this month. Share with us what you're working on by using the hashtag #BreakingGround2019 across social media.
Another beautiful raglan. :) You have a great eye for color. The print is lovely and the solid colored sleeves match perfectly.
ReplyDeleteI love the the gathered detail on the sleeves. It is so unique.
Thank you! After wearing this shirt for a while, I really like the sleeves!
DeleteBeautiful! I think you are spot on about the dark purple keeping the print in check!
ReplyDeleteThis raglan is lovely, but it's crazy, you never had to add seamallowance before? you are right, we have to do that with almost every pattern. Sometimes, when we are really lucky ;) the pattern comes with seam allowance included. We have this special tool to add them :) https://www.google.com/search?q=zoommaatje&client=firefox-b-d&source=lnms&tbm=isch&sa=X&ved=0ahUKEwitotbm8YHhAhVPblAKHfTDArAQ_AUIDigB&biw=1270&bih=676&dpr=2#imgrc=olNxtGGqcXnCNM:
ReplyDeleteNot unless it was a pattern I made myself :) A seam allowance adding tool sounds handy!
DeleteLovely. I really like the gathered detail on the sleeves. I have a TON of Burda patterns with no seam allowances. I need to use them HAHHA
ReplyDeleteThank you! Burda does have some lovely designs, but I've only ever used their paper patterns, which include seam allowance like a Simplicity or McCall's pattern would.
DeleteActually, I learned to add sew allowance on the fabric in sewing class here.
ReplyDeleteYou put the pattern in the fabric as it is drawn and you trace the seam allowance on the fabric with chalk. I have even seen the genius start chalking next to the pattern and make the seam allowance as wide as you want it to be. No measuring, just chalk away. Where the chalk ends is (because the pattern is there) where you stitch. I never done it like that myself, but it looked awesome.
Congrats on your first seam allowance free creation ;-)
Adding seam allowance isn't something I was taught in any of the sewing classed I took as a child. But that method does sound the most precise!
DeleteThose sleeves are so fascinating! I haven't seen anything like it before! I used to add the SA to my patterns but now I have done so many, I often just eyeball it!
ReplyDeleteAfter adding seam allowance to a few different patterns, I imagine it would be quite easy to just eyeball over time.
DeleteYour raglan is beautiful. I like your choice of fabric, aren't leftovers wonderful?
ReplyDeleteThank you! Yes, and I love finding ways to use every last scrap of fabric! There's something immensely satisfying about it!
DeleteI really like the gathered raglan sleeve. I've not seen that before. I think using Burda patterns are the only time I've had to add seam allowances. I like to use my compass for curved edges and I just use my clear ruler for the straight edges.
ReplyDeleteThank you! One of these days I really should get my hands on a Burda Magazine and give one of their patterns a try!
DeleteI'd not seen a raglan sleeve with a gather like that before. That's unique for sure. I like to use a compass to add seam allowances along curves and my clear ruler along the straight edges.
ReplyDeleteSo interesting! I have learned to mark the stitching line. That is the most important thing a pattern needs to tell me.
ReplyDeleteThe seam allowance needed varies. If the material frays or not, if I want different seaming method... I get frustrated with US patterns because I need to draw the stitching lines without pattern after cutting fabric if I want to be super precise.
Very fascinating! If that's how one learned to sew, I can really see the advantages of it, it's just different than what I'm used to.
Delete