Sunday, September 27, 2015

The Shirty Shirt

Yep, I refashioned another men's shirt. Remember how I mentioned in the last post that my mom really liked the tunic I made my sister and she wanted one too? Well, I decided to make her one. Not having a suitable shirt to turn into a tunic for her, I decided to got to a thrift store to find one. I came home with 2 shirts, one to make her a tunic top from, and this short sleeved, not too huge, white one.


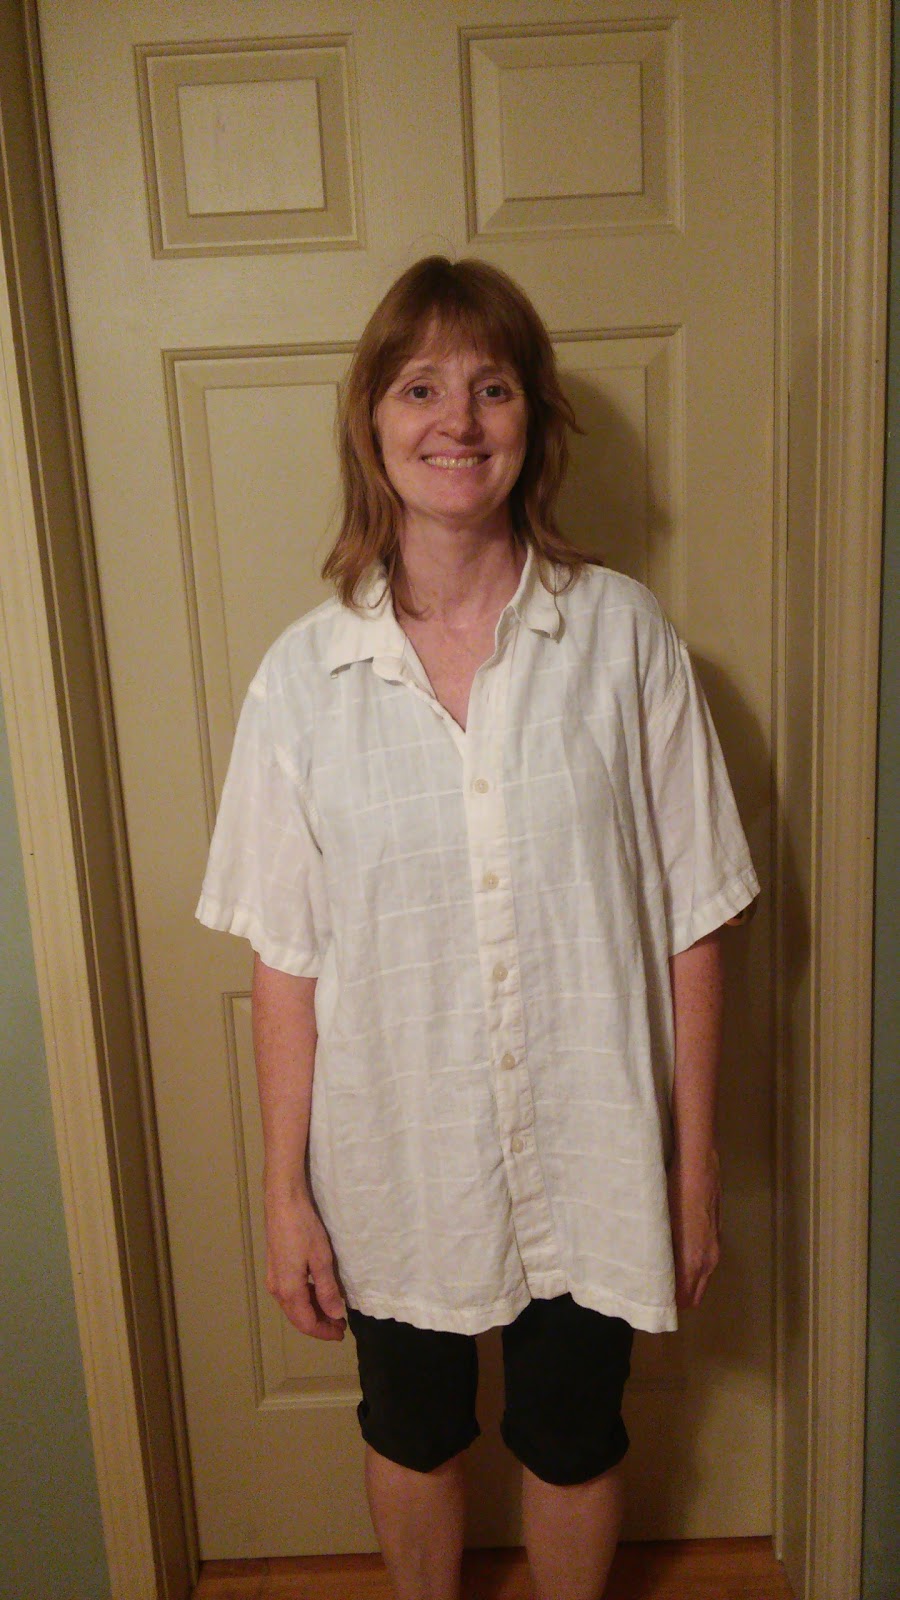
It's a linen rayon blend and just about the softest thing you ever felt. That combined with the fact it was only $1 meant I had to bring it home. It would make a great shirt for my mom, if I ever figured out what sort of a shirt to make from it. 
I brought it home and showed it to my mom and sister. Like I did, they loved the softness of it. I commented that I wasn't sure what sort of shirt I would make my mom from it, and my sister immediately had a suggestion. 
"How about the Esme shirt?" she said.


"Perfect!" I decided. So my mom found her Sew Liberated Esme Top pattern, and I got to work. I had less than two days before The Refashioners 2015 ended, and I wanted to get this done for that.


I cut the back of the shirt from the front of the shirt, the front from the back, and the sleeves from the sleeves. There was just enough fabric! 


The pleats on the back of the shirt lined up perfectly with the new shoulder straps. So I left the original pleats in as a fun design feature, a way to retain as many of the original shirt features as possible. 


I also kept the original hem, I just had to open it up at the edges to sew the side seams. Then I resewed the hem at the sides.


The sleeves I feminized, thanks to my mom's suggestion, by making a casing and adding a drawstring.


I lined the yoke, and made the back facing, from some red and white striped cotton. It was left over from a sundress I made my sister at the beginning of the summer. All the original shirt buttons are on the back of the new shirt, so I used some buttons left over from another shirt refashion for the front of this shirt.

The shirt came together pretty easily. I sewed most of it in one night, and just had to finish up a few details on it the next morning. I finished it before the end of The Refashioners!


My mom was pretty happy with her new shirt. It was definitely fun to make her something after everything I've made for myself and my sister.


One of my favorite parts of this refashion is the button placket down the back of the shirt. I've been seeing lots of shirts made for The Refashioners with buttons down the back, so it was fun to make my own refashion with that feature.


My dad said my mom was beautiful, and the shirt was too. It's always fun to get his feed back when I make something!

This was a fun refashion all the way around, and I was so pleased to finish it before The Refashioners ends - today! A huge thanks to Portia at Makery for organizing this event. It has stretched my creative boundary, and now I can't see a men's shirt without thinking "what can I turn that into?" More shirt refashions will definitely make an appearance here in the future. After all I've still got this HUGE shirt to turn into a tunic top for my mom.

(and an awesome little brother who surprised us by coming home for the weekend!)

So keep your eyes open for the finished result, and all my other sewing projects that got put on hold due to shirt craziness!


Friday, September 25, 2015

The Shirty Tunic

After the last dress, the purple one, I was done refashioning shirts! I'd run out of shirts, plus The Refashioners 2015 ends on Sunday, so I didn't think I'd have time to make anything else. Well, I work well under pressure. So, I came up with one more shirt refashion idea that I just had to try. My dad had this short sleeve, too-big, missing a button, shirt, that he was willing to give up.


With a few chops, it was ready to turn into a tunic shirt for my little sister.

I cut a new, very wide neckline, then narrowed the sleeves and upper part of the shirt at the side seams.


First I sewed closed the bottom part of the button placket.


Then I sewed up the new side seams, and turned the excess fabric, where the new side seams ended, into big pleats, one at each side.


Where the pleats began and the new seams ended I sewed bias tape around the inside of the shirt.


This made a casing, in which I ran elastic through, cut to my sister's waist measurement. Next I used bias tape to finish the neckline and make another casing.


I ran elastic through that. Finally I sewed on a ribbon bow at the waist, where the missing button was, and the tunic was done!


My sister says it's very comfortable, perfect for every day activities.


Such as training her goats, to get them ready to show next year.


(Little Essie sometimes needs some encouragement to walk, but my sister is very patient with her)


This was definetly the easiest of the shirt refashions, it only took about an hour, but I think it might be the one that get's the most wear. My mom really liked it too, and wants me to make her a tunic like it!


Now, I don't think I'll have time to finish that one before the challenge ends on Sunday, but stay tuned, I may surprise myself!


Wednesday, September 23, 2015

The Last Shirty Dress

These two shirts.


They were actually the first shirts I bought for The Refashioners 2015. I love purple, so when I found purple men's shirts at the thrift store, I snatched them up. I brought them home and had a plan for them. There was just one issue, these were size medium, slim-fit shirts. So there wasn't enough fabric between the two of them to make my original plan. Thus, I went back to the thrift store and got the orange and blue shirts to use for my original plan. I refashioned those. These got left on my pile. I refashioned a dress for my sister. These got left on the pile. Finally, I figured out what to do with these two.


Now, I love full skirts, and feel rather trapped in strait skirts, so that was my biggest issue with these shirts, how could I get a full skirt out of so little fabric? I could combine the two shirts in the skirt, but then would I have enough fabric for a bodice in just the sleeves? I had no idea, but I decided to give it a try with Simplicity 1801. It had enough different pieces in the bodice that I could mix and match the two fabrics and it just might work. So, I got started. First I took apart the shirts.


I seam ripped the side seams and removed the sleeves. The solid purple shirt proved most frustrating to disassemble. Not only were all the seams flat felled, they were also glued together! Someone did not want this shirt to come apart. But it did. I put aside the sleeves to be used for the bodice, then I laid out the shirt front and back pieces.

These would be the skirt.


I shaped each skirt panel by trimming off the arm holes at and angle. I also cut the button placket off the center back pieces. I figured I didn't need buttons down the back of my skirt, but I would need buttons down the front of my bodice, so I saved the extra button placket for that.
I sewed the skirt together, keeping the original shirt hems, so that the skirt had a scalloped hem all the way around.

Next I squeezed the new sleeves and bodice out of the 4 shirt sleeves. I had to piece together the bodice back.


And I didn't make the shoulders wide enough, which I realized when I went to attach the bodice back to the yoke, so I had to add two gussets at the top.


Even though they were last minute to fix a mistake, I think the gussets are a kind of cool detail on the back of the dress.

The bodice front went together much easier, until the very end at least.


I sewed the extra button placket onto the bodice, then sewed the bodice to the skirt. Since one shirt had black buttons and the other had white, I replaced all the buttons with some lavender ones I had on hand.


I chose to sew the extra button placket down the center front for two reasons, so that a) I could retain a feature of the original shirt(s), and b) I wouldn't have to put in a side zip like the pattern said to. I've used this pattern before, with wonderful results, so I figured this dress would fit me perfectly when it was done. It *almost* did. There was only one issue. The front gaped between the buttons and at the neckline. I doubled the amount of buttons on the bodice, which has fixed the gaping issue in my other refashions, but that didn't entirely fix the issue. It still gaped, just not quite as much. I really didn't want to give up, just sew the button placket closed and put in a side zip. So, instead I decided to hide the issue.


I did something I've done before when altering too-small garments. I sewed ruffly lace down either side of the button placket. The ruffliness of it hides the gaping! To fix the gaping neckline I added a drawstring (which I will probably replace with lavender ribbon at some point, ivory was just what I had on hand.)

Then the dress was done! Until I put it on and realized I'd forgotten something, pockets. If the dress didn't have pockets it wasn't going to get worn, so I went to add side seam pockets. Then I discovered why I'd forgotten to put in pockets, the skirt had no side seams.


So, I cut slashes, where the side seams would have been, to put pockets in. I sewed in pockets.


Then I sewed some leftover button placket over the pockets so that they wouldn't be to obvious. Perfect! Now I had a wearable dress!


With a very full skirt! This was, by far, the most frustrating of my shirt refashions. I am so glad to have it done!


As frustrating as the whole process was, I'm very happy with the final product. It came out almost exactly like my original design. Typically I sketch something out, then majorly change it once I start sewing, but not with this one.


This was the perfect refashion for me to finish Get Shirty! with. If I'd started with this one, I'm not sure I'd have wanted to do the other refashions. Honestly, If I hadn't had the looming deadline of the 27th to finish this dress, I probably would have set it aside for a looooong time at some point during the process of making it. I may or may not have finished it at some point in time. Now that would have been a loss, because now I have a wonderful new fall dress, which will probably get lots of wear in the coming months! Plus I completed my goal, I managed to refashion all 5 shirts before the challenge ends on the 27th. So there we go, the end of my entries for The Refashioners 2015. If you want to see some more completely awesome shirt refashions visit the Pinterest board  and Makery, the hosting blog for the challenge. Enjoy!


Tuesday, September 22, 2015

Wearing the Purple Plaid Wool

Last year I came home from the Heritage Festival with a bolt of purple plaid wool. So this year I decided I ought to wear that bolt of purple plaid wool to the Heritage Festival.


Now I didn't really have a reason to go to the Heritage Festival in historical clothing, but I didn't have a reason NOT to either. So, I used that as my reason. I'll take any excuse I can to wear my purple plaid dress! My lovely friend Erentry came with me. She wore the Civil War dress that my grandma and I (mostly my grandma) made when I was 14.


It was so much fun to have a friend along who was also dressed in historical clothing. She seemed to be rather impressed with how comfortable the hoop skirt was. It was just a bit limiting in certain situations. Such as when we attempted to walk on stilts.


I managed 2 or 3 very wobbly steps with my squishable petticoats. With her non-squishable hoops Erentry could barely manage to get on the stilts, and walking on them wasn't going to happen. However there are certainly upsides to the hoops, which caused woman to replace their many petticoats with hoops and just a few petticoats in the late 1850's.


The biggest one? Wearing a hoop skirt is quite a bit lighter and cooler than wearing countless petticoats.


Along with stilts there were other activities to enjoy. Several people were demonstrating period crafts. There was woodworking, tin working, lacemakeing (my favorite!), spinning, and rag rug making. One of the more popular ways to make a rag-rug is called twining. There were several ladies demonstrating how to twine, with rugs, place mats, and potholders for sale.


I twined this rug a couple winters ago. I'm rather proud of it, but it had gotten rather dirty. So, I asked one of the ladies who was twining what the best way to wash it would be. She said to just throw it in the washer on gentle, then lay it out in the sun to dry. So that's what I did when I got home, and the rug came out of the washer still intact and beautifully clean!

My favorite part of the Heritage Festival was probably walking through the different historical buildings in my historical dress, although my 1837-1842 dress pre-dated most of the buildings.


I found the mailboxes in the general store rather interesting. Imagine having to go into town every time you wanted to get your mail! Along with the general store there was also a log cabin (from the approximate time of my dress!), a 3-room farm house built around 1911, and a big house built in 1877. That was probably the most interesting house. It would have been a mansion in its day. 
I gave my name and number to one of the ladies giving tours in the house, as she was interested in having a historical dress made. Well, that evening I got a phone call. Apparently the person who was supposed to sit in the sewing room the next day wasn't going to be able to make it. So they were wondering if I would be interested in coming to sit in the sewing room for a few hours the next afternoon. I said of course! 

The sewing room was built in 1891 when the sleeping porches were enclosed. It was used for a seamstress who would come a few times a year to make new clothes, or mend old ones, for the family.
(Yes, my dress is about 50 years to early for this room, hopefully I'll have my planned 1888 dress done by next year!)
I loved getting to be a part of the festival and getting to educate people (just a little) about sewing in the late 1800's. 

My dress, of course, I made about a year ago. My bonnet I made last winter to go with it. However, the bonnet wouldn't stay on my head, it kept sliding off. Last week I fixed that! I came across this blog post about bonnet stays. A bonnet stay was piece of wire or velvet ribbon that held the bonnet on the wearer's head. (apparently bonnets sliding off has always been an issue.) Well, I had some wide brown velvet ribbon in my stash, so I decide to attempt to make a bonnet stay. First I laid the ribbon across my head to figure out how long it needed to be.


Don't I have a lovely selfie face?
Next I pinned the ribbon to the inside on the bonnet and tryed it on, in order to figure out where it should go.


There, perfect! This bonnet isn't going anywhere! (and my selfie face is getting better!) I sewed the stay in, and then had just one more issue. The ribbon showed. I needed to hide it somehow. This must be the reason alot of bonnets had flowers on the inside of the brim. After looking at picures of origenal bonnets, and how they had flowers aranged, I decided I really liked this one from about 1840.


So I ran in to Hobby Lobby to get some silk flowers. I brought them home and sewed them, and some eyelet from my stash, along the inner brim of my bonnet.


I covered the ends of the flowers with velvet ribbon so that they wouldn't dig into my head. (Not only is this bonnet supposed to be pretty and stay on my head, its also supposed to be comfortable!) I ran out of brown velvet ribbon near the end, so I had to finish up with the only other wide velvet ribbon I had on hand, pink.

Well the bonnet was comfortable, and pretty, and it stayed on my head! 

The bonnet was the perfect accessory to my dress!


I really enjoyed getting to wear my purple plaid dress and newly trimmed bonnet to the Heritage Festival. Now I think I may have to track down some more historically themed events (from approximately the right era) to wear my dresses to. Fall seems to be the season for these things, so hopefully I'll find several more reasons to wear my purple plaid dress this year!


September's Historical Sew Monthly Challenge is a color challenge. Make something brown. So, I'm using my newly trimmed bonnet as my entry.

What the item is: A brown bonnet. Made last winter, but fixed to be wearable this month.

The Challenge: #9 Color Challenge Brown 

Fabric: The bonnet is made from cotton buckram with a wool outer layer and silk lining

Pattern: McCalls M2951 

Year: 1840-45 approximately 

Notions: Thread, Velvet Ribbon, Cotton Eyelet, Faux Flowers

How historically accurate is it? The materials the bonnet is made of are historically accurate, the notions not so much, as most are synthetic. The bonnet is about 90% hand sewn. So maybe 80% accurate.

Hours to complete: I don't remember how long it took to make the bonnet itself, but adding the bonnet stay and flowers took about 4 hours. 

First worn: September 19th 2015, to the Heritage Festival

Total cost: Can't remember for the bonnet itself, but the materials for the upgrade cost less than $10


As much as I love getting to wear my historical dresses, fall is also a busy season with goats. So back into my modern clothes and out to milk I go!