Showing posts with label Mission trip. Show all posts

Tuesday, July 7, 2020

A Casey Skirt with EXTRA POCKETS (Super Secret Zipper Pockets!!)

My Brijee Patterns Casey Skirts are the most worn skirts in my wardrobe, especially in the summer. Those huge pockets, the below-the-knee length, and the pleated A-line shape make them practical for just about all of my summer activities (most of which involve keeping up with children. . .).


I first made this pattern when I tested the pattern early in the summer of 2018. I quickly discovered I wore this skirt too much to only have one in my closet, so by the end of the summer, I'd made a second one. Both skirts were worn on repeat, so that winter I got to pattern hacking and made a winter version out of an impulse fabric buy.  This winter version was worn almost as much as the summer versions, so yes, more Casey skirts were absolutely in my future! 


When I went to Japan in June of 2019 (please note that, yes, I wore my Casey Skirts on that trip) I bought 3 yards of a blue striped textured cotton (almost like a seersucker) to make another Casey skirt from. Like most of my projects however, I did not get around to making said skirt right away as I'd intended to.


Fast forward to the end of August 2019 and I was preparing for my first trip to Uganda. I was trying to figure out what to pack for this short trip, and, of course, my Casey skirts made the list. However, there is one thing that makes these skirts less than ideal for international travel. Those beautiful, huge, pockets? They are very easy to pick-pocket. (Trust me, I've had a 4 year old steal my phone out of these pockets on more than one occasion. . . If he can do it, anyone can) This isn't something I was worried about in Japan (as it's actually safer there than in is here in the U.S.), or even in rural areas of Uganda, but it is something to be extra aware of when it comes to cities and tourism areas.


That's when I came up with the idea to add more pockets to the Casey skirt - secret in-seam zipper pockets, which would be hidden by the large, fabulous, patch pockets. As soon as I struck on this idea, it was happening. Out came the pattern, out came the blue Japanese cotton. The skirt, complete with extra pockets was cut out! Then. . . I ran out of time to actually make it before going on that September trip to Uganda.


The pieces of this skirt, ready for assembly, sat in the project basket next to my sewing machine until the first week of January, the week before I left on my second trip to Uganda. I certainly wanted this skirt for that trip as we'd be doing a few more tourist-y activities and be in towns and cities more than I had been on my first trip. With this in mind, I sat down and made the skirt.


I used this pocket scarf tutorial from Patterns for Pirates to figure out how to make a zippered in-seam pocket. (Sorry, I have no pictures of actually installing said pocket, I was too busy figuring out how to do it to think of taking pictures while doing it.)


To put it as simply as possible, I first used thread tacks to mark the placement of the large patch pockets. Then I sewed up the side seams and installed 7" zippers in those seams, inside the patch pocket markings. Next, I put in the inseam pockets, almost like normal, I just made my pocket openings line up with the zipper. (My pockets are anchored at the waist, because that's just how I prefer to make my inseam pockets, it keeps the strain of the pocket off the side seam.) Finally, I very carefully sewed on my patch pockets, being sure to keep my inseam pockets from getting sewn over in the process.


From the inside of the skirt, it just looks like normal inseam pockets!


And from the outside, all you see is the patch pockets - same as my other Casey Skirts!


Phones, money, and other such items can be zipped away in the secret pockets.


Or, if the risk of being pick-pocketed is low/non-existent, items can just be tossed in the patch pockets like normal!


Those hidden zipper pockets gave me peace of mind when I visited the Source of the Nile in Uganda - a big tourist attraction!

Dipping my toes in the Nile River - how often do you get to do that!?!?
And beyond the amazing extra pockets, this skirt is just a really nice summer skirt!


Cool and comfortable to wear while visiting mentor kiddos in Uganda!


And just as cool and comfortable to wear all summer keeping up with my nanny kids here at home!


This skirt is just as much a favorite and just as often worn as my other Casey skirts.


This skirt is certainly not my last from this pattern. The only real question is whether or not my next Casey skirt will have these fancy hidden zipper pockets or not. I haven't decided yet. . . thoughts?


Thursday, March 12, 2020

The Teal Uganda Dress

The weather over the past week has been making me think it's spring, though I'm hesitant to actually believe it as we've had snow in April the past two years. The grass is turning green. The chicken's egg production has doubled. I'ts been above freezing for well over a week. It's been over two weeks since there was any snow. Sunday it was so delightfully warm I wore a sundress all day - without a jacket.


The exact sundress I wore on Sunday? That would be the second dress I made from fabric I bought during my September Uganda trip to wear during my January trip.


I learned the hard way the first time I washed the fabric, this lovely dark teal cotton wax print is not colorfast in the slightest. It dyed an entire load of laundry teal. Thankfully, most of the load was just jeans, which are now a little bluer than they were, but there were a couple things I was quite sad to have stained. All that to say, I definitely should have pre-washed this fabric by itself, rather than with a load of regular laundry. And I'm only washing this dress with things like jeans from here on out.


Moving on from my fabric pre-washing woes, I decided to use Vintage Vogue 1172, a design from 1957. It called for nearly 6 yards of fabric, which worked out well since my cut of wax print was, you guessed it, 6 yards long.


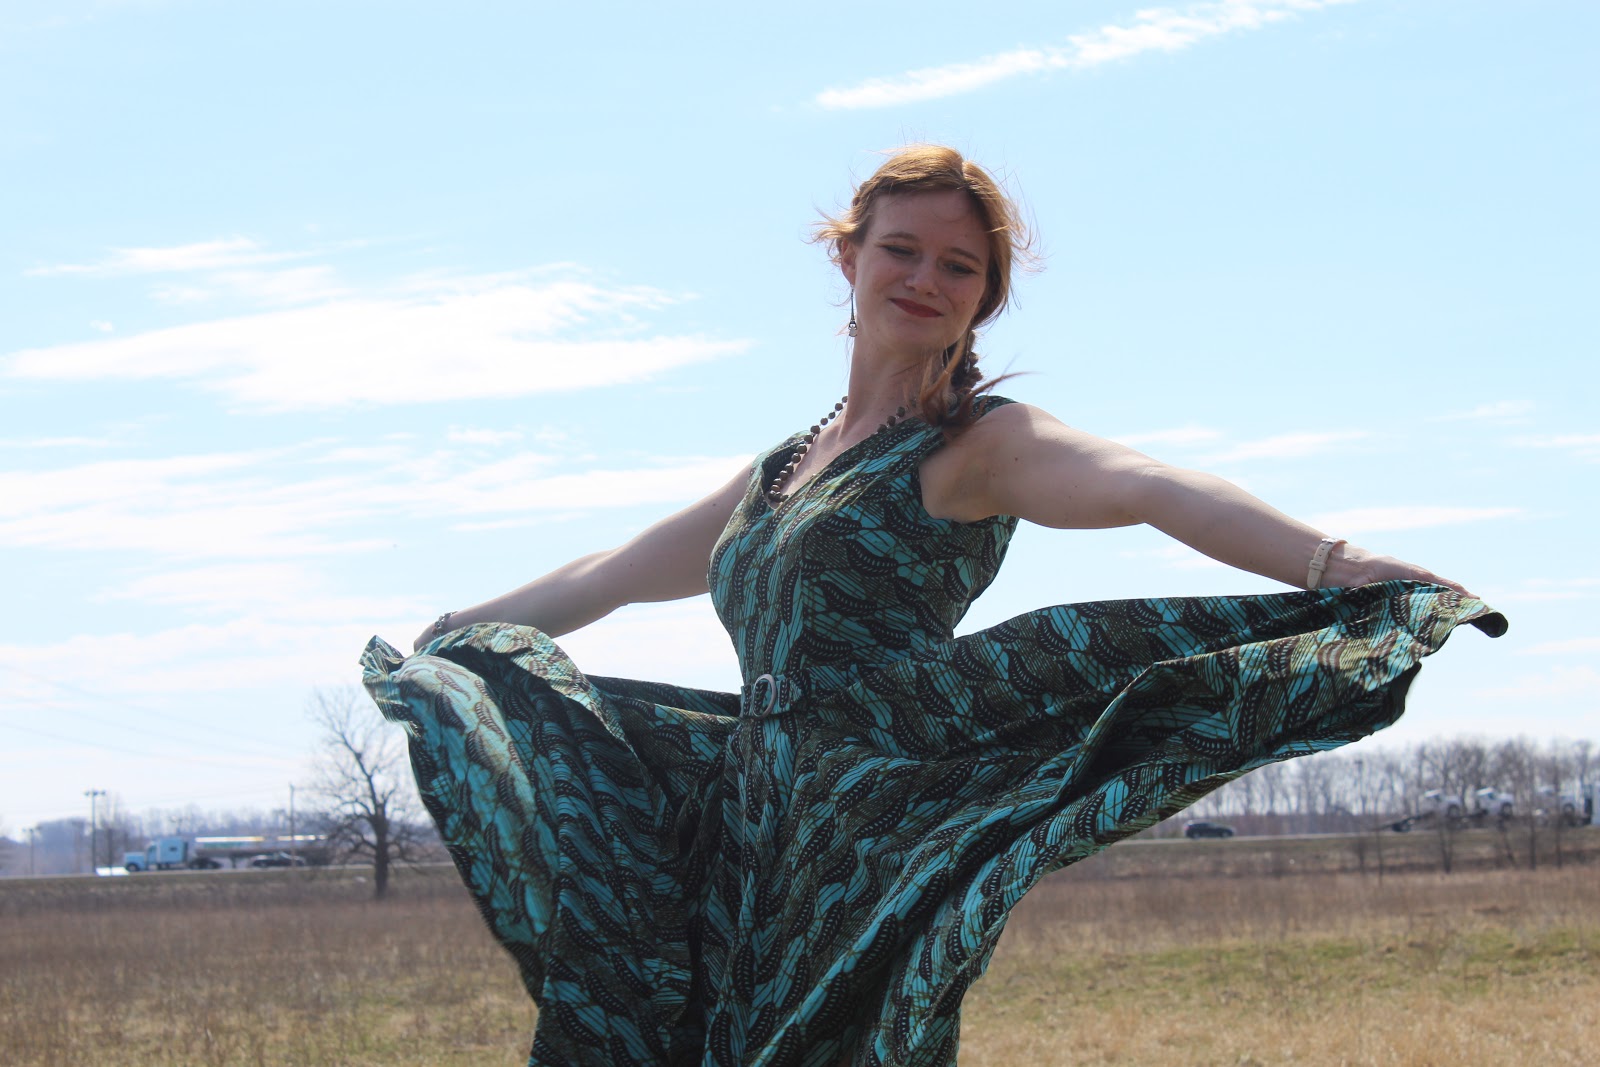
The skirt (the main fabric hog of course) is essentially a full circle skirt, plus some. It's comprised of 4 quarter-circle gores sewn between 4 narrow A-line skirt panels.


These A-line panels are at the center front, center back, and sides of the skirt.


Thus there are no true side seams in the skirt, just side front and side back seams where the quarter circle gores are sewn to the A-line panels. This made deciding on pocket and zipper placement interesting.


I decided to add my inseam pockets (not included in the pattern, I just put pockets in everything) to the side front seam between the side panels and the gores.


As for the zipper, the pattern recommended putting it on the left side, where a side seam generally would be, and just cutting a slash into the skirt for the zipper. I was not convinced this would be very sturdy, nor did I think I'd be able to get a very nice looking zipper installation this way.


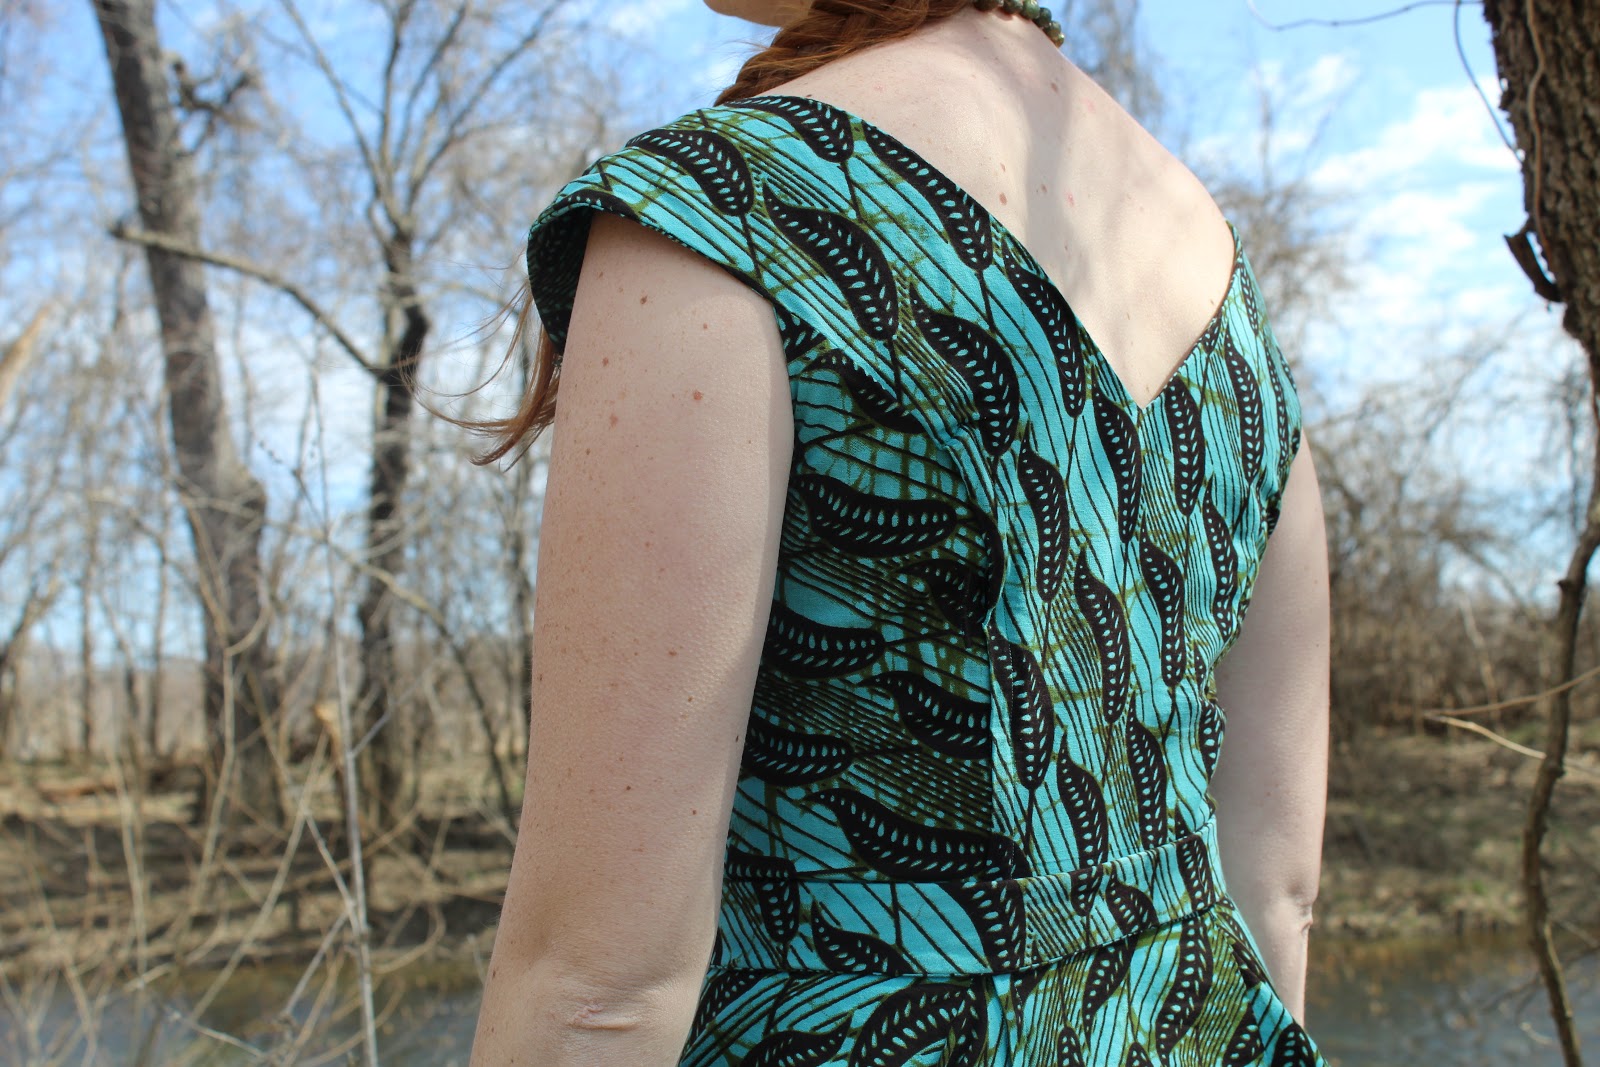
I decided to instead put a lapped zipper in the left side back seam, where the princess seam of the bodice lines up with the gore-to-panel join in the skirt.


Not a very orthodox zipper placement (I've never seen a zipper in this seam before), but it maintains the structural integrity of the dress and blends in seamlessly with the design.


That said, if I make this pattern again, I might just go the easy route and add a center back seam to both the bodice and the skirt and stick the zipper there. I'll let you know next time I have 6 yards of fabric begging to become just such a dress.


Fabric hog, strange zipper placement, and all, I really do like this dress quite a bit.


It's very comfortable, and I imagine I'll wear it quite a bit as an everyday dress this summer.


The bodice, with it's combination of princess seams and side bust darts, fits very well.


The wide, slightly low neckline lays nicely and perfectly showcases this necklace I was given on my first trip to Uganda. The ladies made the beads themselves from paper!


This pattern seems to be a bit longer waisted than most Vogue patterns I've used as the waist seam actually hits me at my natural waist, if not a little lower, rather than right at the bottom of my rib cage  where most "waistlines" hit me.


The belt pattern piece included in the pattern is slightly curved for a very nice fit! I made this belt just like I made the one for my lavender dress - interlined with cotton duck canvas, finished with a buckle (picked up on clearance at Hobby Lobby a while back) and hand sewn eyelets.


I wore this dress for church and going out to dinner (on our way to the airport) on our last Sunday in Uganda.


It made me slightly ridiculously happy to get to wear this dress in the same place I purchased my fabric.


I finished this dress about 2-3 days before we left for Uganda - and it was definitely worth it!


Monday, February 24, 2020

The Dress From the Lavender and Gold Uganda Fabric

I bought two lengths fabric on my trip to Uganda back in September. Both beautiful wax prints. One in teal and one in lavender and gold. The plan was to turn these two 6 yard cuts of fabric into dresses which I could wear on my return trip to Uganda in January. I had all fall to make these dresses, so I was sure I'd get them done with plenty of time to spare. Of course, me being the procrastinator I am, "Plenty of time" turned into "Oh, I'm going to Uganda next week. I should start on those dresses." Thus, around the first of January, I cut out the first of the two dresses. The lavender and gold one.


With 6 yards of each print, I had plenty of fabric to play with. So I decided to use a couple of real fabric hogs in my pattern stash - 1950's re-print patterns from the "Vintage Vogue". They called for at least 5.5 yards of fabric apiece.


For my lavender and gold fabric I decided to use Vogue 9106. This pattern features cut-on sleeves, a button front, a gathered bust, and a wonderfully full, unique, skirt.


As with any design featuring a seam directly under the bust, I knew I would need to lengthen the bust section, otherwise those under bust gathers would be sitting about mid-bust on me.


I added about an inch of length to the gathered section of the bodice. It turned out this wasn't quite enough extra length as the gathers still sit more on my bust than under my bust. Whoops. I should have made a mock-up, oh well. The dress is still wearable.


This pattern recommends bound buttonholes down the front of the bodice, and the first step in the pattern instructions is making said bound buttonholes.


I do not often do bound buttonholes, as they take more time to make than normal, machine-sewn, buttonholes, and I'm impatient. Thus, I did considered skipping the bound buttonholes. However, bound buttonholes are so nice looking, and it's a good technique to practice every now and then. So I decided to make the bound buttonholes this time around.


I appreciate the bound buttonholes being at the beginning of the project, when you're fresh, ready to go, and excited about the project, rather than at the end when you just wanna be done. The bound buttonhole instructions included in the pattern directions were very good and my button holes turned out well.


Along with the buttons down the front of the bodice, the pattern called for a side-seam zipper. I decided this was silly - if my dress looked like it opened down the front, gosh darn, it was going to open down the front!


So I stuck an invisible zipper in the center front seam of the skirt, beginning at the waist where the button placket ends. The zipper pull is covered by the belt when the dress is worn, so you can't even tell its there!


This invisible zipper in the front of the skirt turned out amazingly well, and I'm very glad I choose to do it! The dress is much easier to get on and off with the front opening than it would have been with the side seam opening.


The only other pattern alteration I did was to add sides seam pockets to the skirt - because we all know I must have pockets!


I had to re-configure the construction of the skirt a bit to allow for the pockets, but it worked out just fine!


The hard part on the skirt was getting the area where the gathers end and the flat part of the skirt begins to lay smooth. The ruffled and flat portions of the skirt are all cut as one piece, slashed, and gathered, and sewn back together. I had to do some seam ripping there until I got it right, but eventually I was satisfied.


The finished skirt really is delightful!


Once the dress was finished, it was worn to church the Sunday before I left, then packed for Uganda.


I wore it to church our first Sunday in Uganda, then again at the end of the week for our celebration, when the kids did a good-bye performance for us, we shared a feast, and brought goats home to the new goat pen at the school.

Photo Credit: Sophia Smither
Yes, I wrangled goats in this dress. And it held up just fine!

Photo Credit: Sophia Smither
I made this dress specifically for my Uganda trip, but I quite like it, and it will be worn plenty at home as well!