Robin Hood. Bow and Arrow. Sherwood Forest. Band of merry followers.

Robin Hood. That was this year’s home school co-op play, which my sister participated in. And, per usual, I got to make her a fantastic costume for it.

Over a decade ago, I was in a Robin Hood play with my home school co-op and I made my costume for that occasion. Part of me was tempted to dig out that old costume and suggest my sister wear it.

But really. This was to be my sister’s last high school play, she deserved her own costume. And, my sewing skills have certainly improved in the past 15 years, so I could make her a more impressive costume than I made teenage me.

My sister was cast as “Mother Meg”, one of Robin Hood’s followers, and this is the costume profile she was given:


So, as with most high school plays historical accuracy wasn’t something to worry about, we just needed to come up with something vaguely medieval-renaissancey-ish which would fit the overall look of the play. We could work with that!

My sister wanted a green costume with a lace-up bodice.
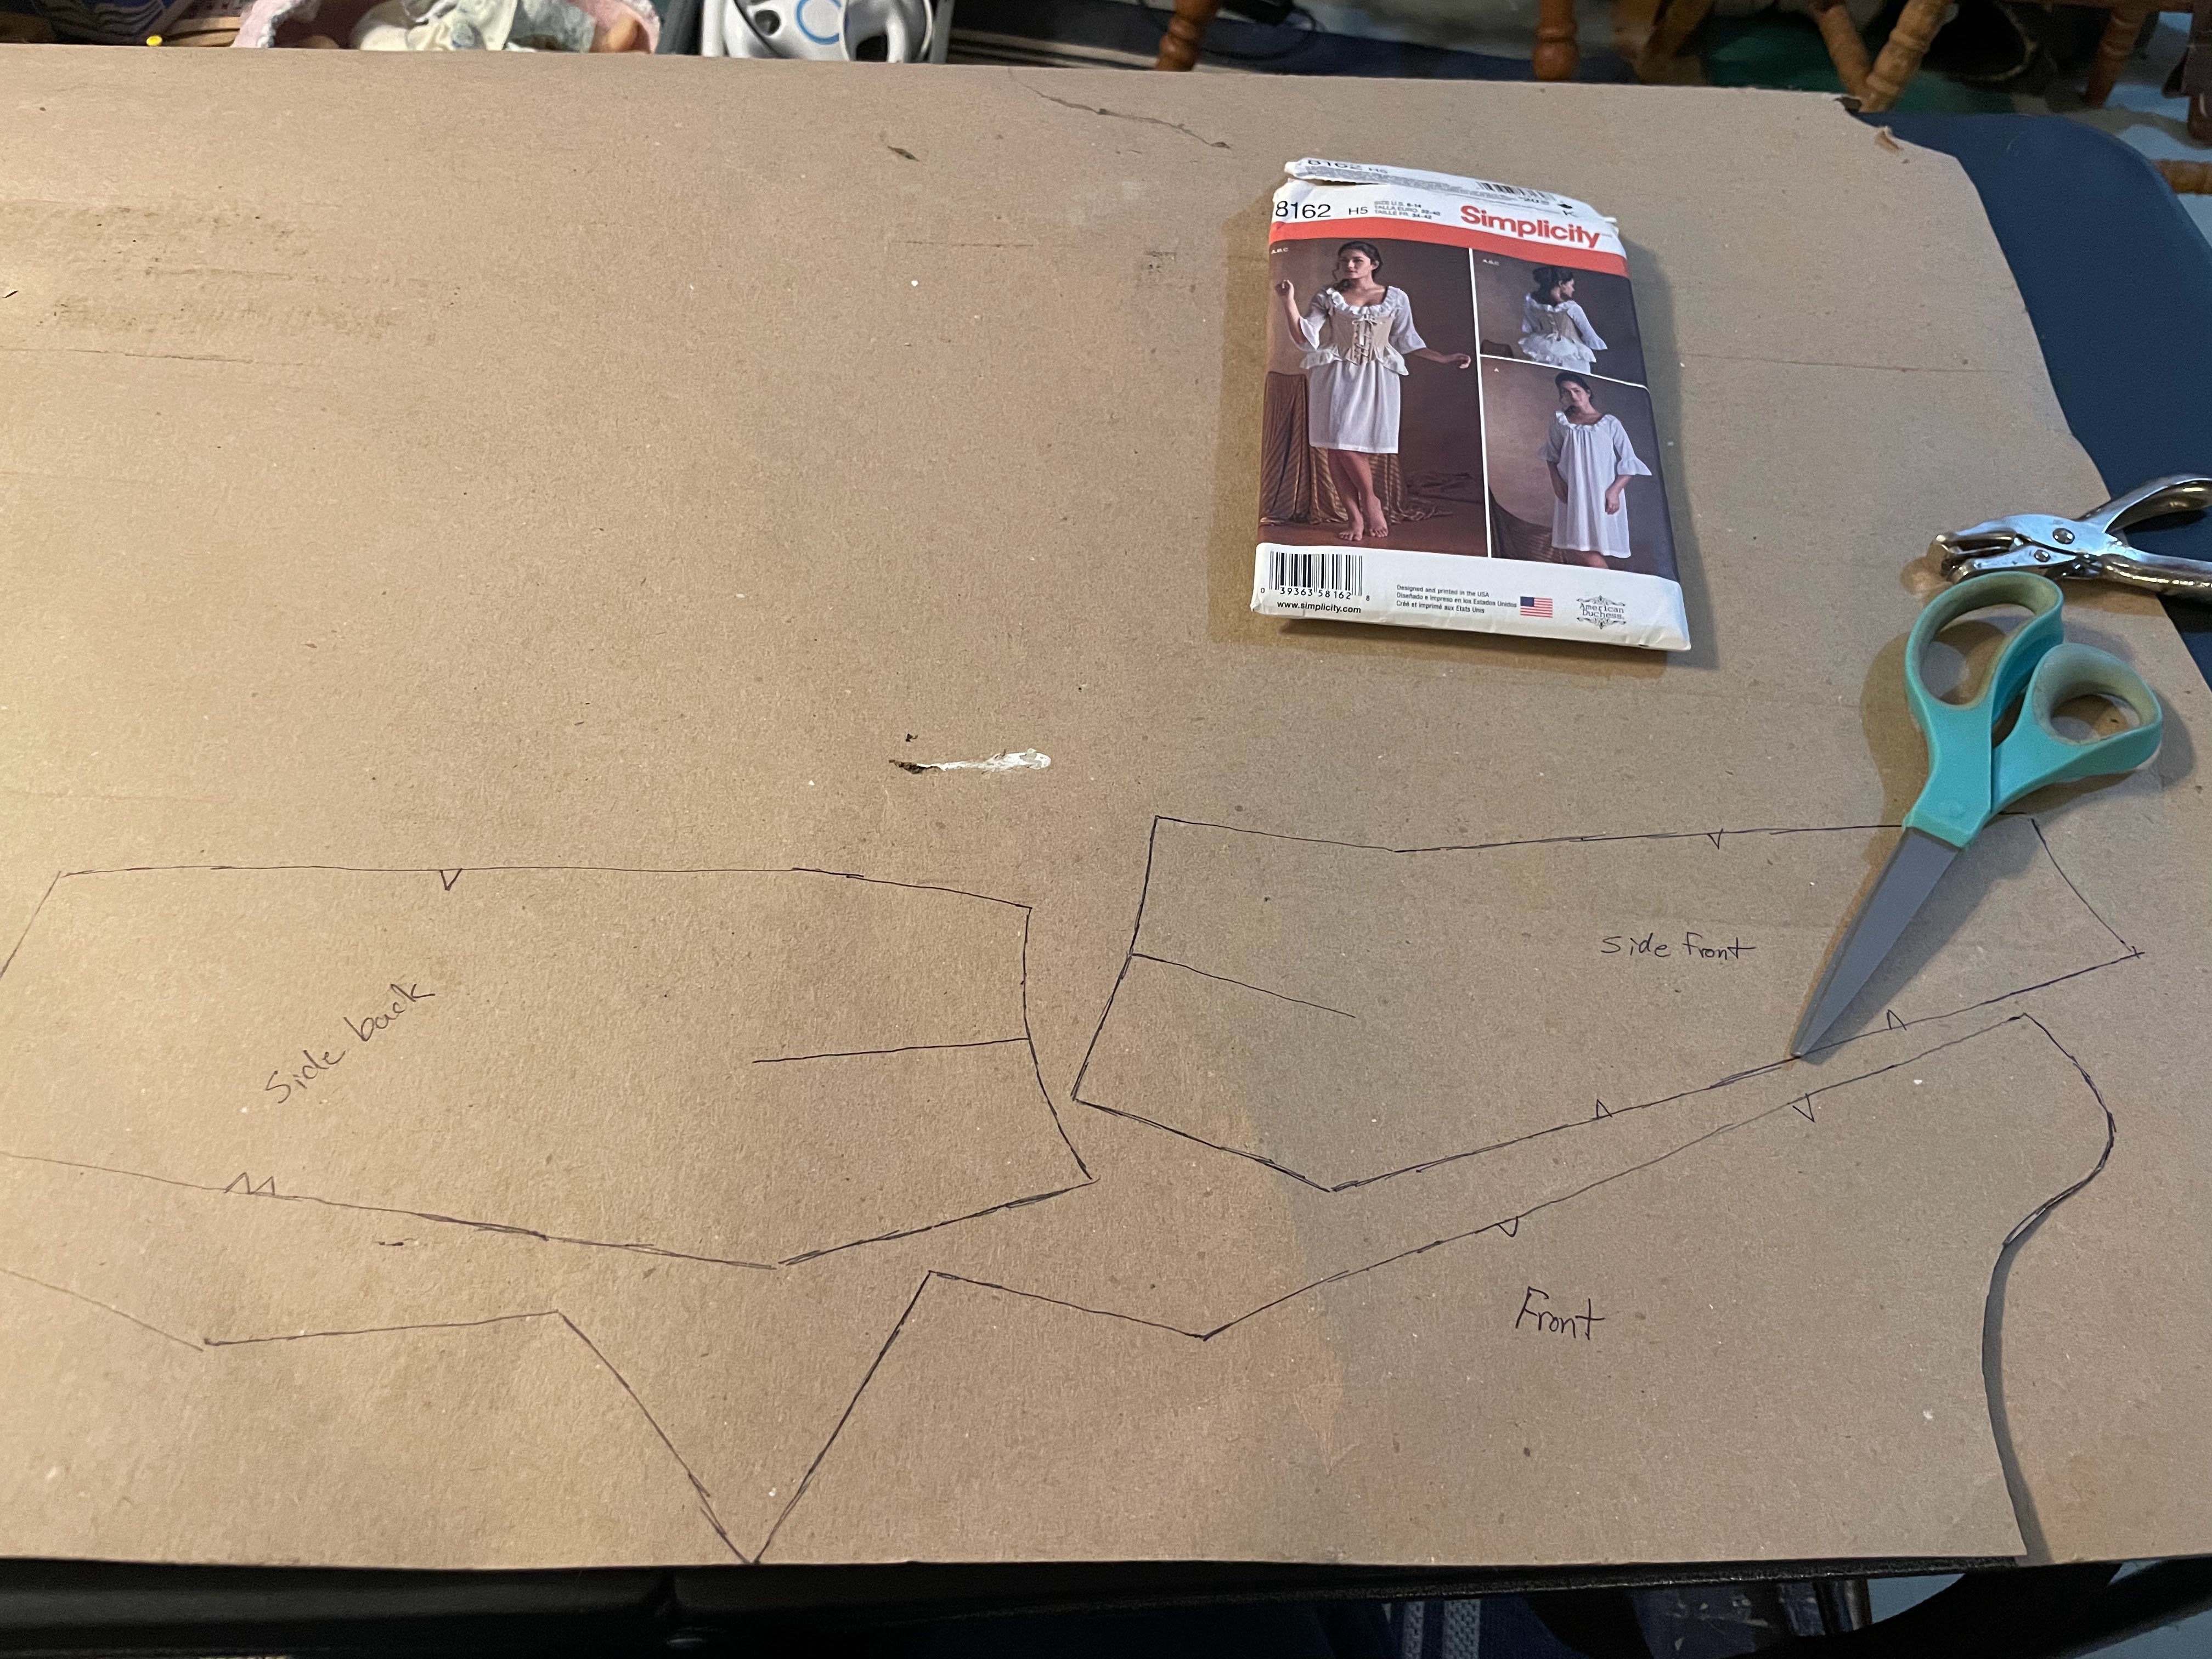
She picked out this pattern from my stash:

It is a fun, fantastical, medievalist pattern. I get the appeal. But. I wanted to make her something she could wear again in the future. (Boring practical big sister here.)
So I asked if we could make her a pair of 18th century stays as her lace up bodice. We’d been wanting to make her a pair to go under the dress I made her last year, and they would be very useful for future costume plans as well.
My sister wasn’t sold on the idea. I begged and attempted to convince. She explained her vision of her costume. We compromised.
18th century stays with tie on sleeves from the pattern (McCall's 4696) she liked.

Perfect! Something special for this play and something that could be used again in the future!
Major design element agreed upon thus, we moved on to the fabrics and secondary elements of the costume - skirt and shift.

The first fabric we picked out was a dark green faux wool from my stash for the skirt and tie-on sleeves.

The skirt was make similar to an 18th century petticoat only with sewn-in pockets and buttons on the sides rather than ties.

We decided a pale green would be ideal for the stays as that coordinate well with the dark green skirt and sleeves while also being pale enough to wear under future dresses. I found several cotton and linen “pale green” options in my fabric stash and my sister picked her favorite.

I envisioned a light tan for her shift, but nothing in my stash quite satisfied me. On a morning spent thrifting with my mom back in March I found just the thing - a tan cotton/linen blend curtain for $3. The right color and a linen blend?? (Linen is more comfortable for shifts than cotton, so given the choice I always pick linen or atleast a linen/cotton blend.) It was perfect!

I washed the curtain, seam ripped out the hems to get the most usable fabric possible, and made the shift!

I’ve made lots of shifts, but after I cut out all my rectangles, squares, and triangles for the thing I completely blanked on how to sew in the sleeve gussets by machine. I knew there was a way, I’d done it before, but my brain just wasn’t finding it. So I looked up my blog post from the first time I made shifts for my sister. In that blog post there was a link to the tutorial I’d followed.
I read through it and suddenly the gussets made sense again. (This is one of the reasons I try to blog all my makes, so when I forget something I can figure it out again later.)

The shift was made in a couple hours one afternoon, all by machine. I made it with long sleeves to resemble a medieval smock. (Gotta have a couple nods to “accuracy”)

I delivered the completed shift to my sister and took the opportunity to fit a cardboard stay mockup on her.

I used Simplicity 8162, the original American Duchess undergarment pattern, to make the stays.
I’ve heard this pattern is short waisted, but as my sister isn’t particularly tall or long waisted it fit her just fine. The only alterations needed were slightly lower armscyes and a slightly higher neckline.

I believe I used the pattern two sizes small than what my sister measured, as “Big 4” stays and corsets always run big. The shapes are good from my experience, you just have to size down 2-4 sizes to get the proper fit with the proper 2” lacing gap.

Upon returning home I cut out the stays from the pale green linen canvas we’d picked out, and I used a thrifted cotton twill curtain for the under lining.

The stays were constructed by machine as much as stays can be constructed by machine.

I didn’t bother marking the boning channels, instead I used the method that worked for me with my Augusta Stays. I kept the pattern pieces by the sewing machine and referenced them while “free handing” the lines of stitching.

Once again, it worked.

I boned the stays with heavy duty, extra long, harbor freight zip ties.

Then I whip stitched the bottom edge by hand. Due to the design of pattern (not my “wing it” boning channel method, this is literally the way the channels are marked on the pattern pieces) the bones are way too close to the edge of the tabs for machine sewing to work around the bottom edge.

The top edge didn’t have this problem thankfully so it got zig-zagged rather than whipped.

The seam allowances all got whip stitched down on the inside, and as with both pairs of my stays I skipped the lining. Maybe one day I’ll make a pair of lined stays, but that day has not yet come.

And then I sewed on the binding. Linen tape. By hand.

Yes, the free-range goats did “help”.

I know there are ways to bind tabs by machine, but I prefer to do it by hand, I’m sure my machine done attempts would be messy.

It wasn’t long before the only thing left to do on the stays was the eyelets for lacing up the front and back. I tried to convince myself just to use metal grommets. It would be fine. These stays didn’t need to be historically accurate. Metal grommets would be so fast and easy!
But I couldn’t do it. 18th century stays are “supposed” to have hand-sewn thread eyelets, and hand sewn thread eyelets (for spiral lacing of course!) these would have!

I didn’t bother marking my eyelet placement. I just used my thread spool as a guide to eventually space each one, and used the hole in the middle as my guide to off-set the top and bottom holes for the aforementioned spiral lacing.

I laced up the stays with 1/4” linen tape and thread wrapped the ends so the stays would be easier to unlace and re-lace for dress rehearsals and performances.

I sewed three eyelets on each shoulder strap for tying on the detachable sleeves.

The ties for the sleeves did not get thread wrapped. And the sleeves did not get hand sewn eyelets.

The sleeves were sewn from the same faux wool as the skirt and lined in brown cotton/poly broadcloth. (This brown fabric was also used in the skirt as pockets.) From cut-out to completion it was only an hour or two. All machine sewn. Even the lacing holes. Those are just little machine sewn button holes.

I tied the sleeves together with cotton cord and tied them onto the stays the morning my mom and sister arrived to pick them up!

And that was the last I saw of the costume until production week.
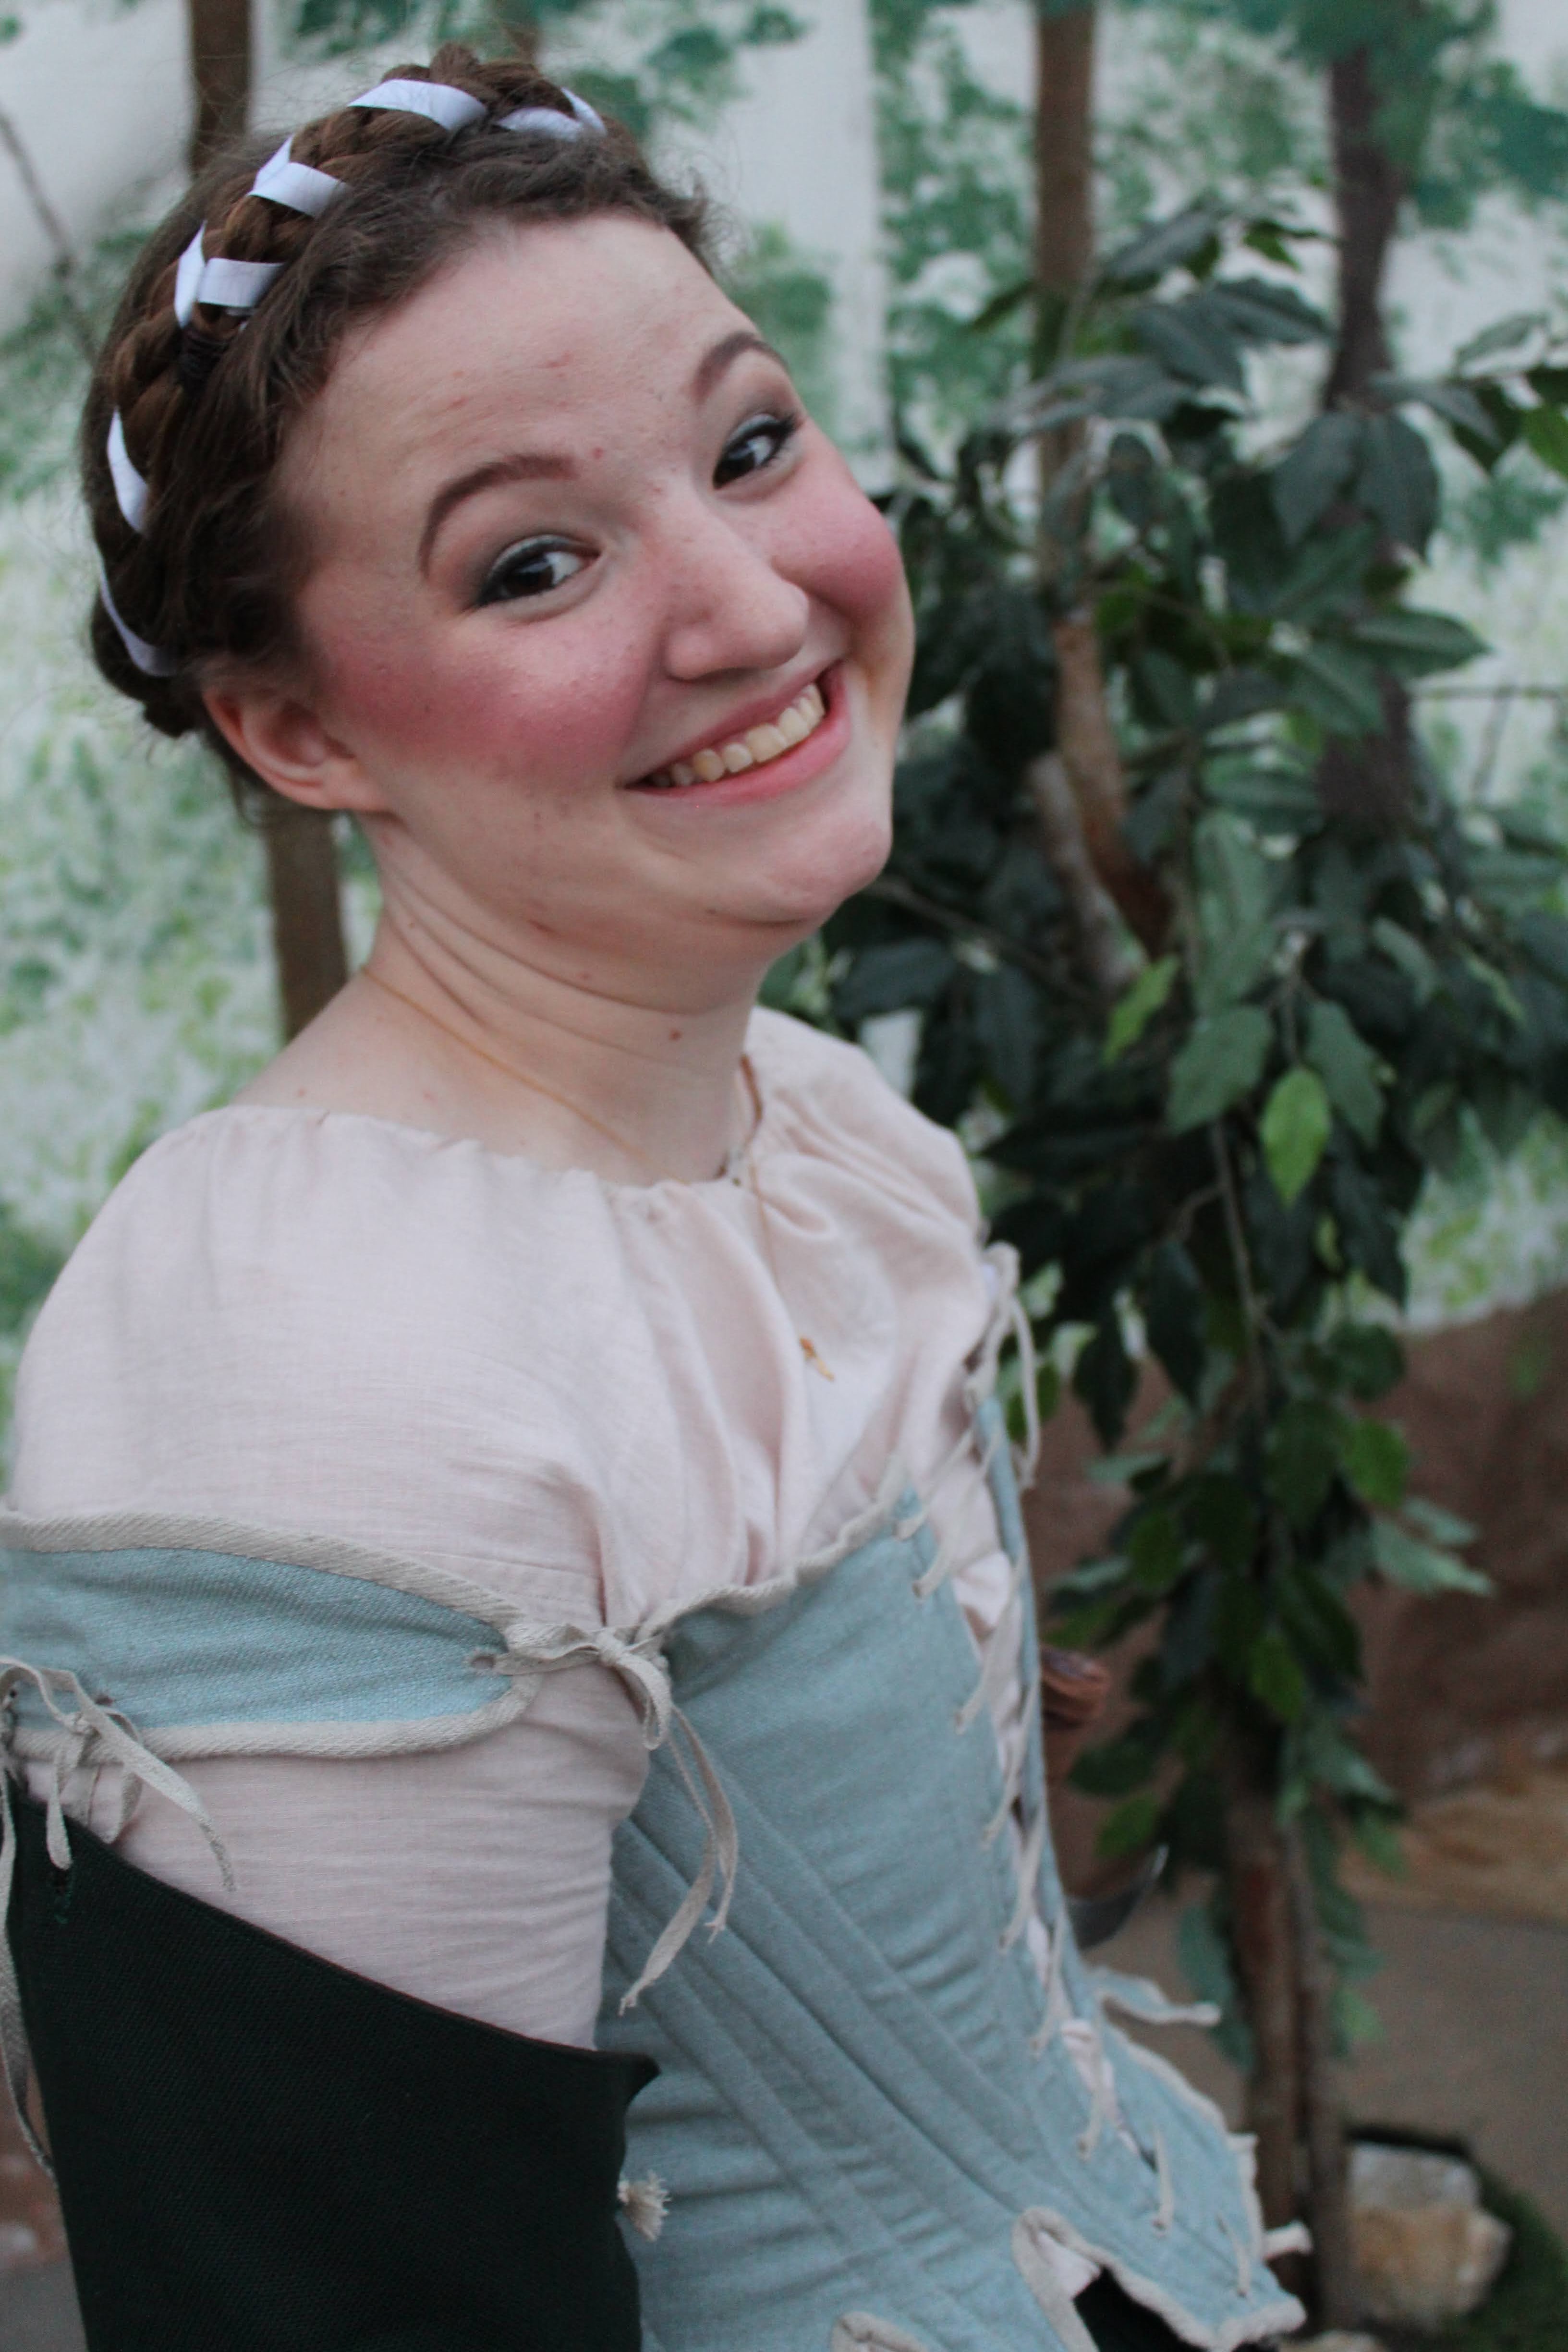
My mom sent me a picture of my sister all dressed up at the first dress rehearsal and I was thrilled!

The whole look had come together beautifully!

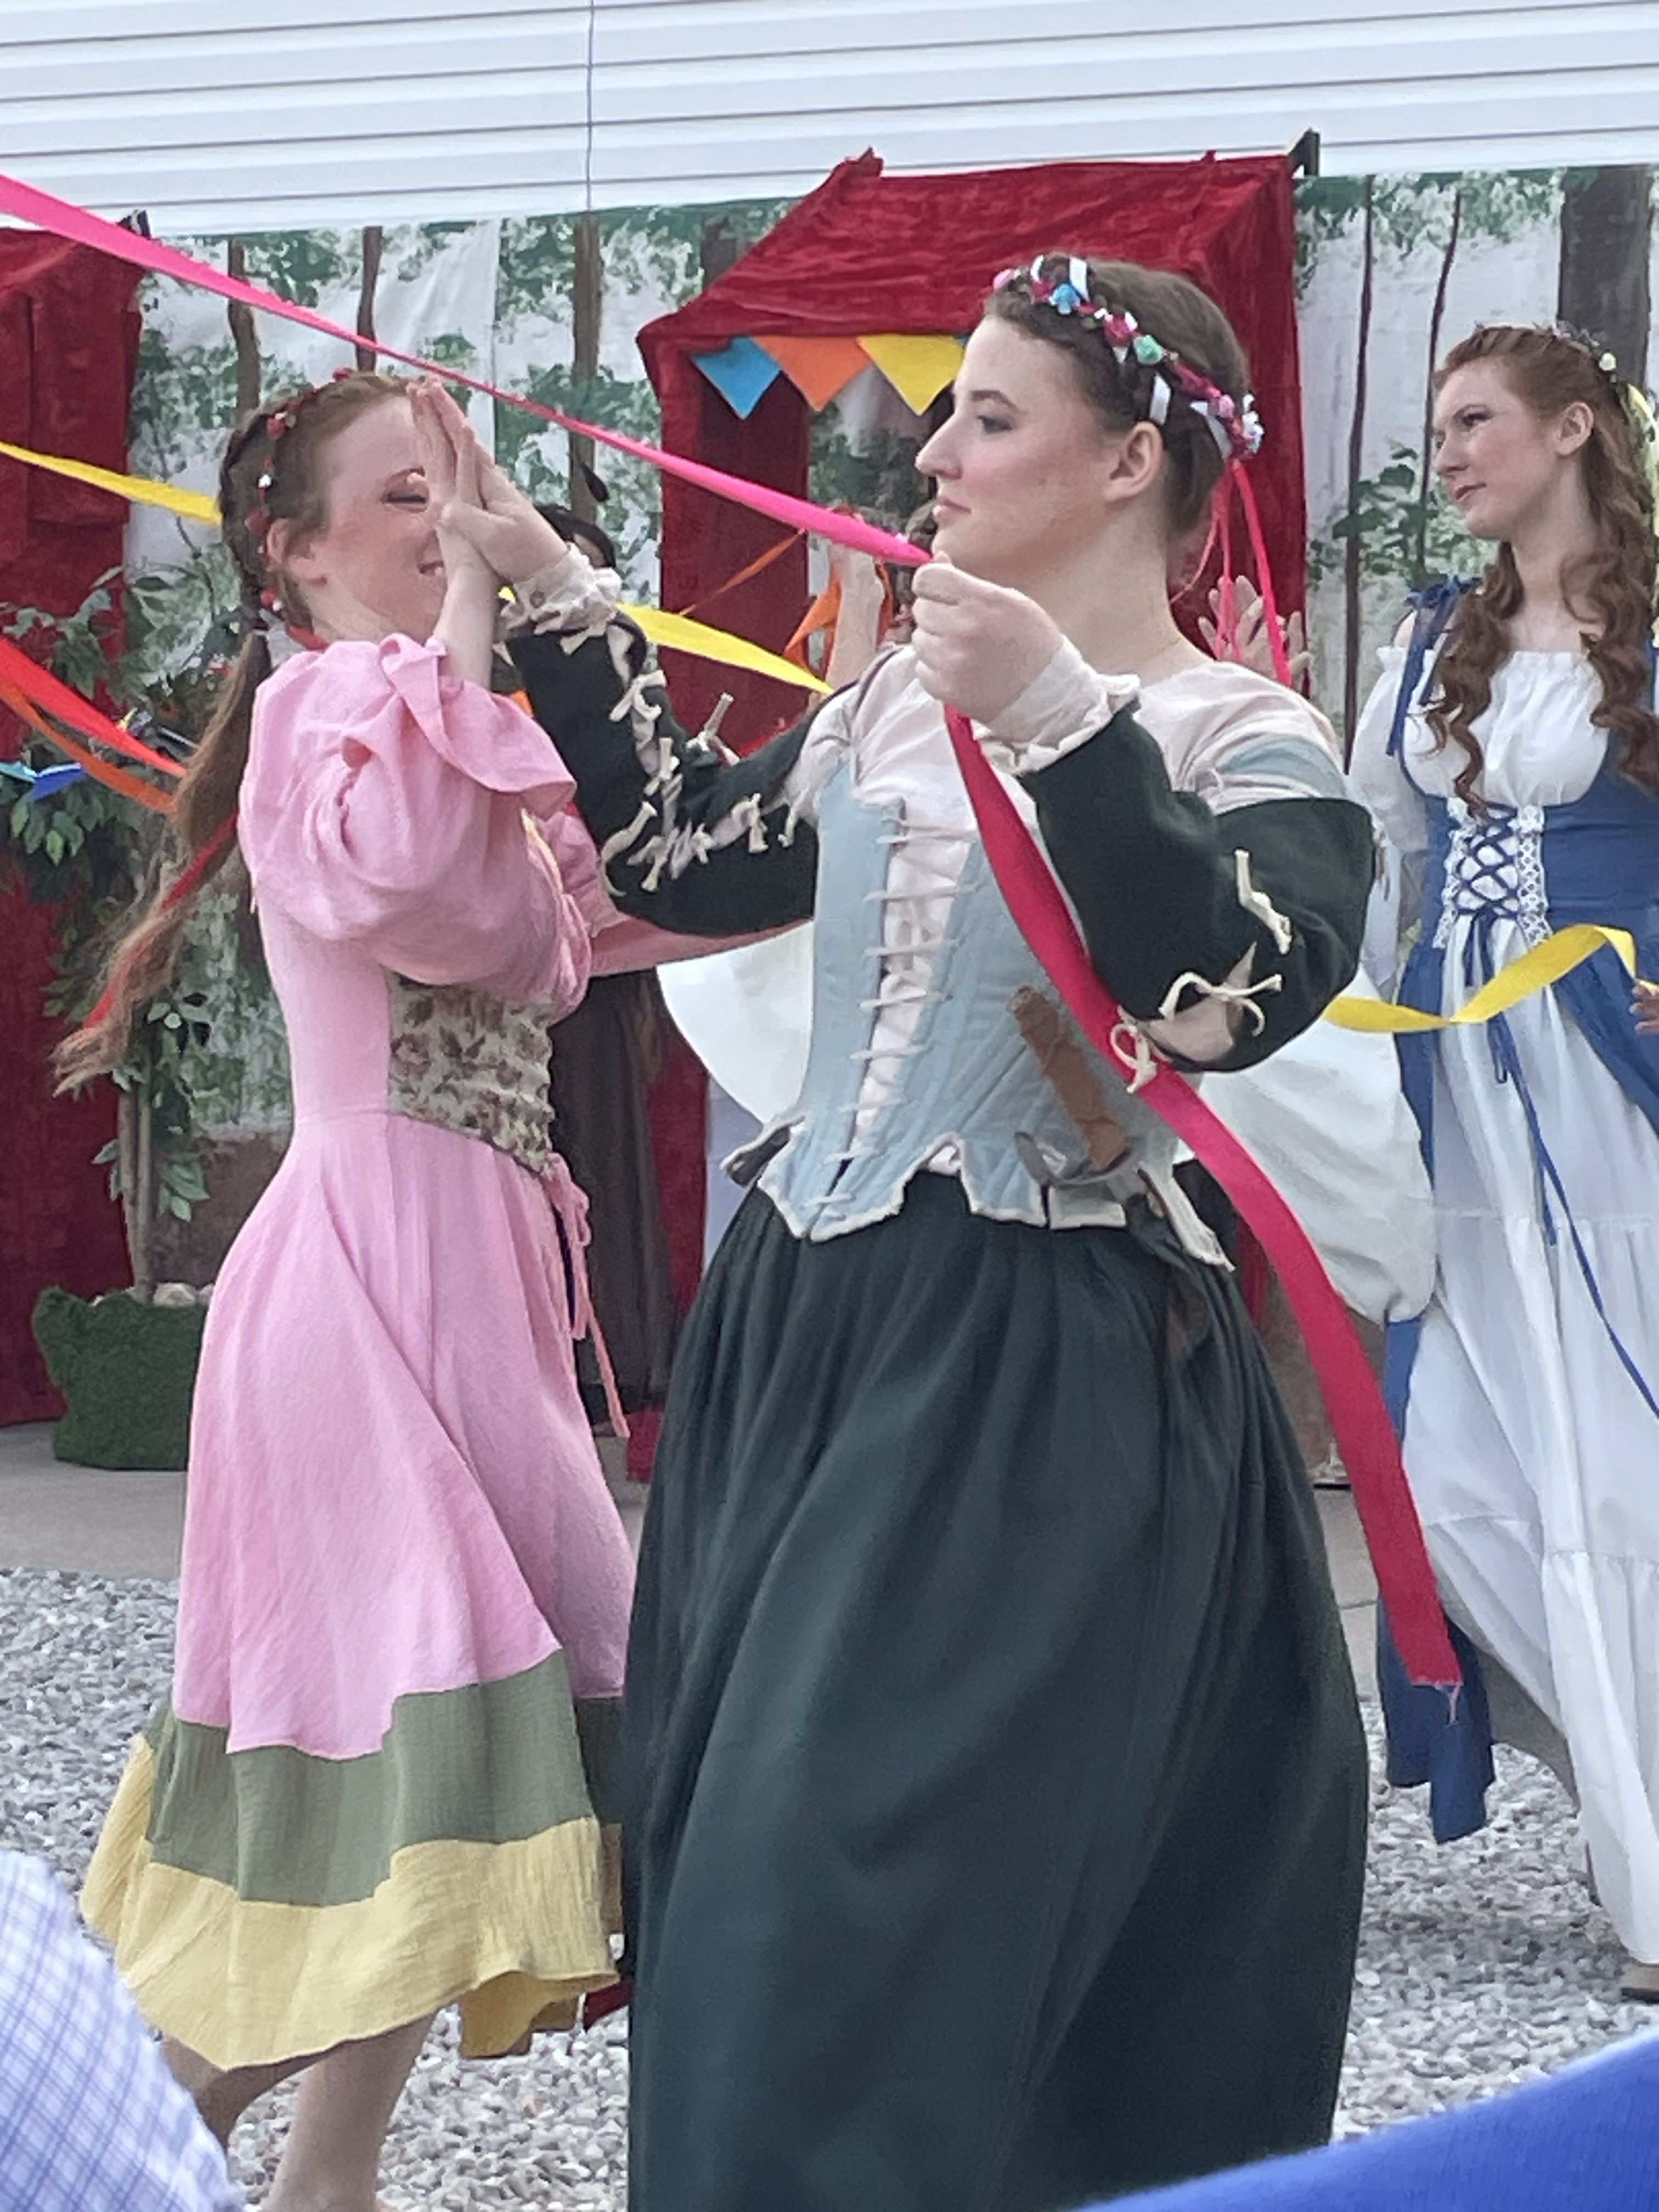
We went to see the play on opening night, and my sister played her character perfectly!

She gave so much personality to Mother Meg!

Gossiping with village women.

Fighting off Prince John’s supporters.

Dancing at the Faire.
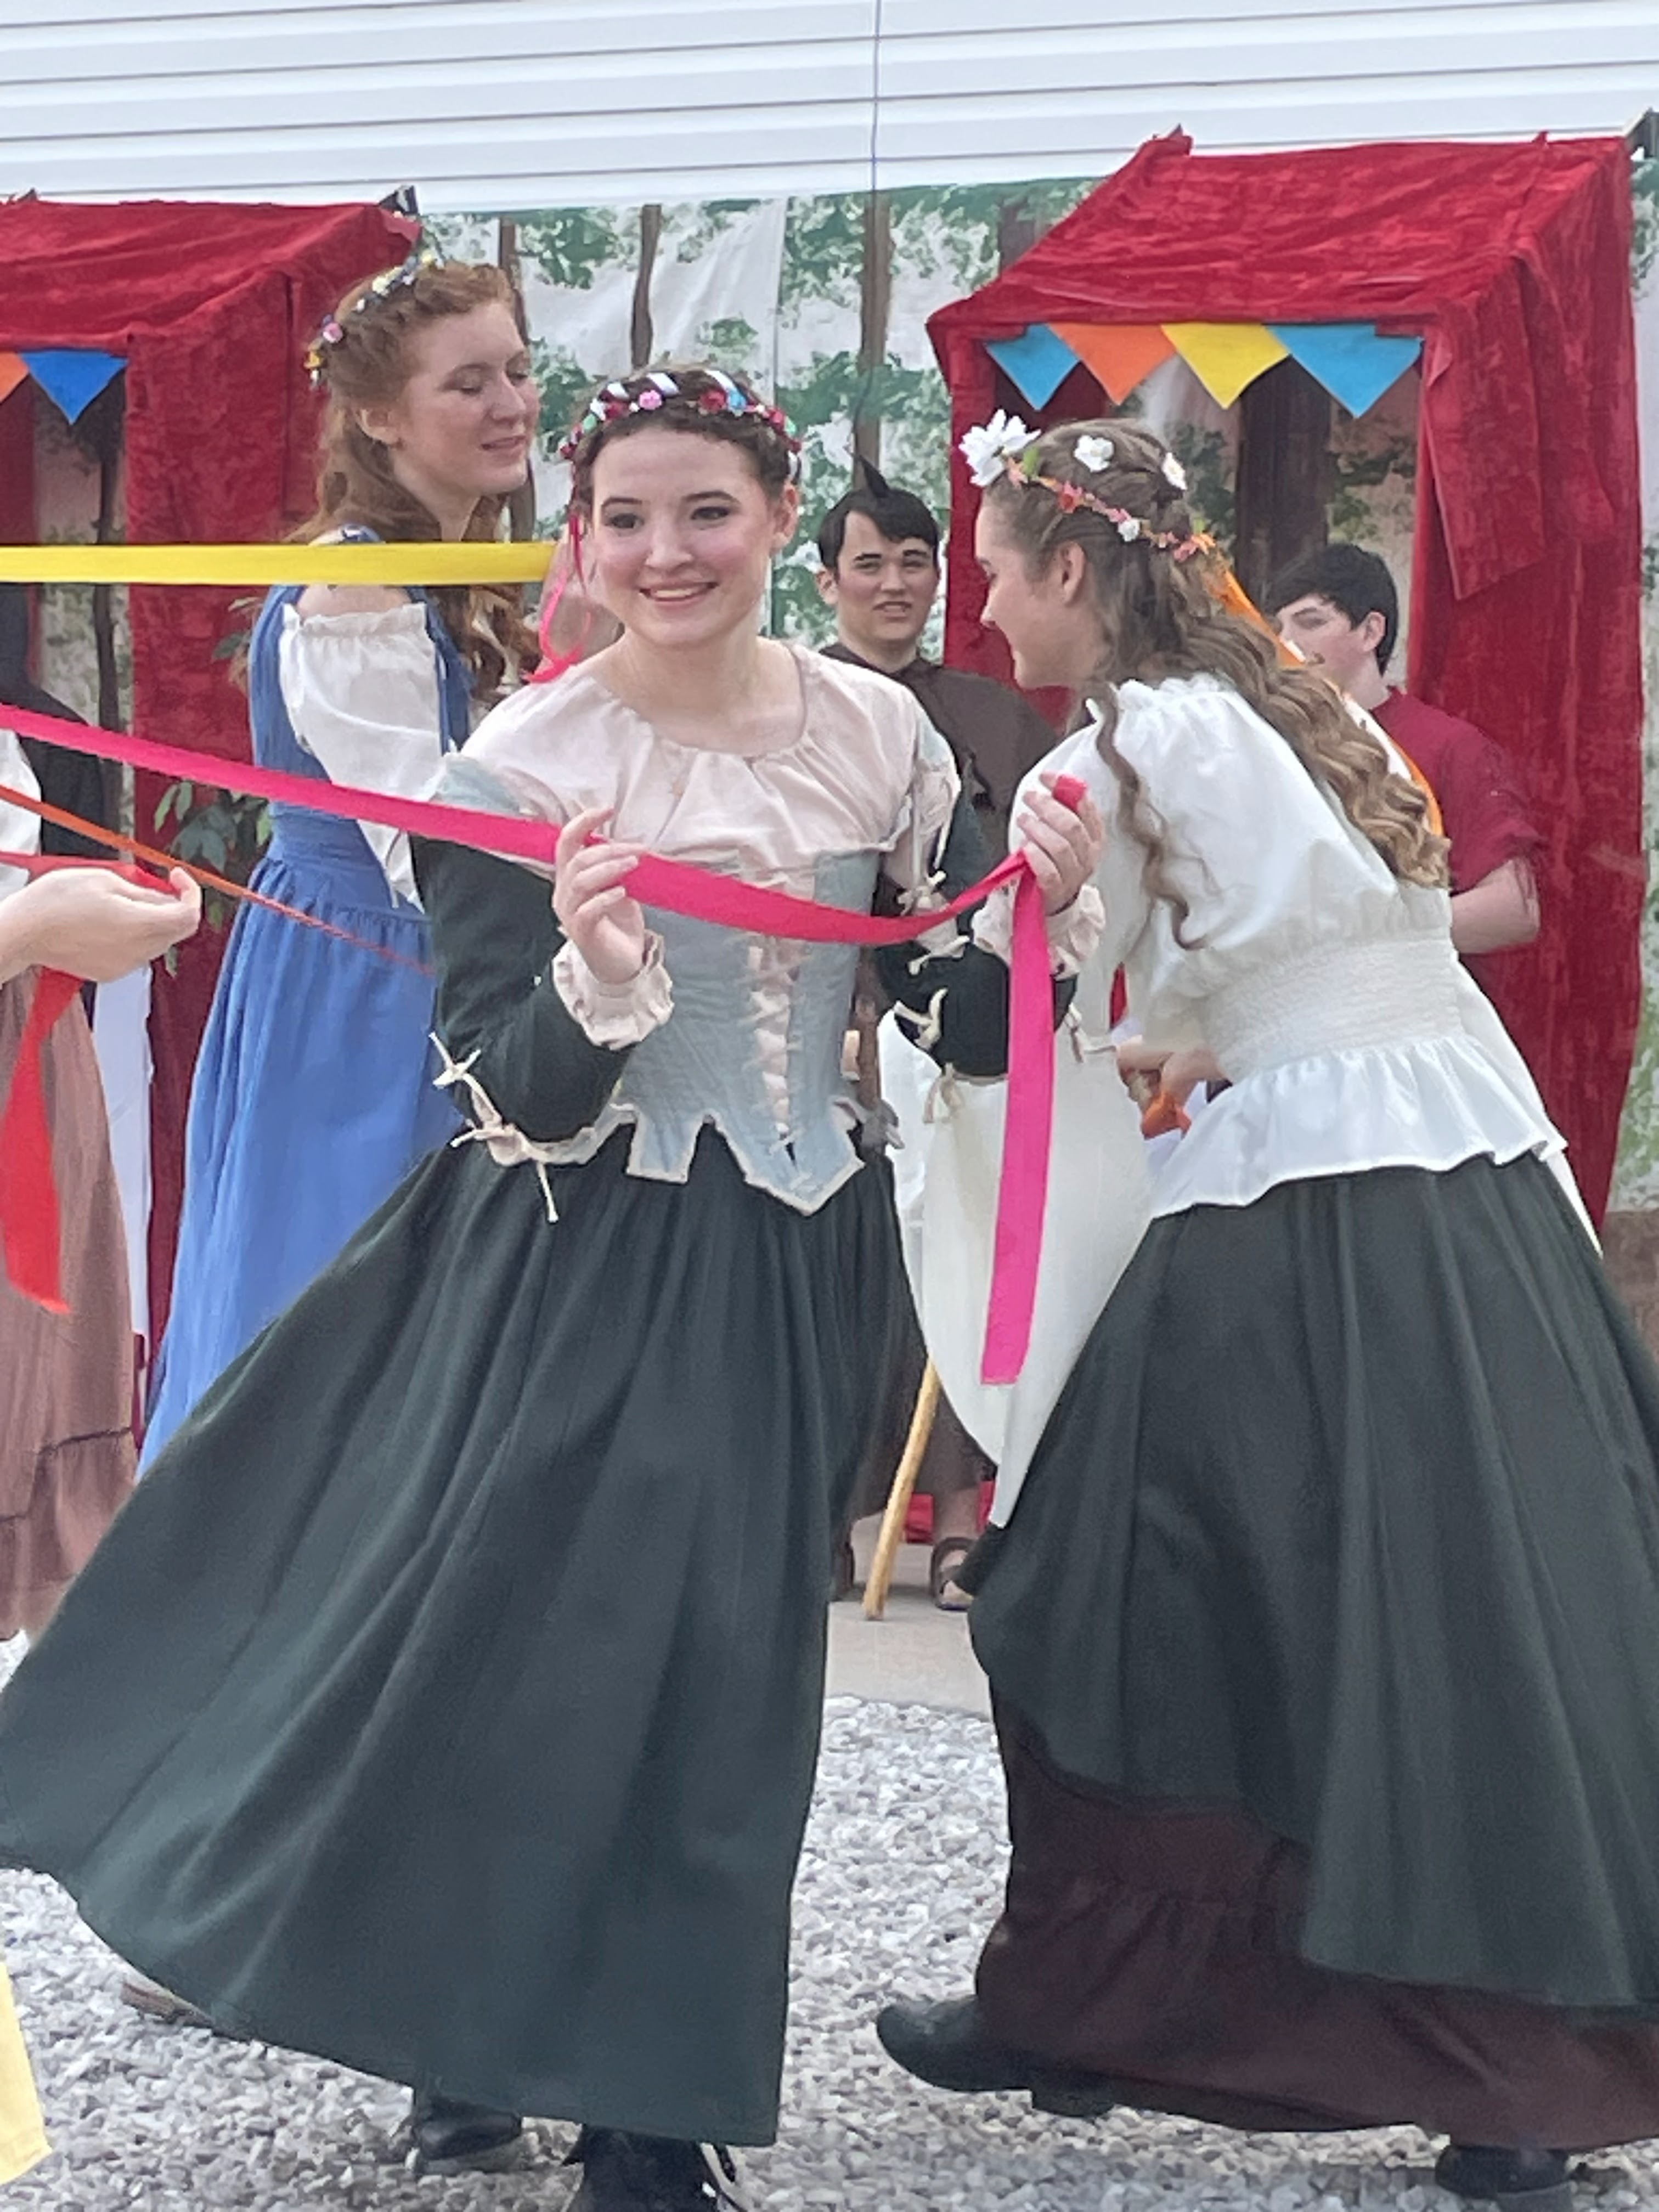
She was brilliant!

And the play was a lot of fun to watch!

Large Harbor Freight zip ties!!!!
ReplyDeleteWow--stunning! That looks great and very Robin Hood-esque.
ReplyDelete-Erin