Sunday, November 21, 2021

1830's Alice in Wonderland

 Back in the spring, when I was making all my wedding things, I thought that maybe, one day, possibly, sometime in the future, I might make a historical bodice of some sort to go with my blue silk petticoat. The petticoat was so pretty, I loved the sheen of the silk, so why not use it as the skirt for a gown?

Dupioni Silk and modern bridal lace trim might not be the most historically accurate of fabrics, but the silhouette would work well for the 1830's through 1850's, it was beautifully cartridge pleated to the waistband, and, after all, it was real silk, even if it wasn't the right kind of silk for the 19th century.


This "maybe one day I'll make a bodice to go with this blue silk skirt" idea got sped up a bit when my husband and I decided to dress up as Alice and the Mad Hatter for Halloween. In the live action  Alice in Wonderland movie Alice wears a blue dress with a wide ruffle at the bottom. Sound a bit like my petticoat?


Alice's bodice has short puffed sleeves, a basque (pointed) waist, buttons down the front, and white trim around the neckline. I could certainly make a historical bodice which incorporated a few of these elements! My goal wasn't a "screen accurate" Alice costume, just an Alice-inspired historical costume, if that makes sense.  


My initial idea was an 1840s evening bodice similar to this one from the movie The Young Victoria. But then I started looking at fashion plates. I came across several prints for 1830's evening gowns with wide ruffles at the bottom of the skirt - just like what my petticoat had. 


I came across this 1836 fashion plate on Pinterest and fell in love! Short puffed sleeves, basque waist, white trim around the neckline, it would work for Alice! All it was missing was the buttons, but I didn't love those anyway, so I was happy to leave them off. This was the bodice I was going to make for my Halloween costume!


On my next trip home to visit my parents, I grabbed the remaining blue silk curtain panel and a half  from my fabric stash, and a handful of patterns to mash together to make this bodice. 
I grabbed the bodice pattern from my 1840's black wool dress, because I thought the 1840's shape and basque waist pattern might be helpful, but I wound up not needing it.


For the bodice itself, I traced off the bodice lining and bodice overlay pieces from Butterick B5832. (The pattern I used for my purple plaid wool dress.) I then adjusted the neckline and the curve of the front overlap to match the fashion plate and changed the bottom edge of the bodice from straight across to pointed. I made no changes to the back bodice pieces.


For the sleeves I used the sleeve pattern from McCall's 8017, and just pleated sleeves to match the fashion plate, rather than gathering as the pattern suggested.


The flat lining was cut from a cotton percale sheet I had on hand, and the outer pieces were all cut from the remaining silk curtain panel. I used heavy duty zip ties for boning at the center front and side seams and made the bone casings from some cotton twill tape I had on hand. The back seams, armscyes, neckline and bottom edge were all piped. I decided to have the back fasten up with hooks and eyes, as that's less fiddley and time consuming than lacing is. Both lacing and hooks and eyes were common back fastenings for evening gowns of this era.


   I started by assembling the front flat lining - sewing up the darts and the center front seam. Then I layered on the blue silk pieces to get the overlap shown in the fashion plate - right over left, trimmed in lace.


Once the front was assembled, I sewed it to the back then added even more lace.


All around the neckline is a wide lace ruffle. I used the same lace I used for the sleeve ruffles on my Edwardian evening gown last year.


Over that, and on the sleeve cuffs, and all around the bottom edge of the bodice, is a narrower lace frill.


I got this HUGE (over 100 yards!) roll of 1" wide lace trim from the local sewing room that sells donated fabric and notions for $1 per pound. It was just what I needed for the frills on this lace hog of a bodice! (I still have plenty left over for future projects too of course!)


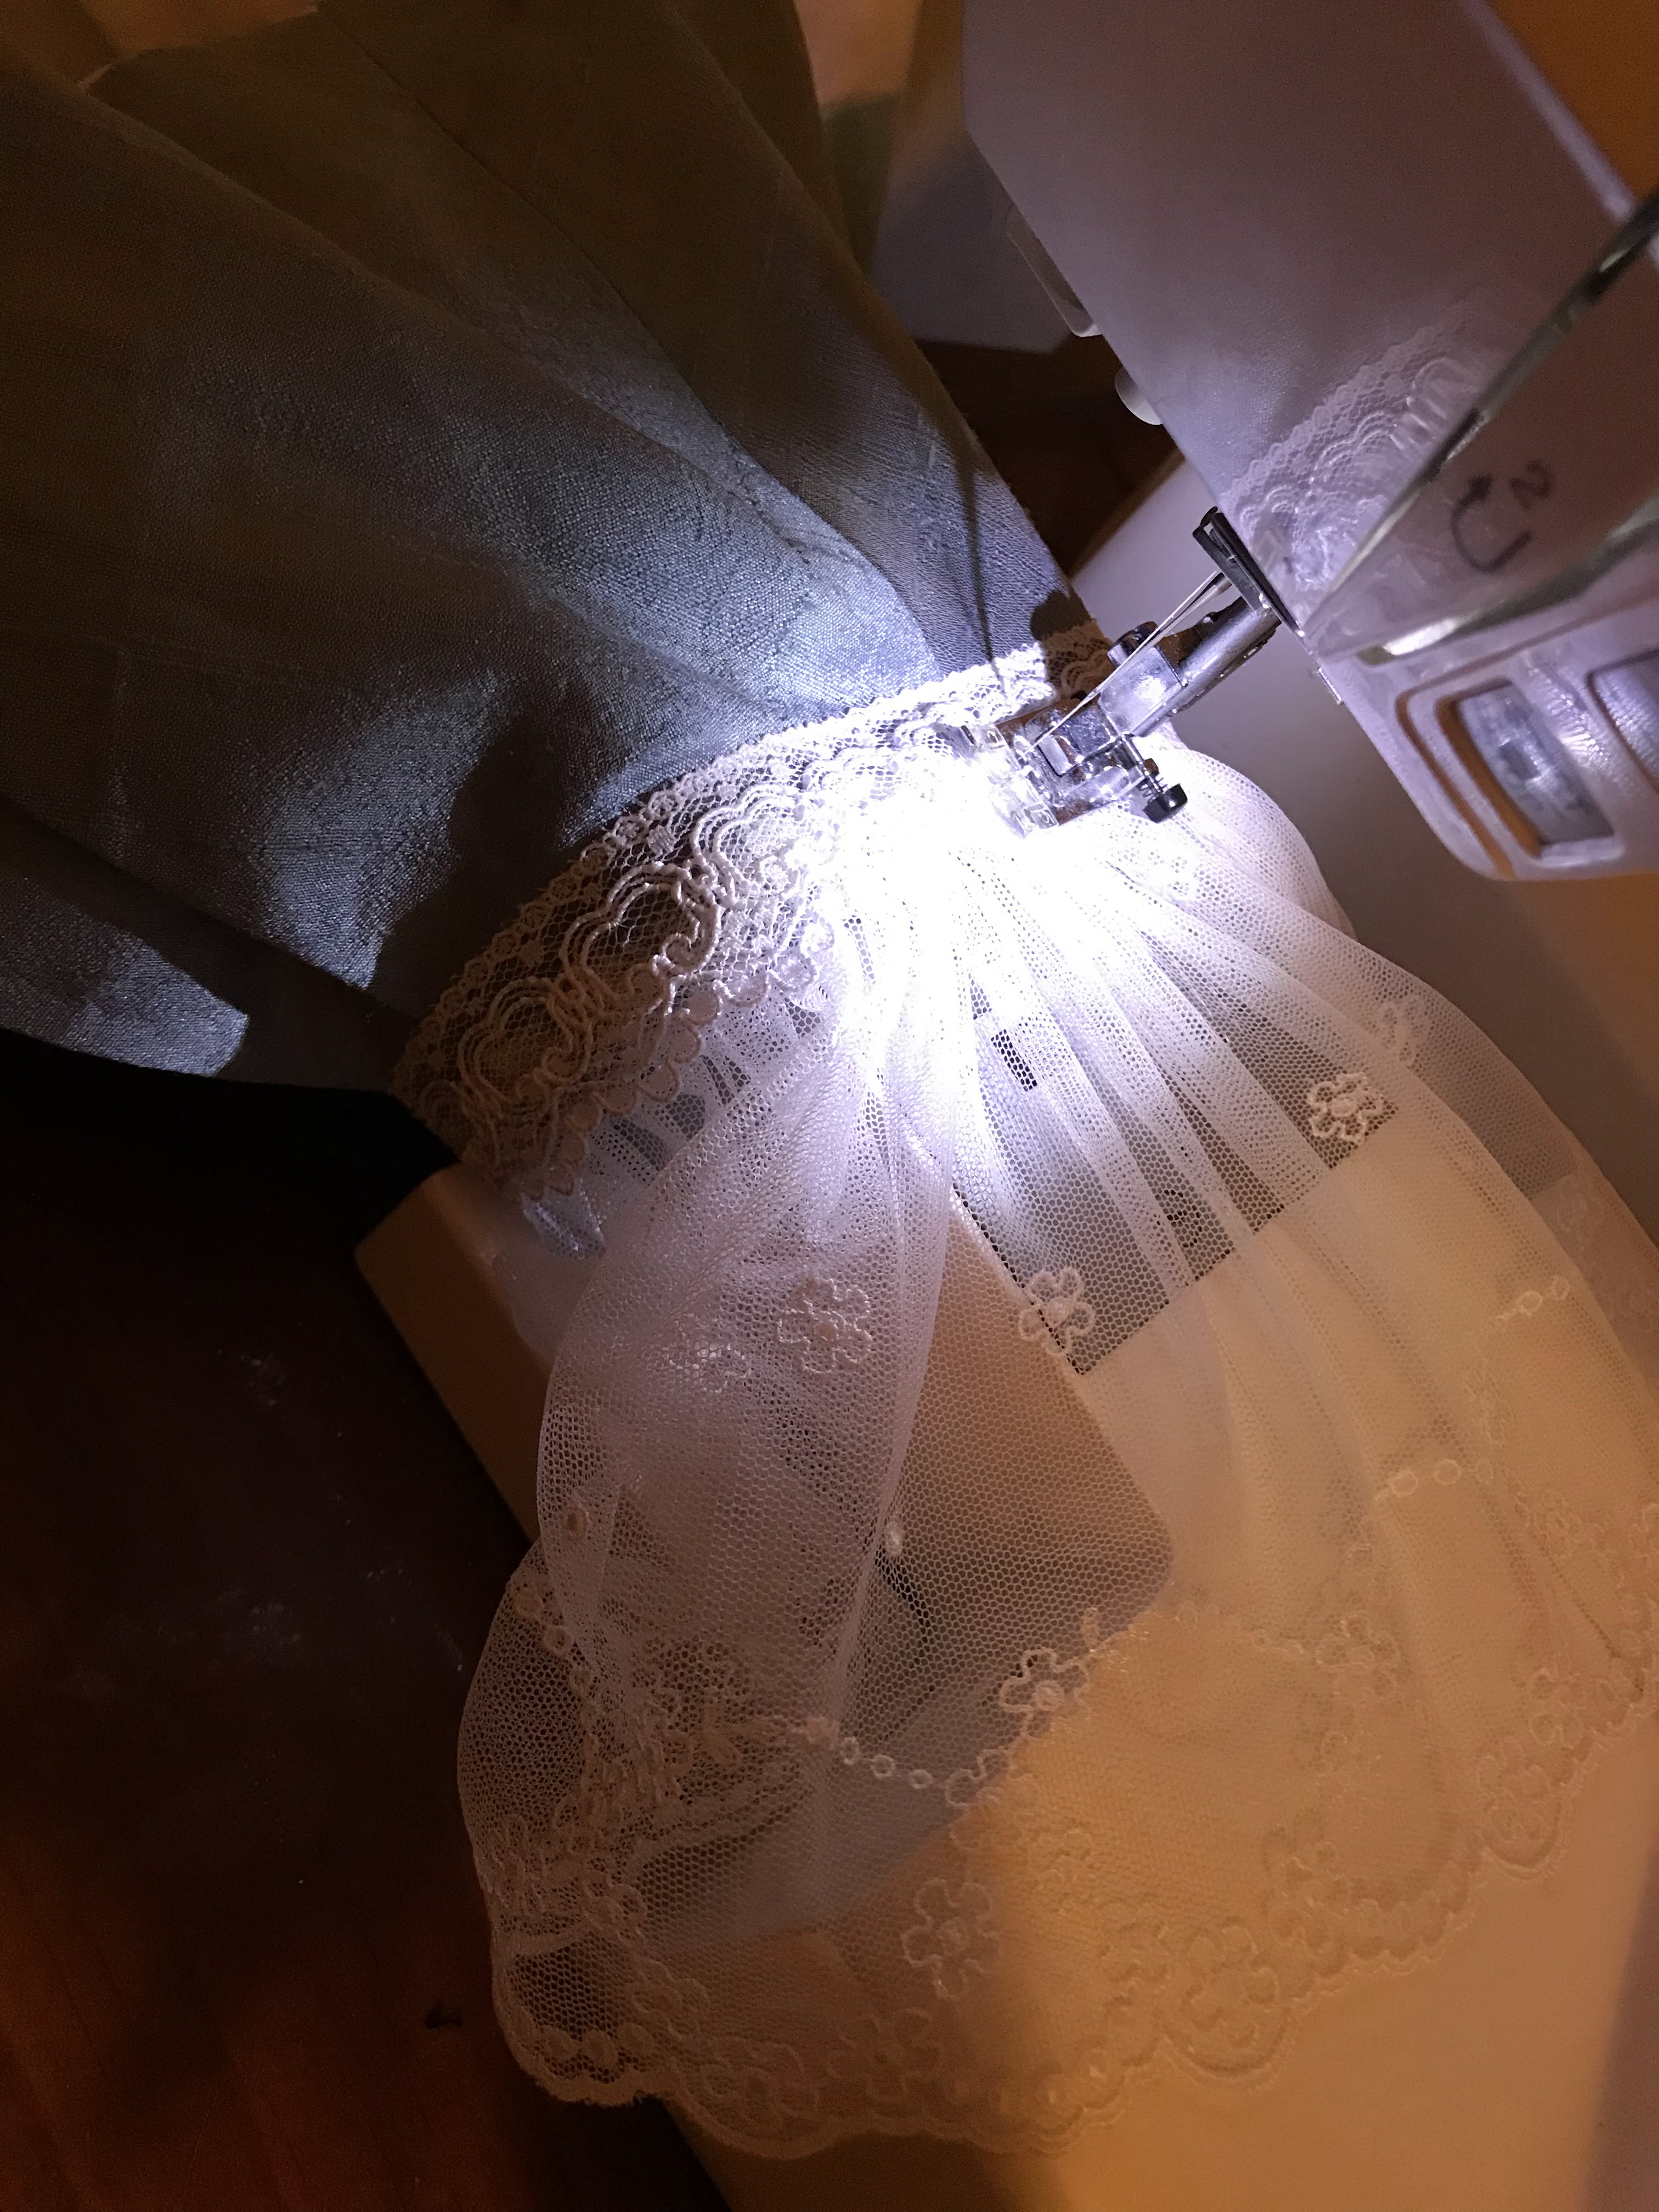
All the lace was sewn on by machine. The stitching blends in to the lace design just fine, and I didn't have time to do much hand sewing on this bodice - I only allowed myself one week to make it!


Thus, the bodice is entirely constructed by machine, with some hand finishing work - which the kittens attempted to help with.


The sleeves are trimmed with wide lace ruffles, made from the same net lace I used for the collar of my wedding dress


The finishing touch on the sleeves are big 4-loop bows made from scraps of silk.


The bodice was made, start to finish, in one week.


Since I'd used this bodice pattern before, and the dress I made from it still fits me, I didn't bother making a mock-up.


I didn't take any time to do any fittings during construction either, so on Halloween I just hoped it would fit alright.


Thankfully, it did!


Ok, it was a little tight, but my husband managed to get all the hooks and eyes done up so we're calling it good!


I threw on a white apron I'd made in one evening to hopefully give the dress a bit more of an "Alice in Wonderland" look, left my hair loose, and I was ready for our evening.


We went over to our friends' house for dinner, a movie, and to hand out candy to trick-or-treaters.


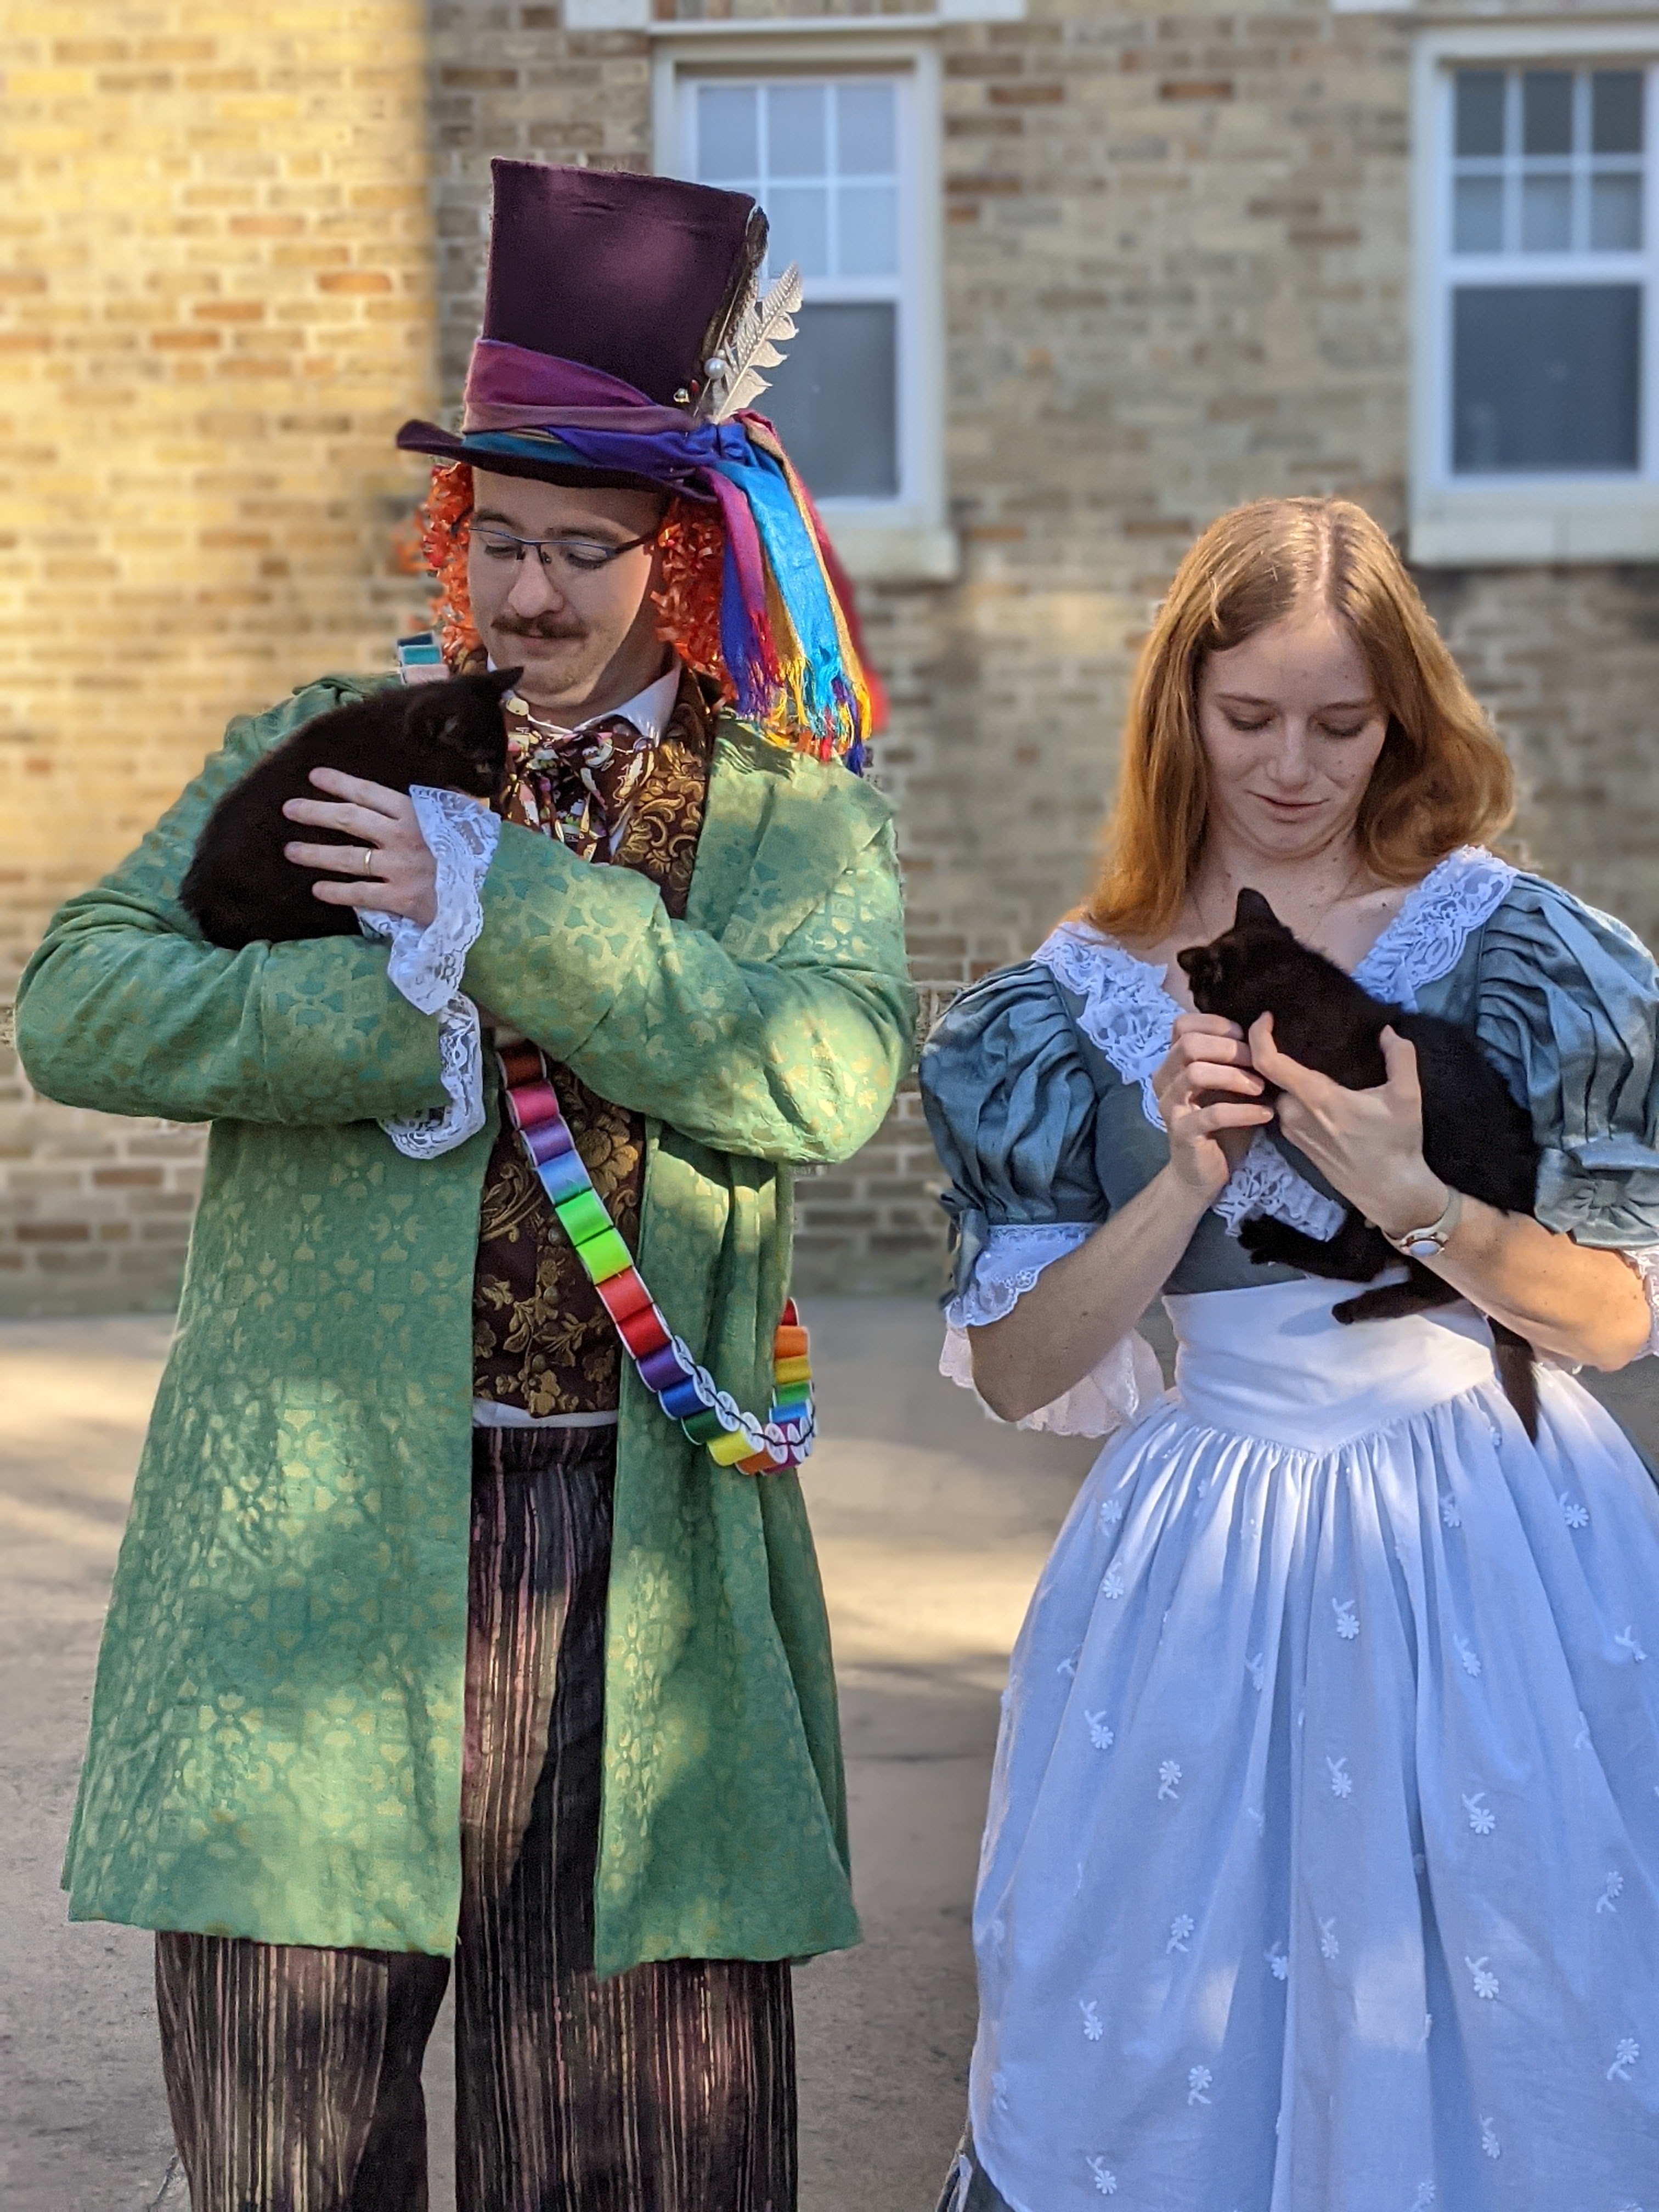
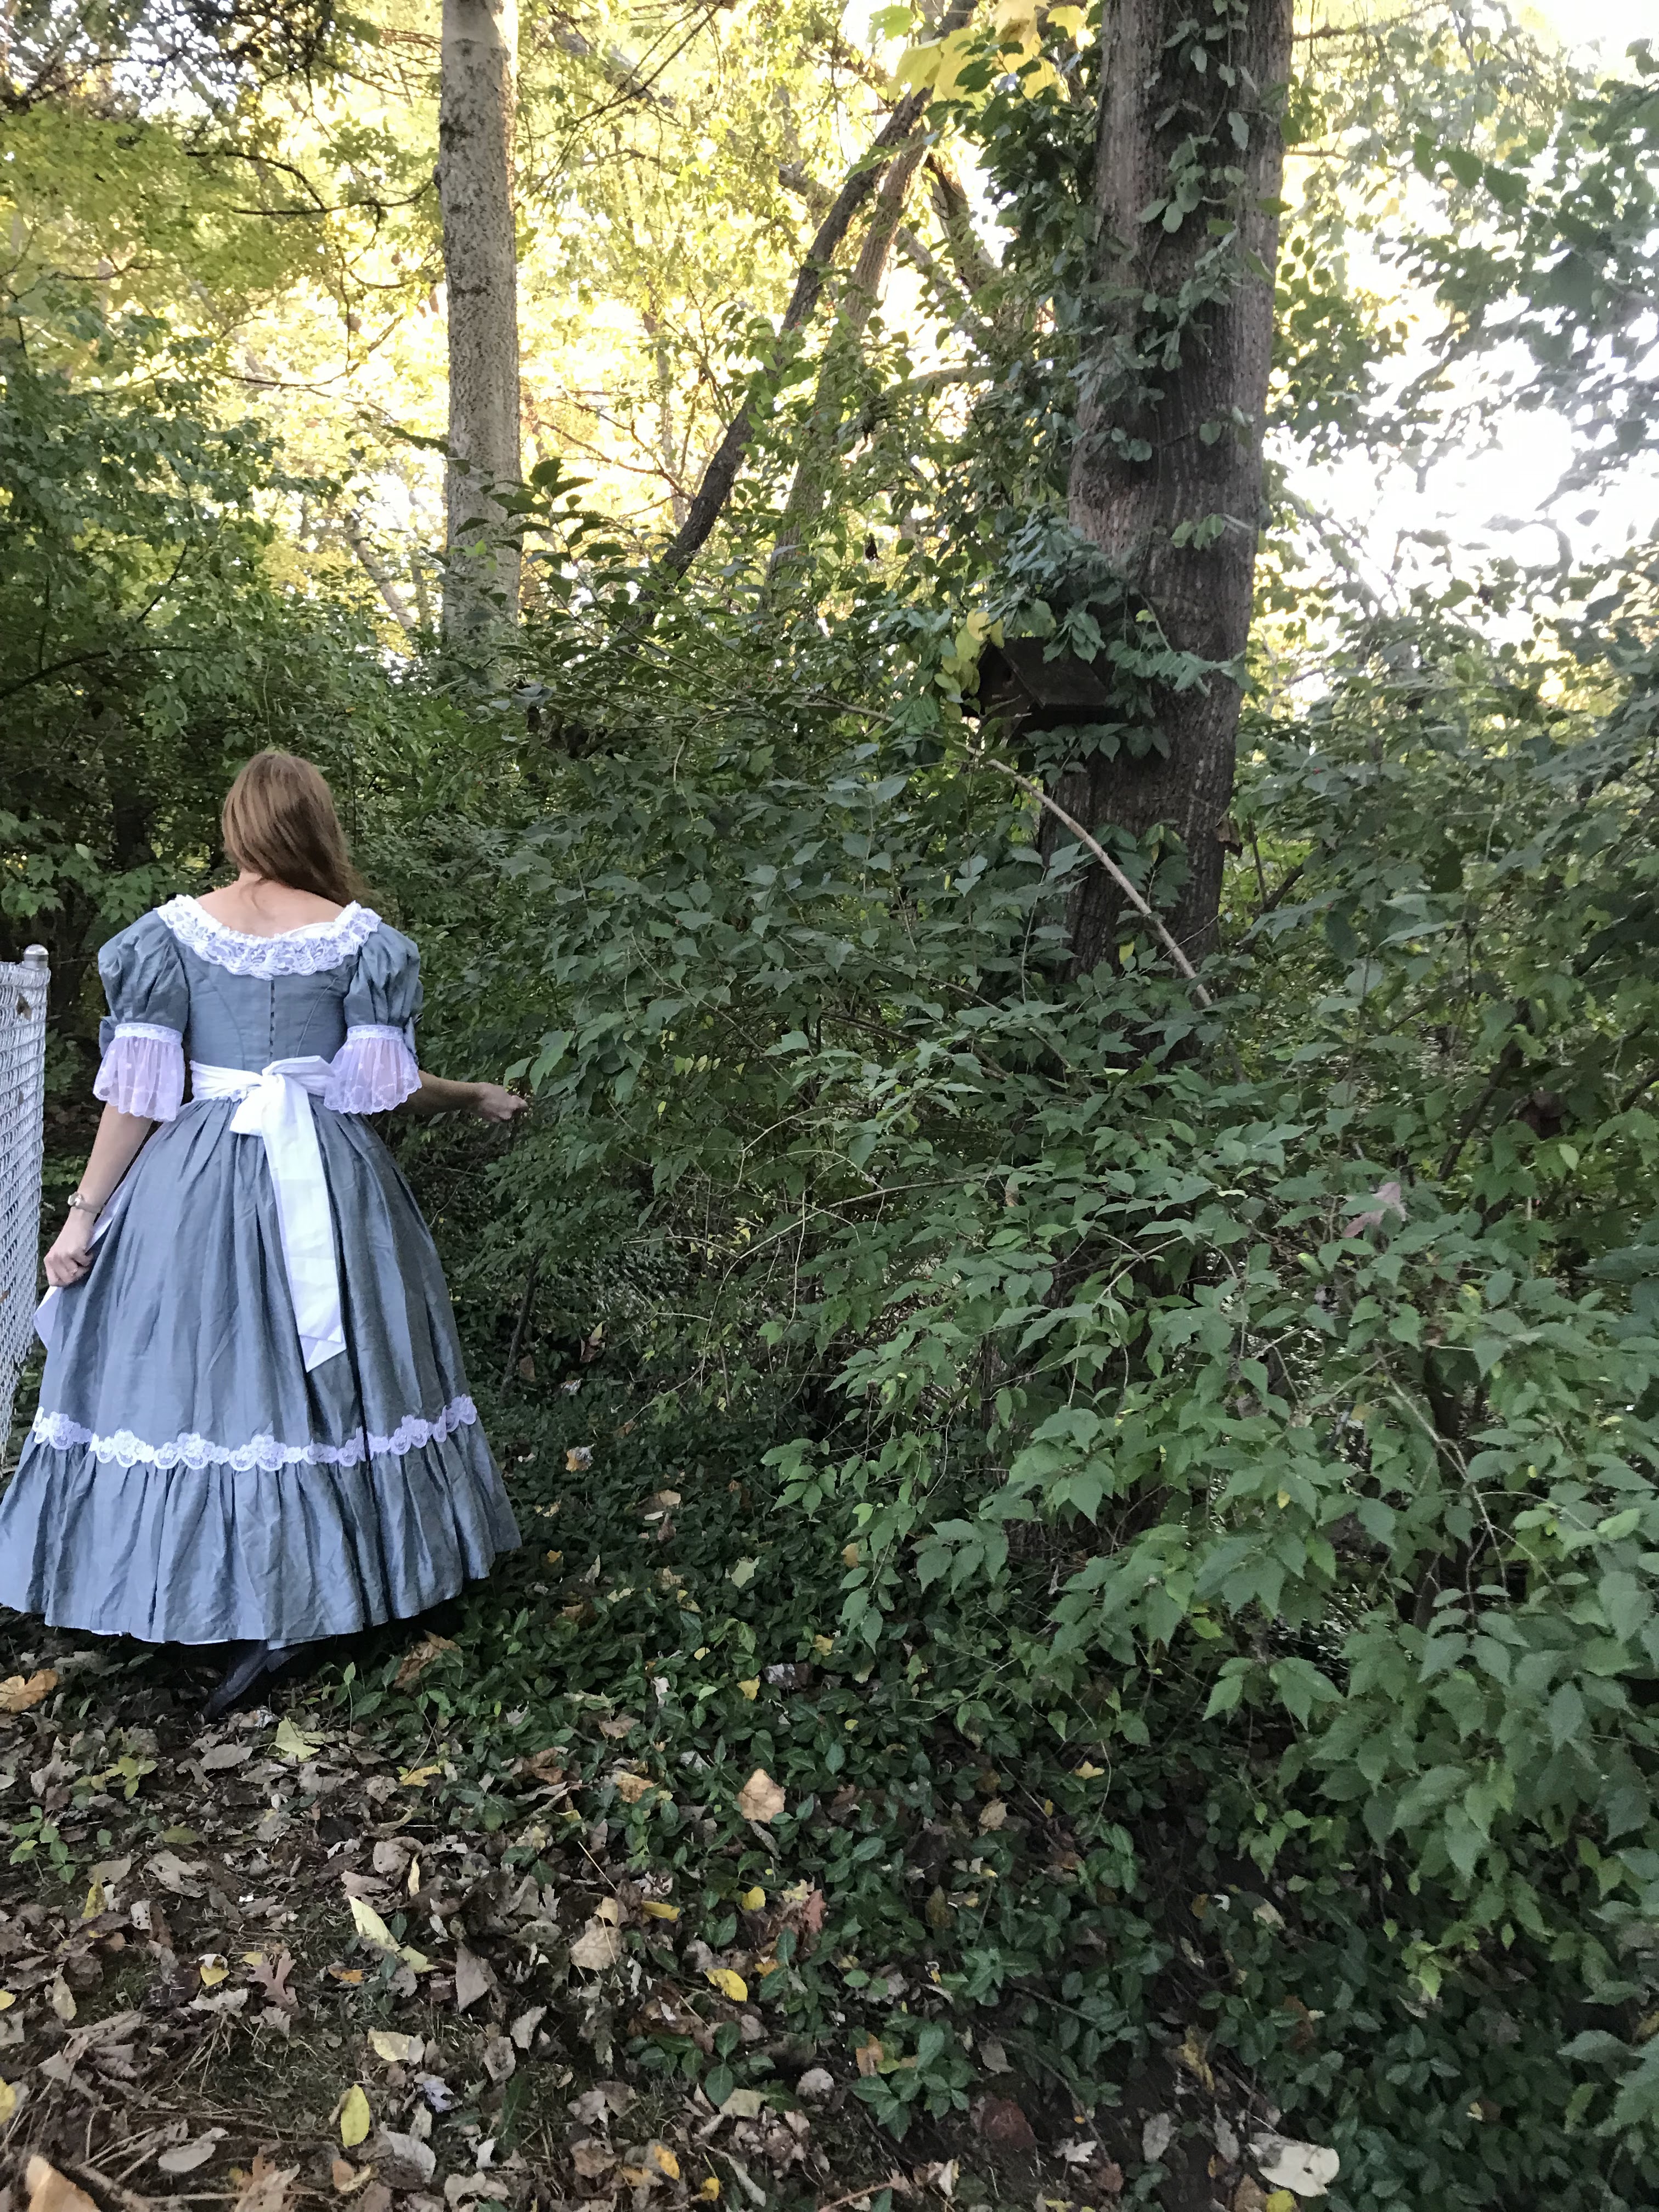
My friend graciously took pictures for me in her back yard. We did our best to figure out Alice in Wonderland-y settings and poses.


 I'm very pleased with how the dress turned out! 


Not bad at all for something made out of old curtains, sheets, and second hand trim in only a week!


Now if I ever find myself needing an 1830's ball gown, I've got one ready to go!


And, while not screen accurate at all, I think it worked pretty well as an Alice costume too!


Especially when paired with my husband's magnificent (if I do say so myself) Mad Hatter costume!


Saturday, November 13, 2021

Making the Mad Hatter (And Alice!)

 Sometime earlier this year my husband and I watched Alice in Wonderland and Alice Through the Looking Glass together - the live action movies with fantastic costumes. I know these movies have been out a long time, but I'd never seen them before. For that matter, I don't think I've ever seen the animated Alice in Wonderland movie all the way through either. I'm not a big movie watcher. All that said. . .


I fell in love with the costumes. I enjoyed the story too, but the costumes were really great! As soon as we finished the first movie I asked my husband what he thought of dressing up as the Mad Hatter and Alice for Halloween. I mentioned I liked the costumes and overall aesthetic of the movie, right??

"Yeah, that's fine"

Perfect! Our Halloween costumes were decided on, now I just needed to make them!


My goal wasn't to exactly re-create the movie costumes, just to make costumes inspired by the movie. For my outfit I decided I would wear my blue silk wedding petticoat and make a historical bodice of some sort to go with it. To top off the outfit I'd add a white apron as a nod to the animated movie. 


 My costume would be pretty straight forward, no crazy accessories there. My husband's costume was where all the fun would be! 


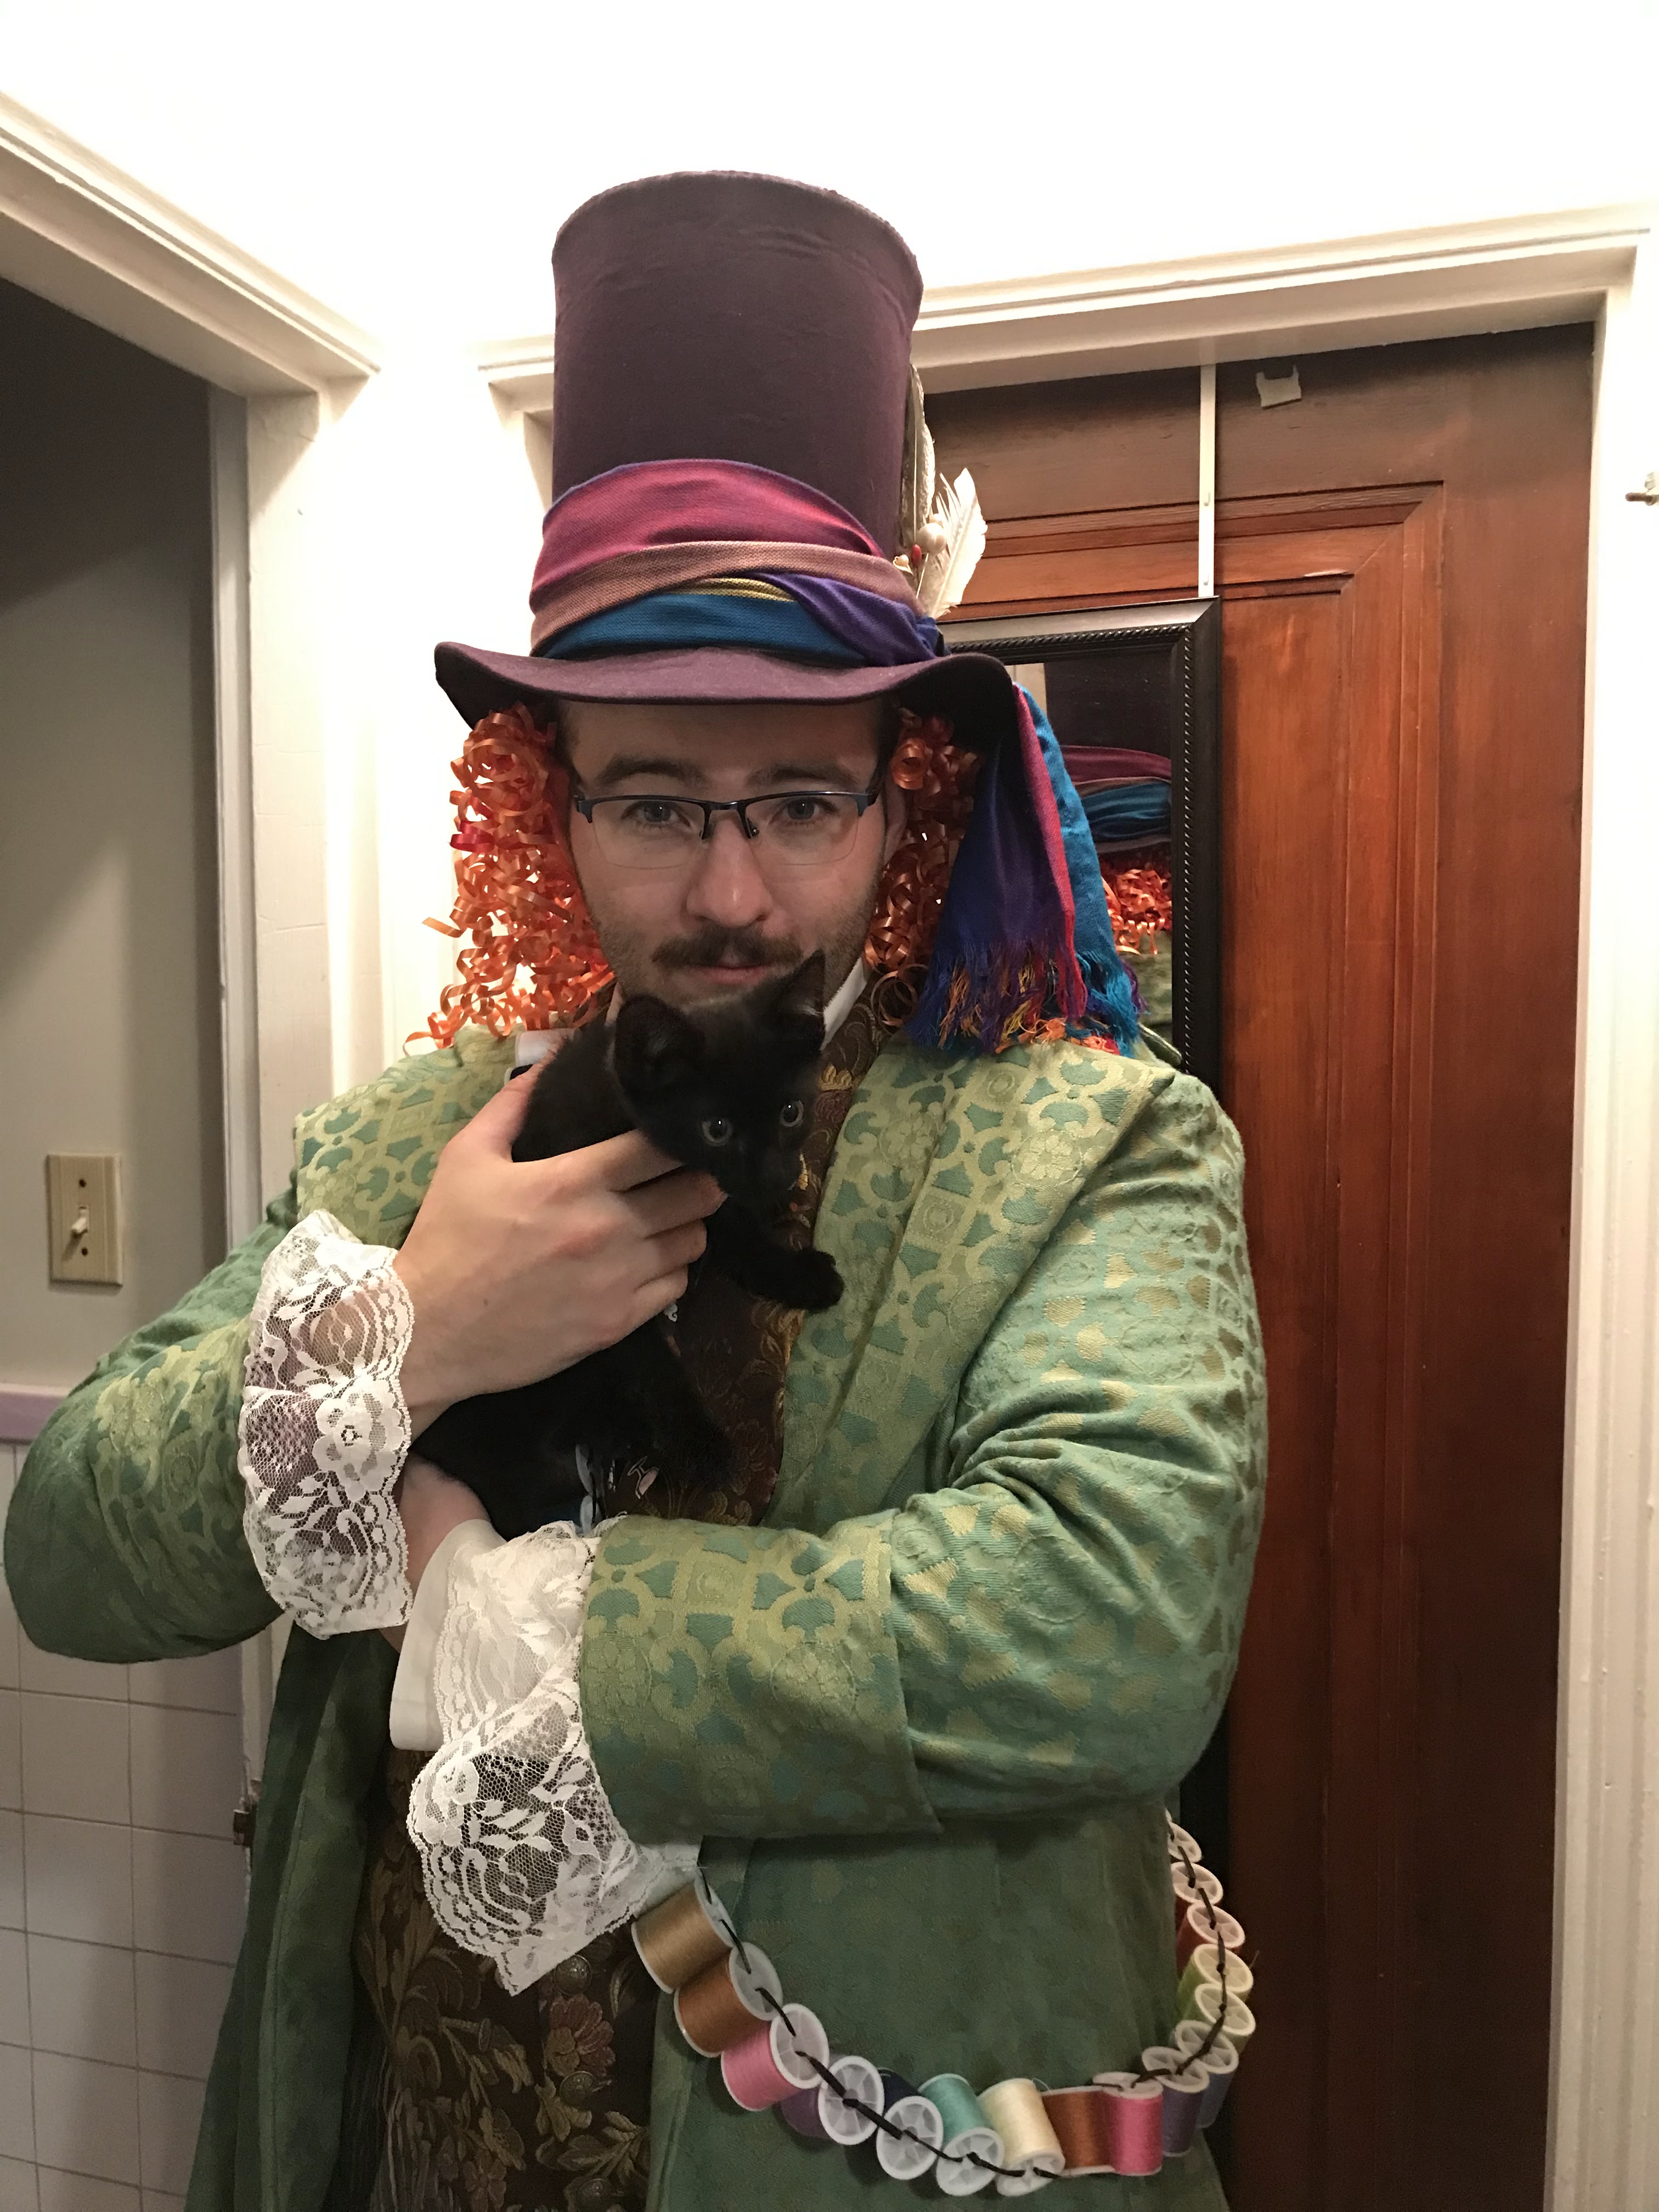
The starting point of his costume was, of course, his purple top hat. I made the hat a little more "Mad" by adding a rainbow scarf, a buckle, some hat pins, and feathers.


Rather than ordering an itchy, uncomfortable orange wig, I thought I might try making the Mad Hatter hair myself and attaching it to the hat some how. After a brainstorming session with my husband, I decided to attempt making the hair out of curling ribbon. 


I bought large spools of both orange and red curling ribbon. After a bit of experimentation, I cut a bunch of 2'-3' lengths of ribbon.


I then curled all these pieces of ribbon. . .


And pinned them onto a piece of wide satin ribbon, cut to be the approximant length of about 3/4ths of my husband's head circumference. 


I centered the curling ribbon on the satin ribbon so half the curl overhung either edge of the satin.

Piece of ribbon after piece of ribbon was curled and pinned until the wide satin ribbon was completely covered by curls.


I mixed together both the red and the orange ribbon to give the "hair" a bit more depth and texture.


Once all the ribbon was pinned, I took it to the sewing machine and sewed everything in place along both edges of the satin ribbon.


I then folded the satin ribbon in half and sewed it that way.


I had Mad Hatter hair!!


I positioned the "hair" inside the hat.


And loosely whip-stitched it in place to the hat lining.


With that the top part of my husband's costume was done!


Now onto the coat! And tie. And pants. And thread-sash-thing (bandoleer?). And pants. And socks. This costume was going to be great!!


In the movie Hatter wears at least two different coats - a brown one and a brilliant teal one. Oh that teal one was pretty! With that jacket in mind, I kept my eyes open for a suitable fabric for several months. I didn't come across anything I really loved, so I decided to use a green jacquard from my stash and attempt to dye it teal.


Apparently the fabric was a poly-cotton blend rather than all cotton, because it didn't take the dye as well as expected. The fabric came out still green, but with a bit of a teal cast to it. Not exactly what I wanted, but it would do.


Fabric dyed, it was time to pick a pattern! I went through my stash and discovered two things.
First - None of the men's "historical" coat patterns I owned were my husband's size.
Second - Most of the patterns required at least twice, if not 3 times, the amount of fabric I had. 
It was time to go pattern shopping! I needed something with approximately the right shape, that could be squeezed out of just over 2 yards of 60" wide fabric, and that came in my husband's size.


I went into Joann's when Simplicity Patterns were on sale, and I came out with this. Simplicity 9252, a "Hamilton" costume pattern labeled "Historical". There were some McCall's historical patterns I liked more, but McCall's wasn't on sale that weekend, Simplicity was. Thus, I would be making this pattern work!


I left off the contrasting "lapel" and pocket flaps and drafted my own lapel and front facing to better match the Hatter's coats in the movie.


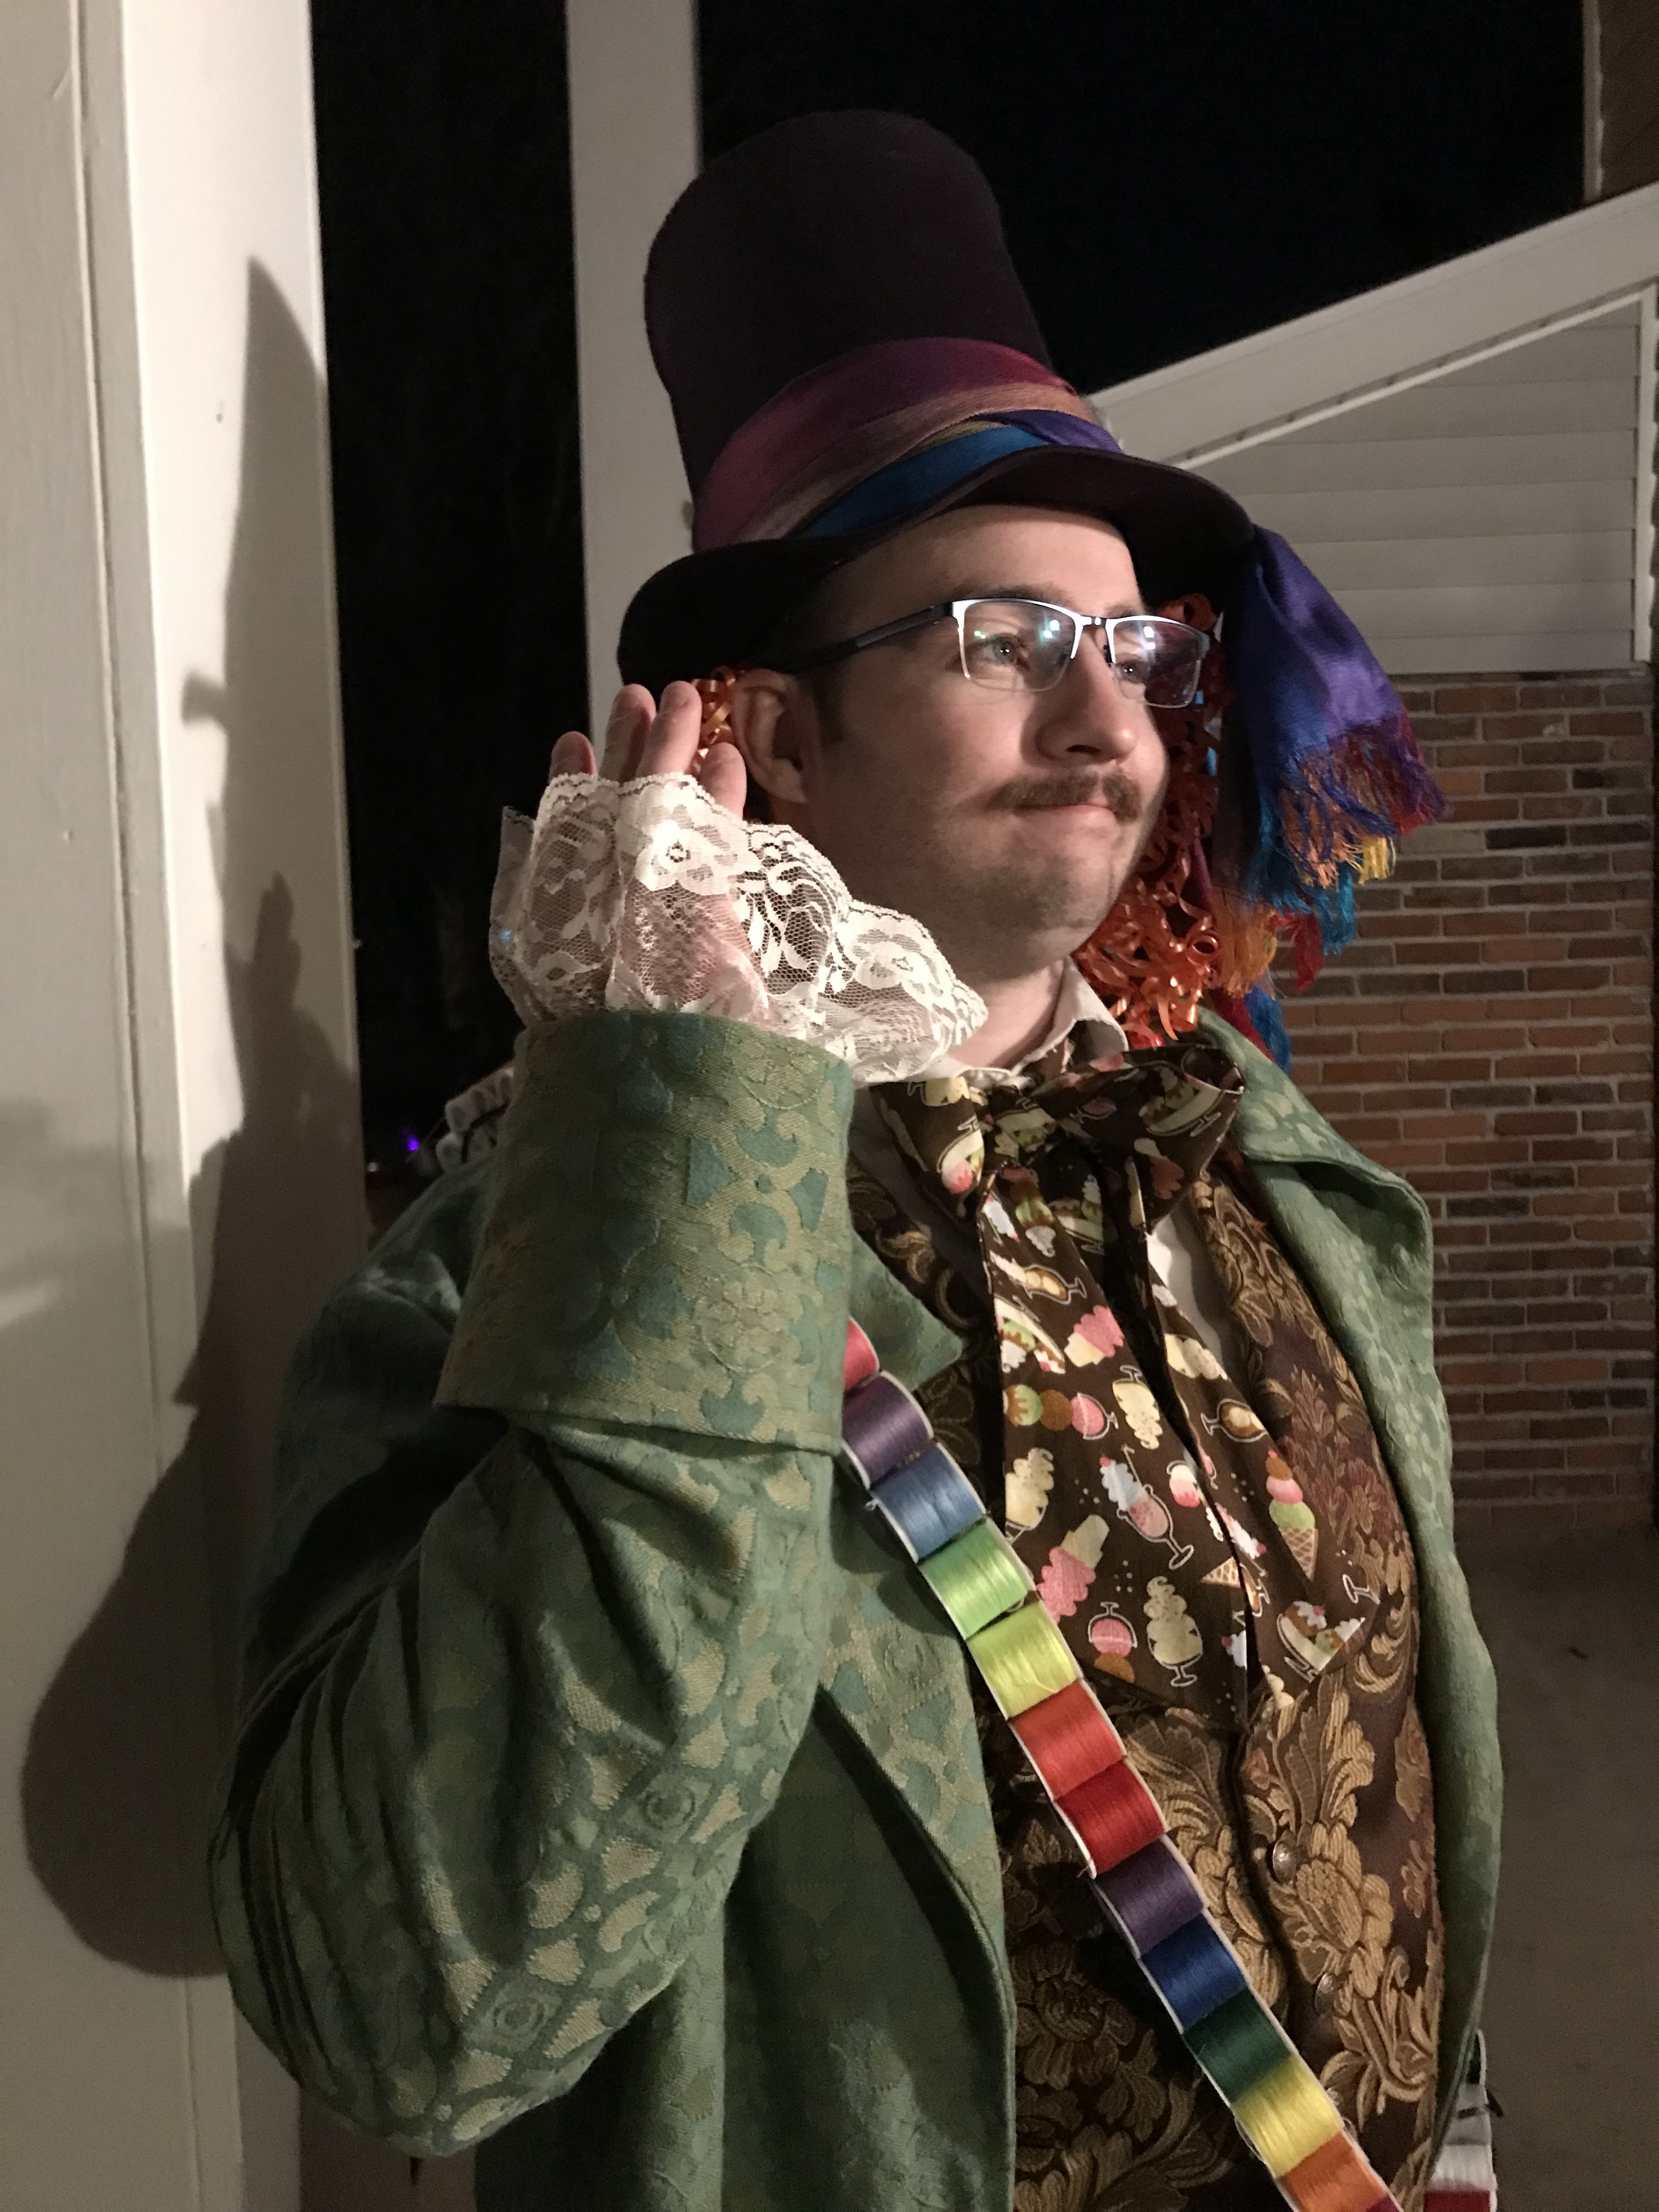
I kept the sleeve cuffs and added lace ruffles to the ends of the sleeves.


I thought with this being a "unisex" pattern the sleeves might be too short for my tall husband, so I added an extra inch of length when cutting them out.


This wasn't necessary. The sleeves wound up being too long. Oh well. I tried.


The entire coat is lined in purple rayon from my stash, and was sewn with the help of our two kitties, Pepper and Rabbit, who we got about 2 weeks before Halloween.


They really do make life fun!


Under the coat, my husband wore a plain white dress shirt from his closet and the waistcoat I made him for his birthday. 


So, the only thing I needed to make him to finish off the top half of the costume was a fun bowtie! It looked like the Hatter's tie in the movie had donuts on it. Well, I didn't have any donut fabric in my stash, but I did have ice cream fabric! Just as good, right?


The tie is just one long strip of fabric, folded and sewn right sides together, then turned right side out, pressed, and tied under the collar. Super quick and simple!


Moving on, there were just a couple more things my husband needed to complete the outfit. Pants, socks, and a thread bandoleer. The socks were easy, I bout a pack of colorful socks from Wal-mart for him to mix and match for the costume. The pants were almost equally easy.


The "Hamilton" costume pattern very conveniently included a pattern for elastic-waist "breeches" (very historical!). I used these pattern pieces, added a couple extra inches of length, and left over the elastic at the knees. They only took about an hour to make, if even that long. 


 I used a purple and green striped cotton batik for the pants. I picked it up at a $1 per pound fabric sale at a local sewing room, and was very tempted to save it for a dress for myself. It's pretty! However, it was too perfect for this costume not use, so beautiful batik elastic waist pants my husband got.


The final piece of the costume was that thread bandoleer. Now I have a very healthy thread stash, so this was no problem, no problem at all!


That said, I didn't actually use any thread from my main thread stash for this project. A family friend of my husband's very kindly gave me a rainbow multi-pack of thread for my birthday this year.


All the different shades of thread were very pretty, however, there was no way I was going to be using this "made in china" thread on my sewing machine. The package said "good for machine sewing" then included warnings like "sew slowly so your thread doesn't break" and "clean out lint often". Thread with warnings is not thread I want on my sewing machine, as kind as the gift was.


Thus, I decided the thread would be perfect for the bandoleer and arranged it in a rainbow pattern I found pleasing.


I then threaded it onto some narrow ribbon from my stash


I tied the ends together, and the thread bandoleer was done! 


The project took one evening to complete, and was the perfect finishing touch to the Mad Hatter costume!


My husband dressed up for work on the Friday before Halloween, and apparently got lots of compliments on his costume! 


He tells me his coworkers were very impressed when he informed them his wife made it!


On Halloween we both dressed up to go over to a friend's house and help hand out candy to neighborhood kids.


My friend graciously took pictures of my costume for me that evening, but this blog post is long enough already, so I'll save those pictures and the details of my outfit for a future post!