Monday, May 13, 2019

Constructing the 1760's Sacque Back Bird Gown

I had grand plans of completely hand sewing my first 18th century gown. I've hand sewn an 1840's dress and a regency dress, so I knew I could do it. I own both the Larkin and Smith English Gown pattern, which is apparently like an entire dress making workshop in a package, and the American Duchess book, which also includes step-by-step instructions for hand sewing four different styles of 18th century gown. So I knew I had the information I would need to successfully hand sew the gown. What I didn't have however? Time. Once my stays were in wearable condition, I only had two weeks to make my gown. Two weeks might be long enough for a crazy fast stitcher to hand sew a gown, but it certainly wasn't going to be enough time for me to hand sew a gown. Thus, my gown was going to be completely machine sewn. Not just mostly machine constructed with hand finishing work (and no machine stitching visible on the outside of the garment), but machine sewn all the way, even down to the hem. My first 18th century gown would be machine sewn with pride. A garment which I would become familiar with the cut and assembly from this era, while not holding myself to a high historical accuracy standard.


In my fabric stash I had 7 yards of a floral home decor cotton I bought off the clearance rack at Hobby Lobby last summer. I bought this fabric with an 18th century gown in mind because the style and scale of the floral pattern reminded me of the material used for this 1780's gown featured in the Kyoto Costume Institute "Fashion" book.

1780's, Kyoto Costume Institute, AC6978 91-11-1

Large scale florals such as this were popular in the 1730's and 40's, and supposedly out of fashion later on in the century. However, gowns made from these fabrics in the first half of the century were often re-made to suit current styles in the second half of the century. The 1780's gown pictured above for instance is apparently made from fabric produced in the 1740's. So, with this in mind, I decided I could more or less "get away" with using my large scale floral cotton for a gown from any decade between the 1730's to the 1790's.


After I bought the fabric, took it home, and unfolded it, I discovered there were birds, perched on vines, interspersed throughout the floral design. For some reason, as soon as I saw those birds, I just knew this fabric would become a sacque-back gown, or Robe a la Francaise, as I felt those long, flowing, back pleats would showcase this fabric perfectly. 


All that to say, when it came time to decide what I would make to wear to the picnic, I decided to turn this floral home-dec cotton into the sacque back gown it needed to become. This plan was well suited to this event for a number of reasons. 
First, a cotton gown would be easily washable if it were to get grass stained or muddy at the outdoor picnic. 
Second, being a home-dec cotton, this fabric is much heavier than an 18th century cotton would have been, so I wouldn't be making this fabric any less historically accurate than it already was by machine sewing a gown from it rather than hand-sewing a gown from it. And, to go along with that, while the print on this fabric is clearly 18th-century inspired, it is not a historically accurate reproduction print. (Yes, I realize this reason might sound crazy to some, but it did definitely influence my decision.) 
Third, I already had a Robe a la Francaise pattern on hand, which included machine sewing instructions for said gown - Simplicity 8578, designed by American Duchess.  Having a pattern ready to go would greatly speed up the gown making process.


And so, with all this in mind, I cut out the pattern and began my first 18th century gown making adventure.


To reduce the amount of long seams I would have to sew (and thus the amount of time the dress would take to make), I squished together pattern pieces and cut out the back of my dress as two long panels, rather than four. Fabric was about 20" wide in the 18th century, so the pattern pieces for each back panel reflected that. My fabric, however, was either 55" or 60" wide, and I decided to take full advantage of that modern width, historical accuracy be darned.


The bodices of 18th century gowns are nearly always lined in linen, so I pulled some linen garments out of my "to be refashioned" bin, and cut the lining from those. Yes, I do have linen yardage in my stash as well, I but I decided to save that fresh, new material for some future project as old garments would do very well for a lining that would not be seen. The lining for the bodice itself was cut from this cotton/linen blend drawstring waist skirt.


Not only was the skirt a suitable material itself for the lining, it also included a drawstring, made from cotton tape, and weird ties on the sides of the skirt, made from the same material, which worked perfectly for making the ties in the back of the bodice lining. These ties allow the bodice to be adjustable, in case one gains or loses weight, or decides to loan her gown out. A truly ingenious fitting system - I wish my 19th century dresses were this adjustable!


There wasn't quite enough fabric in the skirt to also cut the sleeve lining from, so the sleeve linings were cut out of a linen/rayon blend dress, which was also residing in my "to be refashioned" bin. (As you can see in the picture, parts of this dress had already been harvested for previous sewing projects, such as the lining of my regency gown)


Once I had everything cut out, I set to actually sewing the gown. I glanced at the Simplicity instructions, and at once decided they were much too modern for my tastes. Yes, I would be machine sewing the gown, but I wanted to construct it like an 18th garment, not a modern garment. Thus, I tossed the Simplicity instructions to the side and pulled out my American Duchess book. I proceeded to follow the construction order outlined in the book to assemble my gown, adapting the hand sewing instructions to work with a sewing machine.


First, I made the lining. Next, I sewed up the center back seam, then pleated the back. Once that was done, I mounted the pleated back on the linen lining and top stitched the pleats in place, by machine of course.


At this point, I put the lining, with the back panel attached, on my dress form and admired the beauty of those pleats.


Aren't they pretty! Next I attached the bodice front, top stitching the side seams in place as the AD book instructed. Once again, the top stitching was done by machine.


The front skirt panels were sewn to the back skirt panels with french seams, then pleated into the bodice, and top stitched in place.  My machine handled the several layers of home dec cotton, all piled together, like a champ!


Once the bodice and skirt were all together, it was on to the sleeves!


I pressed up the bottom hem of both the sleeves and the sleeve linings, then folded each piece right sides together lining up the seam to be sewn. Before sewing that seam, I layered the corresponding sleeve lining piece on top of each sleeve, and pinned together, then sewed, all four layers of fabric along the sleeve seam.


Once sewn, the sleeve was then turned right side out and the seam was sandwiched between the sleeve and the lining, so there was no exposed seam allowance on the inside, or outside, of the sleeve. This method was not mentioned in the AD book, rather, I found it on a blog several years ago. I have no idea what blog it was, but this was mentioned as an 18th century technique, and I liked it. Thus, this is how I chose to construct my sleeves. I hemmed the sleeves by slip stitching the lining and the outer layer together - by hand. Yep, this was pretty much the only hand sewing I did on the entire gown. Really, I could have top stitched this hem together, but handsewing it was much more satisfying.


The sleeves were then trimmed with a flounce (I'll discuss the trim in another blog post), then they were attached to the gown. First, I sewed the sleeve to the bodice, only along the under arm, leaving the sleeve cap unattached. Then I tried on the gown and smoothed, pleated, and pinned the sleeve cap in place over my shoulder. This is a little difficult to do on one's self, but with the help of a full length mirror, I somehow managed.


I top stitched the sleeve cap to the bodice shoulder strap, then tried the gown on again to check the range of motion.


The range of motion in these sleeves is excellent!! Finally, it was time to finish the gown. I hemmed it by machine, then bound the back neckline.


And with that, the gown itself was done! It only took about two full days of work, then all that was left to do was trim it up, and make a matching petticoat and stomacher.


And as this blog post has already gotten quite long, I'll talk about the pretty pleated trim, beribboned stomacher, and half red petticoat, in a future blog post (or two)!


Thursday, May 9, 2019

Trimming it up for May Day

Three years ago, I made this dress, from McCall's M7317 and a beautiful striped floral swiss dot cotton.


It turned out wonderfully summery and fun to wear, but I only got to wear it twice. The second time I wore it, I managed to drip something on the bodice and stain it. White clothing and I are not the best mixture. I tried to get the stain out and failed.


Stain removal not working for me, I decided I could just add some trim or an applique to cover the stain. I pulled out a few different options, pinned them to the dress, and wasn't satisfied with a single one. Nothing looked quite right. So, I threw the dress on a pile in my sewing room and there it has remained for the past three years - in my sewing room, moved from pile to pile. Too pretty to get rid of, but too stained to wear.


Last week, after I'd been invited to a May party, the dress caught my eye on its pile in the corner of the sewing room. Suddenly, I knew exactly how to fix it! Ric-Rac! 


In my stash I found the perfect blue-green ric-rac to match the blue on the dress fabric, I carefully positioned it to hide the stain - and it actually looked good! I added some red ric-rac and white lace for good measure then proceeded to sew the new trimmings to the dress.


It worked! The trim hid the stain without looking like too much of an afterthought tacked on the dress. I didn't have enough of the blue ric-rac to go all around the neckline of the faux wrap bodice, so I only applied the blue and the lace to the stained side of the bodice, while the red wraps all the way around.


As the dress already featured an asymmetric skirt, the asymmetric bodice trim works beautifully with the overall design.


As aforementioned, I was invited to a May party last Saturday, and my newly decorated white dress seemed like just the springy garment to wear to such a gathering. 


So wear it I did! Paired with a thin brown belt, my brown dress boots, and an 18th century-ish straw bergere hat to protect my face from the sun. (It was highly recommended all party guests come wearing hats on this fine, sunny, spring day)


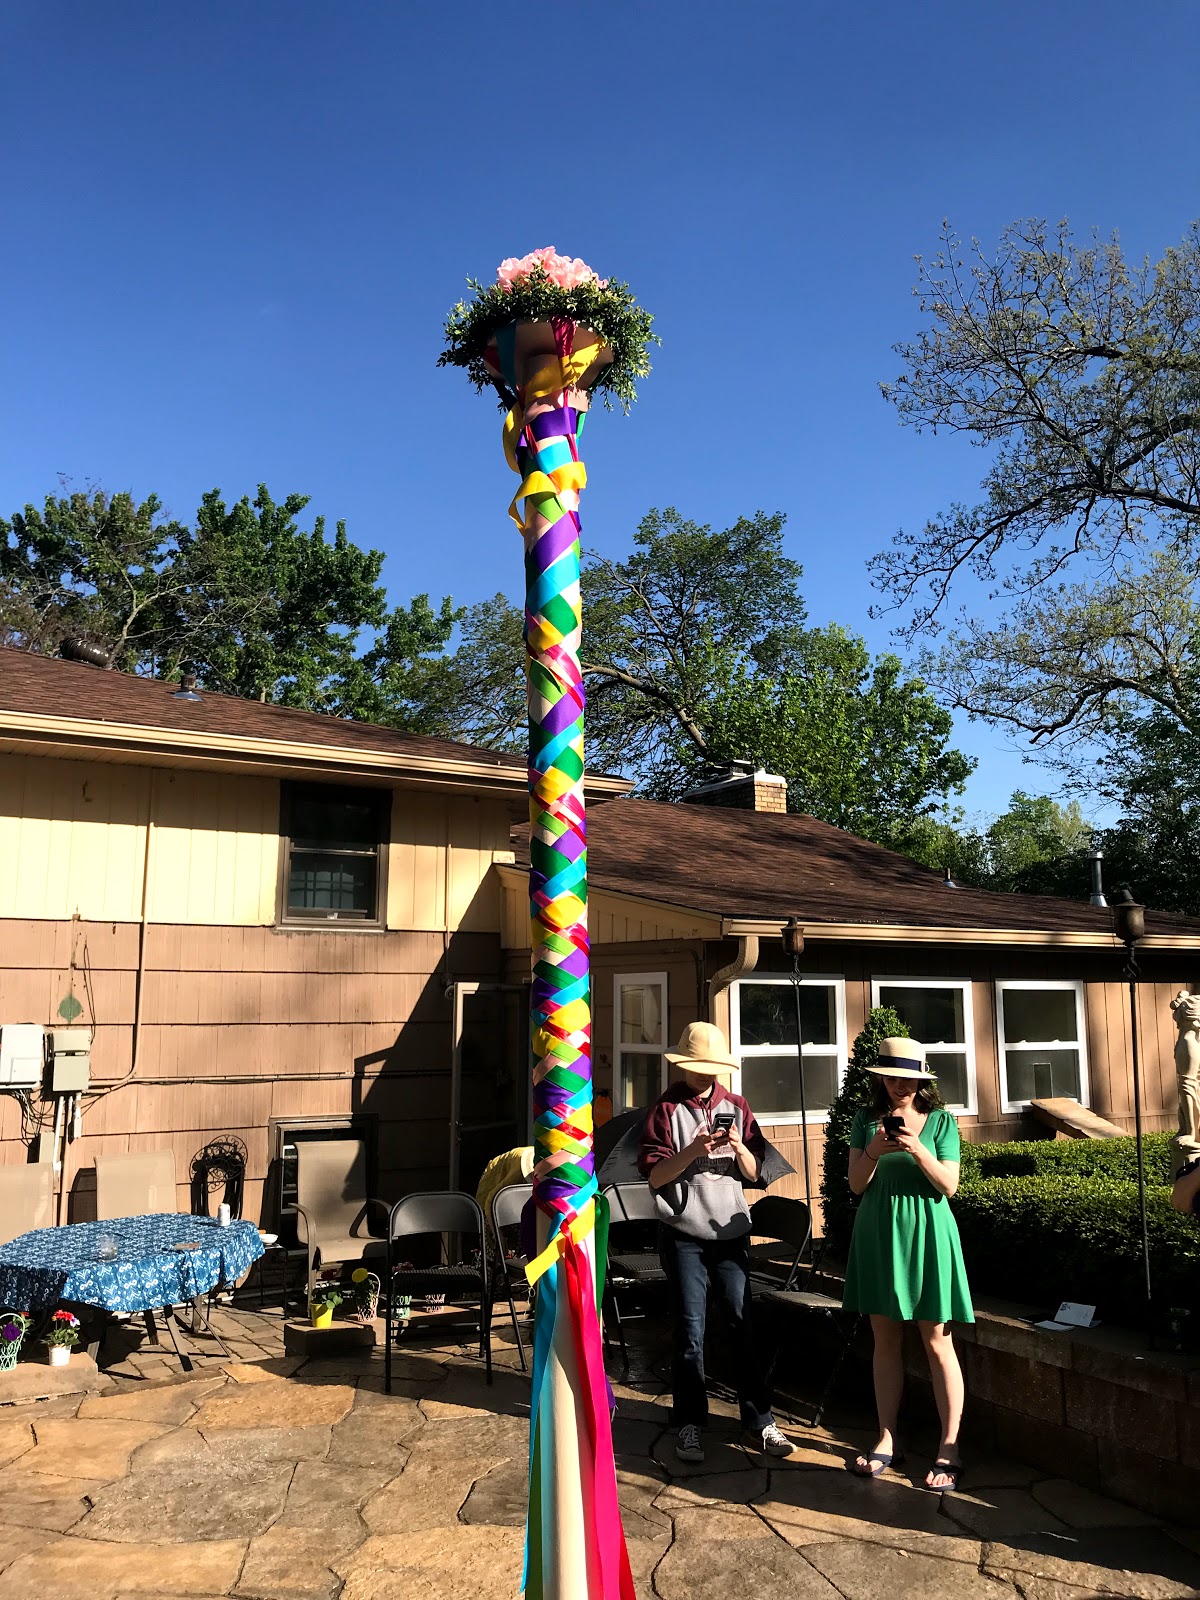
We ate. We drank. We chatted. We enjoyed the beautiful spring day. We attempted to dance around a Maypole.


By the end of the afternoon, after some trial and error, we had somehow managed to weave the ribbons around the Maypole.


And we all left with a small flower to plant at home.


 I enjoyed the afternoon with my friends - and now I can enjoy wearing my mostly white, asymmetric swiss dot dress once more!


Monday, May 6, 2019

The Mahina Circle Cardigan with Beautiful Shoulders

The one thing I have struggled with most with clothing in general, be it store-bought or made by myself, is getting the fit correct in the shoulders. I inherited wide shoulders and a broad upper back from my father. Let me tell you, these physical features do not make finding well-fitting clothing easy! If a shirt fits properly in the shoulders, it's generally too big everywhere else.


Now, in the past few years, I've made the majority of my own clothes, so I've been able to alter patterns to accomodate my shoulders nicely. That said, I do have to remember to actually alter the patterns accordingly. Sometimes I forget to do so and pay the consequences. Thus, I was extremely happy when I recently came across a pattern where the sizing is based on one's shoulder measurement!


Yes! The sizing is based on the measurement! The pattern in question is the Mahina Cardigan by Scroop Patterns, which I tested a couple weeks ago. This cardigan is literally a circle with sleeves attached, wonderfully flowy and cozy.


To make sure the sleeves are placed perfectly in the circle, the sleeve placement is based on shoulder width. To make sure the sleeves fit perfectly, the sleeve size is based on the bicep measurement. Thanks to this combination, I can get a perfect fit - without having to do a broad back and wide shoulder adjustment!


Look at those perfectly placed armscye seams - right on my shoulders! (and please ignore my slightly uneven shoulder darts) I really like the sizing system for this garment. To be fair though, I initially decided to test this pattern based on the design itself, the shoulder-based sizing system was just a nice side feature.


A couple years ago, the Dreamstress blogged about a circular cardigan she made herself, and I've been hoping she would release a pattern for this cardigan ever since. After 2 or 3 years of waiting, the call for pattern testers finally appeared on the Dreamstress blog about a month ago! Of course, I immediately applied, and was very happy a week later to get an email informing me I'd been selected to test the pattern.


Now the first step to making this cardigan was accurately measuring my shoulders and biceps so I could select the correct shoulder width and sleeve size for a wonderfully fitting garment. Measuring my own bicep was relatively easy. Measuring across the back of my own shoulders was darned near impossible. I tried to measure myself multiple times, and kept coming up with different numbers. Eventually I came to the conclusion that I could not accurately measure my own shoulders, so I went in search of a family member to do it for me. I showed my little brother the very handy measuring diagram in the Mahina Cardigan instructions, and requested he measure across the back of my shoulders. He did so. I had an accurate measurement allowing me to pick the correct size and cut out my cardigan.


The Mahina Cardigan pattern has four different views to pick from - a small circular cardigan, a medium circular cardigan, an oval cardigan, and a large circular cardigan. I decided go big or go home, so I made the large circular cardigan. This option looked rather glamorous, and quite cozy.


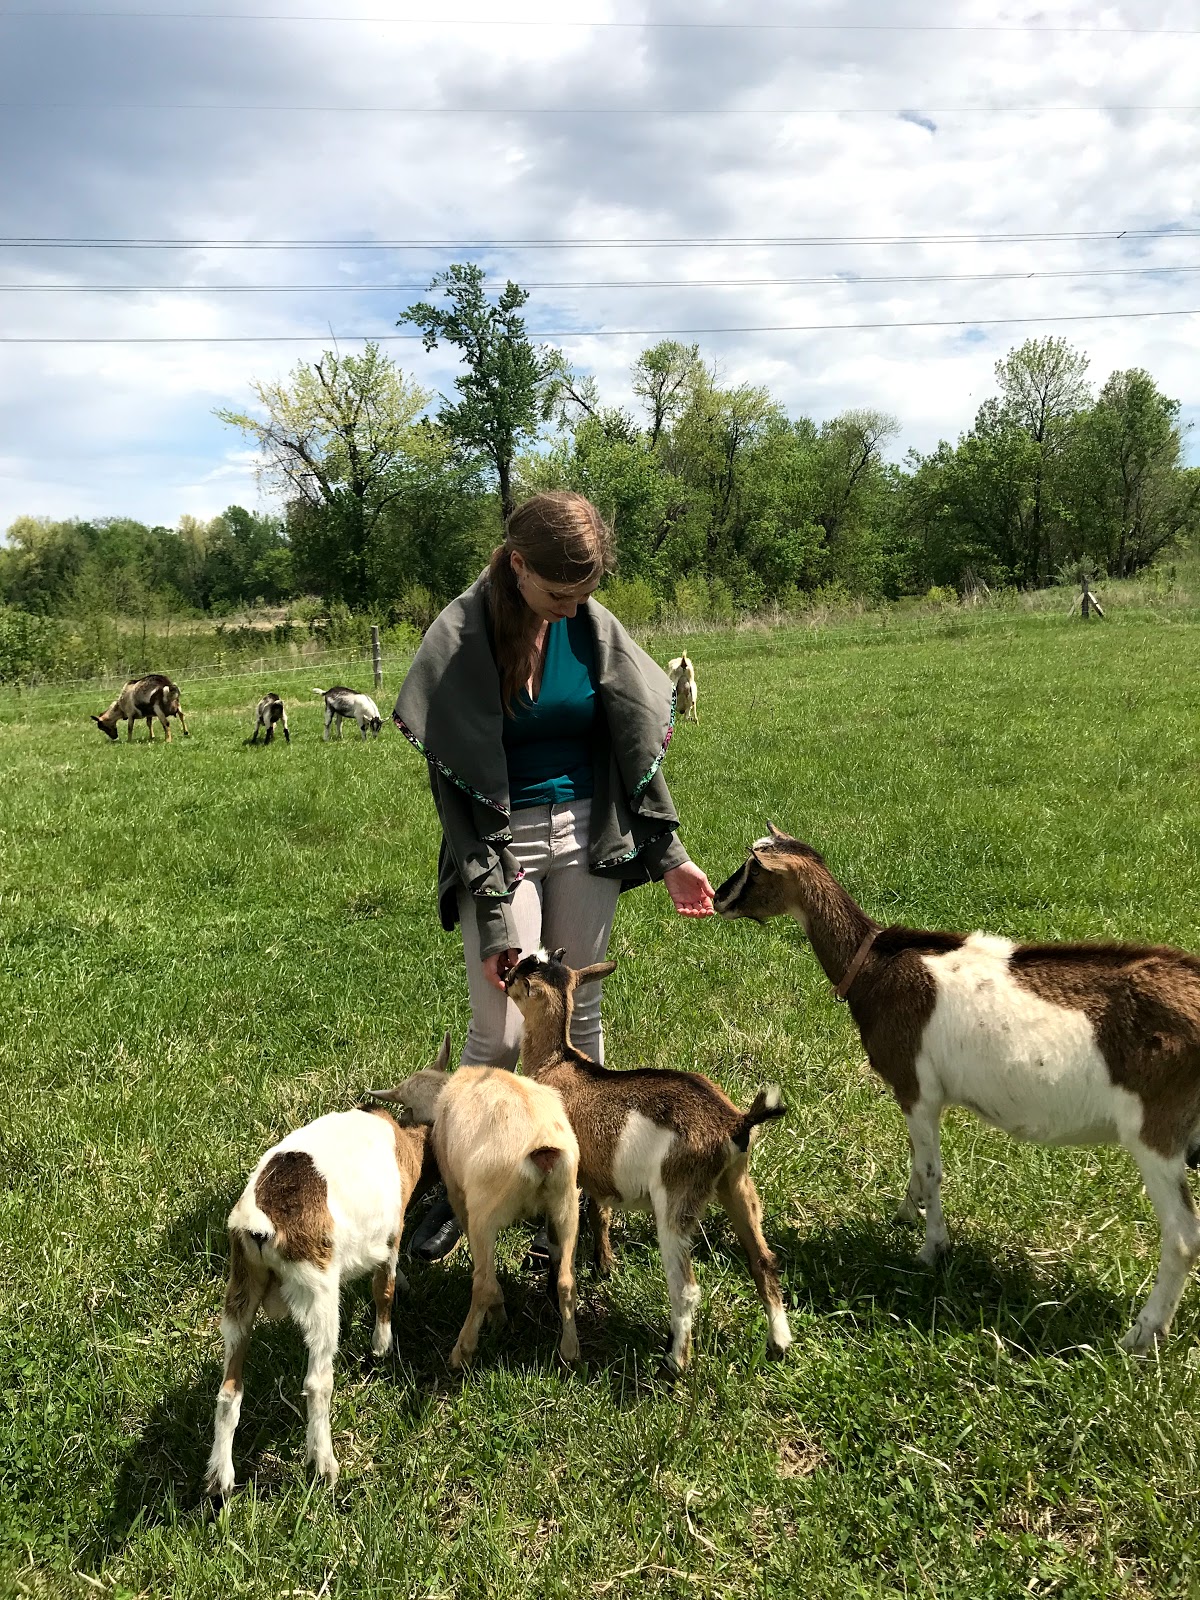
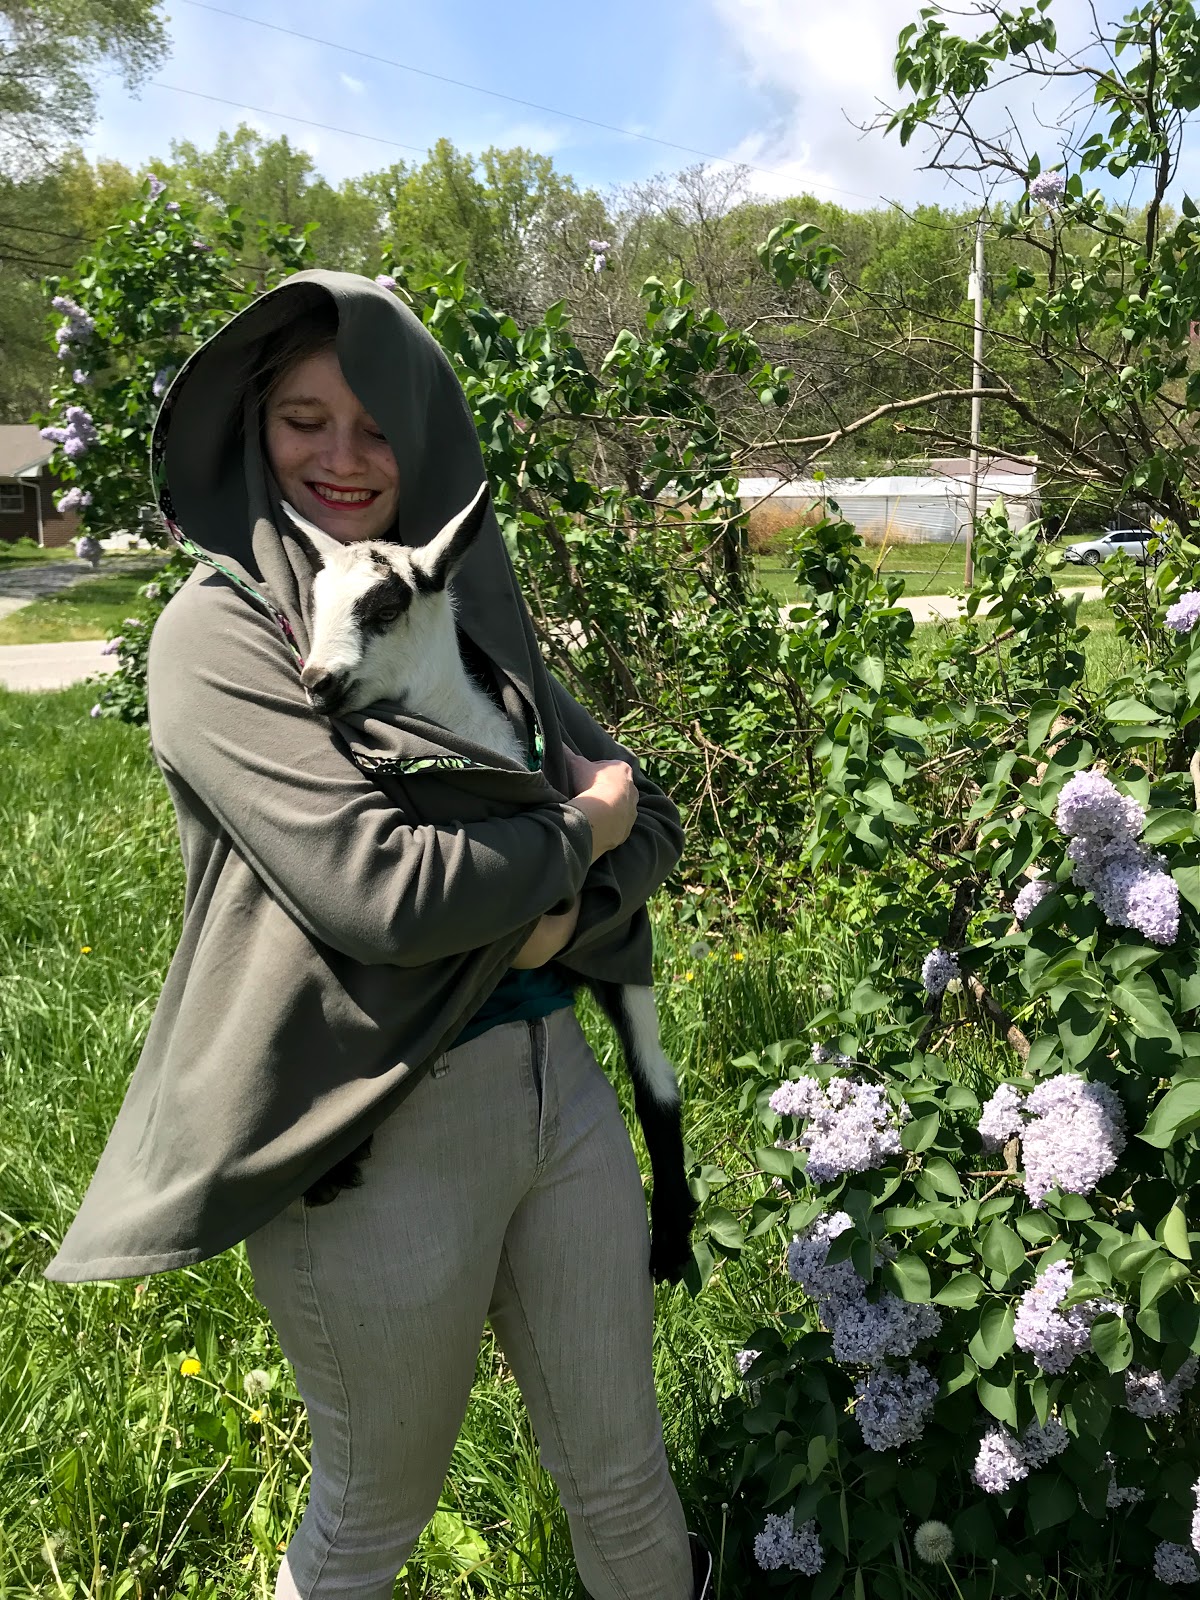
The large circle allows for the "collar" portion of the cardigan to be used as a hood.


And it's full enough to wrap a small baby goat up in! (This is Arabella, our youngest baby goat, born at the beginning of April - very sweet and cuddly, but a little shy)


I made my cardigan out of a moss green cotton interlock knit from my stash. (It's almost the exact same color as the fabric I used for my Otari Hoodie when I tested that Scroop Pattern last year) I absolutely love the color of the fabric, but I'm not sure if this type of fabric was the best choice for this type of garment. The fabric likes to stick to itself, and me, rather than swinging freely, which I find a little annoying.


I may not have made the best choice of fabric for this cardigan, but I do love how I finished the edges!


The pattern instructions offer four different methods for finishing the edges, and I chose the woven bias tape option. I decided to make my own bias tape from a fat quarter of black and rainbow floral cotton batik I found in my stash - and I love the pop of crazy colors and pattern along the edges of my cardigan!


No matter how I wear my cardigan, hood up or collar down, the bias tape is visible, adding a bit of interest to an otherwise neutral colored garment.


Even with the "sticky fabric" I've worn my cardigan plenty since completing it! The past week has been surprisingly chilly for late April/early May in the middle of the U.S. and my big circle cardigan has been just the thing for wrapping up in!


Plus, the shoulders fit perfectly, without adjustment, thanks to the genius sizing system - what more could I ask for?? 


I made the tester version of this pattern, so the final pattern is slightly different than the version I used.

Also, I received this pattern in exchange for testing it and giving feedback on it, but I was not required to blog about it or otherwise share about it on social media. This blog post was purely my own choice to write and all thoughts and opinions shared are my own.