It was 10 days before the event, and after dreaming of and planning this project for years, I was finally starting on my 1916 evening gown!

I began with a mock-up. The Vintage Pattern Lending Library pattern I was using was a copy of an actual vintage pattern, single size, with no alterations made for modern sizing. It happened to be for a 36” bust, which is just about right for me, but, especially with vintage and historical patterns, just because the measurements are right, doesn’t mean the proportions will be right. A mock-up is always a good idea! That said, I was only going to mess with making a bodice mock-up. Skirts are more forgiving.

My first mock-up, straight from the pattern with no alterations, was too short. So I added about an inch of length and made a second mock-up.

The second one fit better, but definitely needed some alteration. The shoulder slope needed correcting, and I just wasn’t pleased with how the wrap front and back were laying. I added the sleeves (minus the elastic in the bottom edge) and that didn’t improve how I felt about the thing.

I came to the conclusion that, despite the fact the pattern I was using didn’t include it, I really needed an under bodice to anchor the wrap bodice to so that it would behave and lay the way I wanted it to. Under bodices were a pretty common element of dresses in the 1910's.
However, I really didn’t feel like dealing with figuring that out right then. So I took off the mock-up and decided to proceed with the skirt instead.

Using the “tunic skirt” pattern pieces I cut out my overskirt, and while I was at it I cut out my sleeves as well since they fit decently enough. I was able to get 3 of the tunic pieces out of the yardage of changeable silk that I had. This would give me a 3-point “handkerchief” hem on my overskirt, and while I would have preferred 4 points, I was satisfied with 3.
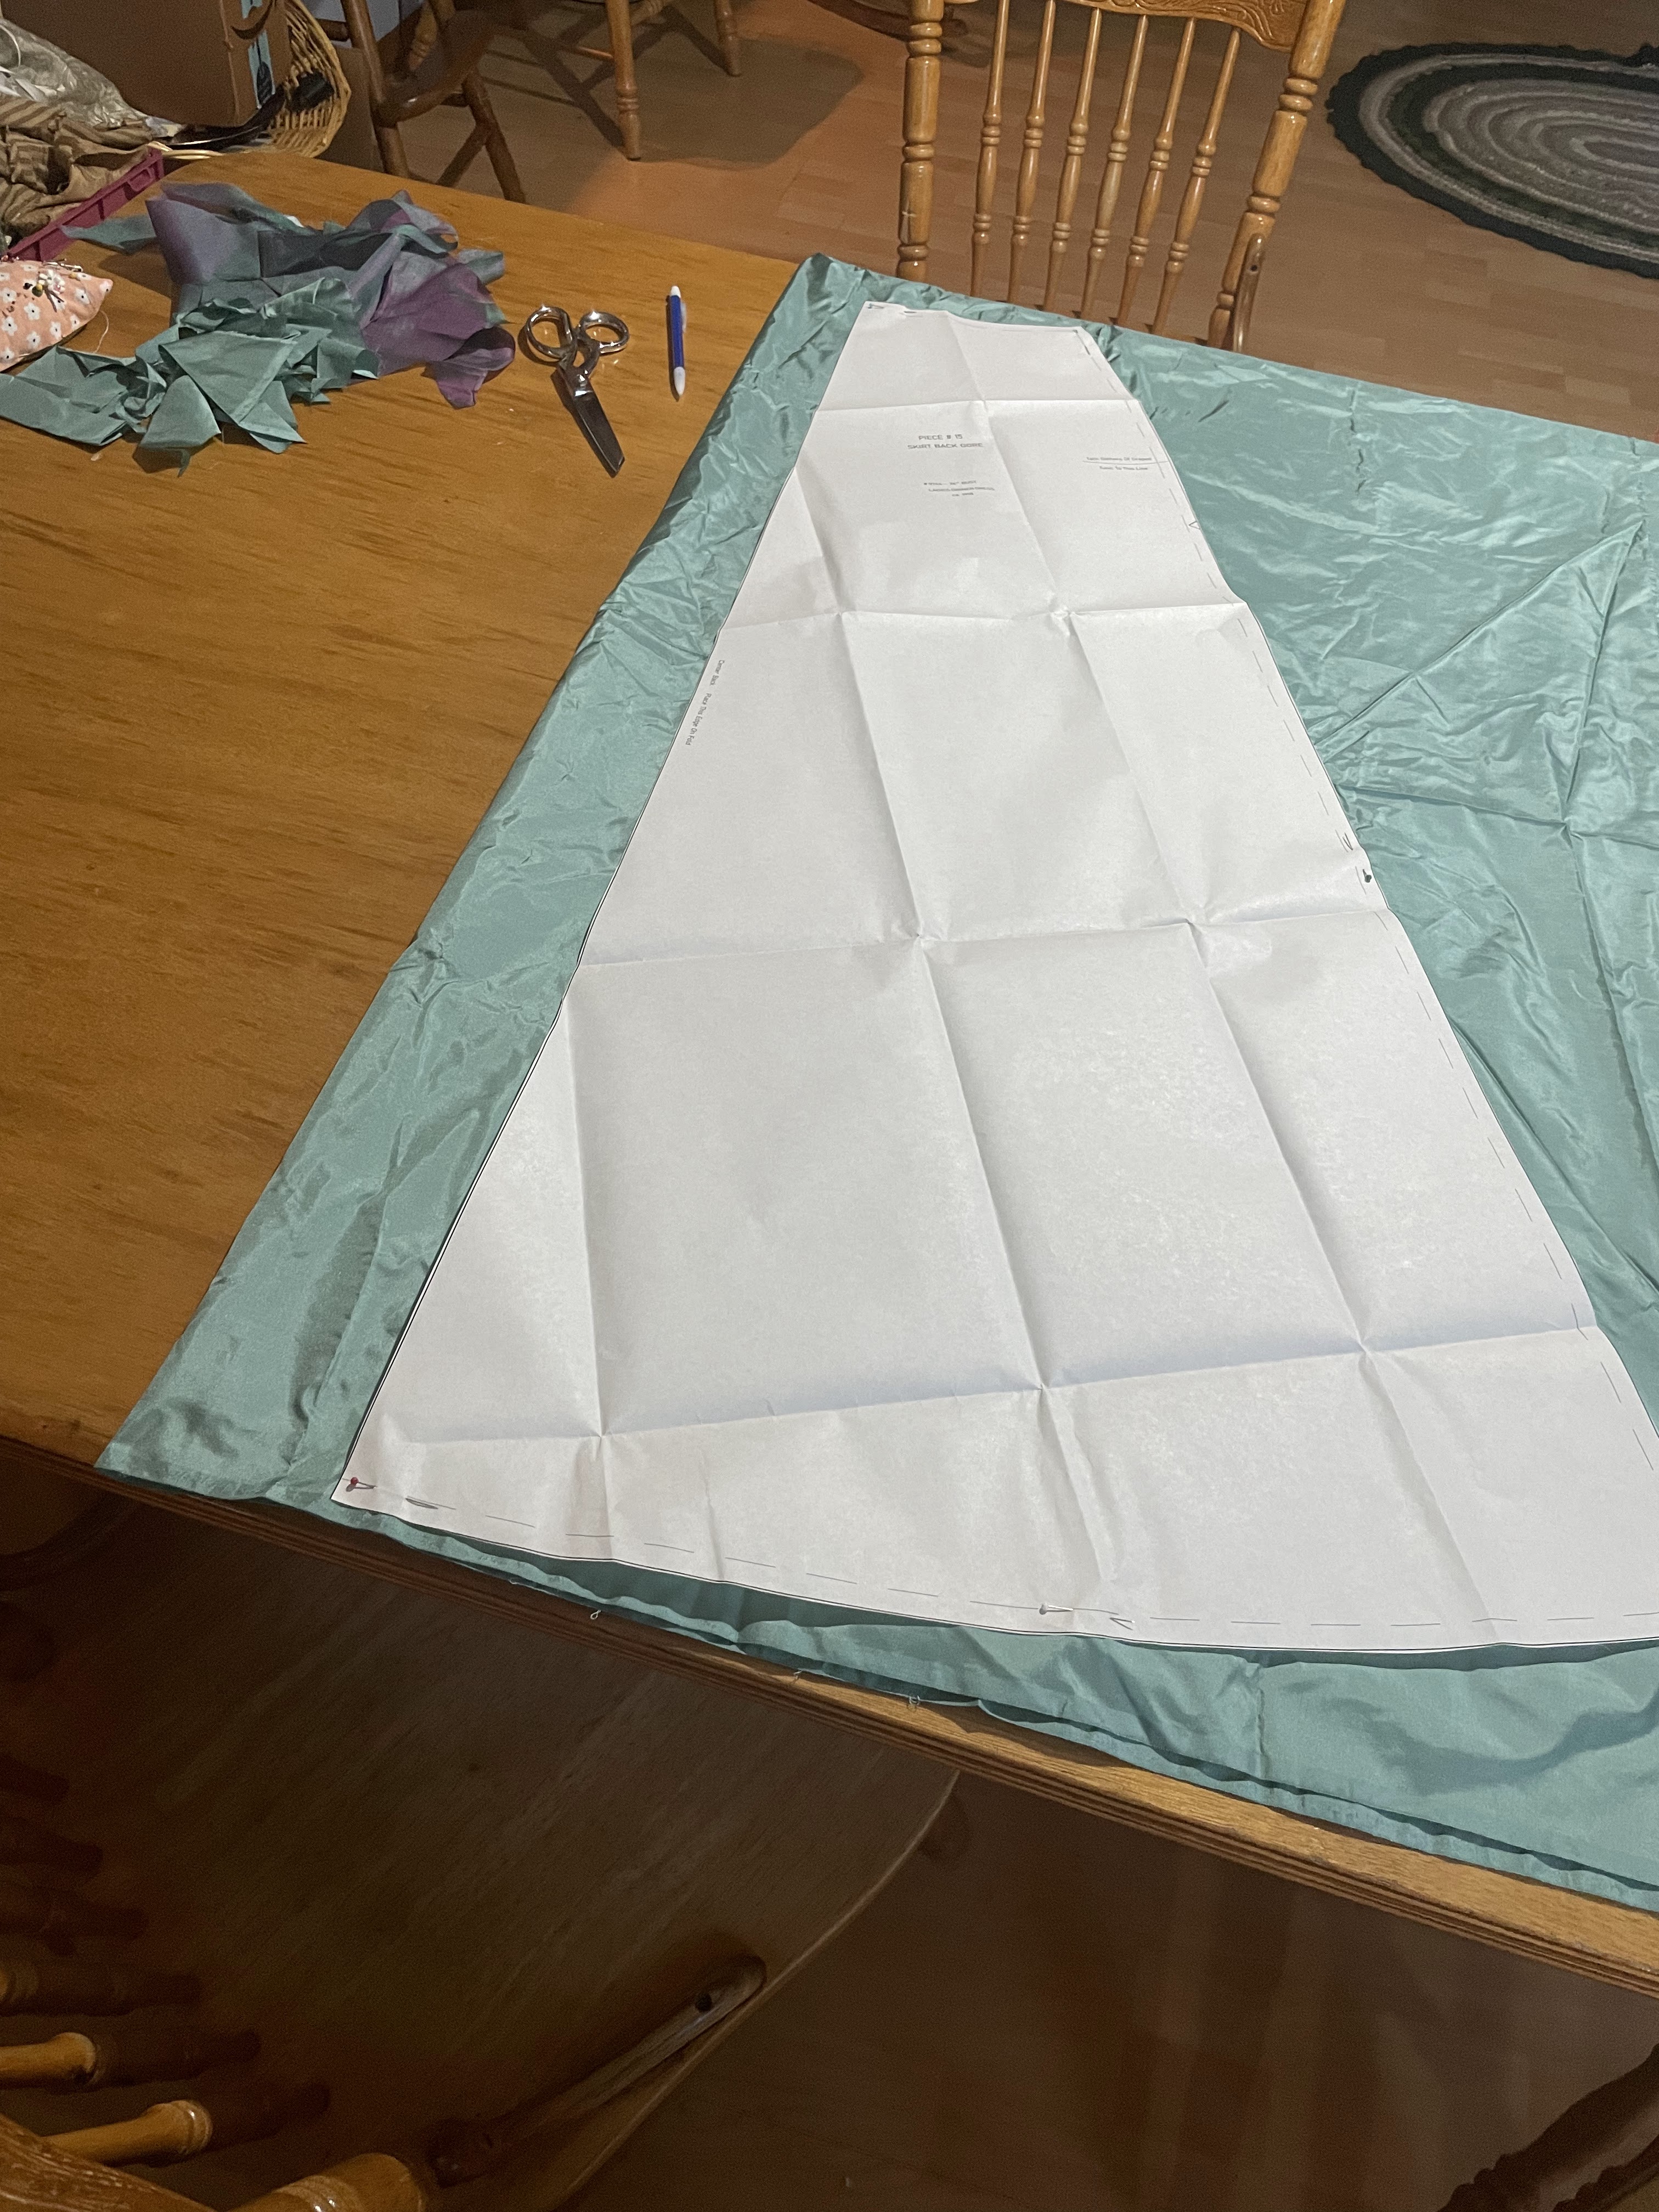
I cut out the front and back under skirt pieces from the leftover silk from my mom’s mother of the groom dress. I used the skirt pieces from the pattern, just cut them a bit fuller, as it looked like otherwise the skirt might be a bit too tight in the hips. Those skirt panels were pretty slim.

I sewed up the skirt seams, and added pockets to the side seams of the underskirt (the pockets are made from a polished cotton the exact same color as the silk, which I just happened to have.) I’d intended to make a little purse to go with the dress, but with less than two weeks until the event I had to admit that wasn’t going to happen, so pockets it was!

In order for the pockets to be easily accessible I cut slits at the sides of the overskirt and narrowly hemmed those slits by hand.

I’m not sure this is really a “historically accurate” 1916 option, but a girl’s gotta have pockets!
Both the overskirt and underskirt were hemmed by hand - though that was a decision I almost instantly regretted as it took forever! That overskirt is FULL!

I love the results, but machine hemming probably would have been fine, and definitely would have saved me a lot of time.
After stewing over it for a few more days I went back to the bodice. I tried on the mockup again and confirmed that yes, an under bodice was necessary to get things to lay right.

This was about 5 days before the event and I grabbed the nearest pattern handy that I thought *might* work for an underbodice. McCall’s 8181.

I altered the armscyes to match the shape of the over bodice armscyes and cut it out of some pale lavender cotton sateen I had on hand.

I basted it together and it fit well enough, I just had to slightly lower the back neckline a couple inches.

I sewed it together, sewed hooks and eyes down the front, and I had my underbodice!

Three days before the event I finally cut out my bodice. I had the day off work and it was time to get this dress done!

In the mock-up stage I took inspiration from this fashion plate:

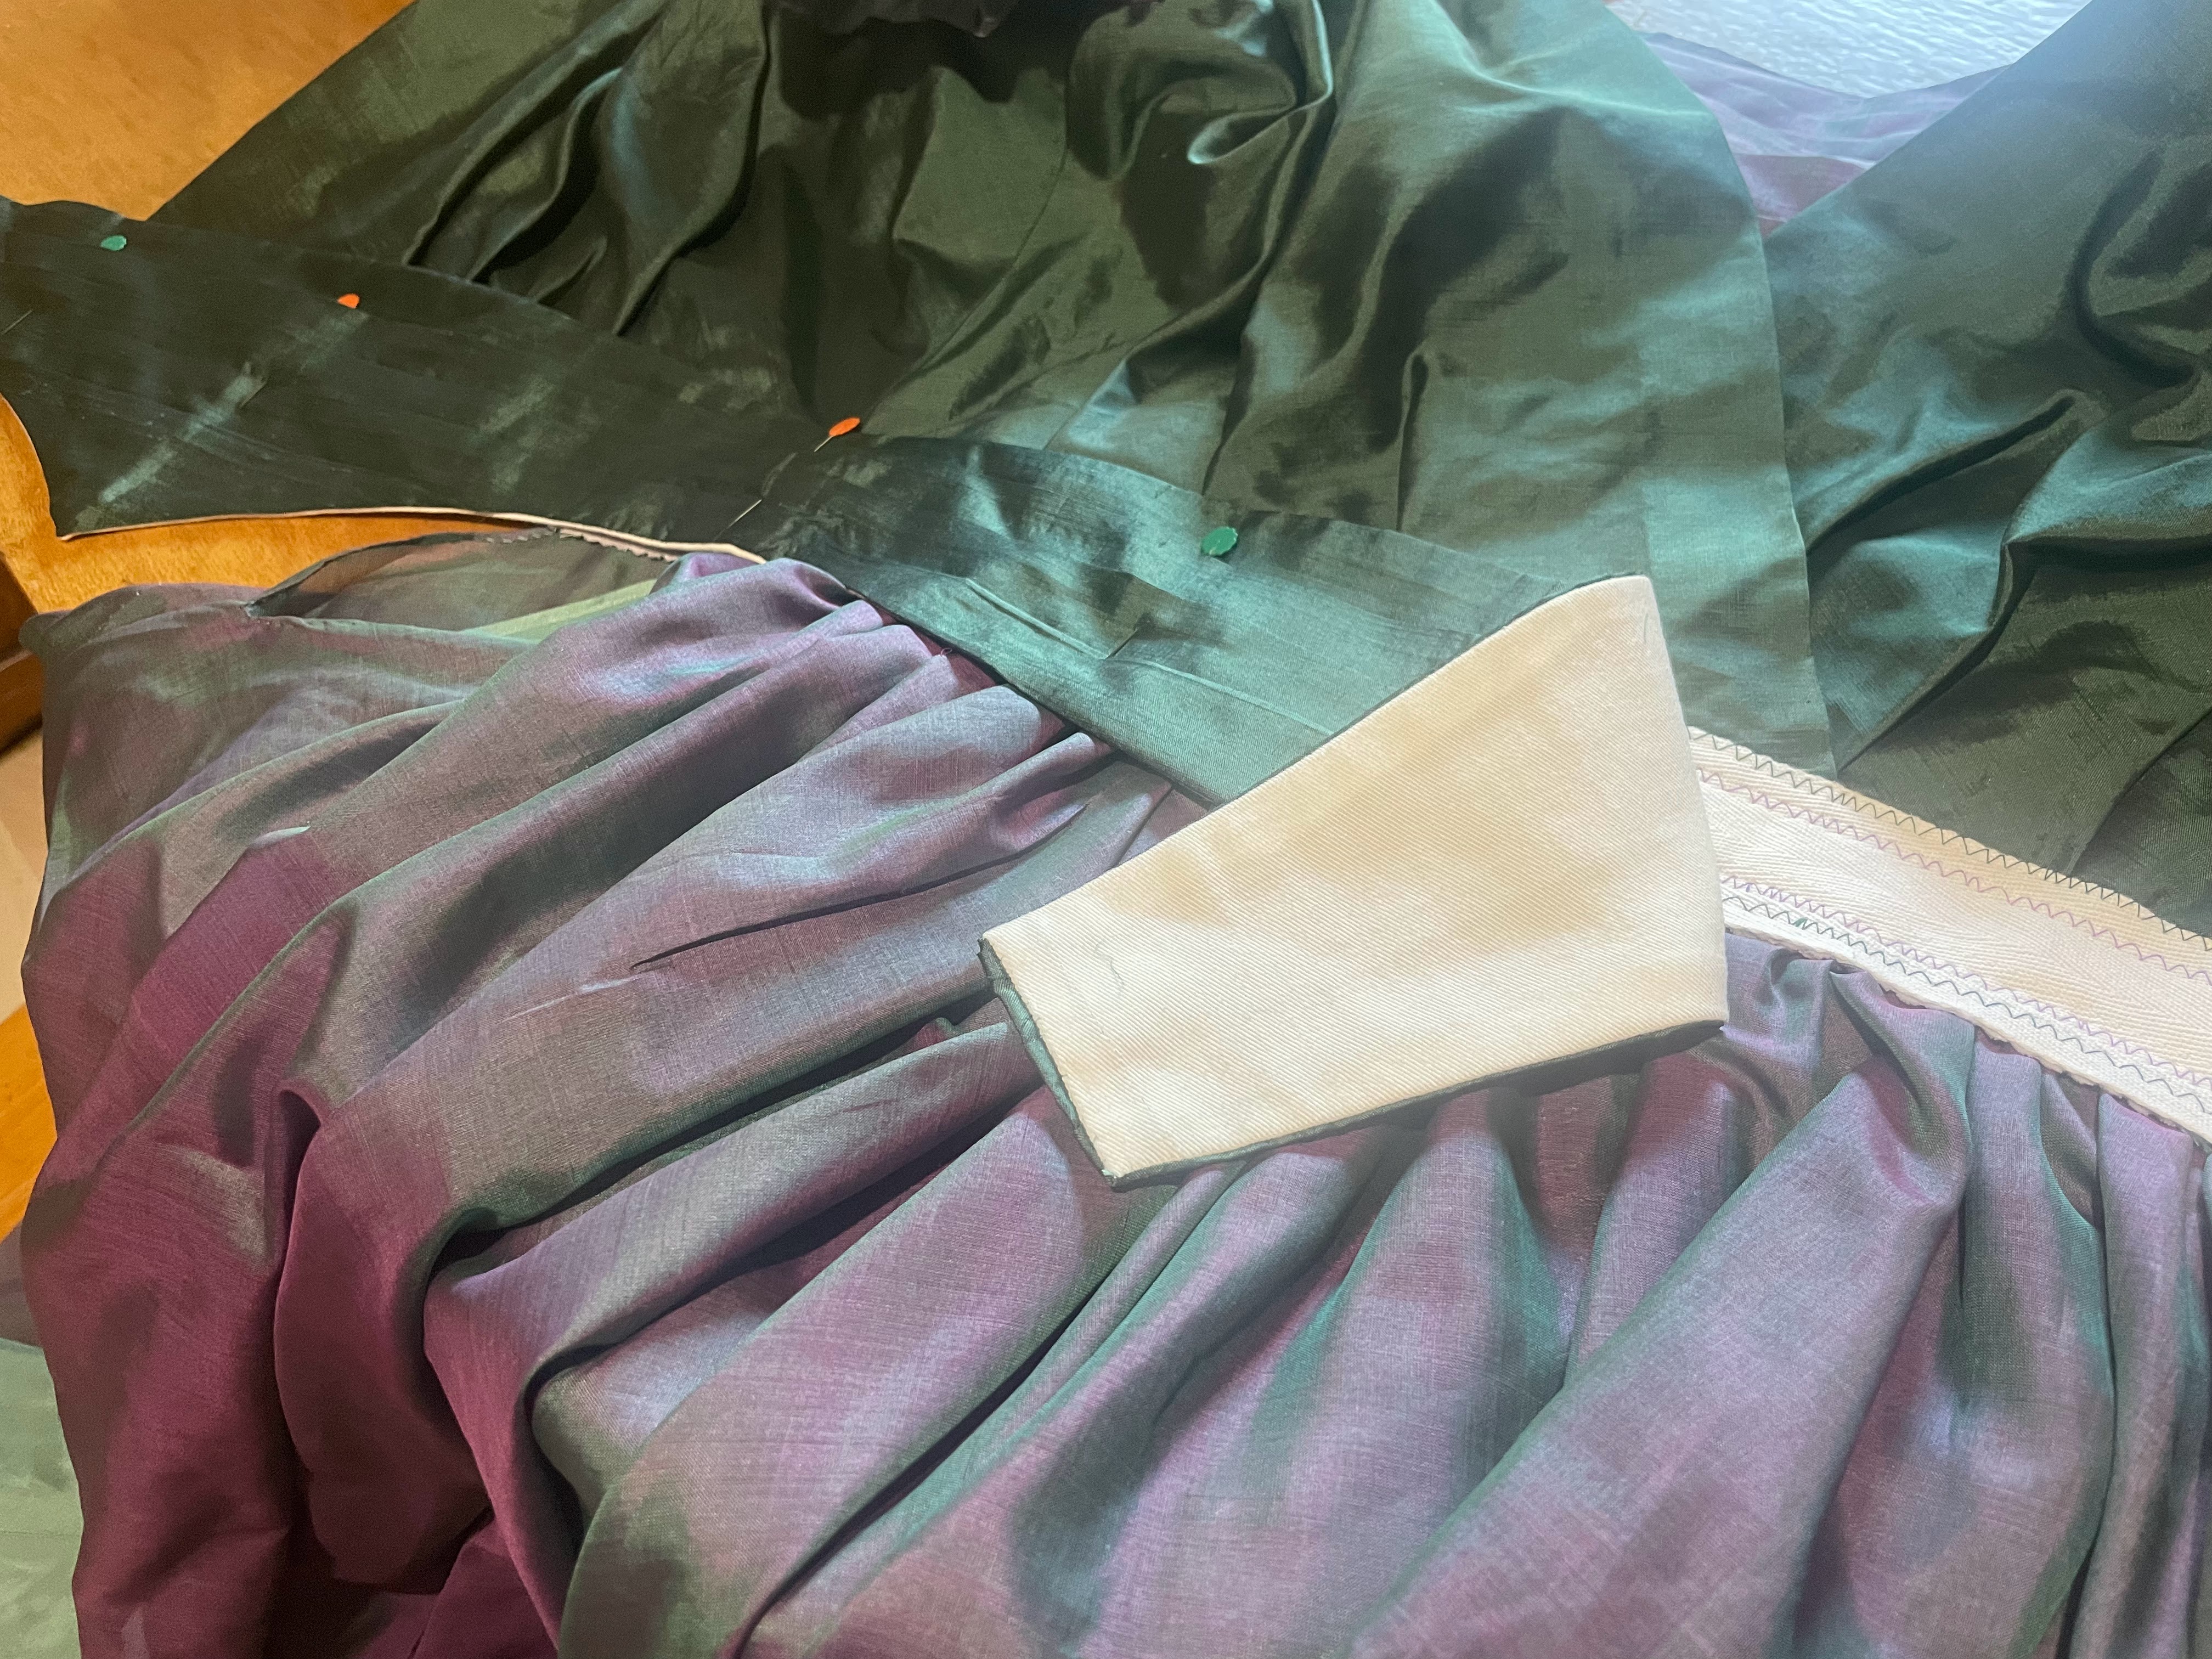
I decided I wanted a pointed belt to finish off the bottom edge of the bodice, so when it came to sewing my bodice, I started with that. I made the base of the belt out of cotton twill, and then pleated the dark green silk to fit, and sewed it together.

I meant to sew it with the opening on the left side, but somehow I managed to put the opening on the right side instead. Oops! I wasn’t going to undo what I’d just done, so it was just gonna have to work!

Moving on, based on the mock-ups, I knew the wrap bodice was going to be lower than I wanted in both the front and the back. I made the under bodice with the neckline at the level I wanted it to be, so I would need to attach something to the under bodice to fill in the gap the wrap bodice would leave. I decided to use the scraps of changeable silk left over from cutting out the over skirt to make a pleated panel for both the front and back neckline.

I sewed the back pleated pieces directly to the back of the under bodice. I used a zig-zag stitch to keep the edges of the silk from fraying to bad.

Since the under bodice fastened down the center front, I couldn’t do the same thing there. Instead I sewed the pleated piece to a scrap of cotton voile and serged around the edges. Period accurate finishing? No. Practical? Yes.

The right side then got sewn to the bodice, and the left side would have snaps sewn on for fastening it to the bodice.

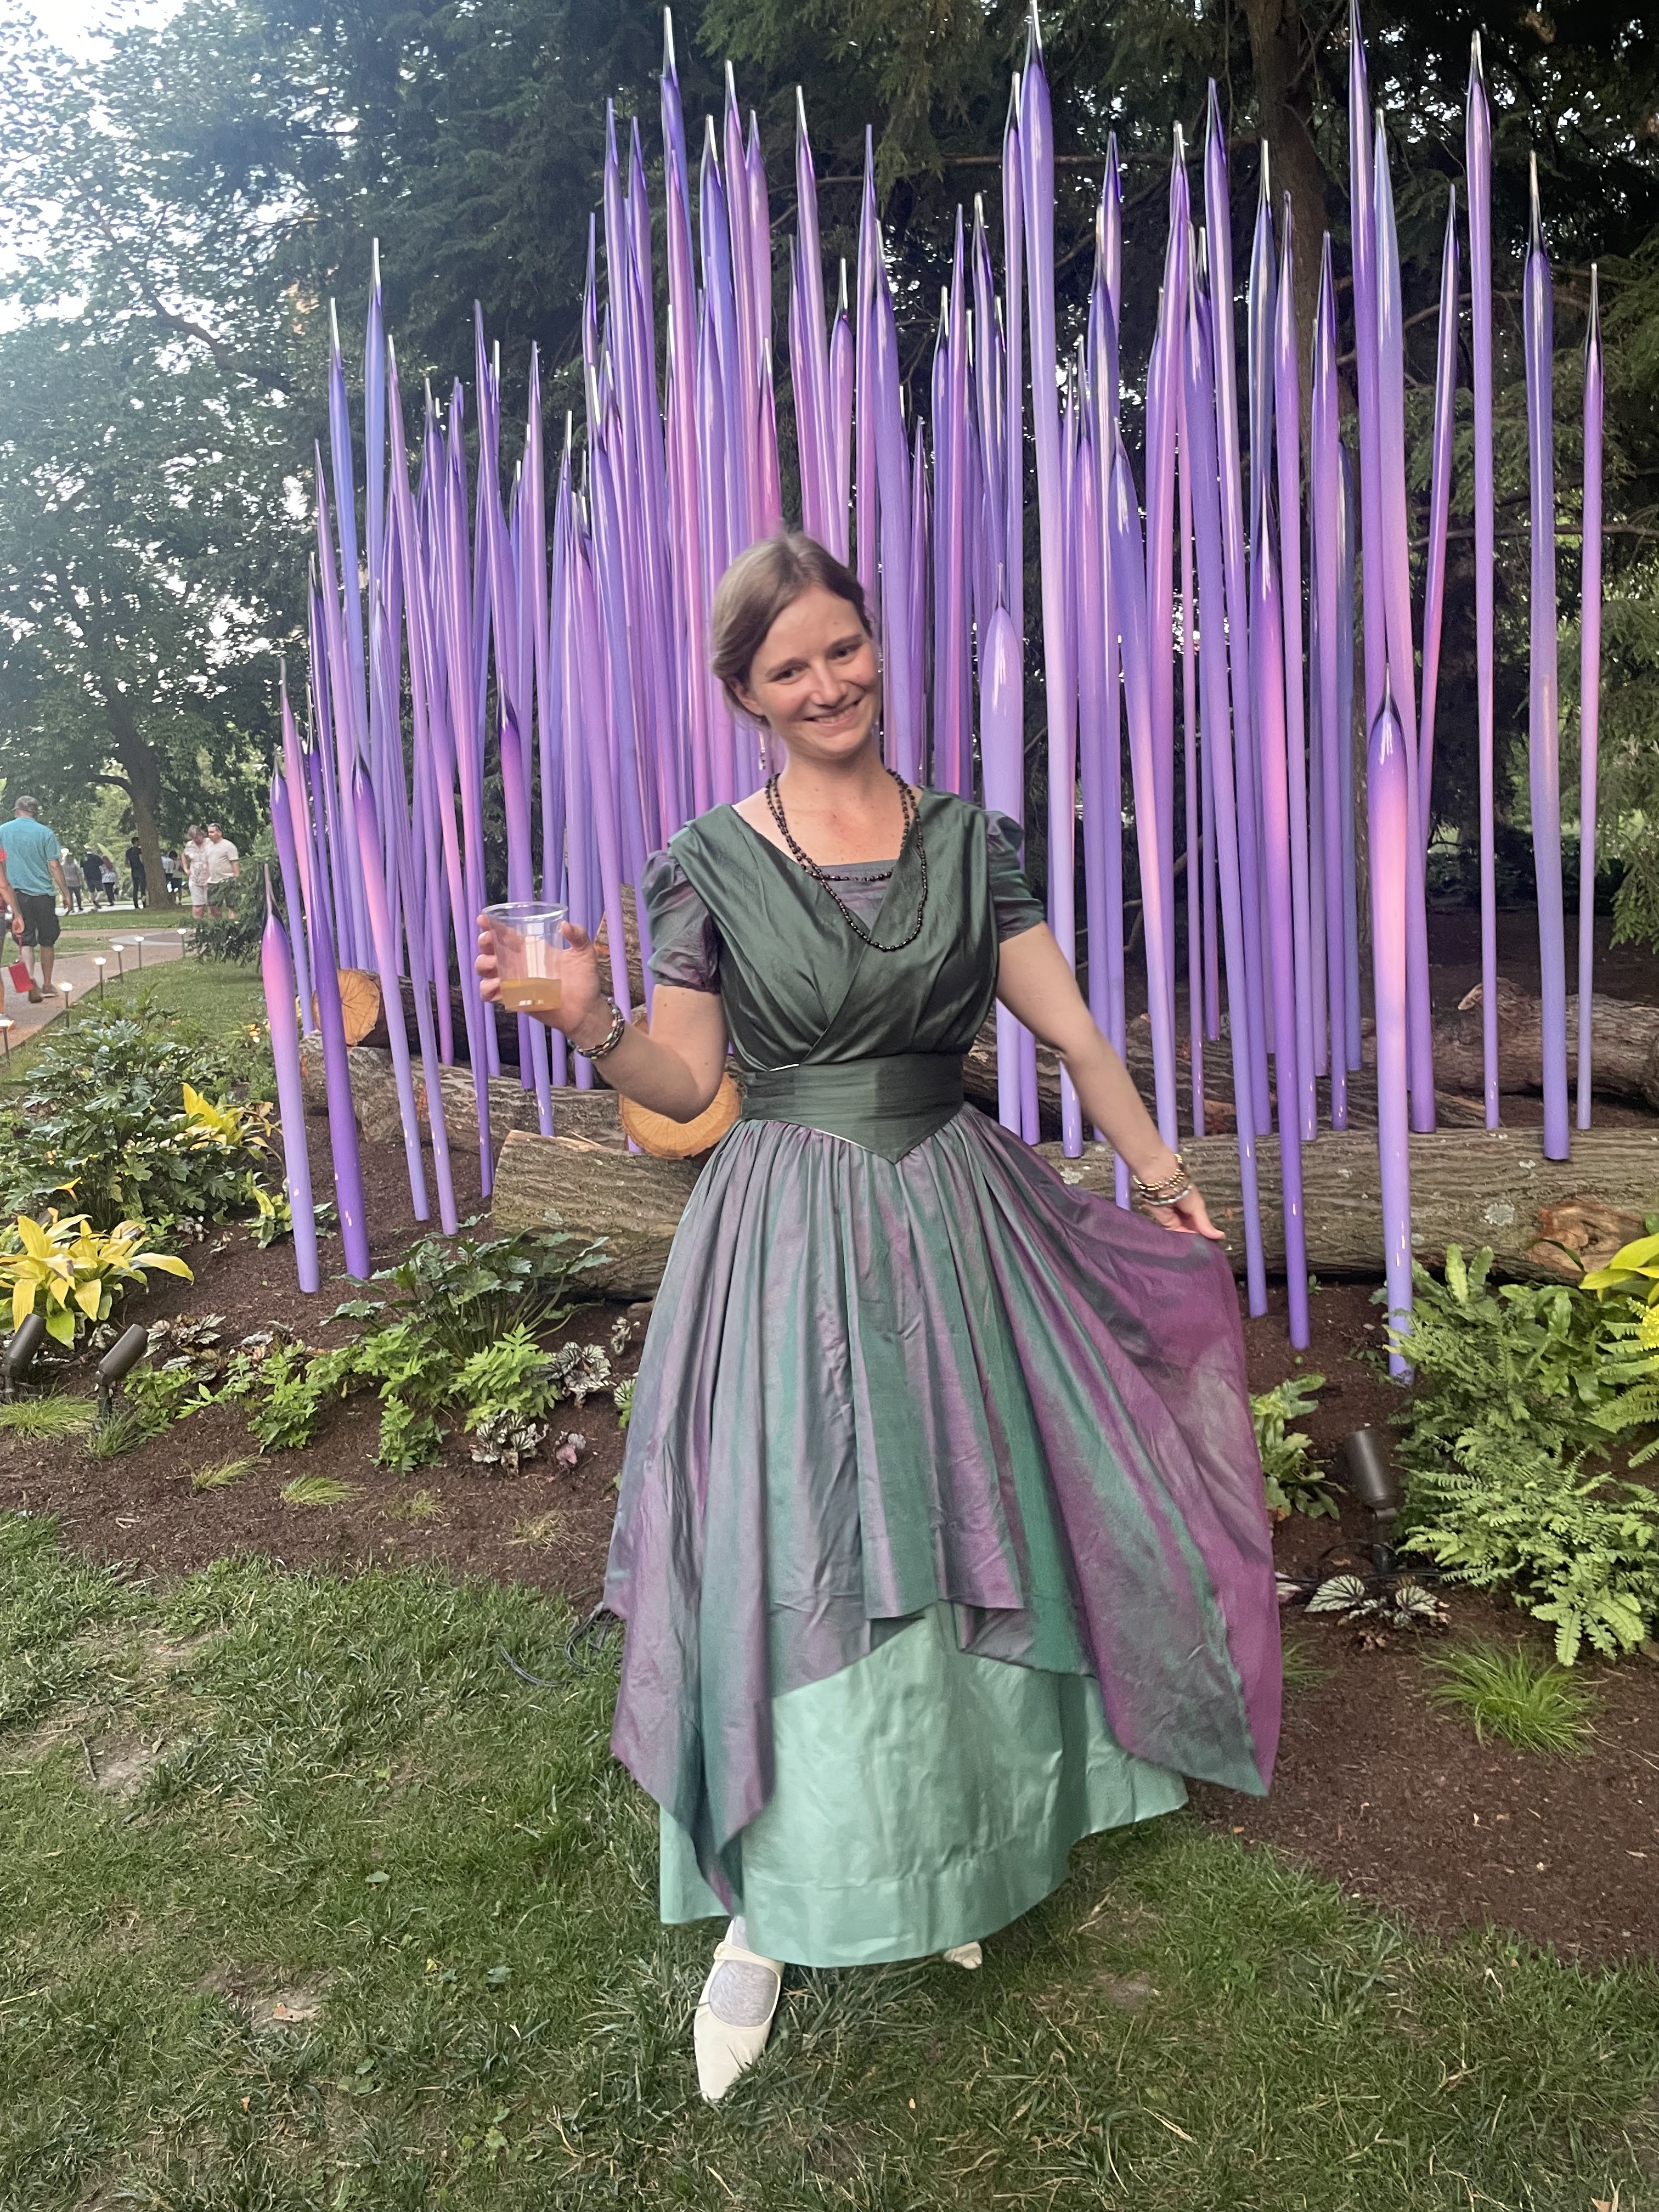
Once the pleated pieces were done, it was onto the wrap over bodice. I sewed up the shoulder and side seams on the green silk and put everything on my dress form - under bodice first, and then the green silk wrap pieces on top.

I smoothed and pleated, and pinned until I was happy with how the wrap lay.


I took it off the dress form and tried it on (with the pointed belt pinned in place as well), and was satisfied with how things were coming along.

So I took it off, laid it flat, and cut a pieces of extra wide twill tape.


At the shoulder seams I used the "stitch in the ditch" method to topstitch my pleats in place.
Now my bodice was pretty well done and ready for the sleeves and skirt to be attached.
I've got nothing to say about attaching the sleeves, they're just basic short puffed sleeves, gathered at the top with elastic at the bottom. (And yes, elastic is accurate for 1916.)


Fascinating how the esthetics of fabric choice and dress design were linked to the practical issues of dress construction and closings. You’re a genius at all of the above! Thanks for sharing!
ReplyDeleteThanks for showing how you hacked this pattern! I'm still a novice at this but hopefully getting better! ;) That fabric is just gorgeous. And thanks for introducing The Vintage Pattern Lending Library to me!
ReplyDelete-Erin