Early in my “Valancy” 1921 dress project I found this early 1920’s sewing manual. I intended to read it through and construct my dress accordingly. Making it as “historically accurate” as possible.

Well, that didn’t happen.
When it came to actually sewing the dress I didn’t take time to read the manual or bother trying to make sure my construction was accurate. I just sewed the dress intuitively, the way I would any sundress.

By the 1920’s sewing machines were common place, so my construction can’t be too far off base anyway, right?
First things first, I serged all the raw edges, because linen frays like nothing else. This is most certainly not a period accurate construction technique, but it saved my sanity, and a lot of time compared to other seam finishing methods.

From a 1/2 yard of pale blue cotton (snagged at the City Sewing Room) I made yards and yards of bias tape. After the pockets were inserted and the side seams sewn up on the skirt I bound the bottom scallops with the bias tape.

One side machine sewn on the front, then folded around and hand sewn on the back.

I did the same thing with the collar once I’d sewn up the shoulder seams.

Once all edges that needed to be bound were bound, I finished assembling the bodice, leaving the left side seam open.
Next came the fun part - butterflies!

So I can’t really say that the blue shapes on the front of my inspiration dress are butterflies, but I wanted butterflies on my version.

I started by making a butterfly template out of paper.

Then I laid the paper butterfly on my bodice to check the scale.

Satisfied, I cut 3 butterflies out of my remaining blue cotton, making them progressively larger for the skirt.

I fray-checked around the edges of the butterflies, and once that was dry, I laid out the skirt out flat to figure out proper butterfly placement.

The butterflies were then safety pinned in place so I could appliqué them on at my leisure once the rest of the dress was assembled.

Hilda, one of my “free range” goats, did her best to help me gather the skirt.

Before sewing the bodice to the skirt, the neckline and armholes needed to be finished.

I used some pretty vintage gingham bias tape I’d been hoarding.


A placket was added to the left side opening, interfaced with a scrap of petersham ribbon.

Vintage snaps and hooks and eyes were pulled from stash to close the placket with.

I mostly used snaps, but some hooks and thread bars were added at strategic points to keep the snaps from potentially popping open. (I made this decision based off what the Quintessential Clothes Pen said in this post.)

This was actually the first time I’d ever used sew on snaps for my closures, and they weren’t as tedious to sew on as I expected them to be! (Thus, I used them on my Rilla Blythe evening gown as well!)

With all the edges finish that needed to be finished and the fastenings sewn on it was back to the butterflies! I used the blanket stitch and blue silk thread to sew all three onto the dress.

A real live butterfly actually came and kept me company while I was working!

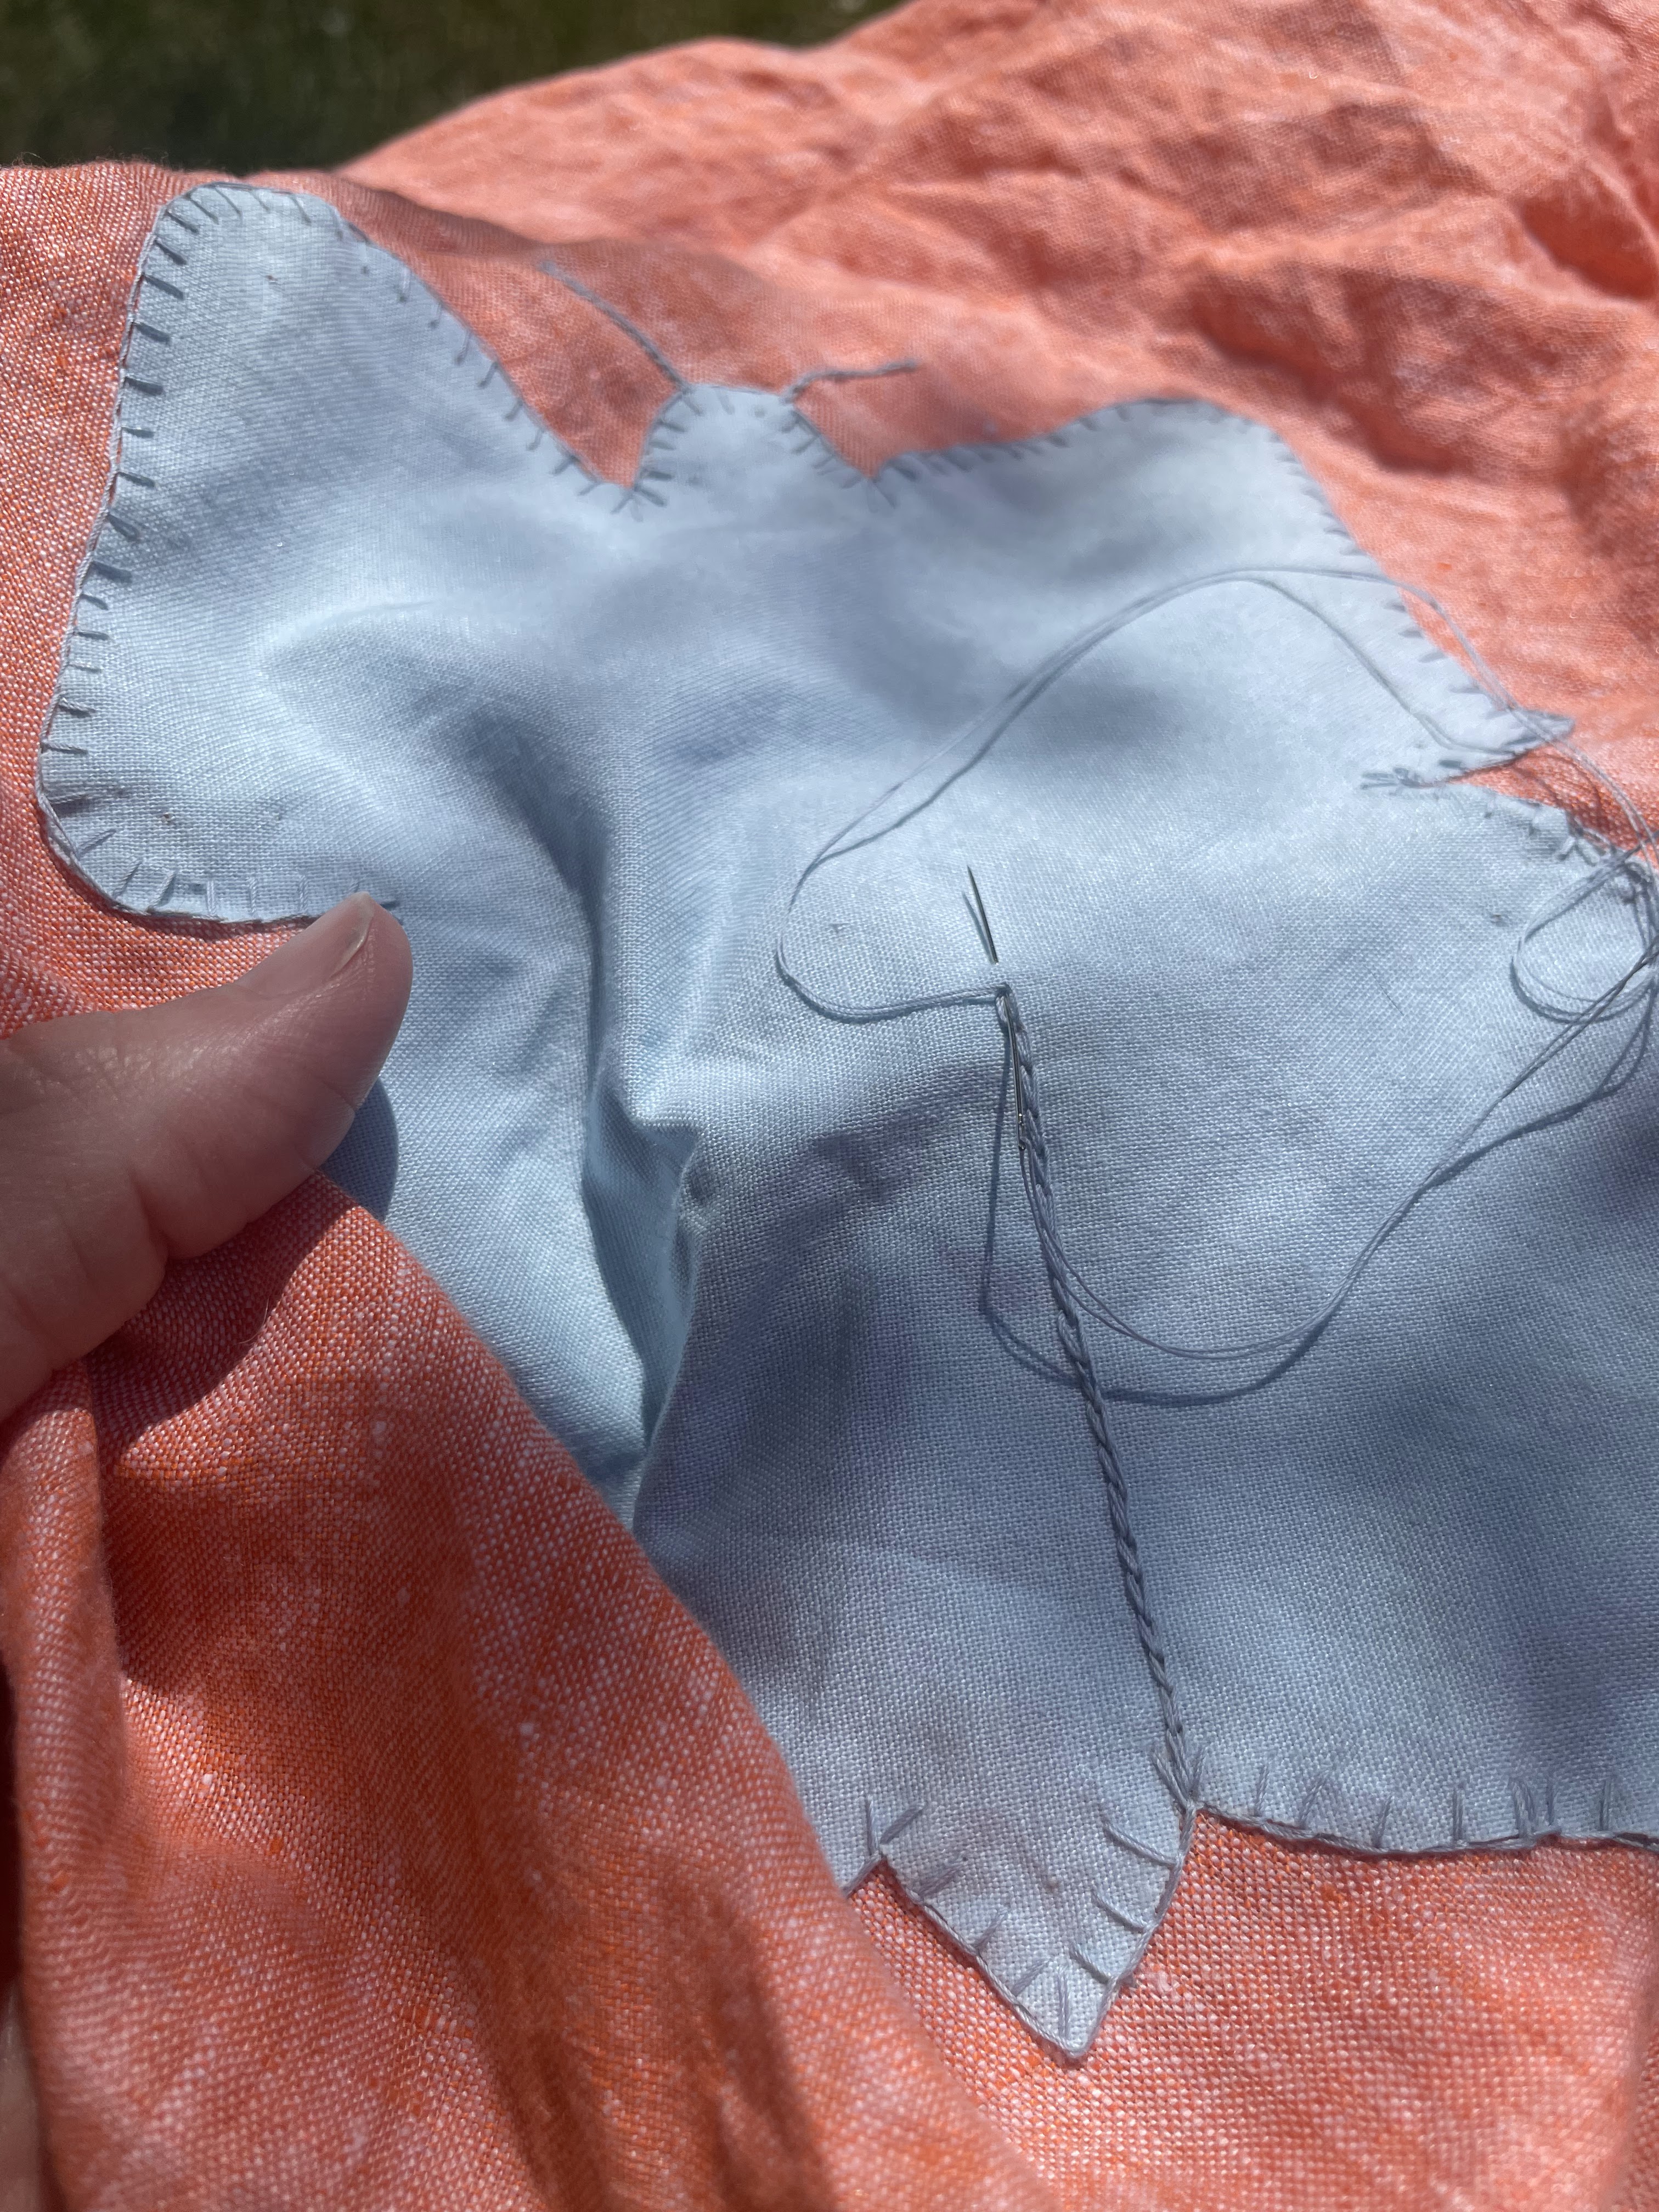
Once the butterflies were all attached, I outlined the bodies and made the antennas with a chain stitch out of the same blue silk thread.

And once that was done, so was the dress!

I paired it with a necklace and some bracelets made by the ladies I visited in Uganda a few years back. And a hat of course, which I decorated the night before the outing to complete the outfit.

And the following afternoon at the Art Museum I felt as pretty and elegant as could be in my new 1920’s dress!
I love the fit, and the style, and just everything about this dress!

I need to find more occasions to wear it! It’s “basic” enough I could wear it for some modern, everyday, occasion, but the right undergarments, accessories, and hat just take it to the next level of elegance. I’m not sure I want to wear it without all the extras!
I’m sure I will wear this dress plenty more, I’m just not sure when, where, or how I’ll style it next time.
 |
| Photo by @papagena1791 (Please excuse the fact that I apparently managed to sit in some dirty water earlier in the afternoon.) |
For now I’m just satisfied that I actually managed to make a drop waisted 1920’s dress that I love! It feels like quite an accomplishment.
 |
| Photo by @papagena1791 |
What the item is: 1920’s afternoon dress
The Challenge: The State of Fashion: Make something for which the fashion was influenced by political situations happening at that time in history (ex: sumptuary laws, imports and tariffs, protests, conflicts or social movements.)
Post WWI and beginning with women gaining the right to vote in the US, the 1920’s were certainly an era of social change, and that was definitely evident in the fashion. Waistlines dropped through the decade, hemlines rose, and the fit became looser. My dress is certainly more conservative as it’s still worn over the undergarments of the previous decade, and the skirt is still nearly ankle length, but the style is that of the new decade.
Material: Linen, with cotton accents.
Pattern: Simplicity 5795 was used as the bodice base, altered for a more 20’s shape. The collar and skirt are my own.
Year: 1921
Notions: Thread, silk thread for embroidery, bias tape, snaps, and hooks.
How historically accurate is it? The overall look matched the fashion print that was my inspiration, so it’s good. Based on patterns and info I found online I believe my pattern is decent. I did not research the proper construction for the era, and the seams are finished by serger, so the construction isn’t particularly accurate. The materials are fine.
60%, maybe a bit more.
Hours to complete: I don’t know. I made it in about a week.
First worn: 6/3/23 for a trip to the art museum.
Total cost: $45 for the linen, everything else was stash, either gifted or picked up cheap secondhand. Definitely under $50 usd total.
Exciting! I expect the linen is super comfortable to wear. The gathered skirt is super cute and a nice design element to see recreated. :) I'm so glad that my experience with 1920s side placket closures could be helpful. Yay!
ReplyDeleteBest,
Quinn