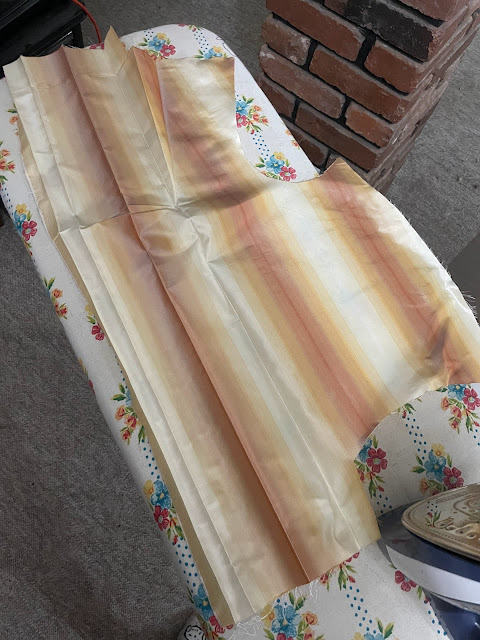
The silk was cut. After agonizing over my pattern choices for who knows how long, there was no changing it now. It was time to sew my ballgown!
The sewing is my favorite part of making anything new. It's always a relief to have the cutting done and be able to just sit down, go into auto pilot, and sew! I'd decided to hand sew my gown, because I just enjoy hand sewing. I find it relaxing and love the fact it can be done anywhere. I'm not tied to my sewing machine in the basement - I can hand sew outside, inside by the fire, at work, at home, in the car while somebody else drives. Hand sewing is just plain freeing! It's fantastic! (Just in case you were worried, I'm very attached to my sewing machine as well, and use it all the time because it's so quick and easy. Both hand sewing and machine sewing have their place.)
As I'd already constructed my linen bodice lining (Prior to even cutting my silk, see my previous blog post if you want more info.), step one of sewing my Strawberry Sacque was seaming together the two back panels. I did this with a running back stitch. (A running sitch with a back stitch sewn every so often to keep things secure. Ideal for long skirt seams and such.)
Long seam sewn up, it was onto the most impressive and iconic part of the sacque dress - the back pleats.
I found no historical president for that many extra hidden pleats, but look at all that "oompf and volume"! It was worth it!
Next up was attaching the front skirt panels - but first I had to finish making the darned things by sewing on those silly front gores I'd decided I just had to cut.
A couple long mantua maker's seams (I actually mostly enjoy sewing mantua makers seams, I was just getting impatient because I wanted to be progressing faster on the gown construction and get to trimming, but the gore seams really slowed me down.) and finished pocket slits later, I was finally sewing the front skirt panels onto the gown.
I pinned the panels in place, shoved the floofy silken monster into a garment bag, and took it outside to continue sewing mantua maker's seams.
My free-range goats kept me company.
Once those side seams were done, I took the gown back inside to lay it out on the table and pleat and pin the front skirt in place along the waist seam.
Once I was more or less pleased with the front skirt pleats and placement, I returned outside to sew (with the gown safely in the garment bag again to keep it from getting dirty), and Blackberry made it very clear that she would love to help me by eating the silk.
"Sorry goat, I can't let that happen."
At some point, I sewed up the sleeves, lining them and the stomacher in pink linen (left over from this gown) since I'd used up every last scrap of my cream linen on my very pieced together bodice lining.
I roll hemmed the top and bottom scalloped edges of my sleeve ruffles.
This was tedious, just pinking the edges would have been way easier, but I loved the clean look of the hemmed edges.
Besides, I had goats to keep me company while I sewed. (I took them into the woods this time so they would have things to eat other than my silk.)
My kitchen sink may have been full of dirty dishes when she arrived, but my sleeves were ready for her to help me finish setting them!
With the sleeves set, the gown itself was almost done. Just a bit of finishing work on the bodice and the stomacher left to go!
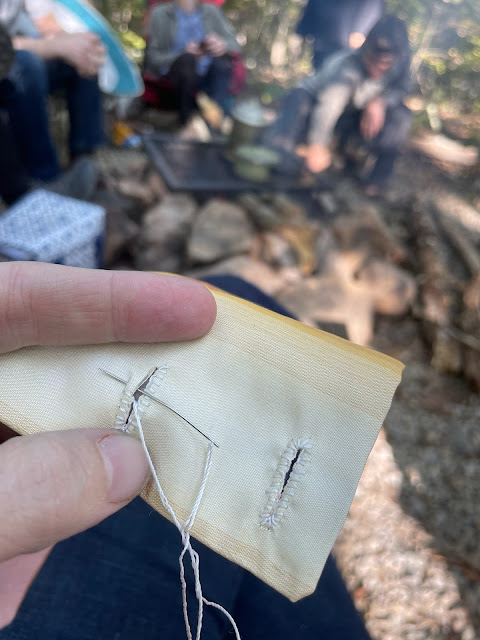
The stomacher came camping with me, and I sewed buttonholes down the front while sitting around the campfire and chatting with my cousins. This was two weeks before the ball.
Upon returning home, I made the covered buttons for the stomacher with the help of a 1/2" covered button kit and some E6000. (Not historical, but it works. The very first covered buttons I ever made fell apart after a few uses, so I've been gluing them together ever since.)
The buttons got sewn on. The final bit of sewing on the bodice was finished.
5 days before the ball I could confidently say my gown was done!


No comments:
Post a Comment