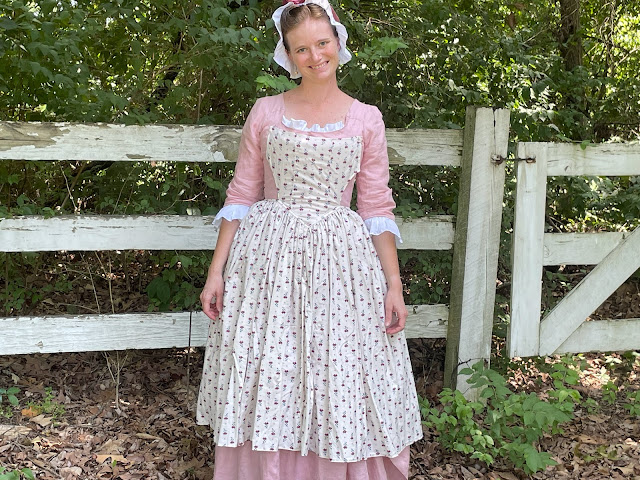
Alright, now that I've finally told the story of my "Happy Birthday Felicity" gown, let's talk about the rest of the ensemble - starting with the apron.
As I mentioned in my last post, the apron was actually the first part of the ensemble that I began. It was a great handsewing project to bring along to work!
That said, the apron, or more specifically the fabric for the apron, delayed my starting on this outfit for a while, possibly a couple years. I found the pink linen for the gown at Joann's several years and snapped up a whole bolt of it for this project when it went on sale for an acceptable price. Then I started keeping my eyes open for the perfect apron fabric.
Felicity's apron features a beautiful block print of flowers in multiple colors. I found an extant 18th century apron on Pinterest with a very similar print - which made me very excited!
So for years, I've been looking for a similar fabric to make my apron from. And I've struck out. (Yes, I know you can get custom printed fabric, but that's expensive and I prefer to find fabric "in the wild")
Well, mostly struck out. In my stash I happened to have a block printed cotton of a similar style which seemed passible for the era. It just wasn't as colorful as Felicity's apron. And all the flowers looked the same. To put it simply, the fabric from my stash just wasn't as "fun" as Felicity's.

Last spring, however, I decided the fabric was good enough and I might as well make an apron from it. If I happen across a better fabric in the future (that fits into my budget), I can always make a second apron. So, back in June, after I finished
my 1910's and 1920's dresses, I made the apron.
I used the pinner apron pattern from Costume Close-up, and I figured out what I found to be a very easy way to size up patterns from that book!
I marked the scale from the edge of the pattern onto the edge of a piece of paper. (Yes, I just used a piece of junk mail that happened to be on the table. No time to find better paper when you come up with a great idea!)
Then I was able to use the scale marked on the scrap paper as a ruler to measure the pattern pieces in the book. Using a yard stick and big paper I was then able to draw out my pattern pieces at full size quite easily! The process was very similar to drawing full size patterns with
apportioning rulers, and made enlarging the patterns in this book way less daunting to me! (This method would also work for the patterns in
Cut of Women's Clothes. It's opened up a world of possibilities!)
That said, the apron pattern was pretty straight forward. I just had to finagle things a bit to get the apron, with 2 full widths of fabric in the skirt, out of my 2 yard cut of cotton.
Due to the slight fabric shortage, the bodice of my apron is pieced together - but piecing is period!
The three pieces of my bodice are seamed together with a mantua maker's seam, then all the edges of the bodice were hemmed.
The skirt panels were likewise sewn together with a mantua maker's seam, then the bottom of the apron was hemmed. the sides had a really nice selvedge edge, so they required no hemming.

The top edge of the skirt was then gathered up.
And sewn onto a narrow waistband cut from the fabric.
Twill tape waist ties were sewn on, then the bodice and skirt were whipped stitched together.
The apron was done!
The top gets pinned onto my gown with straight pins.
And the waist ties get threaded through the pocket slits of the gown so as not to interrupt the beautiful back pleats!
I love it! Over the dress it gives the perfect impression of Felicity's birthday outfit - despite the "less fun" fabric!


No comments:
Post a Comment