Well it has been a while now, hasn't it. This month has been something. A roller coaster really of ups and downs - high ups and low downs - and I still feel like I'm trying to catch my breath. The month started off fantastically with our Anne of Green Gables Picnic!
 |
| Photo by @samithefae |
And that picnic was everything we envisioned it being! But before I get ahead of myself, let me tell you the story of my outfit. . .
 |
| Photo by @samithefae |
As explained in my introductory post on the subject last month, the idea for this Edwardian picnic outfit of mine really began with this white cotton nightgown. It just begged to be turned into a frilly Edwardian blouse!

Thus, I procured the Black Snail Edwardian Blouse pattern for the project.


First, I seam ripped the button placket off the pin-ticked yoke, but left it attached to the body of the nightgown - I intended to use the existing button placket down the back of my blouse, rather than making a new one.

Finally, I removed the pin-tucked yoke from the body of the nightgown. It would be re-used as the yoke of the blouse.
Disassembly thus completed, I carefully ironed all the pieces of material, then assembled the pattern. Once the pattern was all taped together and the pieces cut out in my size, I took stock of the pattern and decided that my best option was to combine elements of view 1 and view 2 - and maybe, just maybe, I'd be able to get this whole blouse cut out of the one nightgown's worth of material.

I decided to start with the smallest piece - the yoke. It took a bit of finagling to figure out the best way to piece together the nightgown yoke pieces to have a large enough piece of flat material to cut out the blouse yoke - but eventually it happened! Even better, where the piecing had to happen resembled a shoulder seam, rather than a "I didn't have enough fabric seam" - and I call that a win!
Finagling really was the name of the game when it came to figuring out the pattern layout for this project.

It was easy enough to figure out where and how to layout the front and the back of the blouse - the center front of the blouse when on the center back of the nightgown, and the center back of the blouse went on the center front of the nightgown to utilize the existing button placket - but the sleeves. Oh the sleeves.

Those gave me trouble! I really wanted the view 1 ruffly sleeves, but that sleeve pattern piece was huge (along with the separate ruffle pattern piece. . .), and I just couldn't figure out a way to make it work. I contemplated making the sleeves out of a different white fabric, but nothing in my stash suited (and I did not want to cut up the second nightgown, though I did consider it.) I contemplated majorly piecing together the sleeves from alllllllll the tiny scraps of fabric, but that wouldn't really work either. I resigned myself to making the less full view 2 sleeves - but even that pattern piece didn't quite fit, and those were not the sleeves I wanted. I wanted ruffles!!
Two days. For two days the pattern was laid out on the dissected nightgown on my living room floor. Every time I came in the room I swapped out the sleeve pattern piece - view 1, view 2, view 1, view 2 - and I spent a lot of time on Pinterest considering Edwardian sleeve options.

Finally, an idea struck. I would use the view 2 sleeve that mostly fit onto the fabric I had available. Out of the larger leftover scraps, I would cut ruffles to go at the bottom of the sleeves - similar to the view 1 ruffles, only less long and less full. Both the bottom of the sleeve and the top of the ruffle would be gathered into a narrow cuff cut from some of the smaller scraps.
 |
| Photo by @samithefae |
This solution worked beautifully! No, the sleeves weren't as floofy as the huge view 1 sleeves would have been - but they were still beautiful and gave the right impression.
 |
| Photo by @samithefae |
And I believe, they had just enough "puff" that even Anne would have been satisfied to wear this blouse!
Once the sleeve conundrum was solved, it was pretty smooth sailing!

I pieced together the pin-tucked yoke, and trimmed it all around the edge with some of the lace harvested from the nightgown.

Then I sewed together the shoulder seams (using French Seams for a clean finish) of the body of the blouse.
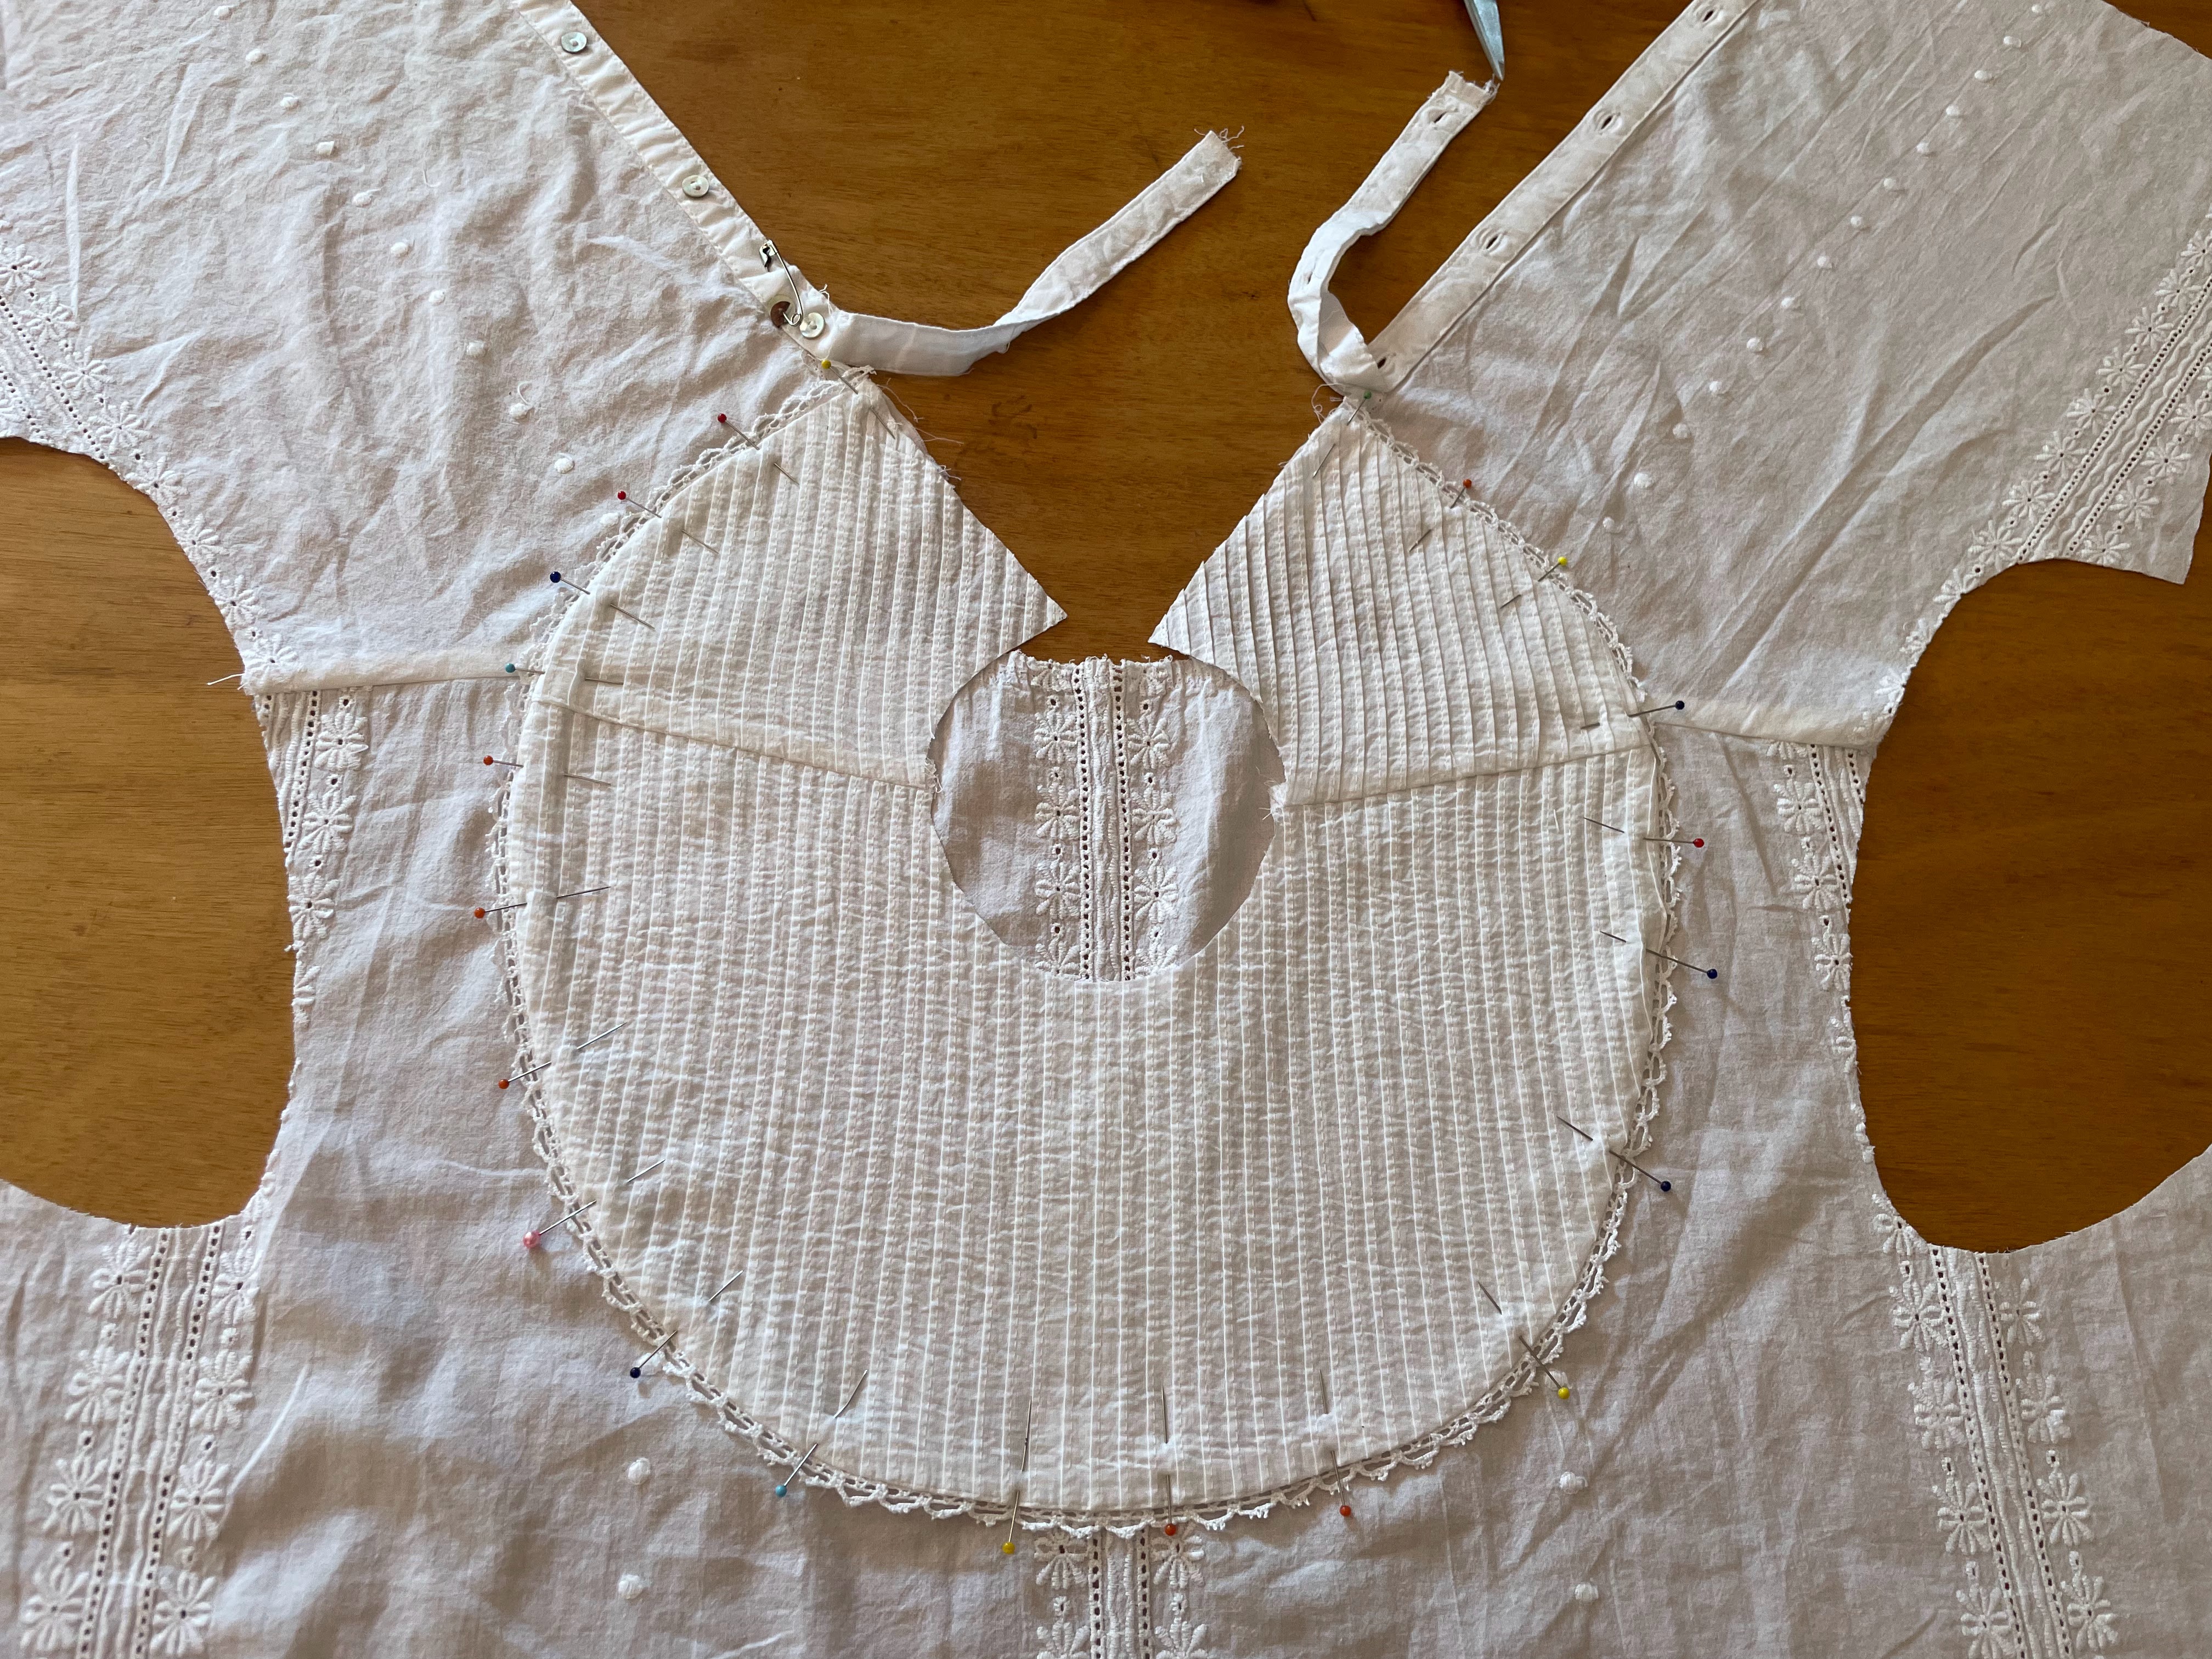
The yoke then got pinned on top of the body, and topstitched in place.
Once the yoke was sewn on, the excess material behind it got trimmed away and the seam allowance was finished with a narrow zig-zag stitch.I made the collar out of a scrap of fabric - adding a few pintucks for fun and finishing the top edge with more of the harvested lace.

The collar was sewn on to the neckline, and that seam allowance was finished by encasing it in some of the bias tape harvested from the nightgown. (Thanks to my seam-ripping at the beginning, the only "new" notion required for this blouse was the thread to sew it together - buttons, lace, and bias tape were all there for the taking!)

Once the collar was on, the button placket could be attached to the yoke and collar - effectively finishing the closure for this blouse!

The pattern actually recommended only having buttons up to the bottom of the yoke, then using hooks and eyes and snaps to close the yoke and the collar, but it was very satisfactory to be able to re-use the button placket from the original nightgown!
 |
| Photo by @samithefae |
And I like the look of buttons all the way up the back - even though it does appear to gape slightly at the top.
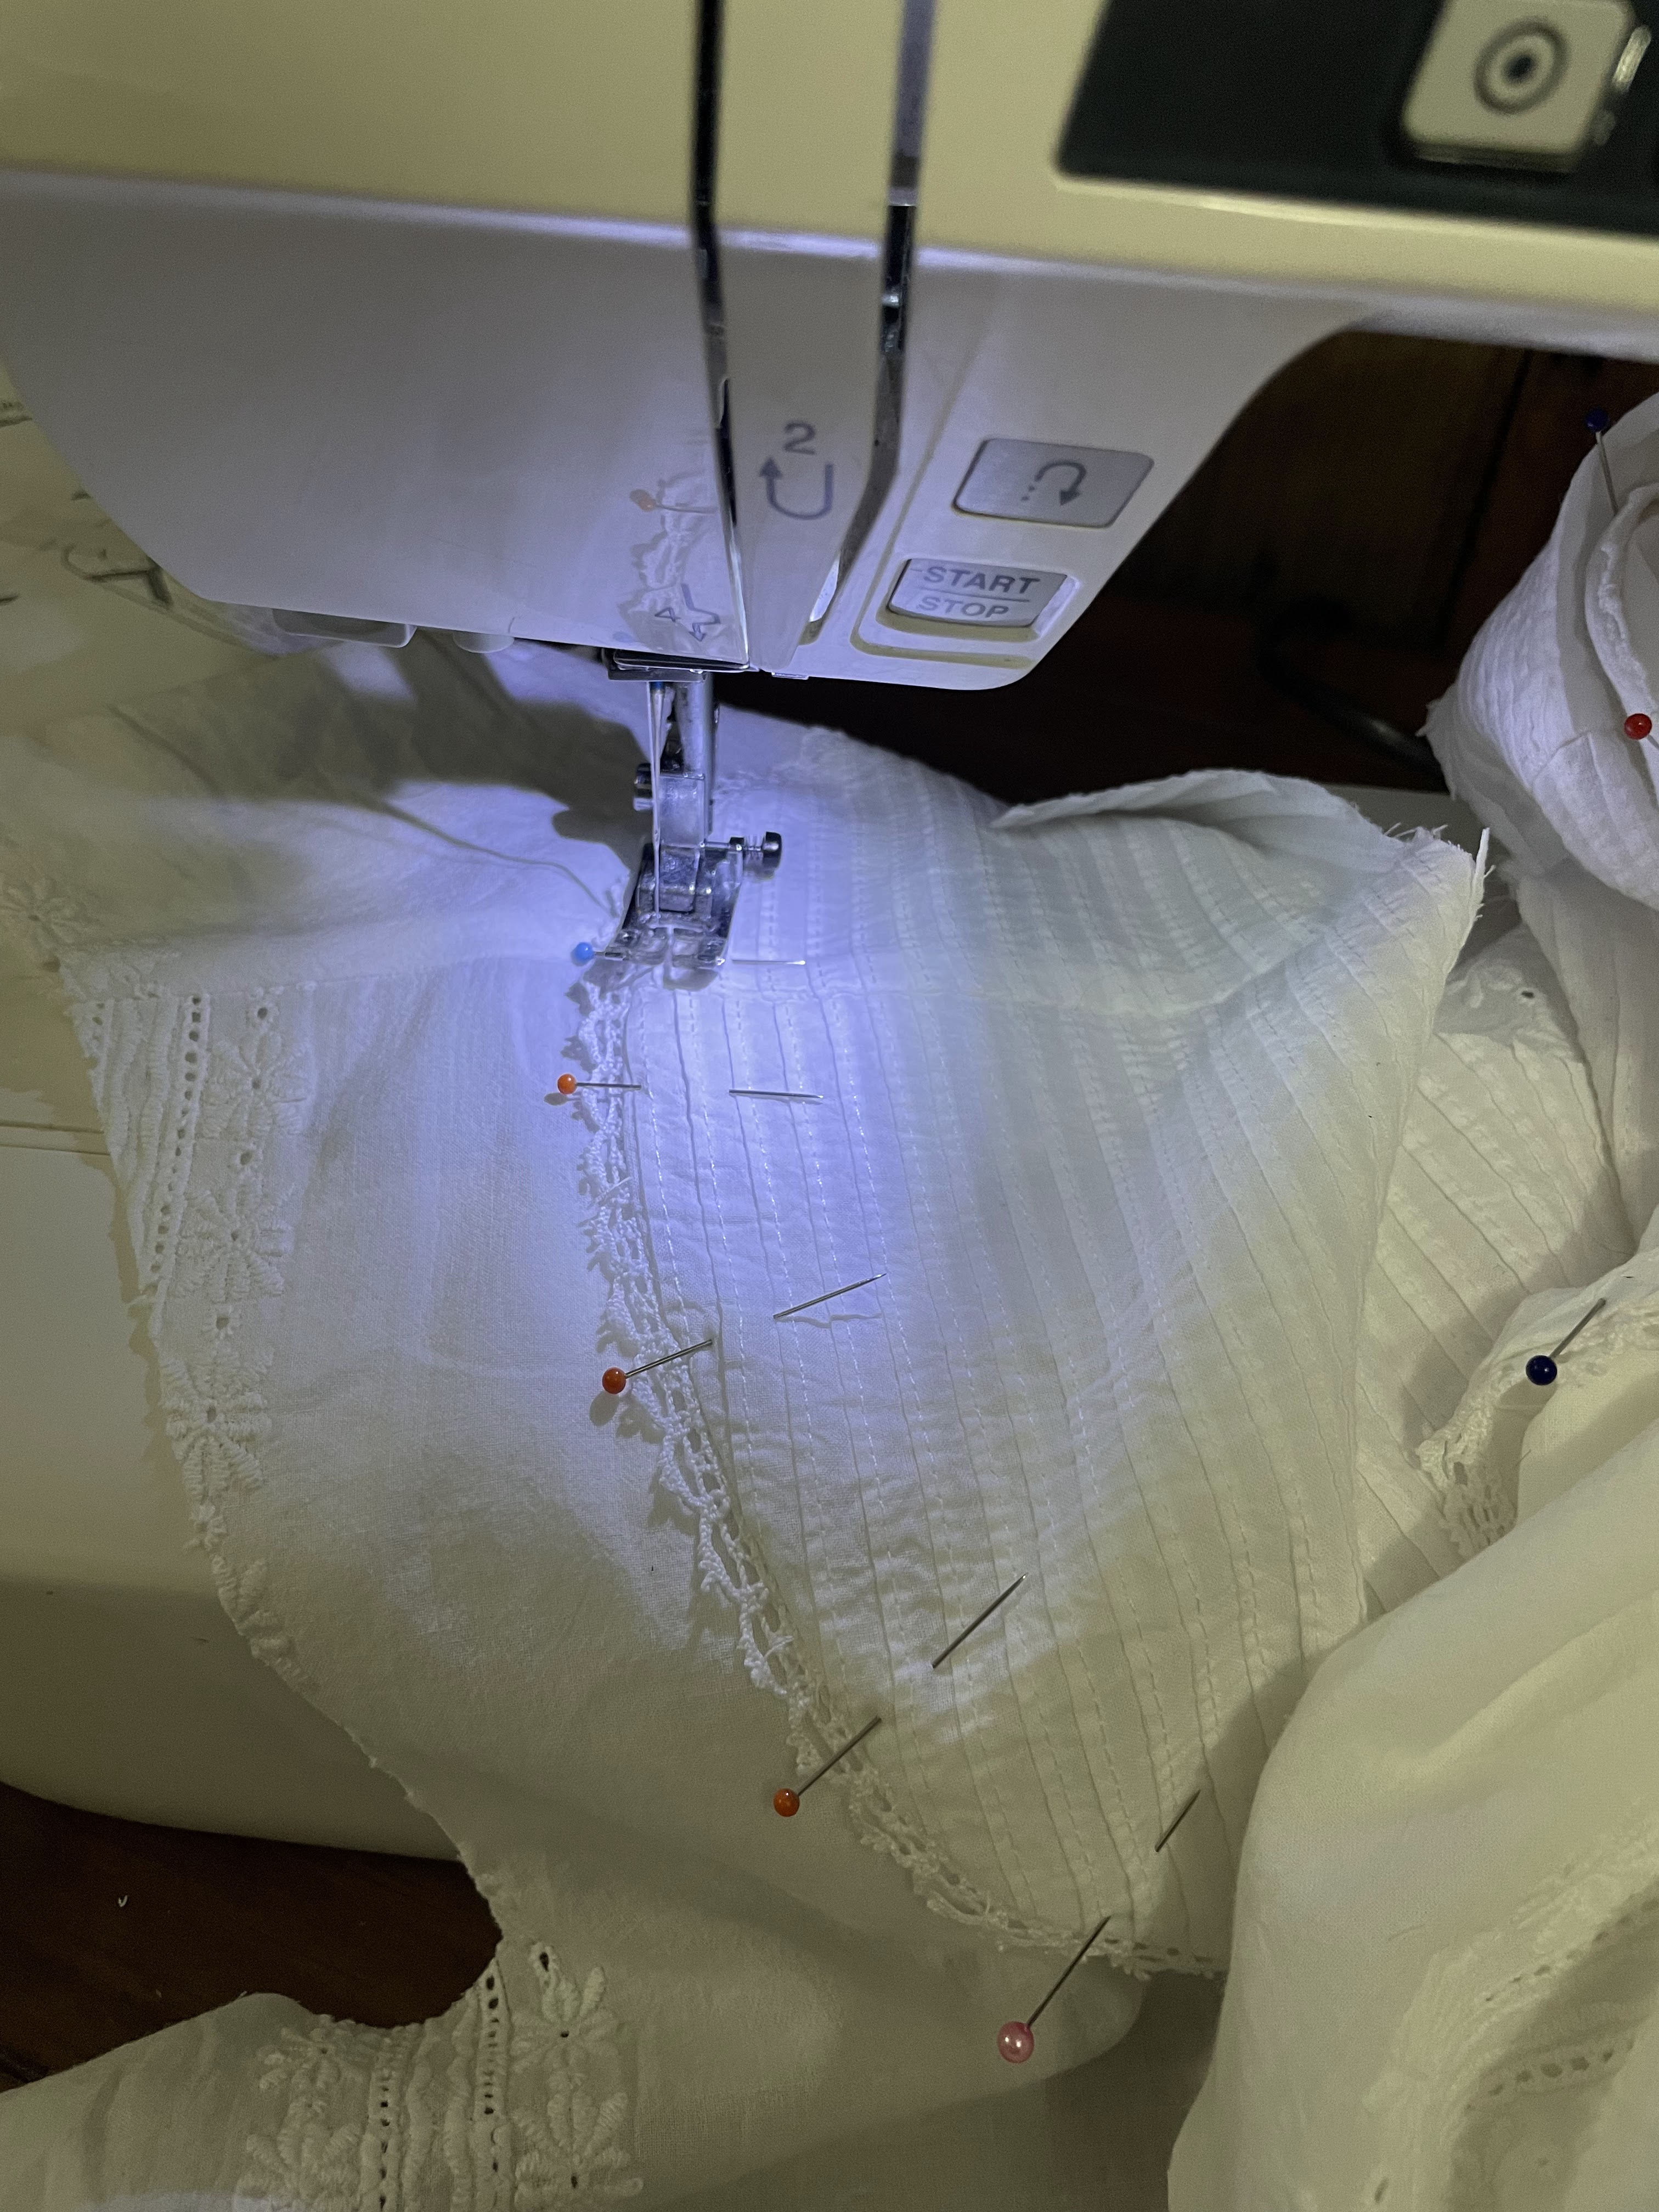
Button placket on, the side seams were sewn up (French Seams again), and the body of the blouse was gathered into the peplum (view 2 option).

The peplum was, admittedly, not cut out of the nightgown material, but rather a lightweight cotton harvested from a bed skirt in my stash. The material didn't exactly match, being a looser weave and a less white white than the nightgown material, but, as the peplum would be tucked into my skirt and never seen when the blouse was worn, it didn't have to be perfect!
 |
| Photo by @samithefae |
The peplum was sewn on with a French Seam. Then the sleeves were assembled, the ruffles finished at the bottom with more of the harvested lace, and set. That seam allowance was then finished with the harvested bias tape.
 |
| Photo by @samithefae |
And the blouse was done!!
 |
| Photo by @samithefae |
Delicate and floofy - everything an Edwardian blouse should be!!
And everything I dreamed that nightgown could be turned into!
Speaking of, since this was a re-fashion project, it fits the HSM #5 theme for this year - New Clothes from Old:
Make something new out of a worn-out garment or accessory. Or make something using recycled materials.
What the item is: An Edwardian Blouse
The Challenge: New Clothes from Old - this blouse is almost entirely made from a thrifted nightgown, the only new materiel in it is thread!
Material: Lightweight embroidered cotton, harvested from the aforementioned nightgown, and a bit of lightweight cotton harvest from a bed skirt for the peplum
Pattern: Black Snail Edwardian Blouse, with slight alterations
Year: 1904-1906ish
Notions: Buttons, cotton lace trim, and cotton bias tape, all harvested from the nightgown - and thread (fresh off a spool, since re-using the night gown's thread would have been tricky)
How historically accurate is it? Pretty good, it certainly resembles blouses of the era. Its all machine sewn, but by the early 1900's that's not unheard of. I'll give it atleast an 85%.
Hours to complete: I didn't keep track, but it wasn't bad. Maybe 6-8 hours total.
First worn: 6/1/24 for an Anne of Green Gables themed Picnic!
Total cost: Less than $1! The nightgown was picked up at a "by the pound" place, and it weighed less than a pound. Being just a blouse, this didn't require a ton of thread, and the bed skirt I used a bit of was also thrifted cheap - plus I've got plenty of that left for future projects.
 |
| Photo by @samithefae |
Thanks for reading! Now hopefully I can get around to telling you about the rest of the outfit before another month goes by!
Beautiful! And the event looks like so much fun. I hope you're doing well despite the "downs" you mentioned.
ReplyDelete-Enid
Amazing! That small amount of fabric turned into a lovely romantic blouse!
ReplyDelete