Tuesday, August 14, 2018

The High-Waisted Swimsuit I Didn't Plan to Make

Two years ago I decided to make myself a swimsuit. I bought the pattern. I ordered the fabric. I didn't make the swimsuit. Six months after I bought my supplies, I was sewing my wardrobe for the World Race. I thought I'd get my swimsuit sewn up while I was at it. A new one piece swimsuit to take along on my year long mission trip? It sounded like a good idea to me, but alas, it didn't happen.  A year later, I returned from the World Race, and remembered I still had a swimsuit to sew. I wanted to sew it, but I'd returned home in the middle of winter so a swimsuit seemed a rather impractical sewing project. Late spring rolled around, and I thought I'd make the swimsuit for my summer of taking the kids I nanny to the pool. Once again, the swimsuit making plans didn't come to fruition. Finally, I figured I'd get my swimsuit made in time for the beach vacation I was going on. Well, I got back from said vacation yesterday, and still, the planned for one piece swimsuit hasn't been made.


It would appear swimsuit making never made its way to the top of my sewing list this summer. Except, it did. I actually did manage to make myself a swimsuit this summer, it just wasn't the one I'd been planning on making. It wasn't a one piece. I didn't even use an actual swimsuit pattern for half of it. And, I didn't even use the swimwear fabric I bought two years ago. Oh no, that fabric is still sitting in my stash, awaiting the day I will make the originally planned swimsuit. Rather than use my carefully picked out swimsuit pattern and pretty purple fabric, I bought some black and white galaxy print swim fabric when I found it on sale at Joann's. Less than a week after I aquired said galaxy print fabric, I made myself a swim top. But let me start at the beginning. . .


As previously mentioned, I've spent quite a bit of my summer hanging out with the kids at the pool. On one of those first pool afternoons of the summer a swimsuit caught my eye. It was a bikini, but the top was different than any swimsuit I'd seen before. It completely covered the upper back and shoulders, and tied in the front, under the bust.


Now, the worst sunburns I've had in my life have been on my upper back, across my shoulders. This swimsuit covered that area, so those sunburns wouldn't happen. (I swear, I do wear sunscreen, I'm just pale and burn easily) Almost immediately, I decided I just had to re-create the shoulder covering bikini! Thus, on my next trip to Joann's, I acquired the patterns and fabrics to do so.


For the top, I decided to use Simplicity 8654. It's a reprint of a 1940's pattern, and had just the shape I was looking for. There were only a couple changes I had to make to turn it into a swimsuit pattern, rather than a woven crop top pattern.


First, as I would be using a very stretchy knit fabric for my swim suit, rather than the zero-stretch woven the pattern was drafted for, I traced the pattern one size smaller than I usually make in Simplicity patterns. Looking back, I probably should have gone down two sizes, but just going down one size worked out ok. 
Second, I widened the shoulders slightly for extra sun coverage. 
Finally, I removed the darts from the bodice back. Thankfully, there were no front bust darts to contend with, otherwise those would have had to be removed as well. (The lack of front darts is the primary reason why I picked this pattern over a similar Vogue pattern for the top.)


I cut the top out of both my galaxy swimsuit fabric, and a swim lining fabric. I then cut out extra triangles of my galaxy fabric to line the front ties with, so when the top is worn the white lining doesn't show on the "wrong" side of the ties. With my top cut out, I began to assemble it.


Now, I had never before made a swimsuit. And, for my first ever swimsuit piece, I wasn't even using a swimsuit pattern. Thus, I had no instructions telling me how to construct this thing. So, I basically just winged it. I googled "how to apply elastic to swimsuits", read a couple tutorials for that particular skill, then went for it, constructing the top in the manner that made the most sense in my head. There was nothing particularly complicated to it. Except for adding bra cups, or rather attempting to add bra cups. Those were really hard to get placed exactly perfectly. In the end I decided my swim top had enough support without cups and abandoned them all together. Other than that I had no real issues.  I ended up stretching my elastic a little too much while applying it to the neckline and lower edge of my top, so the edges are a little ruffly looking rather than laying perfectly flat. This isn't ideal, but I decided it was fine. As this was my first piece of swimwear, I didn't expect it to turn out perfect, just cute and wearable! And in that, I believe I succeeded!


The swim top was actually easier to make than I had expected it to be! The weekend after I finished it, I wore it with some plain black swimsuit bottoms on a float trip with my brother and some friends. Thanks to the back and shoulder coverage, I came home from that float trip with no major sunburn - a first for me when it comes to float trips!


Now, when I cut out my swimsuit top, I also cut out a pair of high-waisted swimsuit bottoms (from McCall's M7168) to go with it. Only, I didn't have time to make them before my float trip in June. Thus, they became lost and forgotten at the bottom of my "to sew" pile. Until I bagan packing for my end of the summer beach vacation.


Suddenly I remembered I'd planned to make some high-waisted bottoms to wear with my top. Before this swimsuit, I hadn't worn a bikini since I was 10. I knew I'd be more comfortable wearing my top at the beach and hotel swimming pool if I had the extra coverage high-waisted bottoms would provide. Thus, I dug out my cut out pair, and sewed them up the night before I left on vacation. The bottoms went together even quicker and easier than the top! (Using an actual swimsuit pattern, rather than an adapted shirt pattern, may have contributed to how easy they were to make)  


My finished swimsuit was just what I hoped it would be - perfect for the beach!


Playing in the waves!


Watching the sea creatures the tide brought in! 


And building sand forts!


It's not the swimsuit I've been planning on making for two years, but I'm incredibly pleased that I actually managed to make myself a swimsuit this summer! Maybe I'll make the intended one piece next summer. . .


Photo Credit to Bretta and Julea Gerhard


Saturday, August 11, 2018

A Triple Take of the Double Take Tank

I wasn't kidding two weeks ago when I said certain shades of green were practically neutrals in my wardrobe. A couple weeks ago I made myself 3 new tank tops, and without even trying, only using fabrics in my stash, all 3 go perfectly with the green skirts, shorts, and pants in my wardrobe.


I've enjoyed sewing up (and wearing!) the Winter Wear Designs patterns for blog tours this year, so when Suzanne put out a testing call for a new woven tank top pattern, I decided why not? I like her patterns and can always use more tank tops in my wardrobe. Plus, as sleeveless tops don't require much material, I had plenty of fabric in my stash I could use for the project.


For the first tank top from this pattern I dug into my stash of "recently used, but not completely used up" fabrics, and selected a remnant of floral polyester left over from making this dress.


I was a little short on fabric, so I had to cut the back out as two separate pieces, rather than 1 on the fold. Thus, this first tank got a center back seam, but, with the busy pattern, it's not too noticeable.


The pattern includes 3 hem options; short, regular,
and shirt tail. I really wanted to make the shirt tail option, but, due to my fabric shortage, that wasn't possible, so I just did the plain old regular hem option instead. It's still slightly longer in the back than the front, just not dramatically so.


As with most WWD patterns I made a size M, graded to a S waist, then back to a M at the hips. I was very pleased with the fit of this sizing combination, so I repeated it with my next two tops.


For the second tank I reached into my stash of "garments to be refashioned" and came up with a rayon crepe, elastic waist, floral skirt. The fabric had a fantastic drape and the floral pattern reminded me of 18th century fabrics.


Unfortunately, I forgot to take a before picture of the skirt, so you'll just have to imagine what it looked like before the refashion. Think 90's church lady skirt. The front of the skirt was one solid panel, so that became the front of my tank top.


The back of the skirt had a center back seam, so the back of my top does as well, since neither back panel was wide enough on its own to become the full back of the tank top pattern.


There wasn't a ton of fabric in the skirt, so I opted to cut the shortest hem length included in the pattern, making this tank about 2" shorter than my first.


Along with 3 different hem options, this pattern also includes two different back options. It can be made up as a racerback, or with a scooped back neckline. I like both options, and fully intended to make both, but instead, I wound up making 3 racer backs - don't ask me why.


For my third tank top I pulled fabric from my "I bought this fabric because I liked it and it was a good deal" stash - a black polyester "chiffon" with a large rainbow butterfly pattern. (The bolt called it a chiffon, but it's really more like a very lightweight satin)


I had nearly two yards of this 60" wide fabric sitting in my stash, so I had more than enough to make a tank top with the shirt tail hem option and no center back seam!


All three tank tops got made, photographed, then promptly packed for vacation! Along with my aforementioned green skirt, shorts, and (yet to be blogged) pants.


The black tank has been worn with my green pants for tours of mammoth caves.


The rayon crepe tank has been worn with my green skirt while visiting museums and a historical farm in the smoky mountains.


The original dusty blue floral tank has also been worn with the green skirt - this time for visiting waterfalls!


Butterflies were abundant all around the waterfalls!


So, just in case you were wondering- green really is practically a neutral color in my wardrobe and tank tops are staples. You can expect both the color green and this tank top pattern to make future appearances on my blog!


This fabulous woven top pattern, the Double Take Tank, can be found here!


*I received this pattern for free in exchange for testing, but all thoughts and opinions are my own and I really do plan to make it again and again!


Sunday, August 5, 2018

Plain, But With a Touch of Gold

I suppose I just wasn't making her clothes fast enough. A few months ago my sister took it upon herself to make some summer skirts. Pretty, comfy, colorful, easy to make, easy to wear, elastic waist skirts.


Over a three day period she made several of these skirts for herself, in all different colors and prints - blue, green, yellow, pink, and brown, polka dots, swirls, and florals.


She enjoyed making all of them, and loved all the fabrics she used for her project, but her favorite of all the skirts was a golden yellow one printed with a wave like design.


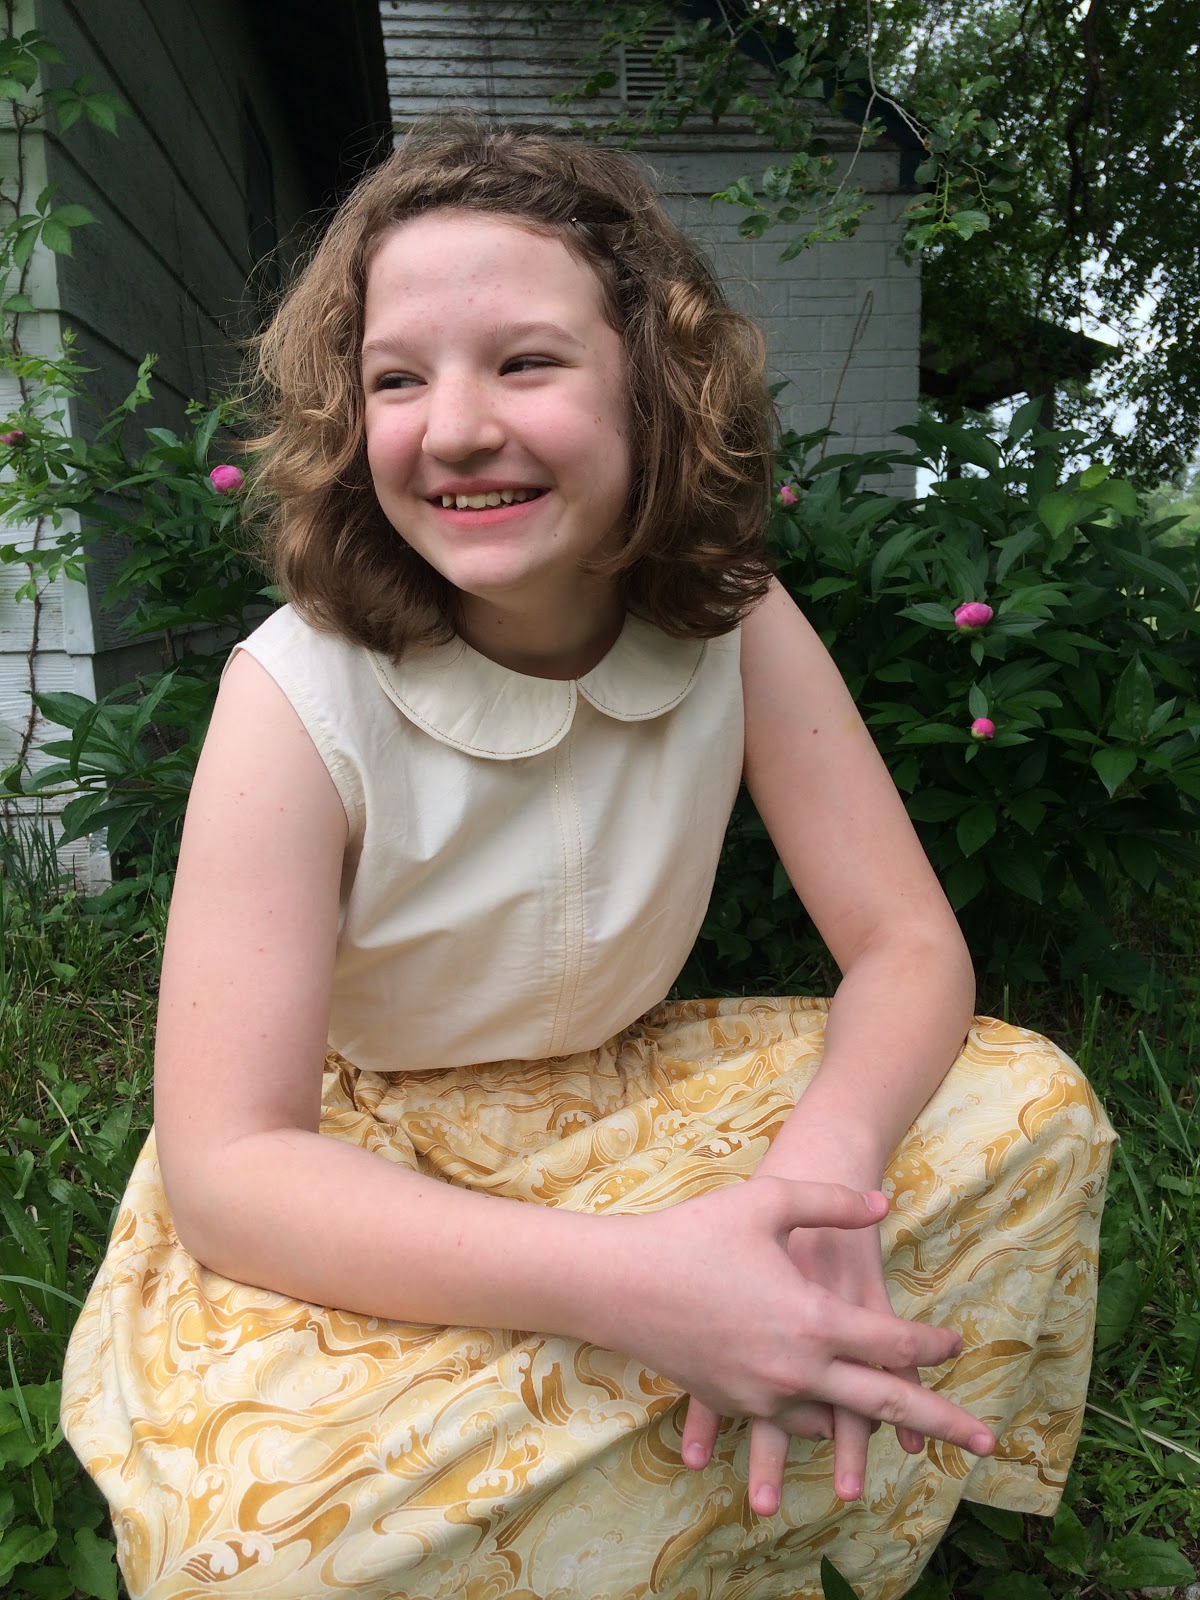
She declared the fabric reminded her of Asia, and she wanted to wear this skirt to her Mulan theater camp auditions. She just needed the perfect cream colored blouse to go with it. 


That's where I came in. My sister hatched her plan and brought me her request. A very plain, cream colored, sleeveless blouse. She wanted the print of her skirt to shine, and the best way to do that was to make the blouse as plain as possible.


I agreed to her plan, with the stipulation that she would give me a little bit of artistic freedom. Let me add a few little details to this garment! After all, plain, detailess, monochrome garments aren't the most fun thing to make! My sister grudgingly agreed, picked out a remnant of plain cream cotton muslin at Joann's, and let me get to work.


  The blouse request came the week after I'd finished testing the Maria Blouse, and the pattern was still out on my sewing table. As it was a blouse pattern, that fit my sister well, I decided to use it for my base. This time I would make the plain shirt body version, rather than the peplum version, of the pattern.


To make this blouse as plain as possible, I omitted the front buttons. My sister didn't want buttons. Instead, I sewed up the center front with one solid seam.


For a bit of subtle detail I added metallic gold top stitching on either side of that center front seam. My sister was unsure of the topstitching at first, as she was afraid shiney gold would detract from the skirt the blouse was to be paired with. However, once it was done, she agreed I'd made a good decision.


Since the blouse didn't button in the front, it needed some sort of back closure so it could actually be worn. The neck hole on it's own would be too small to fit over a head! Thus, I cut the back as two seperate pieces, rather than one on the fold. I sewed up the center back and left the top three or so inches open. I added a button and loop at the neckline, and there you go, a back keyhole opening, allowing the blouse to be easily put on and taken off.


Of course, I added metallic gold top stitching to the center back seam to match the front, and my sister didn't complain.


I left off the sleeves entirely, and insead finished the armholes with bias tape. Finally, for one last little detail, I persuaded my sister to let me add a peter pan collar to her pretty plain cream blouse. I topstitched around the edge of the collar with gold to match the center front and back. My sister didn't seem to mind.


She got her cream blouse. I got my fun little details. And at the end of the day, it was the perfect blouse to pair with her golden yellow skirt.


Just enough detail to be pretty, but it doesn't detract from from the lovely print of her skirt at all! I'd say, between my sister and I, we managed to make a pretty great outfit.