Tuesday, December 13, 2016

Crushed Green Stretch Velvet

My mom's 1890's dress is done! As are the rest of the costumes I got to make/put together for the Christmas play (7 in all)! The past week was spent finishing those costumes in time for dress rehearsal Saturday evening. Every spare moment was spent working on them, and they're finally done! Done! They were done with no time to spare Saturday evening, but done nonetheless. After all that work, though,  I have no pictures to share . . . yet. The play itself  isn't until next weekend so I will have no pictures until then.

Meanwhile, my sewing machine will not be idle. How did I celebrate the completion of all those costumes? By sewing something else, something quick and gratifying, less that 24 hours after the completion of that huge project. Of course.


What exactly? Why a velvet raglan sleeve T-shirt, what else? I have been seeing many adorable ruffled, raglan sleeved, velvet swing dresses come across my instagram feed. I fell in love after seeing the second dress and knew I had to make such a dress for my sister, she's always loved velvet. So, I followed the link to the pattern that had been used for all these dresses, sorely tempted to buy it. Unfortunately, my sister has rather outgrown the size chart for that particular pattern company. (Why must she continue to grow?) Oh, well. This discovery wasn't the end of my velvet swing dress dreams. I figured I could make a similar dress by hacking a raglan sleeve PJ top pattern already in my stash.


Also in my stash? A remnant of crushed green stretch velvet, left over from a dress I made several years ago. Perfect! I wouldn't have to buy a thing for this project! I turned my PJ top pattern into a swing dress pattern and started laying it out on my green velvet. It quickly became apparent that I had nowhere near enough velvet for a dress. So my plan changed. About 16" was hacked off the bottom of my pattern pieces. A shirt this green velvet would be.


I used almost every scrap I had of this green velvet. With a little bit of piecing on the back, I had just enough fabric to eek this shirt out!


Woo-Hoo! I had the shirt cut out, and that was the hard part! This shirt only took an hour to sew together after all that work!


I gave the shirt to my sister as soon as it was done Sunday evening, she was thrilled with it!


She was a little less thrilled yesterday morning when I dragged her out into the cold to get pictures.


She did her best to smile though! She really does like the shirt.


Now I really do want to get my hands on some more stretch velvet to make her a dress version! I'll try to squeeze it in before I leave on the World Race. (less than a month away!) Or I could wait until I return in about a year. By then I'm sure my sister will have outgrown everything I've made her and be ready for more. Oh, what will I do without her (and my sewing machine) for 11 whole months!


Thursday, December 8, 2016

Tea Dyeing Lace for the 1890's

I love lace. Love it, love it, love it. I'm always happy to use lace on any of my sewing projects. Finding reasonably accurate looking lace for historical dresses, however? Now that can be a chore! Almost all the lace that I can find and afford is synthetic, and looks it (way too shiny!). It's nothing at all like the cotton laces from the 19th century. Then there are some modern cotton laces, but most of them don't really resemble historical laces either.


So, what's a historical seamstress to do? Abandon lace all together? Absolutely not! (Well, you could, but that would be no fun.) Mostly, one must just make do with modern laces that don't scream "I'm Synthetic!", but whisper it instead. Or, there's the second option, and my favorite, use vintage lace (if it can be found at a reasonable price) Typically, I wind up mixing these two options.


I have a reasonable collection of vintage lace trim, a lot of it polyester from the 70's, but also some older stuff that's made out of cotton. This is always the first place I go to look for lace for my historical dresses, and my mom's red 1890's aesthetic gown I'm currently working on was no exception.

A search through my lace produced this 1" wide ecru colored cotton lace. It somewhat resembles lace from the late 19th century and the color is perfect with the red linen we bought for the dress! This would trim the neckline, now I just needed some wide lace for the sleeves. After lots more time spent going through my stash, I concluded I had nothing that was quite right for that. All that was left to do was to go to the store.


At Hobby Lobby I found this embroidered net lace. It could work on a historical dress! I loved the style of it next to the lace I'd picked out for the neckline, there was just one issue, the color. I wanted both laces to be the same color. Thankfully, with a little bit of tea, I figured that wouldn't be too hard to achieve.


The lace was a mixture of cotton (the embroidery) and polyester (the netting). I was sure the cotton would take the tea dye nicely, but I thought the polyester might come out of the tea the same color it was when it went in. I was ok with this possibility. I put my lace in a saucepan of strong tea on the stove and left it there for about 1/2 an hour. As I was slowly feeding the lace into the tea I accedently let in touch the edge of the pan and the polyester netting started to melt. Oops! Hopefully I would still have enough undamaged lace to trim both sleeves!


After 30 minutes out of the tea the lace came, and I rinsed it off with cold water. So far it looked like the polyester had taken the dye! Now I just needed to wait for the lace to dry so that I could see what the final color would be, but I was too impatient to wait for it to air day. (I was ready to sew the lace on the sleeves!) So I pulled out the hair dryer (which somehow I never take time use on my hair) and had that lace dried as soon as possible!


I found the one place I'd accidentally let the lace touch the edge of the hot saucepan when I was putting the lace into the tea. Yikes! Polyester melts really well! Thankfully, it looked like I still had enough undamaged lace to trim both sleeves. The color was looking pretty good too! Next came the real test, how did it compare to the other lace? Well. . .


It's not an exact match, but since the laces won't be directly next to each other on the dress, it will work!


I sewed the lace onto the sleeves (I had just enough despite the melted hole!), and I must say I love how the tea dyed net lace looks with the red linen! 


I finished the sleeves that weekend and now both laces are on the dress and the outer layer of fabric just needs to be gathered up and attached to the lining. The end of making this dress is in sight! Here's hoping my mixture of old cotton lace and new tea-dyed lace is the perfect finishing touch for the overall effect of this gown!


So far I'm liking what I see! Just 3 more days and this lacey red 1890's aesthetic dress should be done! 

Sunday, December 4, 2016

Tunic Avontuurs

This pattern is quite a fun and easy to sew.


Just sayin'.     

As soon as I received the Avontuur dress and tunic pattern for testing I was ready to get started, as I often am with new projects. It's rather hard to get started, however, without the proper materials. This pattern required knit fabric. While my stash of wovens has reached epic proportions, my stash of knits is nearly non-existent. Beginning the Avontuur dress, it appeared, would have to wait until I could get to Hobby Lobby and buy that green jersey with little chevrons on it that I'd been admiring for so long. 


Or did it? In my stash, I stumbled upon a remnant of this reversible blue and silver knit denim. There appeared to be just enough to squeeze a tunic-length Avontuur out of. Oh, did I mention the other day that the Avontuur pattern has some fun variations? You can pick dress or tunic length, crew neck or henley, and long or short sleeves. For this tunic my sister requested long sleeves (chilly weather has finally officially arrived) and I decided it would be fun to try out the henley option.


So, a long sleeved, snap-front henley style, Avontuur tunic is what this denim knit would become! The bodice would be blue, the skirt and sleeves would be silver. I got it all cut out and ready to be sewn. I did, however, run into a couple of small issues while cutting it out. First, I didn't yet have the long sleeve pattern piece, so I just lengthened the short sleeve piece according to my sister's arm measurement. I didn't taper the sleeve in toward the cuff so these sleeves have a little extra volume. I adore the look, it's just a bit different than how the pattern is supposed to look. Of course, the day after I got this tunic cut out Steph, the designer behind The Eli Monster, sent out the actual long sleeve pattern piece, without extra volume to get in the way of doing stuff. So, I used that on the green dress a few days later. 


Then came the second minor issue, I didn't have quite enough fabric to cut out the tunic skirt as directed. I would have to piece the back skirt section, while totally disregarding the grain of the fabric, if this tunic was going to get made. So, that I did, and I rather like the result! We'll call that pieced back skirt a design feature.


Once the tunic was cut out I found some silver chevron fold-over elastic to finish the neck and sleeves with and I got that tunic made. My sister loved the result and was thrilled when I told her that next I would be making her the dress version. She was less thrilled with standing outside in the wind for pictures. 


Upon finishing this tunic my mind started turning, as it often does, and I started thinking of all the fun tunics and dresses I could making using the Avontuur pattern. If I extended the button placket on the henley version all the way down the front, into the skirt, I could easily make this pattern out of woven (non-stretchy) fabrics. I already had a fabric in mind to do this with.


My mom bought this plaid back when she was pregnant with my sister to make a baby blanket out of. There was just one yard left over that has been sitting in my fabric stash waiting for the right project. I figured this could be the right project as I just might be able to squeeze an Avontuur tunic out of that yard.


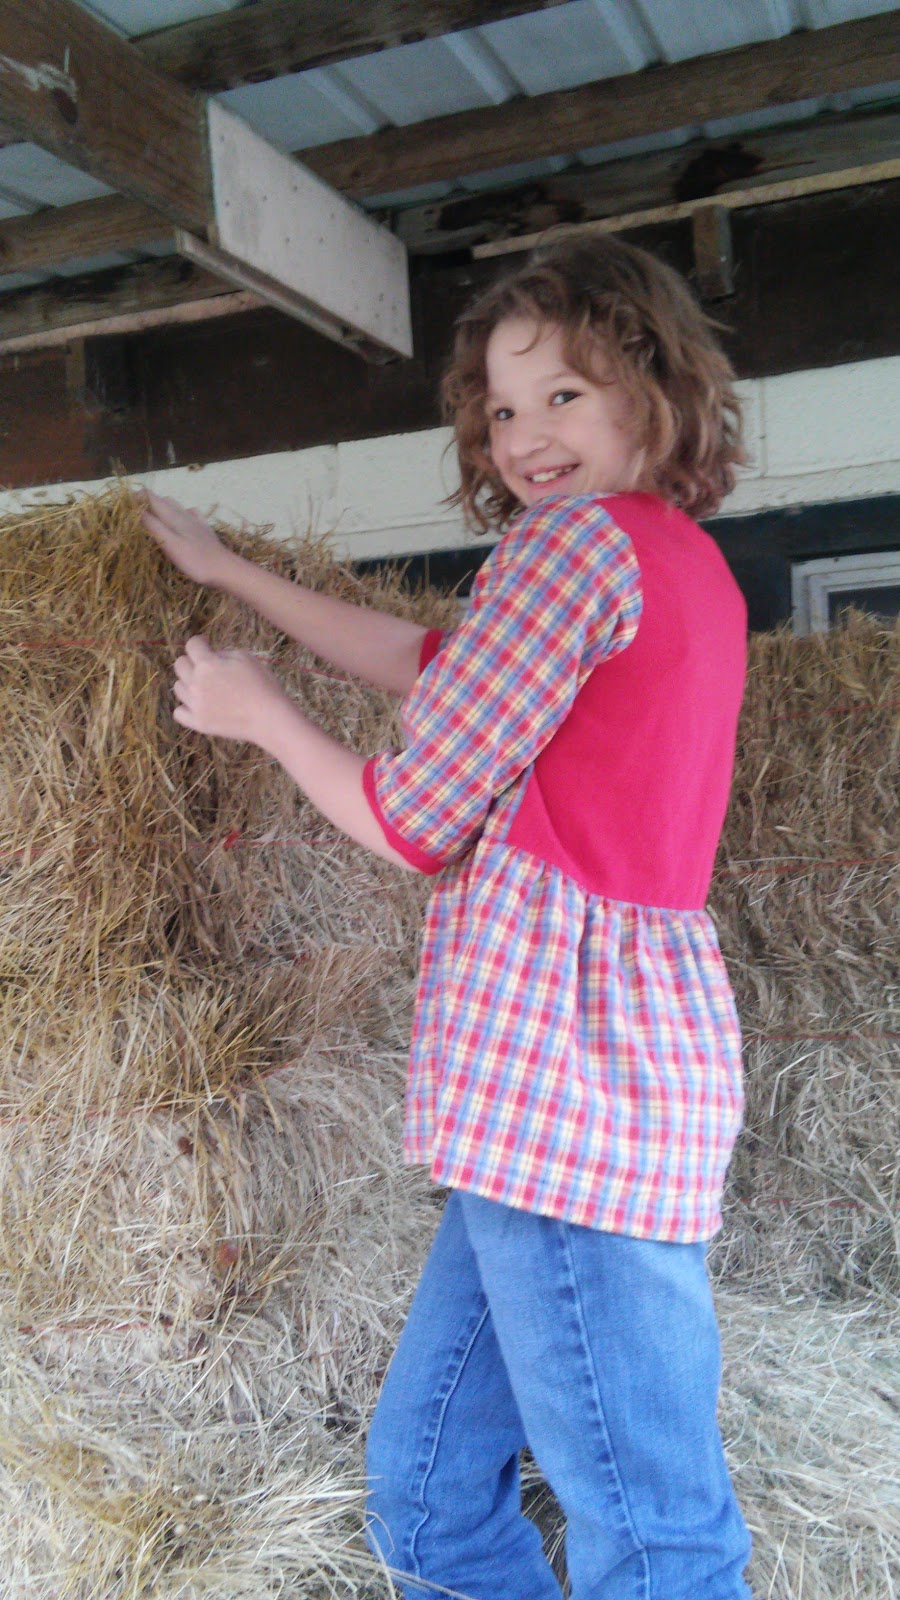
Well, that I did, by combining it with some red linen from my stash. (Darn, that girl just keeps growing! It wasn't that long ago that I could easily make an entire tunic top for her out of only one yard of 45" wide fabric!) I also used that red linen to make bias tape to finish the neckline and elbow-length sleeves with.


When cutting out this tunic, I lengthened the short sleeves to elbow length and made some adjustments to the front skirt piece to allow for the non-stretch fabric I was using. I cut that front skirt in two pieces instead of one and added an extra inch and a half of seam allowance to each piece, down what would be the middle of the shirt so that I could make the button/snap placket. 


To finish off this tunic I added pearl snaps all the way down the front.


The finished tunic turned out just as I'd hoped when I began to plan it, and my sister has no complaints either!


Now, no surprise, my mind is beginning to turn again, thinking of more variations I can make with the Avontuur pattern, but first I have a dress to finish for my mom!


A dress just happens to be made out of this red linen.


*You can get your own Avontuur pattern here if you're interested, (and I would highly recommend it if you have a girl between the ages of 1 and 12 that you sew for) it's on sale through the end of today!


Friday, December 2, 2016

Sister Avontuurs

I've been admiring this fabric at Hobby Lobby all year,


But I really didn't need anymore fabric (my fabric stash is a little scary). So, I've been a good girl and haven't bought any. That is, until two weeks ago.


I had the opportunity to test the Eli Monster's latest dress pattern - The Avontuur Dress. It's a comfy looking knit dress that strongly resembles the dresses my mom bought for me when I was my sister's age. Maybe not the most exciting dress, but it looked the perfect, comfortable, play dress. It did not disappoint.

Please excuse the blurriness, swinging children are hard to photograph.

This dress seemed like a pretty darned good excuse to buy the green jersey knit with chevrons, so as soon as I was selected as a tester for the Avontuur dress I was ready to run into town to pick up a few yards.


While at Hobby Lobby I also picked up some silver chevron fold over elastic to finish the neckline and sleeves with.


Fabric in hand, I sat down one evening to make this dress. It was a quick sew and the finished product met with my sister's approval easily. 


Apparently the dress is incredibly soft and comfortable, and of course it's cute!


Easy to sew and easy to play in, this is definitely a dress pattern worth having!


Now, when I bought this fabric, I picked up a little extra. I wanted something to wear out of it too! I didn't need a dress (though I wanted one), but a T-shirt I can bring along on the World Race next year? That would be a welcome wardrobe addition. A shirt that matches my sister's dress, so even when we're on opposite sides of the world we'll be thinking about each other.


At training camp I bought this very simple T-shirt and fell in love with the fit. It would be my pattern for my Avontuur (the Dutch word for adventure) shirt. 


I laid the shirt out on a single layer of my fabric and cut half way around it, adding an extra 1/2 inch for seam allowance. I slightly altered the hem shape while I was at it.


Next I removed my shirt template and folded over the cut out side of my fabric onto the uncut side. Then I finished cutting out the front of my new shirt. This method insured both sides of my shirt would be symmetrical.   


Since the front and back of the original shirt were identical, except for at the neckline, it was really easy to repeat the process for my new shirt back. I used my newly cut out shirt front as my template and just raised the neckline slightly and lengthened the hemline for a slight hi-low hem.


I got the shirt sewn up in about an hour one evening. With only two seams it was really easy! Serge up the side seams, hem the bottom and sleeves with the double needle on my sewing machine, add a neck binding, and it's done! 


Of course, before I did all that I traced my front and back pieces onto paper so that I don't have to make a new pattern if I want to make this shirt again.


Once I find another fabric I want to use I intend to do just that, with a few adjustments. I'll lower the neckline slightly as this one came out really high. I added seam allowance to the neckline, which I really didn't need to do because of the binding I added. (If I'd finished the neckline with a facing then, yes, a seam allowance would have been necessary.) Also, I think a pocket in the front of the shirt would be cute.


Hmm, I might need to go ahead and add that pocket to this shirt. A pocket on the front of my sister's Avontuur dress might be cute too. . .


So, should I add pockets to these or just make us a second matching set? After all, I do need a few more T-shirts to bring along next year and my sister always loves a new dress!


*If you like the Avontuur dress you can buy the pattern here, it comes in sizes 12 months - 12 years, and it's currently on sale through the weekend!
** If you like my shirt you can copy my method to make your own :)


Monday, November 28, 2016

Recreating the 1890's Aesthetic Dress

I make myself historical dresses, and I love getting to wear them. I make my sister historical dresses, and she adores them. My mom would love to have a historical dress, I just haven't made her one. It's time to change that. She needs an 1890's dress for the church Christmas play. Now. she could have just worn my 1890's dress, but I decided to use this play as an excuse to make her her own dress. Thus, we sat down to browse Pinterest one evening. We needed to find an 1890's dress that my mom loved, that was suitable for her character in the play, and that I could recreate in a somewhat limited time frame. After quite a bit of consideration, we settled on this one.

c. 1895 Liberty & co. dress. V&A Museum
This blue silk dress was made in the mid 1890's for Liberty & Co, a London fashion house that still produces some excellent fabrics today. You may notice that it looks a little different than your standard tailored, puffed sleeved, 1890's dress. That's because it's part of the aesthetic dress movement.

In the last quarter of the 19th century a trend of less structured dresses began. There were two dress movements that did this, the reform dress movement and the aesthetic dress movement. The loose dresses of the reform dress movement were thought to be healthier for women to wear than the standard corset supported designs. The aesthetic dress movement focused on flowing, feminine designs reminiscent of  country life, the Renaissance era, and ancient Greek clothing. These things, a simpler life and time, were considered ideal to many city living people of the 1890's. Sound familiar to the way many people look at things today?

Starting in 1884, Liberty sought to produce something different from the parisian fashion houses by designing aesthetic dresses that showcased their gorgeous fabrics, smocking, and embroidery. This blue silk dress does just that.


That said, my mom fell in love with this dress. I assured her I could re-create it. Now, the only question was how? Where did I start? How did the construction of a dress like this differ from the construction of a standard dress from this era? Thankfully the Victoria and Albert Museum website provided some answers.

"Dress of blue pongee silk trimmed with smocking and machine-made lace. Full length with train, medium height round neck, double-puff elbow length sleeves, trimmed with smocking and frilled edge. Fastens at the back with brass hooks and silk eyes. The bodice is lined with silk twill and well boned. Corded silk waist-band fastening with a double pronged buckle. Skirt is lined with cotton. The dress is cut to fall in soft folds from the neck to the hem and is held at the waist with a diamond-shaped band of smocking. Hem is trimmed with three rows of pale blue silk embroidery and has a frilled border. At the waist there are small silk covered and embroidered buttons with worked silk loops." ~ V&A site

Ok, so I needed to start by making a fitted, boned, bodice lining. I could see that this dress has raglan sleeves so I used a pattern from my stash, out of print Simplicity 9025, as my bodice lining starting point.


A few minor adjustments to the pattern and the bodice lining was perfectly fitted to my mom. Next step, building the rest of the dress on top of it. We just needed to pick out some fabric first.

The original dress was silk. My mom's character in the play is an american country woman. Not someone who would regularly wear silk dresses, or be able to buy an actual Liberty dress. It is plausible however that this woman could have seen the dress in a fashion magazine, fallen in love with it, and decided to recreate it at home in a different fabric, just like my mom and I are doing. With this backstory in place, my mom and I just needed to find a fabric with the right drape. A trip to JoAnn's yielded a red linen/rayon blend to be transformed into the dress.


I draped my pattern making material over the lining on the dress form, and cut it to the right shapes for the dress front, dress back, and sleeves. I then cut apart my new pattern vertically and pinned it onto my fabric all spread out to add extra volume for the smocking. Then I cut out the dress pieces.


Now I'm ready for the fun part, sewing the actual dress! My mom is really looking forward to seeing the final result!