*Ahem*, now that you've heard the tale of my velvet woes, lets get on with this story and talk about the fun stuff, the entire reason I was sewing with velvet - an 18th century riding costume for my little sister. A much more interesting subject than my rant against velvet.

Two weeks ago, while in costume, my little sister stood up in front of her classmates, their parents, and grandparents, and presented the crowd with the fascinating true story of a brave young woman who played her part in the American Revolution - Sybil Ludington.

'“Listen my children and you shall hear of a lovely feminine Paul Revere.” Thus begins the poem written many years ago about me. I defied many ideas of how a girl of my age should behave. My family wanted to support my father in any way we could. There was a time that included a 40 mile ride through the countryside to warn of a British attack during the American Revolution. This midnight ride would later influence people to hail me as a “feminine Paul Revere.”'
~ My Little Sister, in her paper about Sybil Ludington
In the weeks leading up to her presentation, my sister spent hours researching and planning her presentation about Miss Ludington - and "commissioned" me to make her costume.
She wanted an 18th century riding habit, preferably in dark blue to resemble the uniforms worn by the Continental Army during the Revolutionary War. Once this was decided, I dug through my stash to find a suitable fabric for the project. A quick search revealed 4 yards of a wool/synthetic blend suiting the perfect weight for this project. There was only one problem, it was beige, not blue. So, an afternoon spent dying fabric was an order.

We used a bottle of blue dye and bottle of black dye to get the color my sister wanted. She stood at the hot stove for an hour, stirring the fabric in a large pot of dye. In the end we had 4 yards of dark blue fabric, ready to become a riding habit!

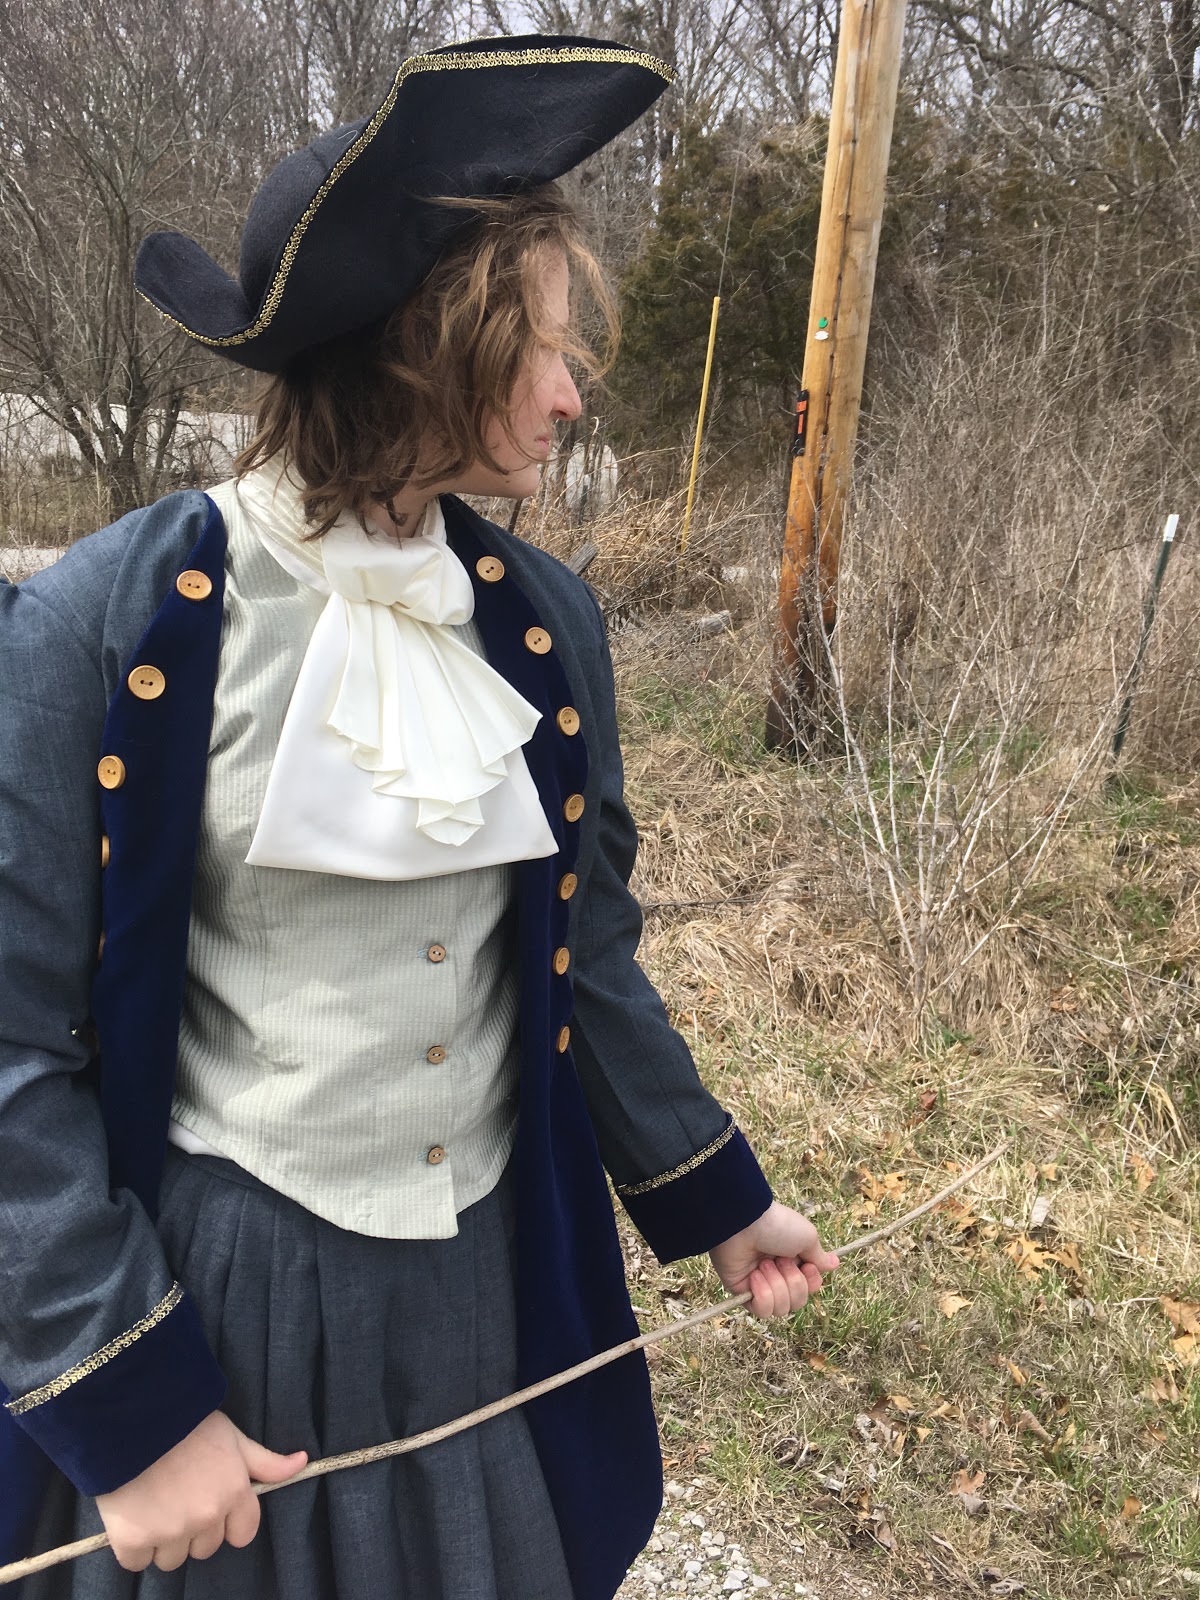
With fabric in hand, I began looking at paintings and pictures of 1770's riding habits, and formulated a plan for my sister's. She would need a petticoat (skirt), a coat, a waistcoat, and a riding shirt. Oh, and she wanted a tricorn hat too.

I already had a pattern for the tricorn hat, McCalls M7705, so I decided to start with that. I made it out of wool felt from Joann's and was surprised by how quick and easy it was to make. It came together in about half an hour one evening!

Tricorn hat done, I moved on to the next part of the outfit - the petticoat. This too was easy to make. No pattern needed! 18th century petticoats consist of two widths of fabric pleated match the waist measurement. Quick and simple. For maximum historical accuracy, these widths of fabric would be pleated and sewn onto linen tapes, which would be tied around the waist. For ease of wearing however, I pleated my sister's petticoat onto a fabric waistband, which fastened at the side with a hook and bar. After all, this riding habit is meant to be a historically inspired costume, not an entirely accurate historical reproduction.

With the petticoat finished, it was time for what I believed would be the most complicated part of the costume - the coat. And this coat certainly certainly had its challenges, though they weren't the ones I was expecting!

When I got around to making the coat I was running short on time and fabric. I had one afternoon to get it made, so I picked the simplest pattern I could find, McCalls 8701. The pattern called for 2.5 yards of fabric, and I just barely had two, but I was going to make it work!

I managed to squeeze all the pattern pieces on to the two yards of fabric, no problem. Then I decided to make the cuffs and line the front to the coat (which would be turned back so it could be seen) in navy velvet, as I happened to have some in my stash. That's where all the trouble started.

Even with a copious amount of pins and a walking foot, the velvet would not stay lined up with the outer fabric! It slipped and slid everywhere, making the seams very hard to sew. After a lot of frustration and a bit of seam ripping, I resorted to hand basting. Now, with velvet you should always hand baste. I knew this, but I was in a hurry so I attempted to skip it. Bad, bad idea.

The hand basting made the rest of the sewing go quite a bit smoother, but the original wonky seams weren't the end of my problems. Oh no, it got worse.
Once the main fabric was sewn to the velvet, I decided to press the front edge of the coat. I thought I was being responsible. I made sure not to apply the iron directly to the velvet. Rather, I pressed on the main fabric side, with the velvet face down on the ironing board. Still, I completely crushed the velvet. Horribly, irreparably, crushed it.

Lesson learned, never get the iron anywhere close to velvet, unless you have a velvet board. (Which I clearly don't have.) So I had to do more seam ripping and re-cut the front lining. More time wasted. But that wasn't the worst of it. No, I was all out of velvet, that was the worst of it. Thankfully, at this point my mom saved me by volunteering to run into town and get another half yard of velvet. While she was gone, I ripped the destroyed velvet out of the coat (Thankfully it was only the lining on one side of the coat, not both.), and proceeded to sew the sleeves without incident.

When my mom returned, I cut out the new front lining panel, sewed it in, and finished the coat. Then breathed a huge sigh of relief. It was done! And it looked just the way I'd hoped it would! Now there were only two pieces of this costume left to figure out - the waistcoat and riding shirt.

My mom came to the rescue yet again, with a satin blouse that would work in place of a riding shirt. One less thing I had to sew! At this point, that was a good thing! Now all I had left to make was the waistcoat. So, the night before my sister's presentation, I looking through my patterns and found McCall's 6937.

The pattern was exactly my sister's size and the vest was just the shape we needed. I only had to make a couple slight adjustments to the neckline and hem, so it would look more 18th century and less 1980's.

I found a remnant of pale green/gray upholstry fabric in my stash that was just big enough for the waistcoat. Thus, the morning of my sister's presentation, I got up early and whipped up this final component of her Sybil Ludington costume, and she was set.

Her costume was ready. Her paper was done. All that was left to do now was deliver her presentation - and she did that fabulously!

She got up in front of the room, wearing her 18th century riding habit (with uncrushed velvet trim!), and read her paper with passion and inflection! She brilliantly conveyed to the room the bravery of a 16 year old girl, who rode to warn her neighbours of a British attack during the American Revolution - and I am incredibly proud of her!

Ooh I LOVE this!I was going to be Sybil Ludington for a history program a few years ago.
ReplyDeleteThank you! I actually didn't know anything about Sybil Ludington until my sister decided to do this project on her. She's an interesting person to learn about.
DeleteThat is SO COOL!
ReplyDeleteThank you!
DeleteThis is so brilliant. Such pressure you managed to get through!
ReplyDeleteIf you don't have a velvet board, you can use a thick towel. Does your presser foot have adjustable pressure? That could help hold the two different fabrics together. I also put the pins in parallel to the edge, then take them out as I approach them...more like as they are just going under the front edge of the foot. I feel that parallel holds a longer bit of the fabrics than a perpendicular pin.
And I had never heard of Sybil Ludington! My grandpa was born on 18 April, so we knew at least the first bit of Paul Revere. I will have to look her up. I am glad your sister's presentation went well. She looks great!
Sandy in the UK
PS I lost my favourites links around the time you got back from the world race. But The Dreamstress mentioned you the other day, so I found you again. I think of you from time to time and pray for you.
God bless!
Hey Sandy! I'm glad you found me again - I was missing your comments, they always bring a smile to my face and it was great to have you following along on my journey last year. And thank you for the prayers, I always need those!
DeleteThanks for the velvet tips, I will for sure have to try pinning parallel next time. I hadn't even thought of that!
I didn't know about Sybil Ludington either, until my little sister did this project on her. She's been an interesting person to learn about.