Around 1900 corset shapes changed. Corsets from about 1900-1910 had straighter fronts, more hip spring, and a lower bust line than those of previews eras. The result is a shape where the hips are pushed back and the bust is pushed forward, thus the "S-bend" shape.
As I'd never ventured into this era with my costuming before, I did not have such a corset already in my collection. Thus, before I could begin my 1901 pink and fur evening gown, I needed to make myself a new corset.

On Instagram several months ago I came across Aranea Black Corsets. She makes modern corsets, rather than historical variety, but her work is beautiful, and on her website she has a selection of corset patterns she has drafted and generously shares for free. Most of these patterns are modern, and not particularly suitable for historical use, however, when I was exploring her website I found one pattern she'd drafted based on an original Edwardian era corset pattern - the Iris Underbust Corset.

This free article on Foundations Revealed shares a bit more about the original 1906 pattern and shows it made up. I read the article, printed out the Aranea Black pattern, and was ready to get started!

I figured out what size I needed and cut my pattern out. It looked like I was longer waisted than what the pattern was drafted for so I added an inch above the waistline to each pattern piece, then made a mock-up.

It appeared I didn't actually need to add the extra inch of length, as this under bust corset mock-up was now pushing my bust up - which is not the correct silhouette for the early 1900's.

Other than the too-high upper edge, the mock-up actually fit pretty well for a first try! There were a couple minor sizing changes to make, and then I thought I might be ready to cut into my fabric.

However, I ran into a minor issue. I pulled out my stash of corset busks and discovered I didn't have one the correct length for this under bust corset. Ok, that's a lie. I had one short busk which would technically work for this corset, but I was saving that for the 1910's corset I planned on making (and still plan on making).

This meant I could either order another short busk (which I didn't want to do since I already had 5 perfectly good separating busks in my stash) or adapt my pattern to work with a longer busk. I opted for the second option.

After referencing pictures of extant S-bend corsets, I added another inch to the top edge of my corset pattern, making it long enough for the busk I had. Then I added a bust gusset between the first and second panels. I mocked-up the changes, and found myself very pleased with the results.

This thing fit and had about the right shape for the early 1900's! I made a few more minor pattern alterations and traced a final version of my pattern onto paper.
 |
| Final pattern on the left, first mock-up pattern on the right. |

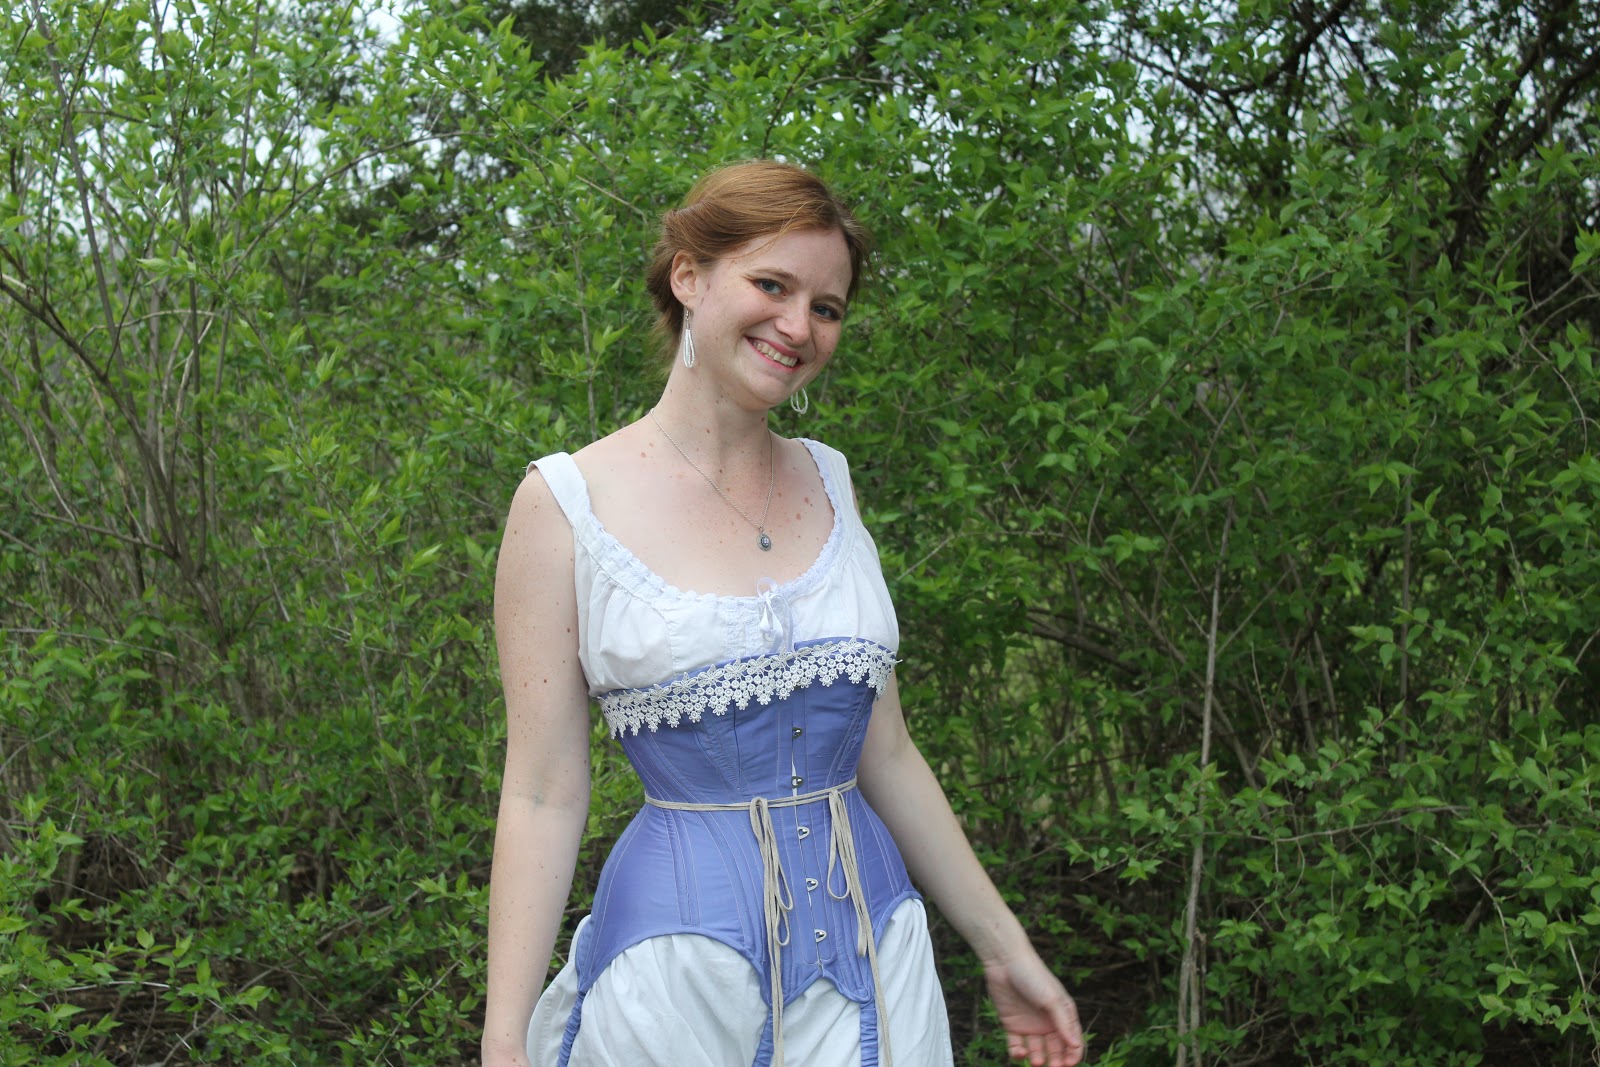
Several months earlier I'd found a periwinkle silk jacket in a free bin at a local thrift store. I decided this silk would make a beautiful corset.

I disassembled the jacket with a seam ripper and ironed all the pieces flat, ready to cut my corset from. For the strength layer of the corset I used a lightweight cotton twill. (The same stuff I used for the interlining of my stays, harvested from thrifted curtains)

I cut all my pieces from both the twill and the silk. The two materials were then basted together so the silk was flat lined with the twill. Once that was done, corset assembly began.

Typically I make my corsets double-layered and insert my boning between the two corset layers, rather than applying separate boning channels. This time, however, I gave single-layer corset construction a try.

I sewed all the panels together right sides together, so the seam allowances were on the inside of the corset.

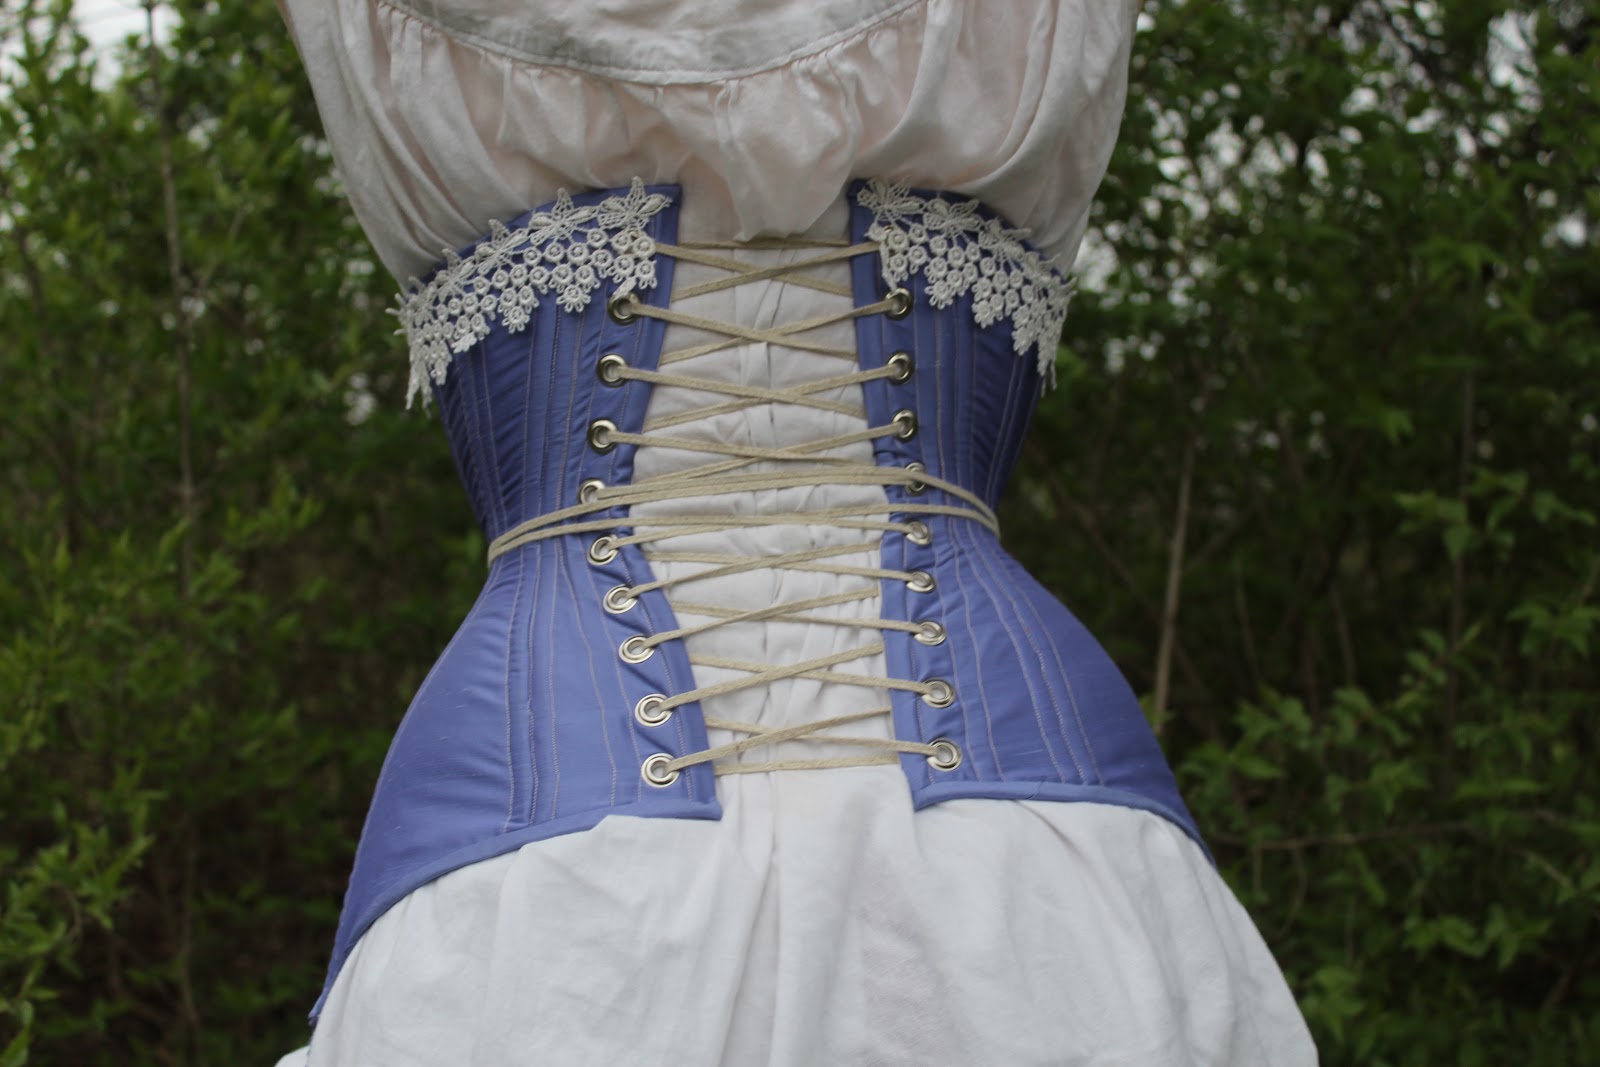
Then I trimmed down the seam allowances with pinking shears and applied boning channels over each seam, concealing the raw edges.

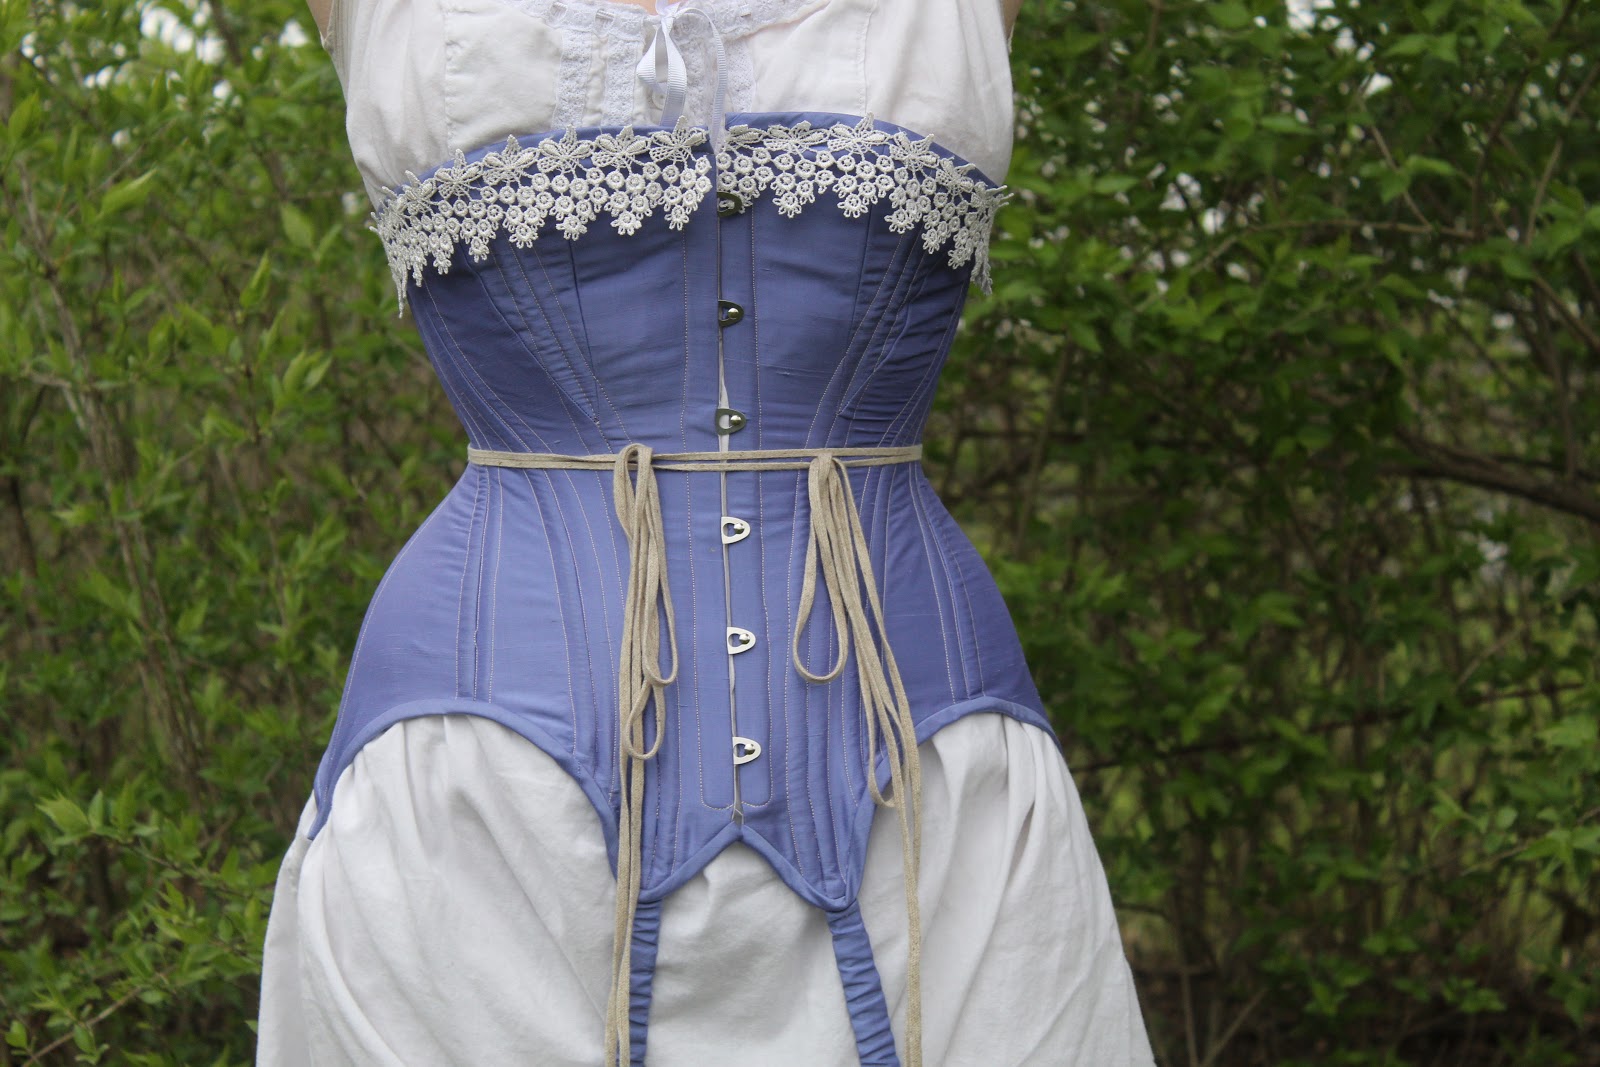
The corset was then boned in spiral steel boning and grommets were put in the back.

The top and bottom edges were bound in silk, and I added some lace to the top.

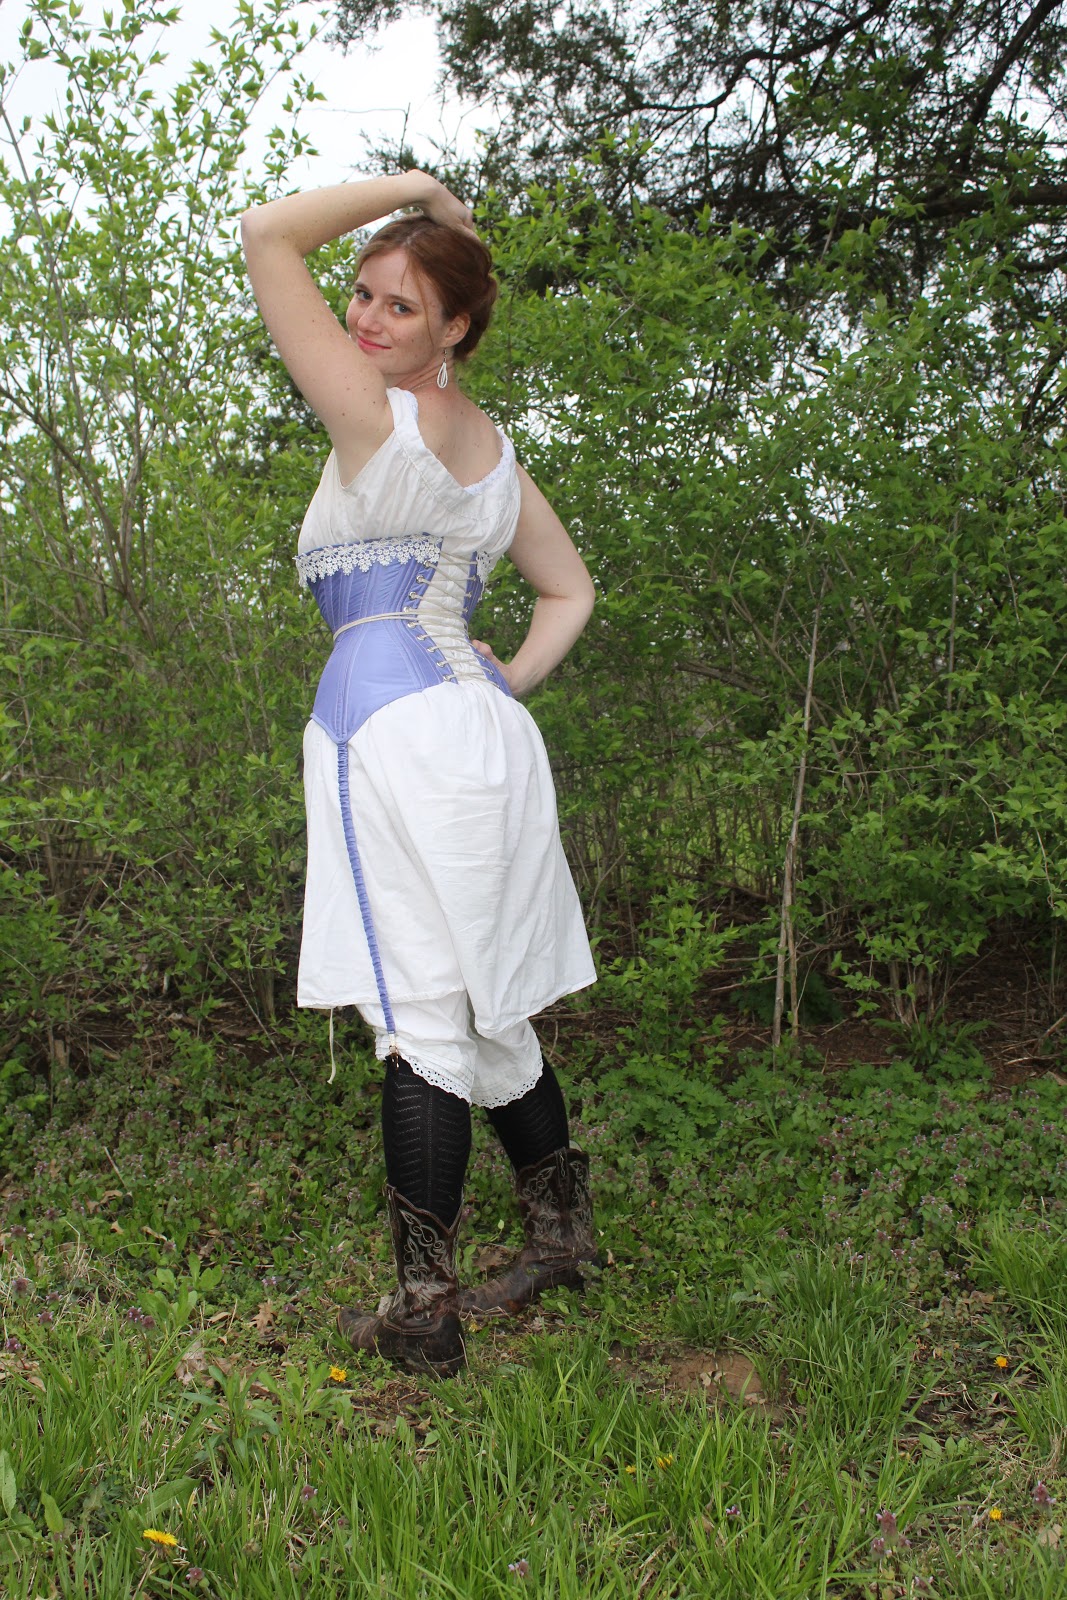
As a finishing touch, I made garters by covering elastic with silk, and sewed them onto the bottom edge of the corset at the sides and center front.

I bought my garter clips from this Etsy seller, and have no complaints about them.

Those garters are actually the one part of this project I procrastinated the most on. The corset itself was done for a couple months before I got around to making the garters and sewing them on.

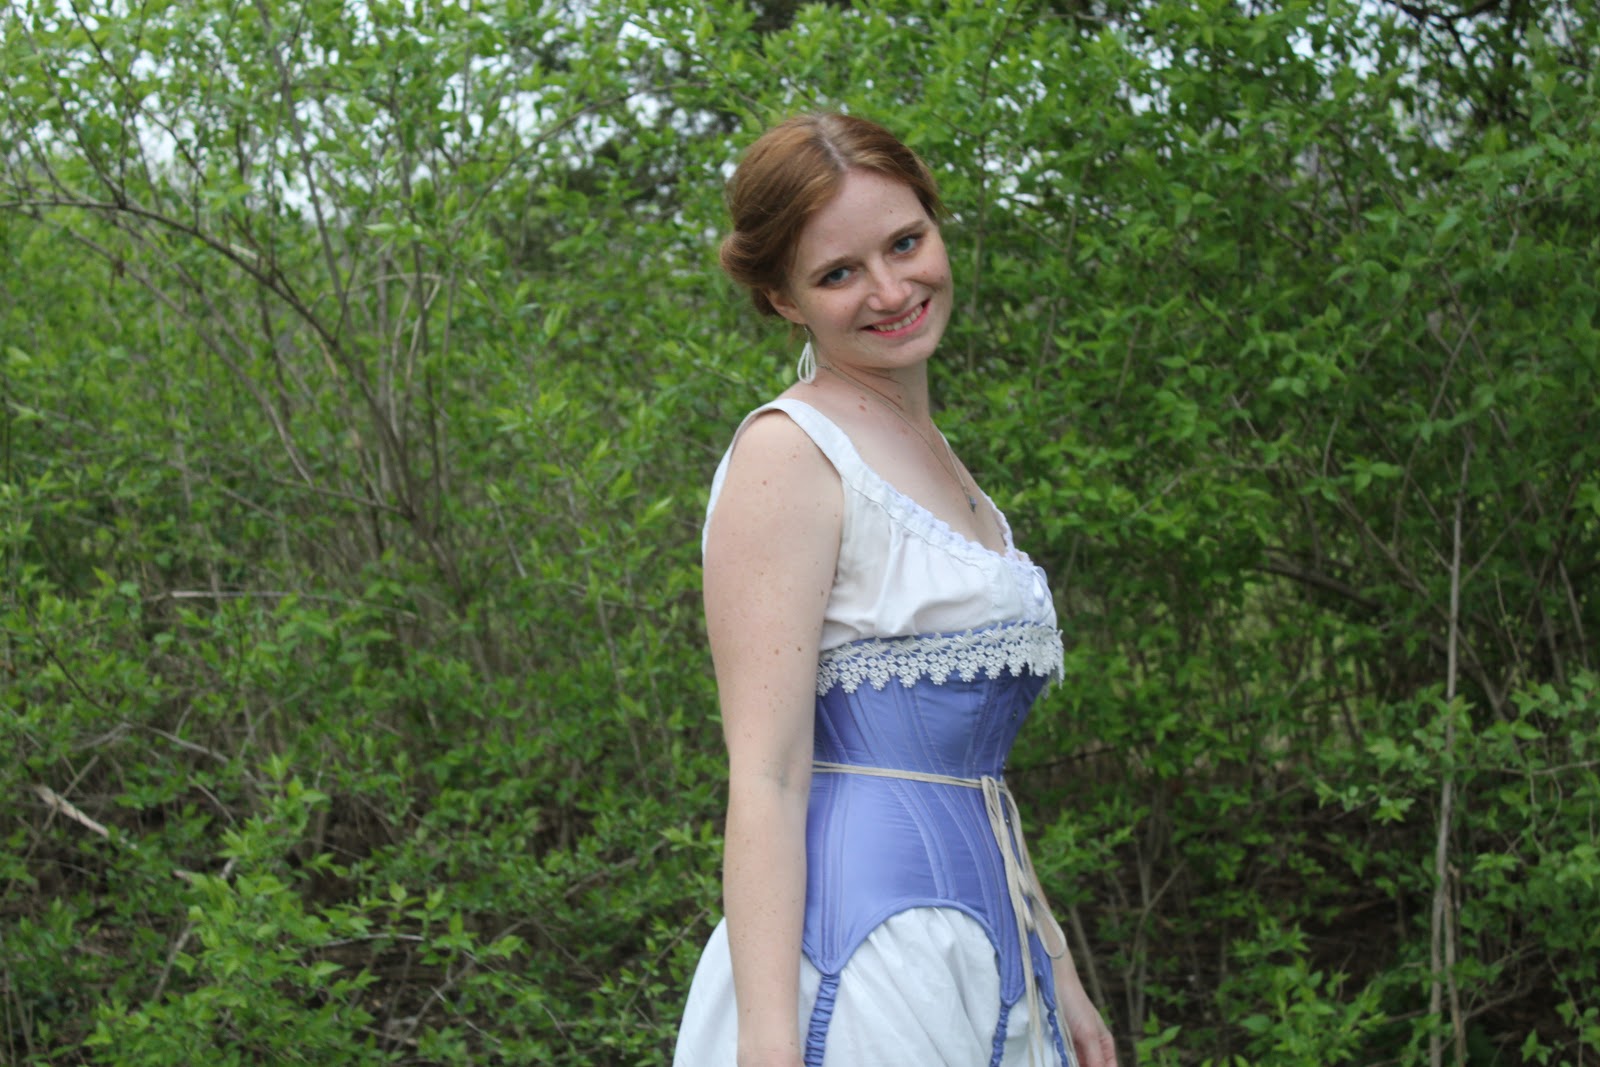
So, now that the corset is done, what do I think of it? Well, it's actually more comfortable than I thought it would be!

Of course I haven't worn it anywhere yet, as my event had to be canceled, but I've worn it at home a couple different evenings while sewing, and there's been no discomfort.
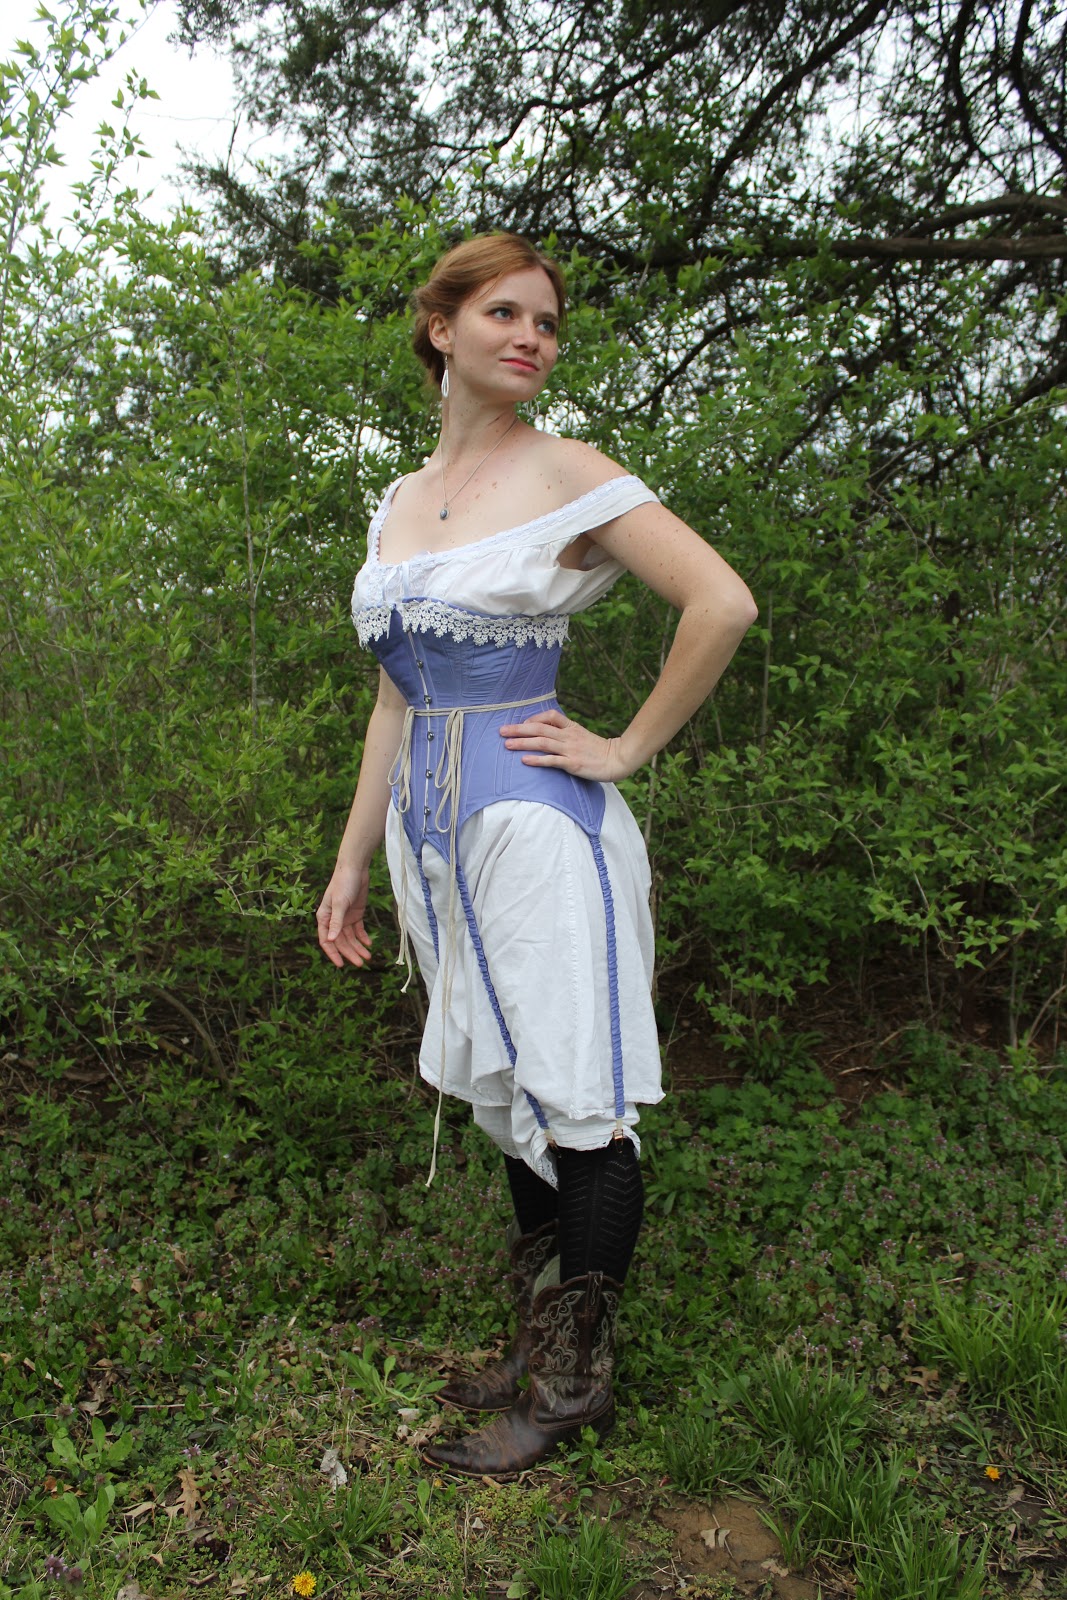
In these pictures my lacing gap is uneven, wider at the waist than at the bust and hips. This is not the way it's supposed to be. Apparently I was a little lazy when I put the corset on for pictures and didn't take the time to properly lace down. I assure you, that lacing gap can be even, and I will still be comfortable.

The overall shape of the corset is quite suitable to the Edwardian era, which is exactly what I wanted.
So yes, I'm pleased with how my first attempt at an S-bend corset turned out.

The pattern was fun to play with and figure out, and the finished garment does it's job.
Is it perfect? Of course not! I can find plenty of little things I'd like to change. But it does make an excellent base layer for my Edwardian costuming endeavors!

OMG is beautiful, i also love iris pattern from Aracnea Black, put this modification is beautiful <3
ReplyDeleteLooks amazing! Did you cut the silk for the binding on the bias or straight grain? I'm working on an Edwardian corset right now and was wondering.
ReplyDeleteThis is 2023 and I just found your blog !I was living under a rock I guess but your corset is beautiful! I’ve made corsets but not the right S bend for me I hope to find / make one as fitting as yours
ReplyDelete