Saturday, June 22, 2019

Skirts of the Most Versatile Colors

Me Made May. It’s a thing in the online sewing community, begun 10 years ago by Zoe of “So Zo, What Do You Know”. The idea of this thing/challenge/event is to wear something you made yourself every day of May. Or, if you don’t have enough me-made items to do that, just to make more of an effort to actually wear the clothes you have made yourself more often, bring them into consistent wardrobe rotation if they aren’t already.


I didn’t officially participate in Me Made May this year, as I already wear me-made clothes pretty much every day, thus, pledging to do something I already do felt like cheating. However, all throughout the month of May, I was very aware of the Me Made May spirit on social media, and this made me a bit more mindful of the me-made outfits I was wearing. Rather than just reaching for my current favorite me-mades every morning, I made an effort to wear some of my older makes, things which have gotten pushed to the back of my closet over time as newer makes have been shoved in the front.


In doing so, I re-discovered things I made and loved last year, and the year before that, and the year before that. Things I still like that fit me well. Things I really should wear more often. Things like these two skirts I made at the end of last summer, wore for several months, then put away for the winter and forgot to pull out again once the weather warmed up. Me Made May reminded me to pull them out and wear them again.


At the end of last summer, The Eli Monster put out a call for pattern testers for a collection of four new ladies skirt patterns. I was on a bit of a skirt wearing kick at the time, plus I’m always happy to test new patterns for this particular designer if I can (The Eli Monster was one of the first PDF pattern companies I tested for, so I have a soft spot for them.), so I signed up to test two of the skirts - a basic A-line skirt with a crown-shaped front waistband, and a long, full, gored maxi skirt.


From my stash I picked a thick-ish, silky, slightly slubby, maroon mystery fabric for the A-line skirt.
I have no idea where this fabric came from, but I had less than two yards of - which was just right for this skirt. I’d had this fabric for years, and was thrilled to discover a pattern that was perfect for it!


I made whichever size corresponded with my measurements and the finished skirt fit perfectly! No need for alterations of any sort required for me to get the right fit through the waist and hips.


There’s only one thing I would change about this skirt personally - I’d make it a bit longer to fit my preferences. Anything more than an inch above my knee almost feels too short to me. I like my skirts to be long enough I can do anything and everything in them without fear of flashing someone.


At the current length, this skirt is perfect for church or dressier occasions, but I wouldn’t wear it for day to day activities such as chasing kids. My fabric choice lends a dressy feel to this skirt, so I suppose that’s not really a bad thing.


The one thing I did change/add to this skirt was pockets - I just cannot wear clothes that don’t have pockets! Thus, each side seam features a concealed pocket, anchored at the waistband for support.


Shorter than my normal length and all, this skirt does make a fantastic wardrobe addition. My closet was missing a maroon skirt, and it can go with a wide variety of my tops, such as the Brijee Patterns Brooks Blouse, shown in these pictures, my beloved Outer Banks Boatnecks, or even a tank top for a more casual look. I’ve worn this skirt with all of the above!


The second skirt I made during this pattern test turned out to be equally versatile in color  - with the added benefit of being long enough to be worn for most every day activities!


The fabric for this long, full, skirt also come from my stash. My first thought when I saw the line drawings of this maxi skirt was “Dang, that’s gonna take a lot of fabric!” Thus, I began searching my stash for a long length of fabric suitable for a skirt. I unearthed a long piece of navy blue polyester crepe. I’m not sure how much of this fabric there was, but it was a lot. And I did not use near all of it for this skirt.


Upon receiving the pattern to test, I discovered that this skirt was actually quite economical when it came to fabric usage - as long as your fabric doesn’t have a one way pattern, you can nest the skirt gores together easily. Thus, I used considerably less fabric for this skirt than I was expecting to.


Named the Artiste skirt, this is a fairly basic 7 gored skirt, smooth at the waistline and full at the hem. Wonderfully flow-y and fun to wear. A skirt I’ve gotten several random compliments on.


Due to the length and fullness, this skirt has been worn quite a bit more than the maroon skirt. I feel elegant every time I wear it, even if I’m only wearing if for every day life and nothing special.


Like the A-line pattern, this skirt fit me perfectly with no adjustments needed. The size chart really is spot on! The only thing I changed was to again add side seam pockets. Like I said before, pockets are a necessity.


Navy is just as versatile a color in my wardrobe as maroon is, and it seems this skirt can be worn with over half the tops I own. For pictures I paired it with the knit Brooks Blouse I made last summer - this is one of my favorite shirts to wear with skirts due to the waist darts.


When I originally made this blouse, I felt the neckline was too high, so I cut it down a bit, and now I wear it all the time!


Me Made May has been over now for a few weeks, but I’m still wearing my me-made outfits nearly everyday. I’m thankful for the reminder the month brought to wear some of “forgotten” pieces in my closet. Now that I’ve rediscovered these skirts from last year, I can guarantee I’ll be wearing them all summer long!


*I received both skirt patterns for free in exchange for testing, but all thoughts and opinions shared here are my own. I was not required to write this blog post.

Saturday, June 15, 2019

The 1760's Bird Gown Petticoat and Stomacher

Yes, I'm in Japan right now*, but this blog post has absolutely nothing to do with that. Instead, this is the final blog post in the series of how I made my very first 18th century gown almost two months ago now - because I really need to finish up the blog posts on this project! If you've missed the previous posts, you can find how I made the gown itself here, and how I trimmed the gown here.

I made my Robe a la Francaise in the week and a half leading up to the Rococo Picnic. The petticoat, stomacher, and trimming? I did that all the day, and night, and early morning, before the picnic.


After cutting out my gown, I had 40 some odd inches of fabric left. This was just what I needed for the front of my petticoat. The back of my petticoat would have to be made out of some other fabric. As the back would be hidden under my gown, this was be perfectly acceptable. (And supposedly, petticoat backs made from cheaper fabric than petticoat fronts is period accurate as well.)


The leftover piece of fabric was longer at the selvage edges, and shorter in the middle - which happened to be perfect. I would be wearing my gown over pocket hoops (also called side hoops, or paniers). These hip-basket type things give the correct wide-hipped silhouette for the mid 18th century. And they make the distance from waist to hemline longer at the side seams than it is at the center front or center back.


I smoothed out the uneven edge of my fabric panel, leaving it longer at the selvage edges and shorter in the middle. This would be the top of my petticoat, as the hemline needed to be cut straight - and yes, that meant the birds on my petticoat would be upside down. That's the way the fabric worked best, so that's just the way it would be.


I put on my pocket hoops, then held the panel of fabric up to myself to check the length and see if the upper curve was correct or if I needed to work on it a bit more to get an even hemline. Everything looked good, the hemline appeared to be even, so I moved on to cutting the back of the petticoat.


For the back of the petticoat, I decided to use the red linen left over from the under petticoat I made back in January. I cut it exactly like the front panel of the petticoat, then sewed up the side seams, leaving the top 8"-10" open so I would be able to reach into my pockets, and hemmed the thing.


Once that was done, I put my pocket hoops on the dress form, put the petticoat on over them, and set to pleating the upper edge.


I pleated, then re-pleated, then messed with the position of the pleats some more until I was happy with how the petticoat fell from waist to hem. Eventually, all the pleating was done to my satisfaction, and I was ready to sew on the waist ties.


I sewed twill tape to the pleated upper edge, left long tails so the taps could wrap around my waist and be tied in place, then flipped the twill tape to the inside and top stitched it in place.


Once the waist tapes were sewn in place, the petticoat was done and wearable! And it was time for me to leave for work, on the day before the picnic. So, off to work I went. When I returned home that evening, I first attached all the trim to the gown, then I began on the final piece I needed for my 1760's ensemble to be wearable - the stomacher.


The Stomacher is that triangular piece on the center front of the gown. It is made completely separate from both the gown and the petticoat, and just pinned in place over top of the stays.


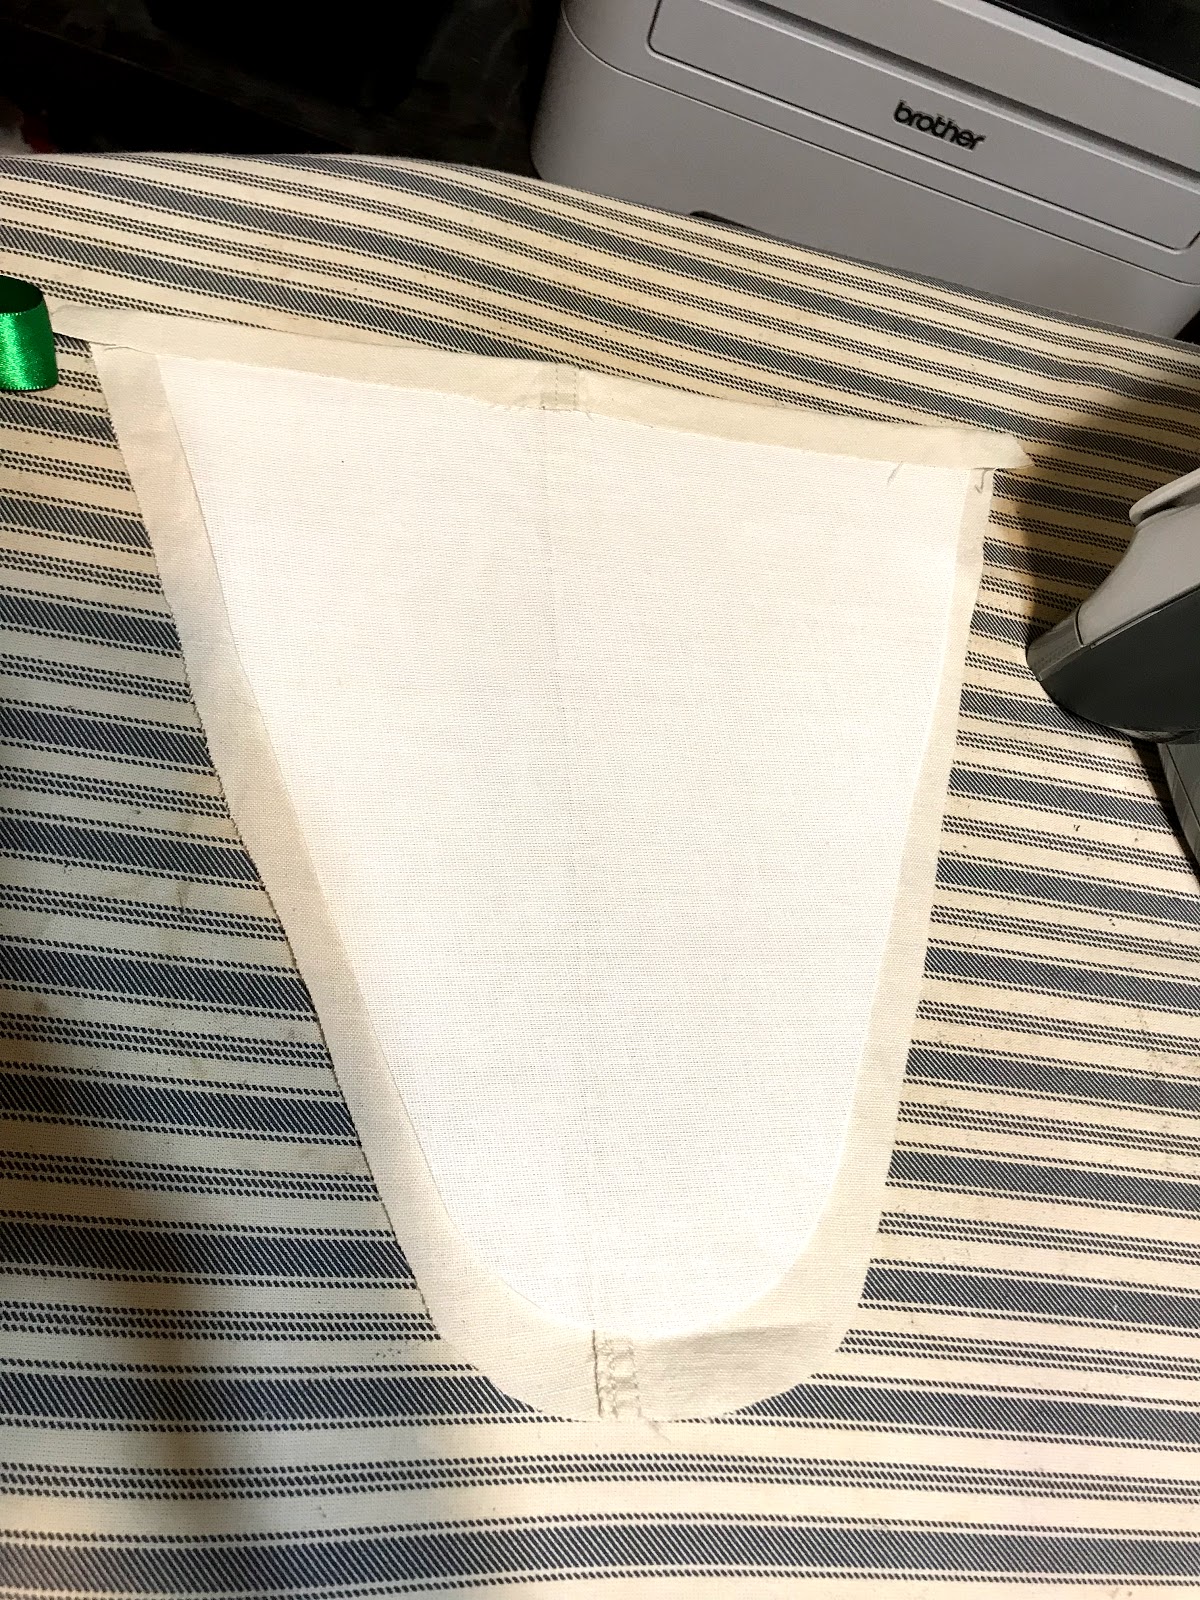
The stomacher is made up of 3 different layers of fabric, a linen lining or backing, a cotton buckram interlining (Linen buckram would be the historically accurate choice here, but I didn't have time to make any so I used the cotton buckram I had on hand instead.), and the outer layer from the same fabric as my gown. The buckram interlining was cut 5/8" smaller all the way around than both the lining and the outer layer to prevent it from added extra bulk to the seam allowance.


Once the buckram was cut to size, I used it as a template to press the edges of both the linen lining and the cotton outer fabric in 5/8" all the way around.


With the edges pressed neatly in, I set to decorating the outer layer of the stomacher with 1 1/2" wide green ribbon, to match the ribbon trim on the rest of the gown.


I chose to make four simple, two-loop, bows in gradient sizes down the center of the stomacher, to match those on my inspiration gown.


I left long tails on the bows, which I wrapped around the edges of the stomacher and pinned in place on the back. The center knots of the bows I tacked in place by hand.


Once all four bows were made, pinned, and tacked in place, I layered the cotton outer layer, over the buckram interlining and the linen lining and pinned the edges of all three together. I cut 6 short lengths of twill tape, folded them in half to make loops, and pinned three down either side of the stomacher, sandwiched between the cotton and linen layers. These loop/tab things would make it easy for me to pin the stomacher in place over the front of my stays.


Finally, I top stitched about 1/8th on an inch in, all the way around the edges of the stomacher, securing all three layers together. And with that, at 3 am, the night before/the morning of the picnic, my very first 18th century gown was done and wearable!


So, after a few hours of sleep, I tied on my petticoat, pinned my stomacher in place, put on my gown, pinned it to my stomacher, then hopped in the truck and drove to St. Louis - ready to picnic in style!


It was worth staying up until 3 am for!

*As I'm currently half a world away from my proof-reader, please excuse any typos in this post!
I did my best to proof read it myself, but I'm sure I missed something!


Tuesday, June 11, 2019

So, I'm in Japan Right Now

I'm in Japan right now. Yep, Japan. A new country for me.


This is my first trip outside of the U.S. since I returned home from the World Race a year and a half ago.


I've never been to Japan before, so it's a new and exciting place, but a strangely familiar experience. The feeling of being in a different culture, trying to learn all you can in a short amount of time. Exploring the local neighborhood, venturing into shops and buying snacks that look different and interesting. The language barrier. Foods I've never tried before. Small churches with services not in English. Being asked to speak at a church event with very little warning. Just being in another culture.


Stepping back into what was my life for a year and experiencing all this again is comfortable to me. I hadn't realized how much I missed it all, until I got here. Who ever thought one could actually miss a language barrier?


Back in January, I got a Facebook message from a man who was part of the El Salvador mission team I joined in 2016. He asked if I'd be interested in going on a mission trip to Japan this summer. I thought about it for a few days, then messaged back telling him I might be. I attended the informational meeting a week later, learned little bit about the trip and decided "why not?" I'd go.


I attended weekly meetings and trainings for the trip over the next few months, and now I'm here with a team of 8 other people. One week into our two week trip.


We are working with Churches, teaching English classes, and assisting with kids events. The same kinds of things I did on the World Race.


On days when there are no English classes to teach or other events to help with, we've gone sight seeing.


We've visited Nara, where deer are protected and considered sacred. A place where the deer are used to people providing treats to eat, and will stand still to be petted. They reminded me of my goats.


Also in Nara is the largest wooden building in Japan.


This ginormous wooden building (look how small the people out front appear) houses the largest Buddha in Japan.


Visiting temples and shrines has taught us a bit about the culture here and what the Japanese people believe, what their faith looks like.


Understanding a bit about the beliefs held dear here helps us to be better communicators about our faith, while still respecting the culture of Japan. Ultimately, we're here to share about the hope that can only be found in Jesus.


And Jesus is for all people of all cultures. Becoming a follower of Christ does not mean becoming American at all, it simply means believing in Jesus Christ as your Lord and Savior. Your culture is still your own and doesn't need to change. Thus, by visiting places our Japanese friends here want us to see and respecting their values, we are hoping to communicate that. 


"To the Jews I become a Jew, so that I may win the Jews; to those who are under the Law, as under the Law though not being myself under the Law, so that I might win those who are under the Law;
to those who are without law, as without law, though not without the law of God but under the law of Christ so I might win those who are without law.
To the weak I become weak, that I might win the weak; I have become all things to all men so that I might by all means save some."
~ 1 Corinthians 9: 20-22


Thus far, half way through my trip, I am greatly enjoying being in Japan. It's refreshing after not leaving the U.S for the past year. I love it.


Saturday, June 1, 2019

My Mom's Striped Dress for My Brother's Graduation

My youngest brother graduated high school last Saturday.


A few weeks before the occurrence, my mother mentioned she would need a new dress for the occasion. Immediately, the wheels in my mind started turning.


She didn’t ask me to make her a dress, and I didn’t volunteer to make her a dress. We both knew my schedule at the time was too full for me to be making any rash promises of the dressmaking sort. However, I wanted to make her a dress, and I knew she would be appreciative of me making her a dress. Thus, I resolved to make my mom a dress to wear for my brother’s graduation. I didn’t tell her about this plan though, as I wasn’t entirely sure I’d have the time to pull it off.


A year ago my mom bought Vogue V9293 for herself. She liked the dress design as a whole, but she particularly liked the striped version on the pattern envelope. The bodice was make from a narrower stripe than the skirt, but both the bodice and skirt stripes were the same colors. It is a rather striking combination.


I happened to have very similar fabrics in my stash to those used for the cover dress, so, knowing my mom’s admiration for that dress, that’s exactly what I decided to make her. I knew she would like the finished dress, and it could easily enough be made in secret.


The bodice fabric (with the narrow stripes) came from a thrift store several years ago, and the skirt fabric (with the wider stripes) came out of a church basement which was being cleaned out. (Four large boxes of fabric came home with me from the church basement clean out last fall.)


I cut the dress out one afternoon at work while the child I nanny napped. I carefully matched all the stripes on all four skirt seams, and did my best to match the stripes on the shoulder seams as well. Stripe matching takes a long time, and the four year old woke up before I was done cutting out the dress. He didn’t want to be left out of the fun, so I handed him some fabric scraps and a pair of scissors so he could happily cut out his own “project” right alongside me.


As with most stripe matching projects, cutting was the time consuming part, and actually sewing the dress wasn't bad at all. Well, sewing the skirt wasn't bad at all at least - all my carefully cut stripes matched beautifully! The bodice had its own challenges. 


Sewing the dress would have been quite easy had I finished the neckline and armholes with bias tape as the pattern recommends. However, due to the slight see-through-ness of the primarily white bodice fabric, I decided to completely line the bodice, and use the bodice lining to finish the neckline and armholes. This would have been an easy enough thing to do, had it not been for the combination of a crossover bodice, waist ties on this dress, and wonderful side seam pockets, on this dress.


The waist ties are sewn into the side seams, between both the bodice and the skirt. This mandated that the bodice and skirt would be sewn together, before the side seams were sewn up. Due to the cross-over nature of this bodice, the bodice lining had to be put in before the bodice was attached to the skirt and before the side seams were sewn up. Figuring out how to accomplish these two things, and have the inseam pockets fall the correct direction, and have a nicely finished interior of the dress, was a bit of a head-scratcher when it came to construction order.


After a lot of pondering, and only a little bit of seam ripping, the bodice and skirt were attached, the side seams were sewn up, the bodice looked very nice from both the inside and the outside, and the pockets were wonderfully large and functional. I sewed in a lapped zipper, hemmed the dress, and gave it to my mom.


She loved the dress - and thankfully hadn't yet gone shopping for something else to wear to the graduation.


A week later, she wore it as her third child graduated high school. She and my dad were able to present my brother with his diploma at the local homeschool co-op graduation.


So that's it - my brother is graduated, and headed off to school this fall and my mom has a new dress in her closet.