Wednesday, May 13, 2020

The Fur Trimmed, Pink Silk, Edwardian Skirt

I was ready to cut into the pink silk lustring which started this whole Edwardian evening gown project. I'd made myself a S-bend corset. The hip padding was ready to go. My skirt pattern was drafted. The actual making of the gown could begin.


Well, almost. A few minor pattern alterations still needed to happen before the scissors touched the pink silk.

Evening dress ca. 1901 from the Munchner Stadtmuseum

The longer I stared at the single photo I have of my inspiration gown, the more I became convinced that the skirt was just slightly gathered at the waistline. Thus, I needed to add just a touch more width to the waistline of my Edwardian circle skirt pattern so it could be gently gathered down to the length of the waistband.


To do this, I trimmed three inches off the top edge of my skirt pattern. With the way a circle skirt is drafted, this made the waistline several inches larger all the way around.


To keep the skirt the correct length, I then added 3" to the bottom edge of my skirt pattern.


The skirt pattern was now the correct length and width, ready to be slightly gathered at the waist, but I still wasn't ready to cut the pink silk.


My skirt needed to have two rows of fur around the bottom. One right at the hem, and one about six inches above the hem. I decided the best way to apply this upper band of fur to my skirt would be to sandwich it into a seam. Thus, I needed to add a seam.


To do this I measured and marked 6" up from the bottom of my newly altered skirt pattern. 


I cut along that new line, which gave me a pattern piece for the main part of the skirt and a pattern piece for the bottom band of the skirt.


Finally, I measured the top and bottom edges of this bottom band pattern to establish exactly how much fur I would need to trim this skirt with.


And once that was done, the pink silk could be cut! Well, actually, I probably should have made another mock-up at this point to double check my newly altered pattern, but I didn't bother. (And I don't really regret not making a mock-up, so all's good.)


Now my skirt pattern was very wide, and my silk was not. Narrow fabric is a historically accurate issue, so I used the historically accurate solution. I pieced my fabric together, selvage edge to selvage edge to get enough width.


Once my fabric was cut out and seamed together, I went ahead and assembled the main part of the skirt before worrying about the bottom band and fur trim. I referenced Authentic Victorian Dressmaking Techniques, a Dover re-print of a 1905 dressmaking manual, to answer a few questions I had on the proper construction of an Edwardian skirt. (As the original manual was published in 1905, this book should be called "Authentic Edwardian Dressmaking Techniques", as the Victorian era ended in 1901, but oh well. At least the book has good information for constructing turn of the century clothing, even if it's not accurately named.)


The book recommended no lining at all for skirts. Quite a change from the 1890's skirts I'm better acquainted with, which are lined and structured within an inch of their life to achieve the fashionable silhouette. The early Edwardian silhouette is softer overall than that of the previous decade however. So skirt linings can be dispensed with, and only a soft cotton flannel hem facing is recommended, according to the book.


Thus, I proceeded to assemble my skirt without a lining. I made a beautifully finished hook and eye placket following the directions from the Truly Victorian 1906 10 Gore skirt pattern.


As all of my dresses and skirts must have pockets, I cut out one ginormous pocket for this skirt.


As this skirt style lacks side seams, I put the pocket in the center back seam. along side the placket. 


There are multiple examples of pockets placed here in 1890's and early 1900's skirts in both Patterns of Fashion 2, by Janet Arnold, and Costume in Detail, by Nancy Bradfield. 


Once the placket and one ginormous pocket were done, it was onto the waistband.


I made a simple 1" wide waistband, stabilized with cotton twill tape. I gently gathered the skirt to fit it.


Goodness gracious, it was hard to get those gathers to look right!


I wound up quite pleased with the gathers on one half of the skirt and considerably less pleased with the gathers on the other half of the skirt.


After I finished the waistband, the more I stared at those gathers the less pleased I became with them. I realized I'd patterned this skirt wrong as the shape and drape didn't really match that of the original gown at all.


What I'd thought were gathers on the original skirt were now obviously not. The more I stared at the skirt the more I became convinced those "gathered" sections were't gathered at all, rather that appeared to be where the skirt was cut on the bias. It was the drape of the fabric, and the way it pulled at the bias verses the straight of grain that gave the appearance of gathers. Also, the original appears to be made out of silk satin, which has a very different drape from my silk lustring. 


At this point I considered re-patterning and re-making the entire skirt. However, I didn't really have enough fabric for that. And I didn't want to re-make the skirt after all the work I'd already put into it. And, I couldn't change the drape of my fabric, so my silk lustring skirt would never look exactly the same as the silk satin skirt. I decided to just leave the skirt on my dress form and ignore it for several days, until I came to terms with it.


 Come to terms with it, I did. I no longer hated it, and, within a week, I was ready to finish this thing up by trimming it with fur!


I began by deconstructing the fur coat I'd picked up at my local antique mall/flea market.


Upon removing the lining, I discovered the coat was made out of lots of narrow strips of fur seamed together. Perfect!


I separated all those strips of fur from one another in the front and sleeves of the coat. I left the back panel whole as I didn't need quite that many strips of fur. The back can be used for another project later on.


Looking at the measurements I'd written down when I patterned the skirt, I figured out how many of my strips of fur I would need to piece together for each band on the skirt, and bundled those together.


I whip stitched the strips of fur together end to end, until I had two bands of fur, ready to be sewn onto the skirt.


With a thimble, this fur was easier than I expected it to be to hand sew together! The leather backing was quite thin and supple.


Once my strips of fur were the correct length, it was go time! I sewed the first strip of fur onto the bottom of my skirt using a zig-zag stitch on the sewing machine.


Then I sewed on the bottom 6" band of silk, sandwiching the fur between the two layers of silk.


I sewed the second band of fur to the bottom of the band of silk.


Then added the cotton flannel hem facing recommended by Authentic Victorian Dressmaking Techniques.


After hand sewing the upper edge of the hem facing in place, I finished up the skirt with some cheap nylon lace, sewn along the hem on the inside of the skirt to protect the fur from dragging on the ground.


Cheap nylon lace is definitely not historically accurate, but it seemed like a good idea for protecting the fur.


And with that, the skirt was done!


Worn over my petticoats and hip padding, the shape is just amazing!
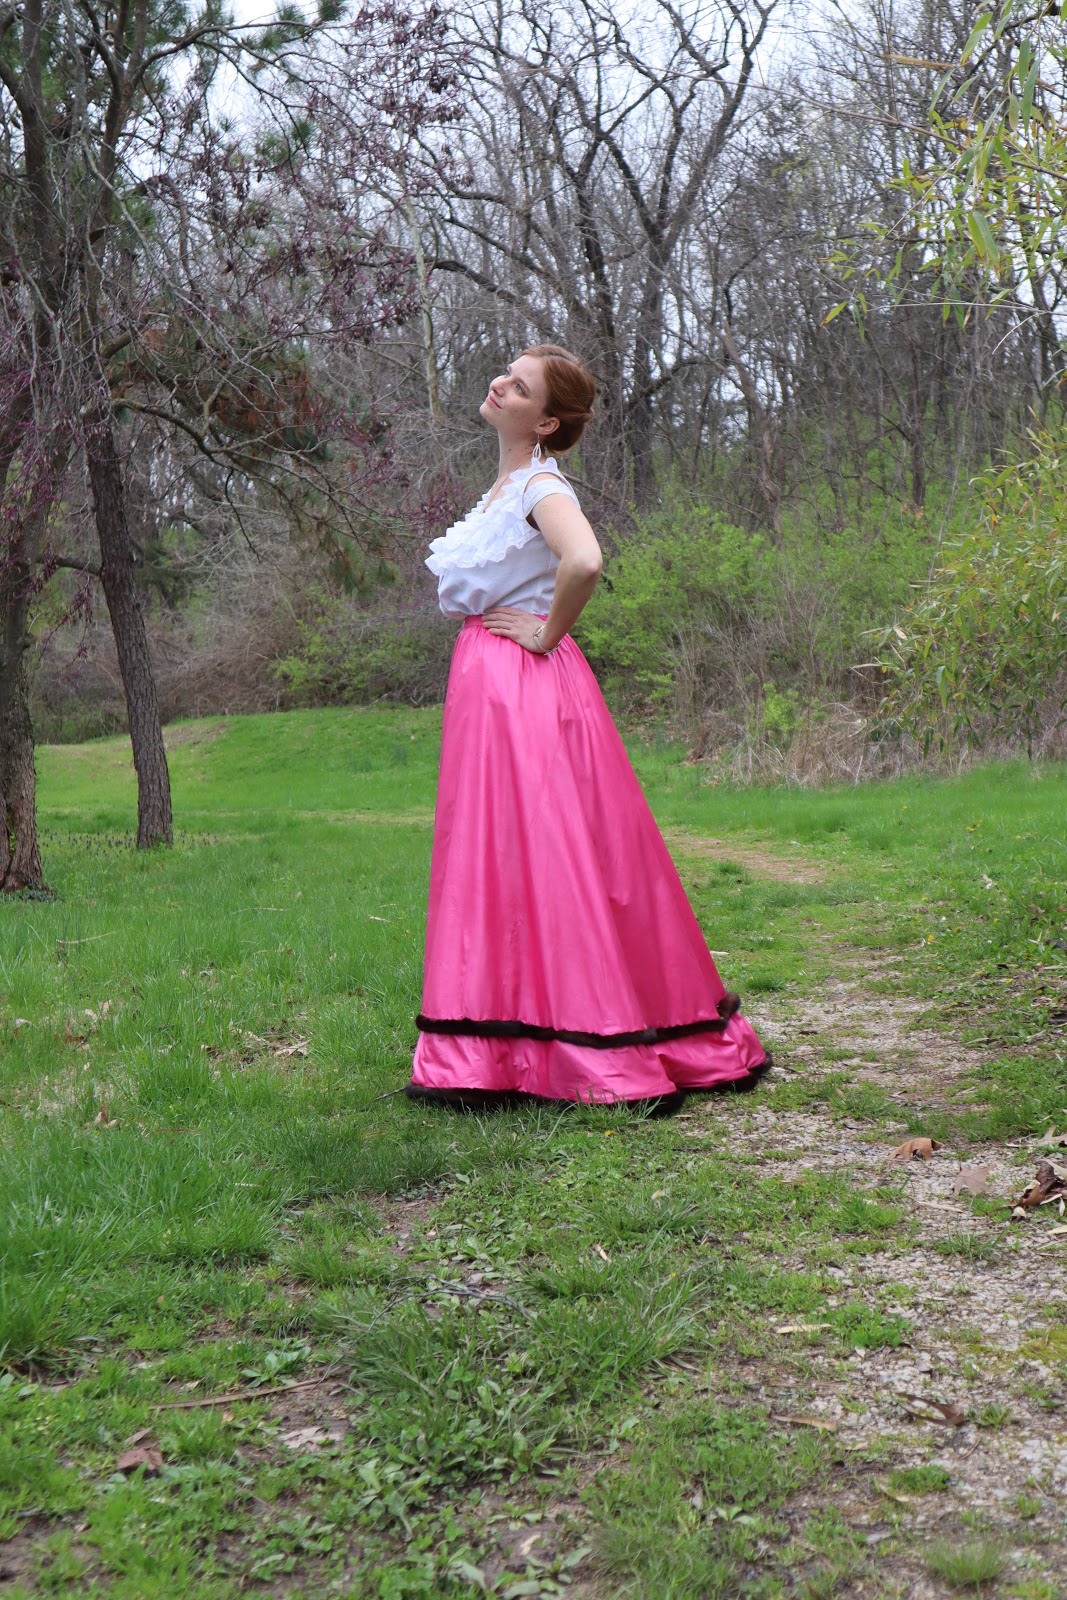

Very Edwardian - just as it should be!


No, it is not an exact match to the original skirt, but that actually doesn't bother me now like it did when the skirt was still under construction.


I'm very pleased with the finished product.


Thrilled, actually, with how it all came together.


It's so easy to get caught up on the little imperfections when you're making something and closely analyzing it. 


Once it's done however, when you can step back and look at the full picture, those little things often don't matter anymore.


And such it was, with this skirt.


My fur-trimmed, pink silk, Edwardian beauty.


Which happens to look good with cowboy boots, if the outdoors happens to be too muddy for it to be photographed with nice shoes.

Tuesday, May 5, 2020

Drafting a Skirt Pattern for my Pink and Fur 1901 Evening Gown

For my Edwardian evening gown, I decided to start with the skirt. I've learned the hard way, more than once, that historical ensembles generally turn out better if you make the skirt first. This way, you can make sure the bodice is the correct length, lays smoothly over the waist band of the skirt, and has the correct shaping at the hips. Make the bodice before the skirt and it's likely too end up a bit too long, or a bit too short, and either be too loose or too tight through the waist and hips. Like I said, I've learned this the hard way. More than once.


Of course, in order to make the skirt for my evening gown, I had to figure out a pattern for the skirt. With my S-bend corset and hip padding on, the difference between my waist and hip measurement is around 16". Most commercial patterns are drafted for a difference of 10". After my attempt at wearing my 1906 Princess Skirt with my Edwardian undergarments, I decided I would probably need to draft the skirt pattern myself in order to get the correct waist to hip ratio. 


I stared at the one picture I had of the dress I was replicating for a very long time, trying to figure out how that skirt might be patterned and where the seam lines were before I began drafting my skirt pattern.


I could not see any seam lines on the inspiration dress skirt, so I decided the skirt was probably not gored, but rather drafted as a circle skirt (After making the actual skirt for my gown a few weeks later, I'm no longer convinced of this, but I was at the time, so a circle skirt is what I made. More info will be in a future blog post.)


For Christmas one of my family members gave me this book, Turn of the Century Fashion Patterns and Tailoring Techniques, a Dover publishing re-print of a 1901 dressmaking and tailoring book. Along with other things, it includes instructions on how to draft multiple different late Victorian and early Edwardian skirts - such as the circle skirt. Exactly what I needed!


I put on my corset and hip padding, took my measurements, then followed the directions in the book to use said measurements and draft the circle skirt.


Now when we hear "circle skirt" we generally think of a 1950's circle skirt, which is actually a full circle with a hole in the middle for your waist. I've made myself a few skirts like that. Edwardian circle skirts, however, are a little different. They're actually closer to what we would call a half circle skirt now a days. In early 1900's fashion a "circle skirt" is a skirt patterned as one large flared piece instead of multiple smaller gores. This large flared panel is a portion of a circle, thus the name.


My finished circle skirt pattern was HUGE - much wider than most fabrics are. Clearly, fabric would have to be pieced together to make this skirt. Piecing together widths of fabric to make very full skirts is historically accurate, however, so no problem! For my mock-up though, just to test if my skirt pattern actually fit and looked the way it was supposed to, I didn't feel like piecing together fabric. Thus, I cut my mock-up out of a thrifted king size sheet. The sheet was just barely wide enough for my full pattern piece to fit.


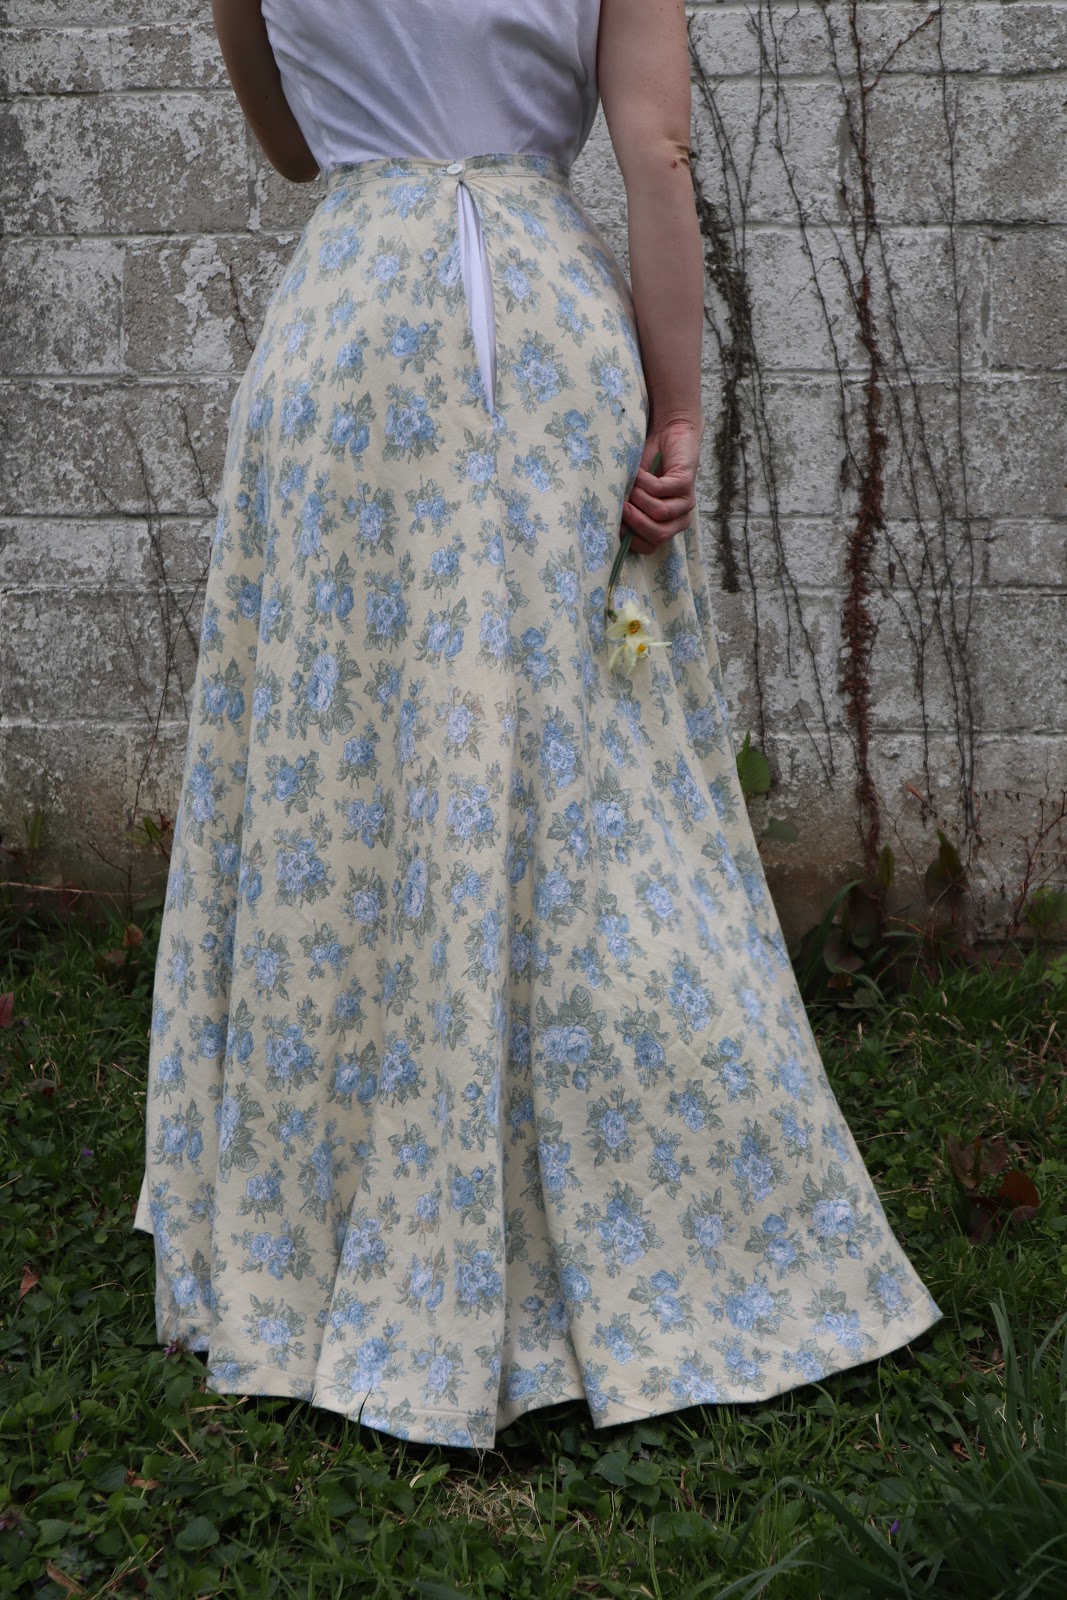
Once I squeezed my pattern piece out of the sheet, I sewed up the center back seam - the only seam this skirt has. A quick waistband was added, then the mock-up was tried on over the corset and hip padding.


It fit!! It fit in both the waist and the hips and had an absolutely beautiful early Edwardian shape. Just what I needed!


I decided this mock-up was good enough to be used as a petticoat, so I finished it off with a hem and a button on the waistband.


And with that, skirt pattern in hand, petticoat ready to go, it was time to get started on the actual skirt for my 1901 pink silk and fur evening gown.


Saturday, May 2, 2020

Trying Out the Bella Loves Patterns Vita Dress

Puffed Sleeves. Ever since I read "Anne of Green Gables" as a child, just the words "puffed sleeves" have made me want to squeal with delight.


All because of puffed sleeves, I decided to sign up for a pattern test a few weeks ago. The pattern in question was an Edwardian era inspired modern dress. Puffed sleeves and inspired by historical fashion? Clearly this pattern was right up my alley!


The pattern in question is the Vita Dress and Blouse by Bella Loves Patterns. With a high neckline and a rather straight skirt, this pattern was a bit outside my standard style, but there was just something so whimsical and sweet about it! I had to make it!


Honestly, as soon as I saw this design on instagram, I was following the link to sign up for the pattern test before I even thought about the fact I don't wear high necklines, and straight skirts and I do not get along.


No, I thought of these things a few days later, after I'd already been accepted as pattern tester and was preparing to make my dress. By this point it was too late. I was committed. A straight skirted, high necked dress, I was going to have.


With the designer's knowledge and "ok" I made one alteration to this pattern during testing, but it didn't affect the design of the dress, only the function. I added pockets - as I just can't "do" dresses without pockets. Dresses without pockets have no place in my wardrobe!


Now did a dress with a high neck and not full skirt have a place in my wardrobe? Well that remained to be seen!


This dress is made completely out of stashed materials. This is partially due to the pattern test happening during the Corona lock down (making fabric shopping. . . difficult. . .), and partially due to the fact I have an insane fabric stash I really need to work my way through.


The shape and ruffly-ness of this design is made by shirring with elastic thread at the cuffs, collar, and waistline. Shirring isn't difficult, I've done it before, but it does work best with a light weight, drapey, fabric. With this in mind, I picked a dark green textured rayon for my dress. I received this rayon in a tub of fabric from a friend of a friend who was de-stashing.


This fabric is incredibly soft and comfy to wear! Which is good, because I have several more yards of it to use up in the future.


The fabric took shirring without issue. I'd forgotten how fun this sewing technique is!


I made view A of the Vita dress, with puffed sleeves rather than bishop sleeves. View A is supposed to have a ruffle on the cuff, but I decided to make mine a completely shirred regular cuff instead.


The "puff" of these sleeves is supported by a gathered bit of silk organza (nylon tulle would also work) sewn into to sleeve head. I greatly appreciate the pattern including this detail - it definitely improves the overall look of the finished garment!

  
The back neckline of the dress can either fasten with a big bow or two small buttons and loops. I decided I didn't want to mess with tying the bow every time I wore the dress, so I opted for the button option, and picked a matching pair of shank buttons from my stash.


Once those buttons were sewn on and the dress was hemmed and done, I tried it on, not sure what I'd think. Would the high collar make it feel frumpy? Would the straight skirt make it feel restrictive?


Well, I tried it on and my first thought was I felt like Anne of Green Gables. Thus, I would call this make successful! 


Yes, the skirt is on the straighter side, but it's not too straight. It restricts movement in no way at all, and I can still climb a tree in it - the test of every great dress.


As for the neckline, it's not bad. High necks still aren't my favorite, but on this dress it works.


I've worn my Vita Dress almost weekly since finishing it, and the neckline hasn't bothered me at all.


I'm glad I decided impulsively to test this pattern!


Everyone needs a dress in their closet that makes them feel like Anne of Green Gables!


If you are interested in the Vita Dress pattern it can be found here - and it's on sale for 20% off through May 11th, 2020!


I was given this pattern free of charge in exchange for providing the designer with my feedback on it. All thoughts and opinions here are my own. I was not required to write this blog post.